Technical Article
Neural Networks on the NetBeans Platform
by Zoran Sevarac
Published February 2011
Downloads:
Introduction
The NetBeans Platform is a generic Java Swing application framework that provides GUI components and a module system for the development of custom desktop applications. The best known application on the NetBeans Platform is, of course, the NetBeans IDE, but there are also many other examples that can be seen at the NetBeans Platform Showcase.
Neuroph Studio is a Java neural network development environment built on top of the NetBeans Platform and Neuroph Framework. It is an IDE-like environment customized for neural network development. Neuroph Studio is a GUI that sits on top of Neuroph Framework. Neuroph Framework is a full-featured Java framework that provides classes for building neural networks.
In addition to providing easy-to-use neural network wizards and tools, Neuroph Studio also integrates basic Java development modules from the NetBeans IDE, so developers can create, test, and deploy various Java components based on neural networks in the same environment. Previously, developers usually needed two applications: one for neural network development and one for Java development.
Neural networks are artificial intelligence (machine learning technology) suitable for ill-defined problems, such as recognition, prediction, classification, and control. This article shows how to create some Java neural networks for classification. Note that Neuroph Studio also has support for image recognition, text character recognition, and handwritten letter recognition, which will be covered in future articles.
Note: If you want to install Neuroph Studio and Neuroph Framework so you can try the examples that are described in this article, download Neuroph Framework and Neuroph Studio (for Microsoft Windows, Linux, or Mac, depending on the operating system your system is running).
Brief Overview of Neural Networks with Neuroph Studio
Before I show how to create and use neural networks for real-world problems, I'll first briefly explain what neural networks are and provide some general principles for how they work.
Neural networks are computational models inspired by the way the human brain works. Although they are very simplified models based on known principles about how the brain works, they exhibit some very interesting features, such as learning, generalization, and association capabilities. In addition, they are good at dealing with noisy or incomplete data.
Neural networks are graph-like structures that consist of a set of interconnected nodes called neurons. Each neuron has inputs through which it receives input from other neurons (connected to its inputs) and outputs through which it sends output to other neurons (connected to its outputs). The way in which the neurons are interconnected determines the type of neural network architecture.
In addition to the connection pattern among neurons, network behavior is determined by the processing inside the neurons and so-called connection weights. Connection weights are numerical values associated with connections among neurons, and by tweaking these values using an appropriate algorithm (called a learning rule), we can adjust the network behavior.
Typical neuron processing includes calculating the weighted sum of neuron inputs and connection weights and then feeding that value into some function (step, sigmoid, or tanh functions are commonly used). The output of that function represents the output of the neuron.
The Neuroph framework provides all of these neural network components out of the box, regardless of whether you want to create a common type of neural network or a custom neural network.
Neuroph Studio also provides samples that demonstrate the basic principles behind neural networks.
Basic Neuron Sample
The basic neuron sample demonstrates the basic components and processing for a single neuron.
1. To open the basic neuron sample, in Neuroph Studio, select File >New Project > Samples > Neuroph > Basic Neuron Sample.

Figure 1. New Project for Basic Neuron Sample
This basic neuron model consists of the following components:
- Two inputs, x1 and x2, with corresponding weights, w1 and w2.
- An input function, which calculates the weighted sum using the following formula:
s = (x1*w1) + (x2*w2). - A transfer function, which takes the weighted sum as input and calculates the output of the neuron using a simple step function. If the weighted sum is greater then zero, the function outputs 1; otherwise, it outputs 0.

Figure 2. Basic Neuron Sample
2. Try to run this sample and play with the neuron by changing the input and weight values, and then click the Calculate output button.
During a learning procedure, a neuron's weights are automatically adjusted in order to get the desired behavior. These are the basic principles of how artificial neurons work, but there are many variations depending on the type of neural network.
One neural network type commonly used for many different types of problems is the multilayer perceptron (MLP) network. This network consists of several layers of neurons (at least three) where each neuron from one layer is connected to every neuron in the next layer. The common transfer function for this type of network is the so-called sigmoid function. The architecture of this type of network is shown in Figure 3.
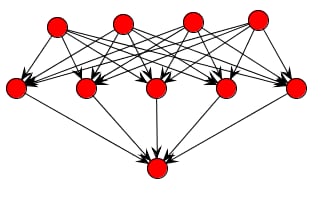
Figure 3. Architecture of a Multilayer Perceptron Network
This type of the network can be used for various machine learning tasks, such as recognition, prediction, approximation, and so on. Neuroph Studio provides a sample that shows how a multilayer perceptron network can be used for classification problems.
Multilayer Perceptron Classification Sample
This sample shows how a multilayer perceptron network can be used to learn complex classification tasks.
1. To run the sample, in Neuroph Studio, select File > New Project > Samples > Neuroph > Multi Layer Perceptron Classification Sample, as shown in Figure 4.

Figure 4. Multilayer Perceptron Network Sample
2. Create a classification task by clicking the feature space (x1, x2).
Left-clicking creates red dots, and right-clicking creates blue dots. Each dot represents an item with two features (x1 and x2).
These items represent data that the neural network should learn in such a way that for a given input (x1 and x2), it can decide whether the input belongs to the blue class or the red class.
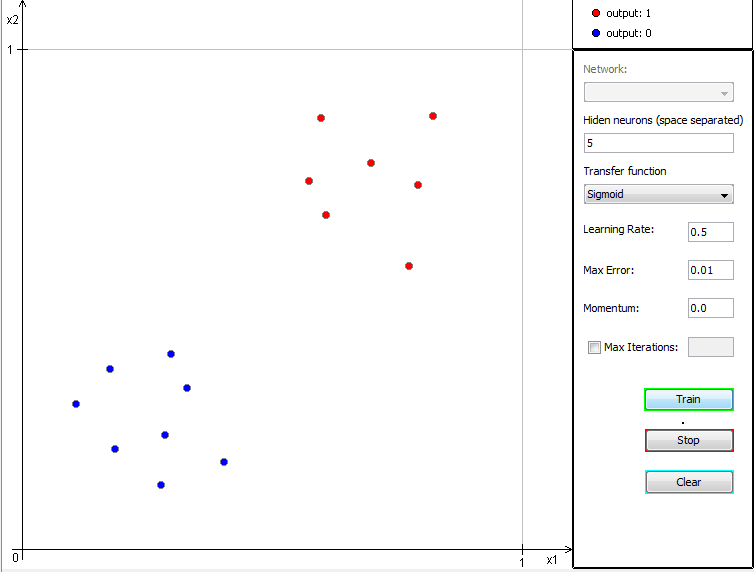
Figure 5. Data for the Sample Multilayer Perceptron Network
The number of input features corresponds to the number of input neurons in the neural network, while the number of classification classes usually corresponds to the output neurons. In this example, since we have only two classes, we are using only one output neuron, which should output zero for the blue class and one for the red class.
We also need to set the number of hidden neurons (and layers), which depends on the classification complexity. Hidden neurons are neurons between the input and output layer, and MLP networks may have one or more hidden layers.
3. In the corresponding field, enter the number of neurons that are in the hidden layers. Separate the numbers with a space.
For this simple example, five hidden neurons will suffice.
Besides the number of hidden neurons, we can set some learning parameters, such as Learning Rate, Momentum, Max Error, and Max Iterations, which are typical settings used for Backpropagation (the learning algorithm for MLP).
Leave these as the default values for now, but keep in mind that for different problems, some other values might give better results. These values are always in the range [0, 1].
4. Click the Train button.
The neural network is created and the learning process starts. After a while, you can see the result in the Multi Layer Perceptron Classification Sample tab, as shown in Figure 6.
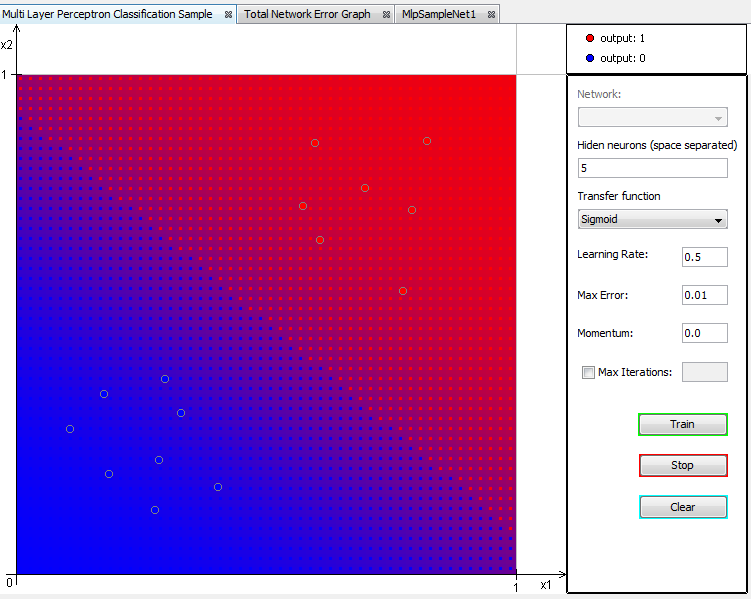
Figure 6. Results for the Sample Multilayer Perceptron Network
Figure 6 shows how the neural network sees the given data and how it will interpret any other data fed into the neural network.
We can also see how the network learned the given data by looking at the Total Network Error Graph tab. This graph, which is shown in Figure 7, shows how the learning rule tweaked the network weights in order to minimize misclassification (network error).
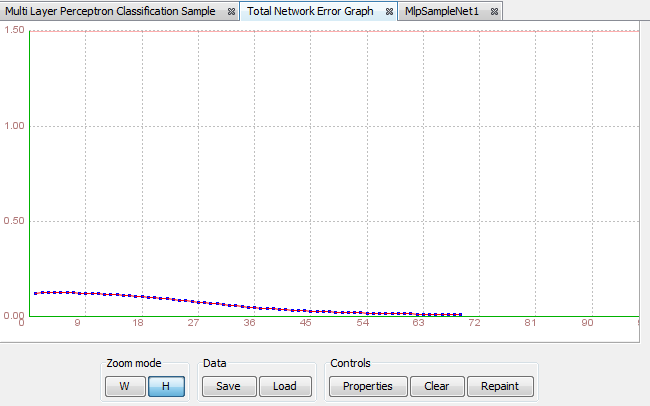
Figure 7. Total Network Error Graph Tab
We can also look at the neural network itself in the MlpSampleNet1 tab, as shown in Figure 8.
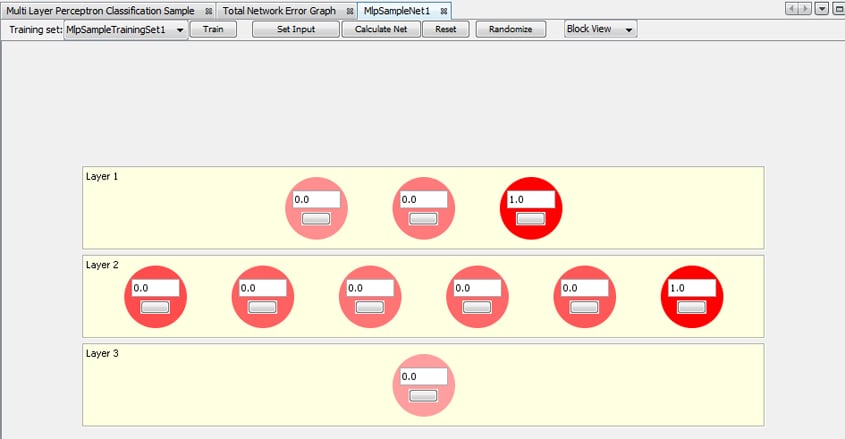
Figure 8. Neural Network Shown in the MlpSampleNet1 Tab
Note that in this image, there are three neurons in the input layer and six in the hidden layer. One neuron in both layers is the bias neuron, which always outputs 1. The bias neuron provides additional internal input.
The preceding example is the simplest possible, and we don't need a neural network for it. However, we used this example just to show the basic principles when working with neural networks. Neural networks can actually do complex classifications, such as the one shown in Figure 9.

Figure 9. Example of a Complex Classification
You can experiment with different classification problems and learning settings to get a feel for how this works.
Once you train your neural network, you can serialize it as a Java class by clicking the Save button in Neuroph Studio. Then you can deploy it to your application by using Neuroph Framework. Here is the sample code:
// load serialized network from file
NeuralNetwork nnet = NeuralNetwork.load("MySavedNeuralNetwork.nnet");
// set network input which we want to classify
nnet.setInput(0.5, 0.9);
// process input/calculate network
nnet.calculate();
// get networkoutput/classification result
double[] output = nnet.getOutput();
Note: You can create a Java project and run this code directly from Neuroph Studio, but you need to put a reference to the neuroph-2.5.jar file from your project to be able to use this code. The jar file is a Neuroph Framework class library and it is available, along with full Neuroph Framework documentation and source code, by downloading the neuroph-2.5b.zip file.
Creating and Training a Custom Neural Network
The previous examples were created using classification samples from Neuroph Studio. However, you can easily create and train custom neural networks using wizards. To create a neural network and teach the network a classification problem you perform the following tasks:
- Create a new Neuroph Studio project.
- Create a neural network using the New Neural Network Wizard.
- Create a training set using the New Training Set Wizard.
- Train the neural network using the created training set.
Here are the specific steps.
1. First, create a new Neuroph Studio project by selecting File > New Project > Neuroph > Neuroph Project.
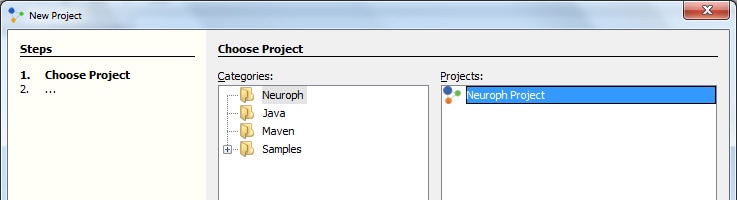
Figure 10. Creating a New Neural Studio Project
2. Enter the name of your project and click Finish.
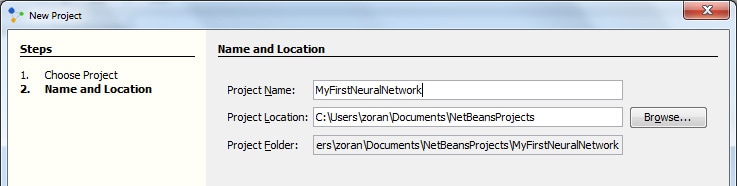
Figure 11. Specifying the Project Name
3. Create a multilayer perceptron neural network by selecting File > New File > Neuroph > Neural Network.

Figure 12. Creating a Multilayer Perceptron Network
4. Set the type of neural network to Multilayer Perceptron and enter a network name.
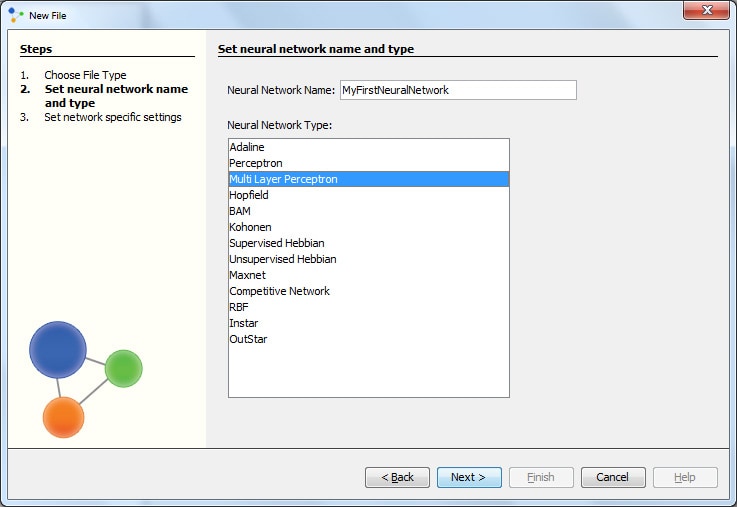
Figure 13. Setting the Network Type
You will be asked to set the network parameters.
5. Enter the network parameters values shown in Figure 14 and click Finish.

Figure 14. Setting the Network Parameters
This creates the neural network, as shown in the Figure 15.
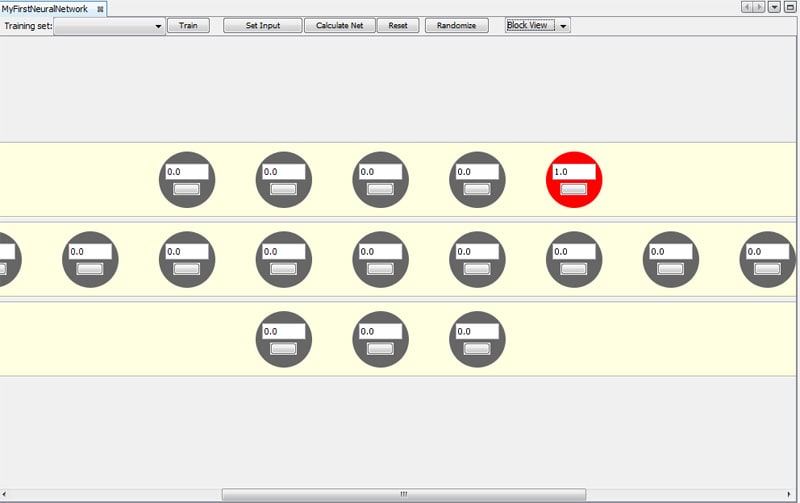
Figure 15. Neural Network Is Created
6. Create the training set by selecting File > New File > Neuroph > Training Set.
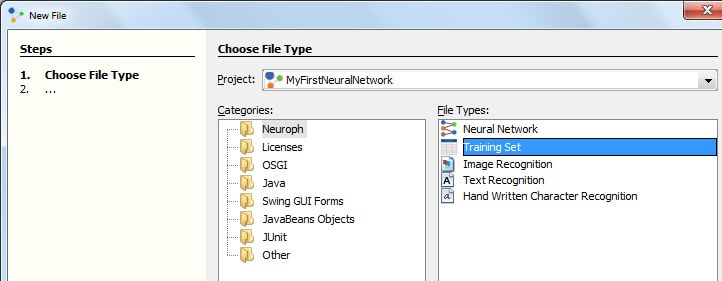
Figure 16. Creating the Training Set
7. Specify the training set settings, as shown in the Figure 17.
For this example we'll use the Iris classification data set, which is well-known classification problem data set.
In short, we have four properties and three classes of iris flowers and the classification is a bit tricky. See this Wikipedia article for more details. Note that number of properties corresponds to the number of network inputs, while number of outputs corresponds to the classification classes.
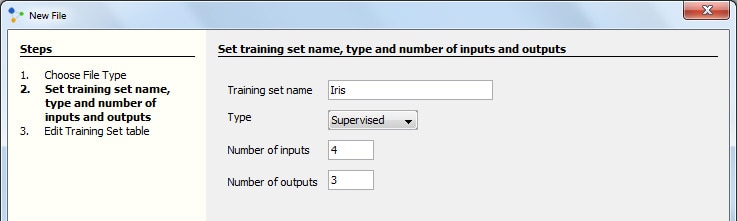
Figure 17. Specifying the Training Set Settings
8. Import the iris data set from this normalized file, which uses tab-separated-values (TSV).
Here we use a normalized data set, which simply means that original values are scaled to the interval [0, 1].
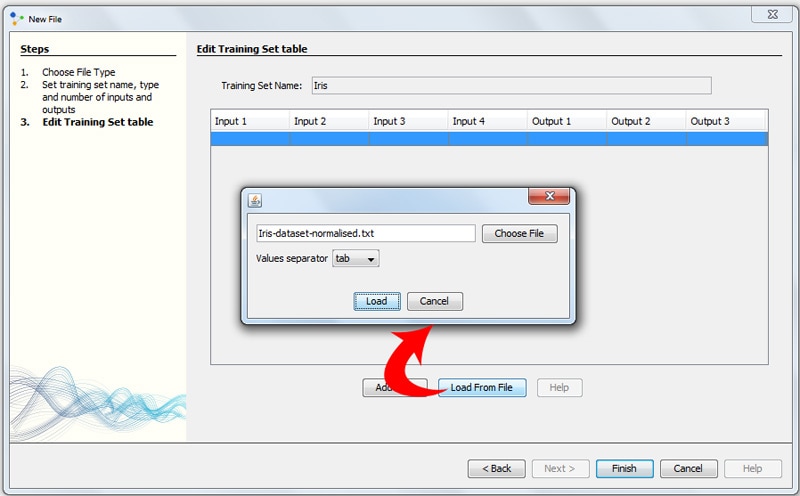
Figure 18. Importing the Iris Data Set
The training set will look like this:
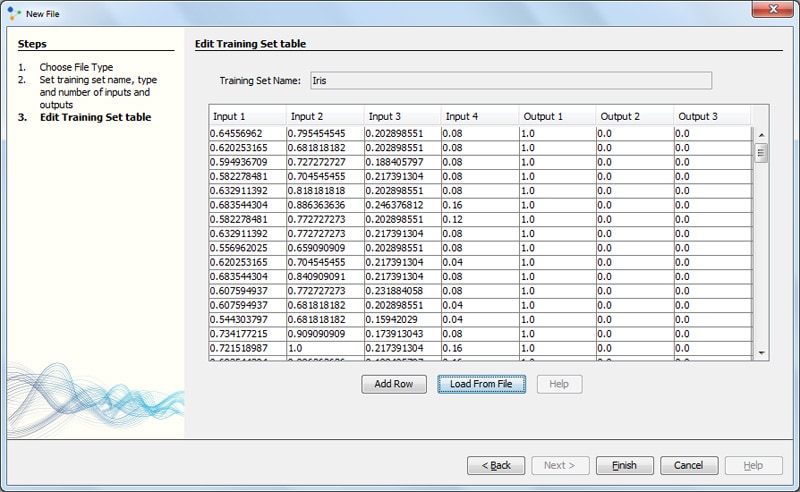
Figure 19. Example Training Set
9. To train the network, click the neural network to open it, select the Iris training set from the training sets list, and click the Train button.
10. Use the default learning parameters in the Set Learning Parameters dialog, and click the Train button.
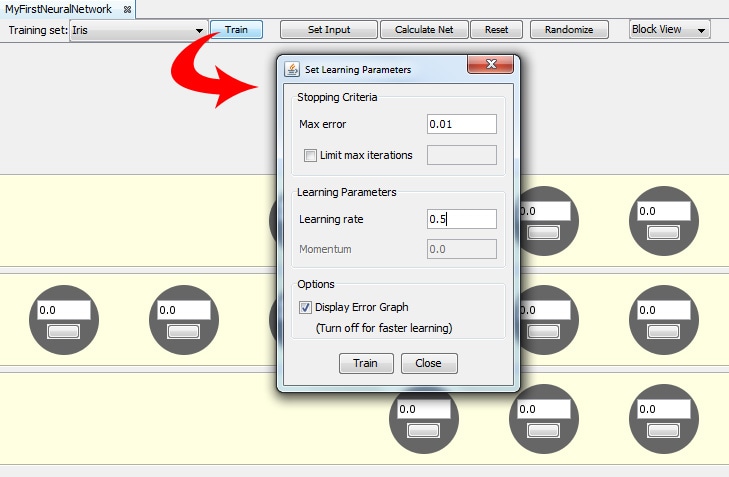
Figure 20. Using the Default Learning Parameters
In the Total Network Error Graph tab, you can watch how the network error is minimized during the learning procedure.
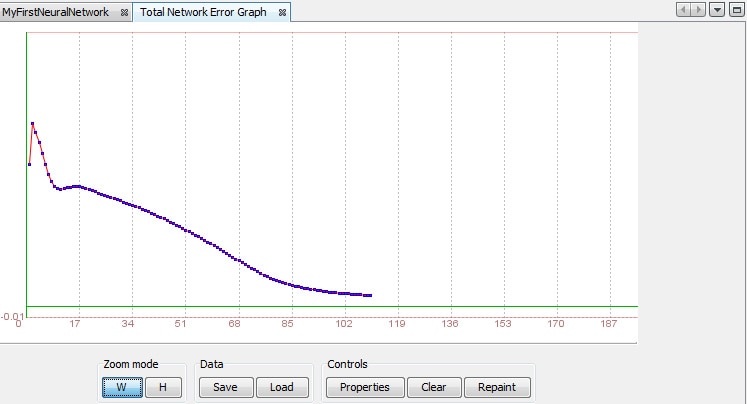
Figure 21. Total Network Error Graph Tab
Summary
This article showed how to use Neuroph Studio along with Neuroph Framework to easily create Java neural networks. More details about neural network theory and practice are beyond the scope of this article, but several resources are provided in the See Also section.
It is very convenient to have an integrated neural network and Java development environment, and Neuroph Studio is the first application to provide this type of environment. Because Neuroph Studio is open source, it is very suitable for education and research, but it is also helpful for Java developers who want to use neural networks as part of their projects.
See Also
- Neuroph download page
- Neuroph home page
- NetBeans Platform page
- Iris classification problem (Wikipedia article)
- Neural network course at University of Birmingham
- Neural network course at Willamette University
- Artificial Neural Networks--A Neural Network Tutorial
About the Author
Zoran Sevarac is a teaching assistant at Belgrade University, Department for Software Engineering, and a researcher at the Laboratory for Artificial Intelligence at Belgrade University. He is also a member of GOAI Research Network. Through his research, he has been working on the development of a Java neural network framework, which was released as the open source project Neuroph. He holds a master's degree in Information Systems, and he is a Ph.D. candidate.