Building Event-Driven Architecture with an Enterprise Service Bus
by Lucas Jellema
Published February 2007
Learn how to configure an ESB to "publish" enterprise events using a simple example.
One of the more important concepts in the domain of Service-Oriented Architecture (SOA) is that of Event-Driven Architecture (EDA). Similar to the event mechanism in, for example, JavaScript or 4GL environments where triggers—pieces of executable program code—can be hooked into events such as button-pressed, field-value-changed, or query-submitted, EDA specifies how "services" are hooked into "business events."
Most business events—ranging from the arrival of an order or request for quote to the hiring of a new employee or the delivery of some piece of equipment—trigger several responses across an organization. At a slightly more detailed level, there are events within process steps—such as failure to invoke a service, crossing a predefined threshold, or reaching a specific target—that may interest parties external to the process itself.
EDA allows you to publish all these events from the process that creates or encounters them to a central event-handling backbone, thereby making them available from there to all interested parties. The process or service where the event originates needn't concern itself with these external parties; otherwise, in addition to straining the execution of that particular process, you would end up with tightly intertwined systems (and hence a maintenance nightmare).

In this article, you will learn—via a simple example based on Oracle ESB—how this central backbone can be configured to carry published events as messages to the external parties. (For those of you too lazy to complete this tutorial, a link to a zip containing the completed JDeveloper application is available in the "Conclusion" section.)
Background
Oracle ESB has key capabilities that make it suitable for its task. First, it can receive messages (event notifications) in various ways: via JMS, through Web Service invocations, from the file system or a database table, and so on. It can also extract the message holding the data associated with the event and transform it, typically to turn it into a more generic, canonical, enterprise model.
The ESB can also turn a coarse-grained event message into multiple finer-grained messages. For example, it may create a New Customer event as well as a New Order event out of a message received from the Web-based Consumer Ordering system when a new customer has registered and placed his first order. During transformation of the original message into one or more canonical, possibly more specialized messages, the ESB can also enrich the content of the message—for example, by adding current date and timestamp information or adding information looked up from reference data sources—that will likely be required by multiple event consumers.
Finally, based on the characteristics of the event (the content of the message), the ESB can deliver the transformed, enriched messages to multiple output channels, such as a Web Service, JMS, a database procedure or table, a file, or an email.
(Note: a prime example of an event reporter is a BPEL process. As the BPEL process is executed, there may be several stages and situations where events can be published, typically in the form of a Web Service call into the ESB.)
There are several approaches to help the parties interested in the events consume the messages from the ESB:
- The ESB can deliver all messages to JMS topics and have each interested party sort out for itself how to get to the messages and how to transform them into customized formats.
- Each system that wants to know about the message can be invoked directly from the ESB, from the same service that consumed the event from the originator and possibly transformed its message into a canonical format. This, of course, means that the ESB service needs to be extended for every interested party added and may need to contain additional transformation and filtering rules for every additional party.
- The ESB has one service for receiving the event, transforming and enriching the message, and publishing that event to JMS as well as a dedicated service for every interested party. This dedicated service will receive the event message directly from the receiving service (coupled) or read the message from JMS (decoupled); perform additional, tailored transformation for the party it is serving; and deliver the message by whatever means - JMS again, WebService call, database manipulation - that suits the message receiver. In this scenario, adding a new party interested in the event (message) means creating a new, independent and loosely coupled service in the ESB. However, it introduces some overhead-specifically, many more service definitions as well as service instances—and it will replicate through an external JMS topic what the ESB is doing more or less internally as well.
In most situations the second approach is probably best. Note that the target services called from the ESB service instance to notify each of the interested parties can be called in parallel or sequentially, whatever is appropriate
Developing an ESB Service with Oracle ESB
A simple demonstration of this approach can be created as follows in Oracle ESB, the ESB component of the Web services infrastructure in Oracle Fusion Middleware.
The business event in this case is the hiring of a new employee. When the new employee has signed the contract, the event is published to the ESB. The event message contains name, age, gender, role and first-day-at-work-date. There are several parties interested in this event:
- The new employee needs to be registered with the Security Department, which will setup accounts, issue a badge for access to the facility, and so on.
- The Finance Department needs to make various payroll and expense reporting preparations for the new employee.
- The Junior Managers Club will invite anyone in a management position and under the age of 40 for their club. To that end, they want to be informed of any new hirees fitting that bill
The implementation of this simple business event service using the Oracle ESB could look something like the following:

The business event NewEmployee gets published ("fire-and-forget") by the HR Department (which invokes the ESB Web Service to that end). The ESB Service consumes the event and executes three routing rules that also perform some transformation:
- The SendNewEmployeeFileToJuniorManagerClub target service is invoked and writes a CSV file to the target directory
- The InformFinanceDepartmentOfNewEmployee target service is called and writes a new Employee record to the Finance database
- The NotifySecurityWebService is called to pass the message containing the data for the New Employee. This in turn starts a BPEL Workflow process that requires manual activity in creating a security badge for the new employee.
When this service is deployed, any call to the NewEmployee ESB Web Service to publish the New Employee Event results in the firing of two or three (for new managing employees under 40) target services. The key to this architecture is the full decoupling of the event publisher (the HR Department) from the event consumers—new consumers can be added without any impact on that department. Changes in the New Employee event can, by and large, be dealt with in the Router Service and need not impact the event consumers.
To develop the ESB service for this event, you will go through the following steps:
- Download and install Oracle JDeveloper 10.1.3.1 or later.
- Start the SOA Suite.
- Run JDeveloper.
- Perform initial setup.
Initial Setup
Before you can get started with the implementation of the EDA, you need to do some preparation. Specifically, you have to create a table in a database schema using a DDL script, copy a file to a directory on your file system that is accessible to JDeveloper, and deploy a very small and simple BPEL project to your SOA Suite instance.
Here are the setup steps:
- Unzip the sample code download to a temporary directory.
- Use the employees_table.sql script to create the table EMPLOYEES in a database schema of your choice. You will use this table later on into which to insert new records.
- Copy the file NewEmployeeEvent_Template.csv to a directory that is accessible from JDeveloper. You will use this file in the File Adapter Wizard, to model the file that should be written by the ESB Service you will develop in this tutorial.
- Unzip the SecurityProcessingNewEmployee.zip file to a working directory. It contains a small JDeveloper 10.1.3.1 project, with a BPEL Process: SecurityProcessingNewEmployee. This is a simple process that invokes the BPEL Workflow Service that has the Security Department inherit the task of creating a new badge for every new employee.
- Load the SecurityProcessingNewEmployee project in JDeveloper 10.1.3.1. Deploy the project to the BPEL PM in your SOA Suite instance. We need to have this BPEL process available when you develop the EDA Service in the ESB.
Deploy the BPEL process by right-clicking SecurityProcessingNewEmployee and selecting the Deploy option, and then picking the option BPEL Process Deployer:

The resulting popup window allows you to select a Connection to a BPEL PM instance.

Select the correct Connection and press OK to start deployment.
Creating the JDeveloper Application
In JDeveloper, create a New Application, called EventDrivenArchitecture. Press Cancel when JDeveloper offers to create a default project for you.
Go to the New Gallery and this time select the Projects, ESB Project item:

Call the project something like NewEmployeeEventService.
When the ESB diagram opens, click on the little icon in the upper left hand corner in order to create a System:

When you register your project with the ESB server, the system or service group you create will be available within the ESB Console. Services are part of a System or a Group within a System. Systems and Groups provide a means of organizing services - not unlike scopes in BPEL processes. One important aspect of Systems is that Target Services in different Systems will be called in parallel from a Routing Service while Target Services in the same System will be invoked sequentially.
Call the new System something like NewEmployeeEventSystem.


Before you can get started with the Event Handling Service in the ESB, you need to specify exactly what type of message we will receive from the HR Department upon the occurrence of the New Employee event. You do so by creating an XML Schema Document (XSD) that describes the structure of the XML message received for the event.
Go to the New Gallery, select the node General, XML and click on XML Schema in the list of available items. Then enter the name for the new XML Schema Document—in this case, NewEmployeeEventMessage.xsd.
Note that this schema has a relatively simple message structure, with a simple complex type with five simple type elements, describing the core information associated with the business event.

Let's now return to the ESB tab where you can start creating the service.
Drag & drop the Routing Service component from the Component Palette to the ESB Service. Enter the name for the Routing Service and - using the Browse button and Type Chooser, select the NewEmployeeEvent schema element in the NewEmployeeEventMessage schema definition.

Here's a screenshot of the Type Chooser that allows you to select the XSD element that describes the input to this Routing Service.

As you are creating a fire-and-forget (asynchronous with no callback) style of service, you do not have to specify either a Reply Message or a Fault.

You will allow external processes to directly call into this NewEmployeeEventRS RoutingService through its Web Service interface. When other channels are to be used for publishing this event - for example, by putting a new Employee file on an FTP server, by entering the new employee in a database table, or through JMS - you can add inbound Adapter Services to the ESB Service, which will forward the messages they acquire to the NewEmployeeEventRS. For the moment, assume the HR department will use the Web Service interface.
Now for the outbound adapters. Remember, three parties are interested in the event: the Security Department, the Finance Department, and the Junior Managers Club.
- The Security Department has a Web Service endpoint to be invoked - in fact that is just the front of a BPEL process that will be run inside the Department, including Human Workflow that involves the creation of the physical badge.
- The Finance Department wants you to directly insert a new record into a database table, and then will take it from there.
- The Junior Managers Club has stipulated that it wants to receive word of new Junior Managers via a CSV file written to a specific location on the file system. It has provided a sample file to indicate the exact format of that file.

So let's add the outbound services to the ESB Service.
In the esb diagrammer, drag and drop the File Adapter to the diagram. You will get a popup window to define the details for the File Adapter Service that you will use for writing the CSV file to file system.

Enter the name for the service. Then click on the Define Adapter Service icon next to the WSDL File field.
Next you will enter the File Adapter Configuration Wizard. On the first page, specify the name for the Service. (Basically, confirm what you previously specified in the Create File Adapter Service popup window.)
After clicking on Next, you are on the Operation page. Here you specify that you want the service to write files.

Step 3 asks you to specify the output directory and naming convention for the file the service will write. For now take the easy approach by specifying a hardcoded directory - not the best way to get your service to be portable, obviously. The filename can be specified using several dynamic elements - but only one at a time - such as the date or date time of the message or the sequence.

In Step 4, specify the output format for the file: How should the information be structured? Since you want to write a CSV file, click on the Define Schema for native format button.

This takes you to the Native Format Builder, where you can create an XSD that the File Adapter can use to create a CSV file from the XML data fed into it. Use the sample CSV file the Junior Manager's Club was kind enough to send you.

Accept the default values and click on Next.
On the next page, browse to the sample file or type in its name and location. Then press Next.

Accept the defaults on page 3. Click on Next.
Enter names for the elements containing multiple records and representing a single record. For example, use NewJuniorManagers and NewJuniorManager. Note: these will be presented when creating the mapping to this file service; they will not be present in the files that are written.

Accept the defaults on page 5. Click on Next.
On page 6, check the checkbox "Use the first record as the field names". Again, this will make the XSD more readable—it does not affect the files written by this service.

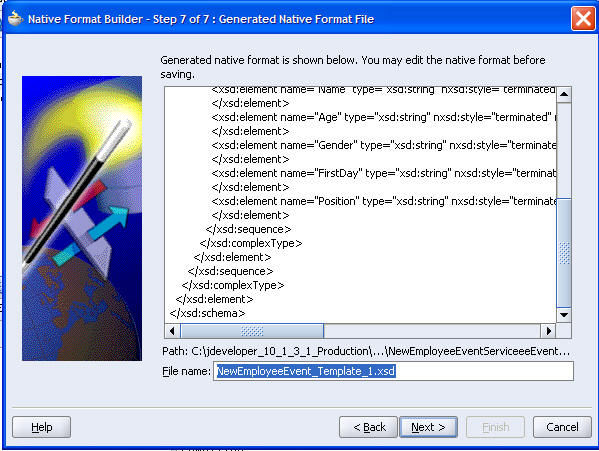
On the next page, an overview is given of the XSD file created by the wizard for use by the File Adapter. You may inspect it. Then accept it by clicking on Next.
You have arrived on the last page of the Native Format Builder wizard. Click on Finish.
We return to the File Adapter Configuration Wizard. Click on Next.

Then click on Finish . You will return the to Create File Adapter Service popup window. Once again, click on Finish.
The ESB diagram for the NewEmployeeEventService is extended with the SendNewEmployeeFileToJuniorManagersClub service.

Double-click on the NewEmployeesRS icon to specify a routing rule that will pass the NewEmployeeEvent message to this target service.

Click on the green plus sign to create a new Routing Rule. The Browse Target Service dialog is opened. Here you can select the service to which the Routing Rule will pass a message.

Select the write operation on the SendNewEmployeeFileToJuniorManagersClub and click on OK.

Add a filter expression with two parts - one stating that the age of the new hiree should be under 40, the other one requiring the role to be a managing one. Here's the full expression you have to enter:
/inp1:newEmployeeEvent/inp1:age < 40 and contains('MANAGER,PRESIDENT,
VICE PRESIDENT,TECHNOLOGY MANAGER,CFO,CHIEF,SUPERVISOR',/inp1:newEmployeeEvent/inp1:role)

Now you need to specify how to transform the message received from the HR Department in order to pass it on to the target service.

Click on the mapping icon. Select the Create New Mapper File option in the dialog.

Press OK . You go into the Mapper tool. Here you connect two XSD documents, thereby defining an XSLT to transform from the source XSD to the target.

First drag-and-drop the newEmployeeEvent element on top of the NewJuniorManager, to create the simple, obvious mappings.

Uncheck the checkbox Match Elements Considering their Ancestor Names.
So now you have your first-cut mapping:

The role element is not yet mapped to the Position field, and you know you have a special date format requirement for the FirstDay field.
Drag and drop role to position . Then drag and drop the format-dateTime Date Function from the component palette on top of the connection from firstDayAtWorkDate to firstDay.


Now double-click the function item to specify exactly how the transformation should be done:

Next, let's address the specific message delivery needs of the Finance department.
The Finance Department. Recall that the Financial Department wants you to directly insert a new record into a database table. The table can be found in the FINANCE department of one of the corporate databases:
SQL> desc employees
 Name                          Null?            Type
 ----------------------------  ---------------  ----------------------
 NAME                          NOT NULL         VARCHAR2(50)
 GENDER                                         VARCHAR2(1)
 JOB_TITLE                                      VARCHAR2(50)
 START_DATE                                     DATE
You will create a new adapter service for this target. Using the Database Adapter, set up a Target Service for the NewEmployeeEventRS. From the Adapter Services section in the Component Palette, drag the Database Adapter to the esb document. The following window pops up.

Enter the name for the Adapter Service and click the first icon after the WSDL File field, to configure the database adapter.
Create a New Database Connection, to connect to the FINANCE schema in the corporate database. (Note: Create a connection to the database schema in which you created the EMPLOYEES table during "Initial Setup."):

Specify the name of the connection:

Next, enter the username and password for the FINANCE schema:

Click on the Next button, to enter more Connection details:

In this step you need to specify the JDBC URL details, such as hostname, port, and database SID. Click Next when done, to test the Connection.
If you have been successful, click on Finish . Otherwise correct the erroneous details.
You are returned to the Database Adapter Configuration Wizard. Click on Next.

Select the operation you want this service to perform: just inserting new records.

Click on Next ; you go to the Select Table page. Click on Import Tables to select the EMPLOYEES table in the FINANCE database.
Click on Import Tables . Press the Query button. A list of all the tables in the FINANCE schema is shown. Select table EMPLOYEES and click on OK.
Click on Finish when the Select Table wizard page is shown again.

You are returned to the Create Database Adapter Service; click on OK.

Back in the esb diagram now:

Connect this target service to the NewEmployeeEventRS. Double-click the icon for the Router Service.

Click on the green plus sign to add a Routing Rule:

Select the Event operation in the InformFinanceDepartmentOfNewEmployeeEvent service and click on OK.

Click on the Mapping icon to define the mapping from the incoming NewEmployeeEvent to the Target Service.

Select Create New Mapper File and click on OK.
Drag The newEmployeeEvent event element to the top:Employees element.

Untick the Match Elements considering their ancestors checkbox.

The automapping gives you the first step of the transformation:

You need to manually map role to jobTitle and firstDayAtWorkDate to startDate . It only takes dragging and dropping of the Source elements to the Target elements.
The final mapping looks like:

Click on the Save All icon. You're almost done: Two out of three interested parties have been linked in with the NewEmployeeEvent.

The Security Department. Security has published a Web Service that you need to invoke with the new employee event. Behind that Web Service lurks a BPEL process that starts a Human Workflow (and for the moment that is the only thing it does).

In your ESB Service, you need to create another Adapter Service that invokes this BPEL process, and then tie it to the Router Service.
From the ESB Services Component Palette, drag and drop the SOAP Service element to the ESB diagram.
The Create Soap Invocation Service dialog pops up. Enter the name of this service, for example NotifySecurityWebService. Then click on the Service Explorer icon.
Select the SecurityProcessingNewEmployee service (that is already deployed on the BPEL PM instance).

Click on OK.

And on OK again.

Double-click on the Router Service. You are about to add a new Routing Rule, connecting the Soap Invocation Service to the Router Service.
Click the green plus sign to add a new routing rule.

Select the initiate operation on the NotifySecurityWebService target service.

Click on OK.

Click on the Mapping icon.

Select Create New Mapper File and click on OK.
Map the RouterService newEmployeeEvent to the SecurityProcessingNewEmployeeEventRequest message.

Save All.
The ESB service looks as follows:

Registering the Router Service with the ESB
It is time to register your service with the ESB. If you do not have a connection with a running ESB, first follow steps outlined at the end in the "Create a Connection with the ESB" section below.
Click on the project with the right mouse button and select Register with ESB and select the LocalESB_soasuite_10_1_3_1 connection.

Upon successful registration, the following report is shown:

If you now go to the ESB Console, you can see the services that have been deployed.

The NewEmployeeEventRS service can be invoked as a normal Web Service. You can find out its WSDL location if we go to the Definition Tab for this service:

Firing the EDA's NewEmployeeEvent Routing Service
You can also go the Enterprise Manager for your Application Server to see which Web Services are available on the OC4J instance, as well as test them.

Click on the Test Service button.

Go to this page (by clicking on Test Web Service ):

Enter values for the five input fields and press the Invoke button. The result in the Enterprise Manager console should be disappointingly minimal, as the ESB Service was an asynchronous one and does not return any response:

In the ESB Console, you can see a new instance of your service, triggered by the call to the Web Service we just made:

You can also see that all three target services have been invoked by the ESB Service when it received word of the New Employee event.
That should mean that:
- The Security Department has a new workflow waiting.
- The Junior Managers Club has a new CSV file.
- The Finance Department has a new record in its EMPLOYEES table.
If you go to the Worklist Application, logging in as JSTEIN - the security officer currently assigned all tasks for creating security badges for new employees:

You will find the following task waiting:

If you take a look on the file system in the directory specified by the Junior Managers Club, you will see:

If you open this file, you will find:

SQL> show user
USER is "FINANCE"
SQL> select *
  2  from    employees
  3       /

NAME                                                      G
--------------------------------------------------------- -
JOB_TITLE                                                 START_DAT
--------------------------------------------------------- ----------
Lex Jellema                                               M
MANAGER                                                   16-AUG-20
Creating a Connection with the ESB
Before you can connect to the ESB to register new services with it, you need a connection with the Application Server.
In SOA Suite 10.1.3.1, creating the Application Server Connection now takes the following steps:
Go to the New Gallery and select the option Application Server Connection.
Select the Connection Type as Oracle Application Server 10g 10.1.3 . Also provide a name for the connection. Click on Next.
Enter the username and password of the user you use to connect to the Application Server. For a local development environment that is likely just the administrator, oc4jadmin. Click on Next.
This next screen is where you specify exactly which application server instance to which you want to connect. To confirm you are using the correct value, check the opmn.xml file in the directory <soasuite_10_1_3_1_HOME>\opmn\conf. In this file, look for the value for the port element's request attribute.

Enter the correct values and click on Next.

Click on Test Connection and wait for the Success! status to appear.
Click on Finish . Go the New Gallery again. This time select the Integration Server Connection . Click on OK.
Type the name for the connection and click on Next.

Select the correct Application Server Connection - the one you just created. Also specify the correct port number. (The file SOA_SUITE_HOME\install\esbsetupinfo.txt may provide the correct information on the port.)
Ideally, you will get output like the following when you click on the Test Connection button:

Conclusion
The promise of EDA is that business events mediated through an intelligent event communication infrastructure trigger loosely-coupled business services that can decide to take action as an additional outcome of the event.
In this tutorial, you have seen how the business event "newly hired employee" was mediated by Oracle ESB to invoke three unrelated and decoupled business services, each with its own delivery mechanism and message format. The ESB did all the routing, filtering, and transformation for you. A zip containing the completed JDeveloper application is available here.
As you saw, implementing this basic EDA using Oracle JDeveloper and Oracle ESB turns out to be a fairly simple and straightforward process that requires no programming and is largely wizard-driven. Deploying and managing the EDA is quick and easy.
Lucas Jellema is Technology Manager with AMIS in Nieuwegein, The Netherlands, and is an Oracle ACE and Oracle Fusion Middleware Regional Director. Lucas is a frequent blogger, author, and presenter at international conferences and workshops, as well as developer of reusable software such as JHeadstart Designer Generator, CDM RuleFrame, and the Oracle Designer Repository Object Browser.