Create a Site and Add Users
Create Asset Types and Assets
- 5. Create a basic asset type
- 6. Create a flex Family
- 7. Create a basic asset
- 8. Enable Assets
- 9. Create a flex asset attribute and definition
- 10. Create a flex asset
Create a Template and a Page
Publish a Site
Create a Site and Add Users
1Log in to admin site


Enter your user name and password into the login form.

Click Login.

Ensure that you are logged in to the admin site by selecting
AdminSite from the drop-down box for sites in the top right corner
of the interface.
2Add
a new site
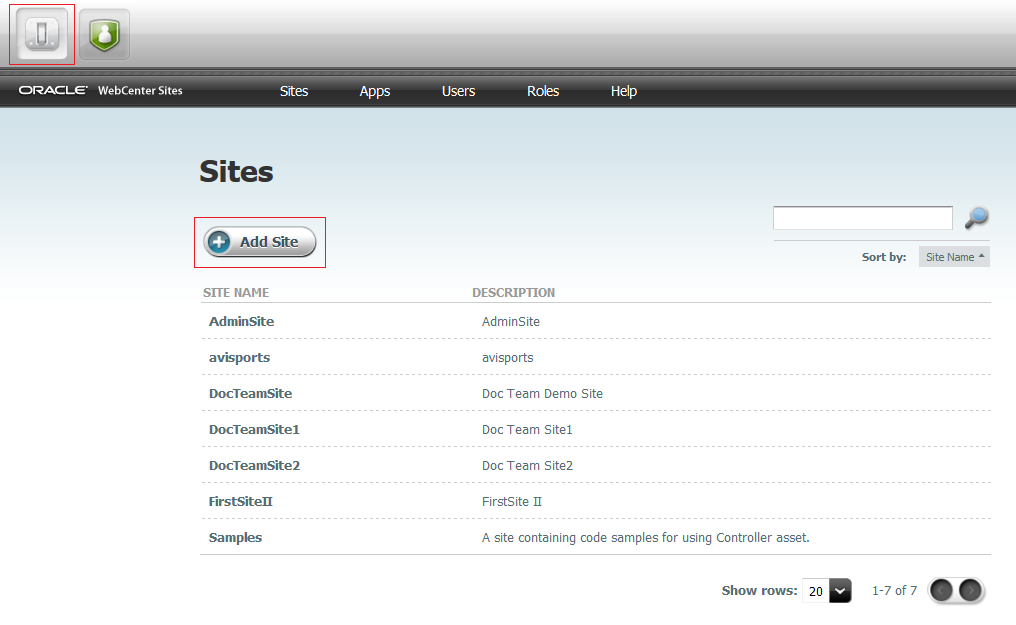

In the WEM Admin Interface, click Add Site.

In the Name field of the Add New Site form, enter the name for the new site.

In the Description field, enter the name of the site as you want it to appear in the WebCenter Sites interfaces, (up to 64 characters). This site name is used in site lists throughout the user interface.

Click Save and Close.
3Add
users for a site
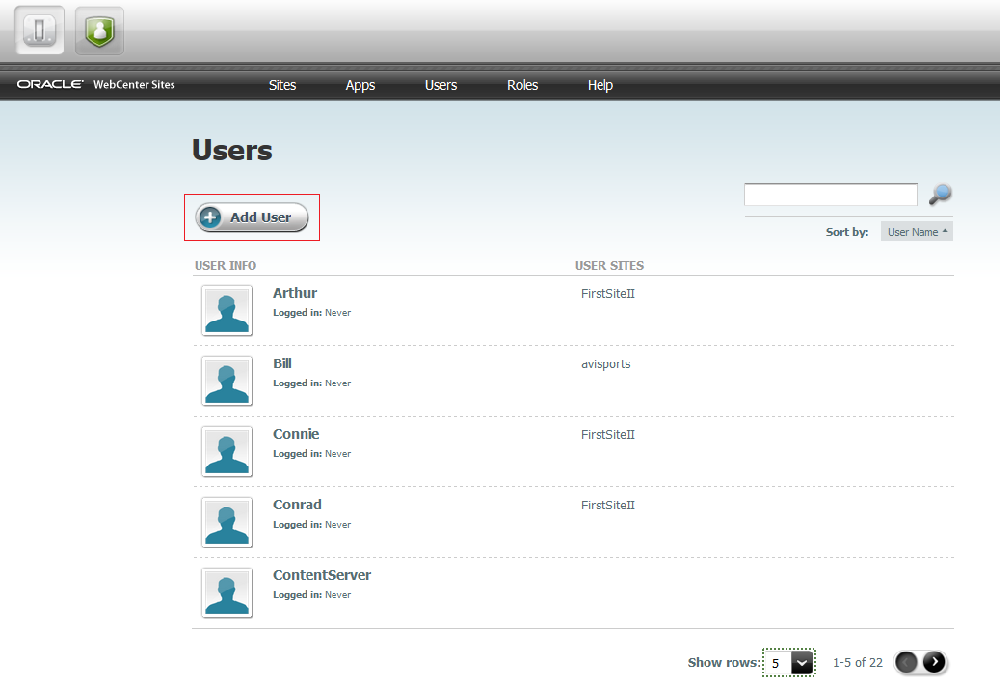

In the WEM Admin Interface, click the Users menu.

In the Users form, click Add User.

In the Add User form, enter the name of the user, select the ACLs that you want to assign to the user, enter the password for the user, confirm the password, and then click Save and Close.
4Assign
users to a site


We assign users to a site so that they are enabled to edit the site as required. In the WEM Admin interface, click the Users menu.

In the Users form, point your mouse to the newly added user and click Manage User.

In the Manage User form, click Assign to Sites. In the Select Sites for User form, select the site(s), and then click Continue.

In the Assign Roles to User form, select the roles for the user, and then click Save and Close.
Create Asset Types and Assets
5Create
a basic asset type


In the Admin interface of the General Admin section, expand the Admin>AssetMaker, and then double-click Add New.

In the Add New AssetMaker Asset Type form, enter the name and upload the Descriptor File for the asset type, and then click Save.

In the Asset Type: form, click Register Asset Elements, and then again click Register Asset Elements in the Register Asset Elements form.

In the Asset Type: form, click Create Asset Table… and then again click Create Asset Table in the Register Create Asset Table form.
6Create
a flex family
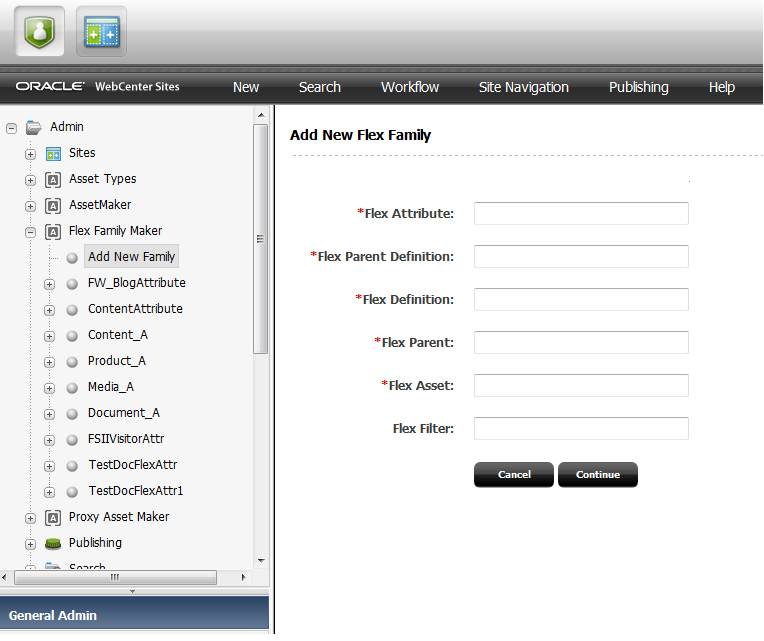

In the Admin interface of the General Admin section, expand the Admin>Flex Family Maker, and then double-click Add New Family.

In the Add New Flex Family form, enter the names of the required fields, and then click Continue.

In the Add New Flex Family form, click Add New Family.
7Create
a basic asset


In the Contributor interface, click the Content menu, and then click select New <basic Asset type name>.

Enter the basic asset name, and then click the Save icon.
8 Enable asset types
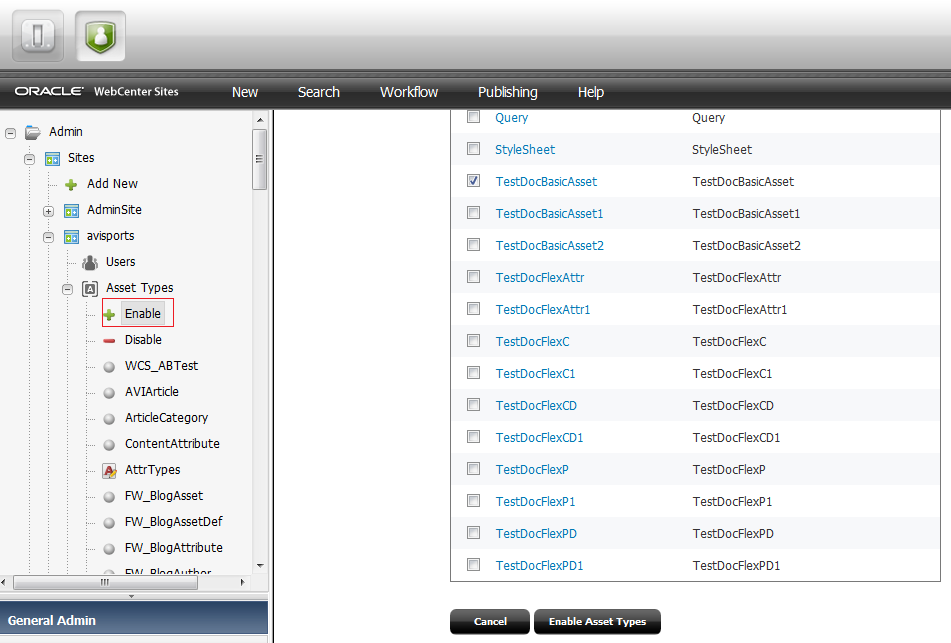

In the Admin interface of the General Admin section, expand Admin>Sites>newly created site>Asset Types, and then double-click Enable.

In the Enable Asset Types form, select the asset type(s) you want to enable, and then click Enable Asset Types.

Select the Start Menus for the asset type(s) that you want to enable, and then click Enable Asset Types.
9Create
a flex asset attribute and definition
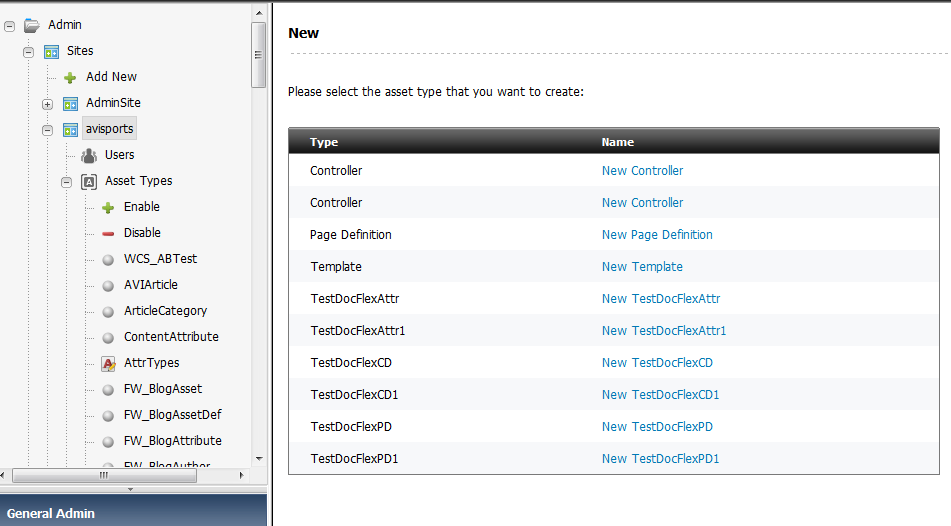

In the Admin interface of the General Admin section, expand Admin>Sites>newly created site, click the New menu, and then click the link for new flex asset attribute.

Enter the Name and Attribute Type, and then click the Save icon.

In the Admin interface of the General Admin section, expand Admin>newly created site, click the New menu, and then click the link for new flex asset definition.

Enter the flex asset definition name, select the attributes, and then click the Save icon.
10Create
a flex asset


In the Contributor interface, click the Content menu, and then click select New <Flex Asset type name>.

Enter the flex asset name, select the flex asset definition, and then click the Save icon.
Create a Template and a Page
11Create
a controller


Controllers contain the business logic to be authored by developers to sort the content logically. In the Admin interface, click New.

In the table on the right, click the New Controller link next to Controller.

In the Name field, provide a name for the controller and in the Description field, provide a description of the controller.

In the Controller Logic field, provide the controller logic as required, and then click the Save icon.
12Create
a template


Templates are created to define the framework of the site content. In the Admin interface, click New.

In the table on the right, click the New Template link next to Template.

Fill in the Template form,
and then click Continue.
While filling the form, you can select the controller as
required.

Fill up the fields in the form as required, and then click the Save icon.
13Create
a page
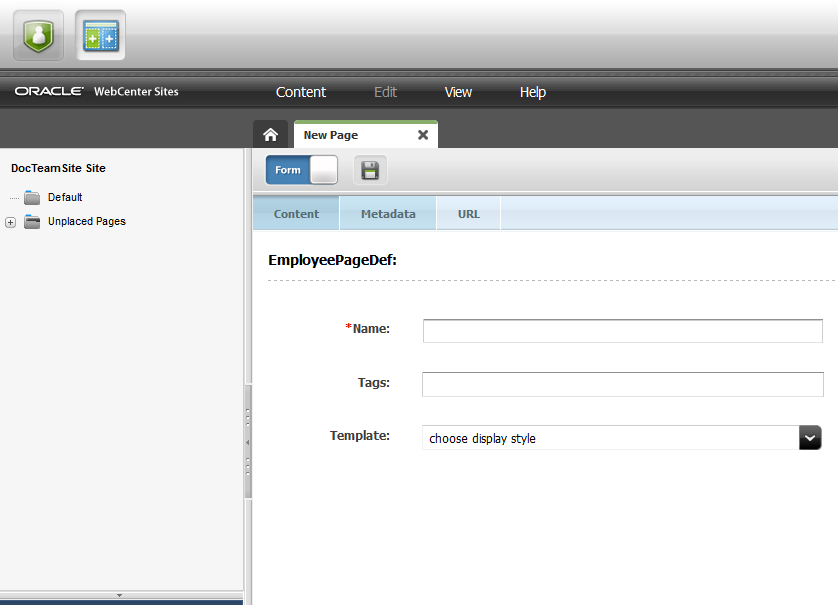

In the Contributor interface, in the menu bar, select Content, New, and then select New Page.

Fill in the Page form, and
ensure that you select a template for the page.
Publish a Site
14Create
a destination address for publishing
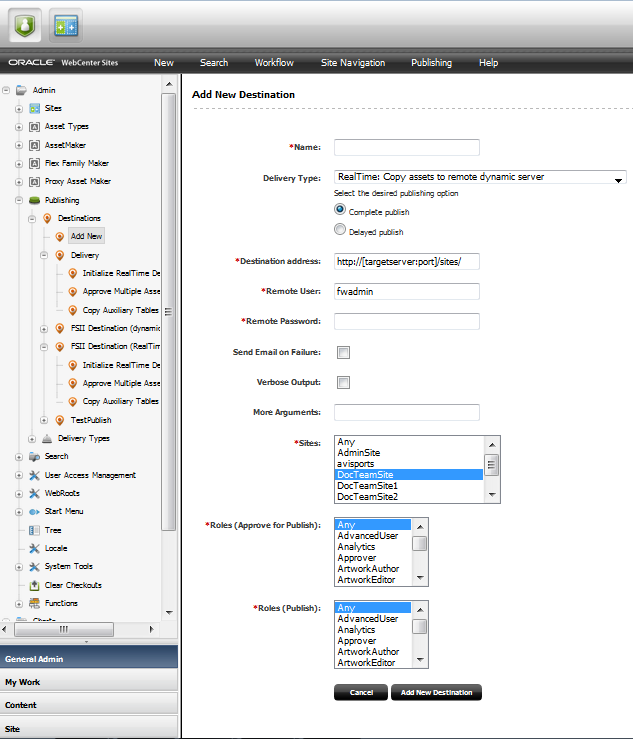

We should publish a site to make it accessible to the site visitors. In the Admin interface, expand Admin>Publishing>Destinations, and then click Add New.

In the Add New Destination form, enter the data as required, and then click Add New Destination.
15Approve
and publish an asset
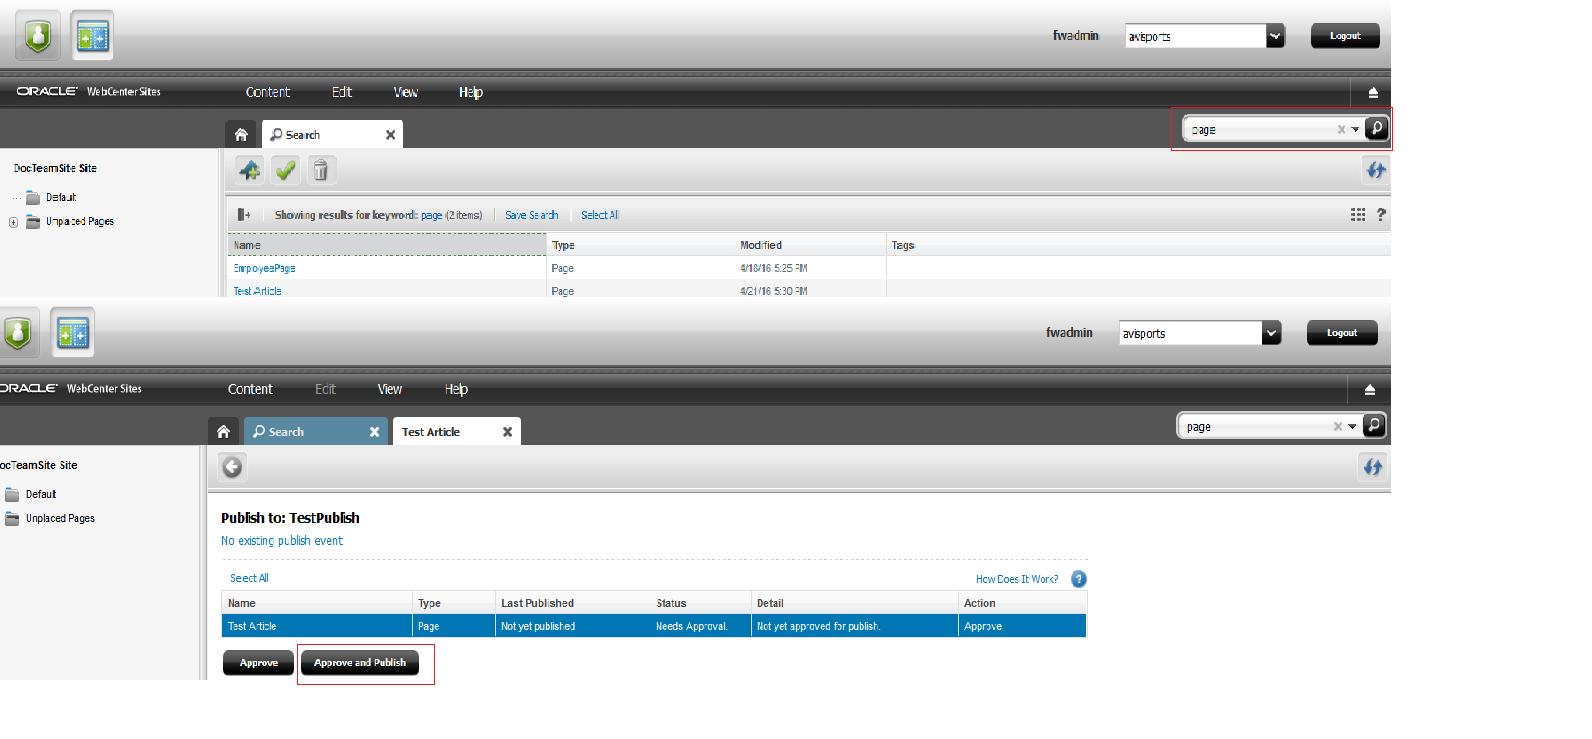

In the Contributor interface, search and open the page that you want to publish.

Click the Publish icon, and then select the Destination Address.

In the Publish to form, click Approve and Publish, and then click Yes to confirm.
 You're
done!
Find out more about Oracle WebCenter Sites
See:
oracle.com/webcenter sites and docs.oracle.com
Sites
Naming Conventions
About ACLs
About Controllers
See events.oracle.com and blogs.oracle.com/webcenter for information about Oracle WebCenter Sites events.
Follow Oracle Cloud on


 Facebook
 Twitter
 YouTube
