Data Loading and the Oracle Database Cloud Service
Overview
- In Application Express, SQL Workshop contains an area which allows you to run SQL scripts. These scripts can include both SQL statements and embedded data, and can be used to load data into the Oracle Database Cloud Service. In addition, Application Express has a set of utilities that allow you to load data from a variety of formats, including .csv files, Excel spreadsheets, and text files.
- SQL Developer is a Java-based tool that runs on a client machine. SQL Developer accesses an Oracle Database Cloud Service through a set of RESTful Web Service calls and allows you to access and load data and data structures into your Oracle Database Cloud Service.
Purpose
This tutorial covers how to load data into an Oracle Database Cloud Service using SQL Developer.
Time to Complete
Approximately 20 minutes
Introduction
The Oracle Database Cloud is an ideal platform for building data-centric applications universally available in the Cloud. These applications allow users to add, change, and manipulate data to extract valuable information to allow for better operations and strategic decisions.
Some applications will begin with a clean slate – with data structures defined, but without any data populating those structures. The data is added through user interaction.
A more common scenario is an application where some amount of data already exists, although not in an Oracle Database Cloud Service. This scenario will require data to be loaded into the Oracle Database Cloud Service.
You can load data into your Oracle Database Cloud Service with two different tools – Application Express or SQL Developer.
In this tutorial, you learn how to load data into an Oracle Database Cloud Service using SQL Developer.
Prerequisites
Before starting this tutorial, you should have performed the Signing Up for a Database Cloud Service tutorial.
To load data into your Oracle Database Cloud Service, you will need access to an Oracle database and Oracle SQL Developer release 3.2.10.09 or later.
Setting Up Your Database Cloud Service to Allow for Data Uploads from SQL Developer
- Change the password for the SFTP user
- Create a cloud connection user in your Database Cloud Service
- Create a cloud connection in SQL Developer
There are three tasks you need to perform before you can perform the data upload from SQL Developer:
Change the Password for the SFTP User
You need to change the password for the SFTP user defined for your Database Cloud Service. Perform the following steps:
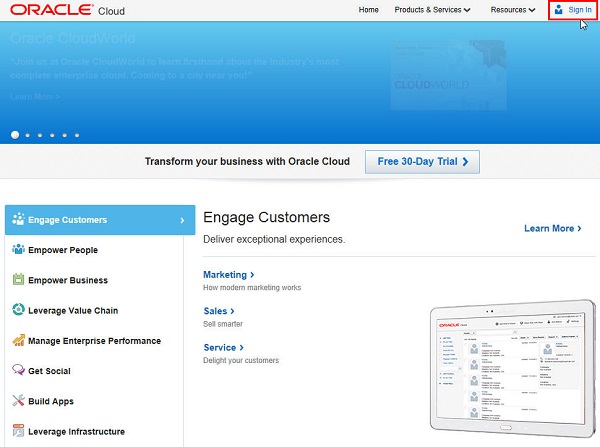
Sign In to your Cloud Service. Click Sign In from the main cloud page.
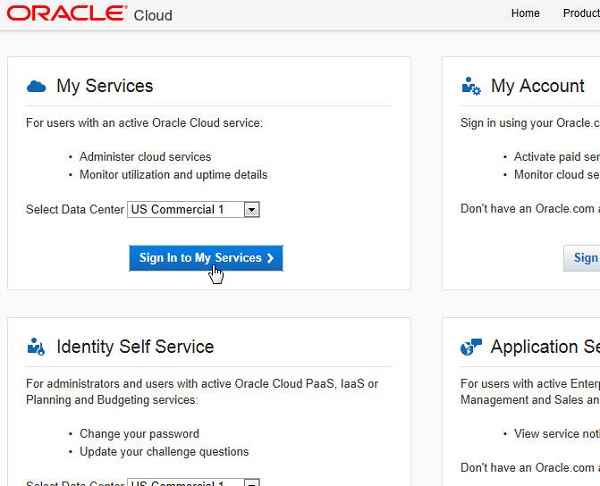
Make sure the correct Data Center is selected and click Sign In to My Services.
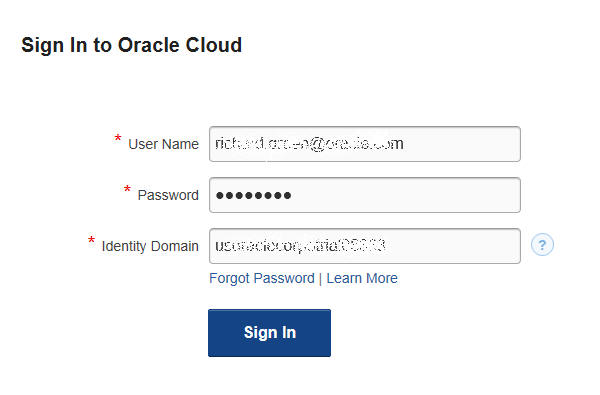
Log in as the database administrator user for your service and click Sign In.
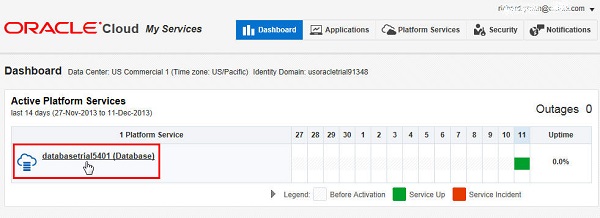
In My Services, click the name of your Database Cloud Service.
Make note of the Service SFTP Host &
Port, and the Service SFTP User
Name. You will be using these later to
define a connection.
Note: You want the Service
SFTP information for your Database Service,
not the Domain SFTP
information for your entire identity domain.

Click the link in the Service
SFTP User Name field. This will bring you
directly into the Security tab,
with only your Service SFTP User listed.
On the right side of the screen, click the icon with 4
horizontal bars, and from the pop-up window, click Reset Password.
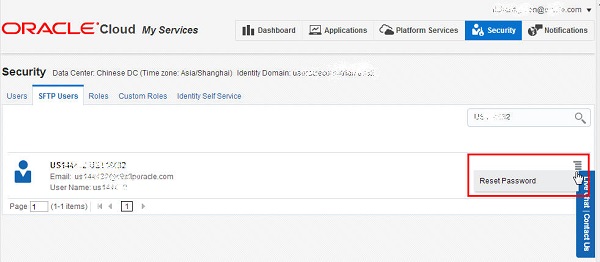
Enter a new password, confirm the new password, and
click Save. Keep a note of the new
password that you entered.
Next you need to create a a cloud connection user in
your Database Cloud Service.

Create a Cloud Connection User in Your Database Cloud Service
You need to create a user to load the tables and data into your Database Cloud Service. Perform the following steps:
In the previous step, you were in the Security tab of My Services. Click the Dashboard tab. Click your database name.
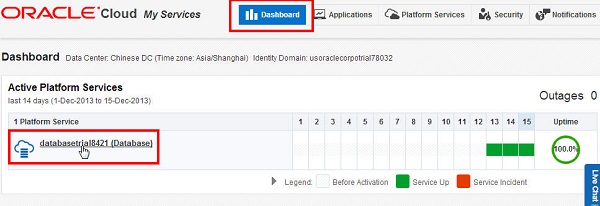
You are in the Overview tile of the Dashboard tab.

Scroll down to the Additional Information
section.
Note the URL in the Service Instance URL
field. If you hover your mouse over the URL, a pop-up
shows the complete URL. Right-click the URL and select
Copy link address from the pop-up
menu. Then paste the URL into a text file so that you
can copy and paste it in the next section.
Also make note of the port number at the end of the Service
SFTP Host & Port field. In this
example, the port number is 22.
This is the URL and Port Number you need to specify in
the next section when you create a SQL Developer
connection to this Database Cloud Service.

Scroll back up to the top of the Dashboard tab and click Open Service Console.

Select Administration > Manage Users and Groups.
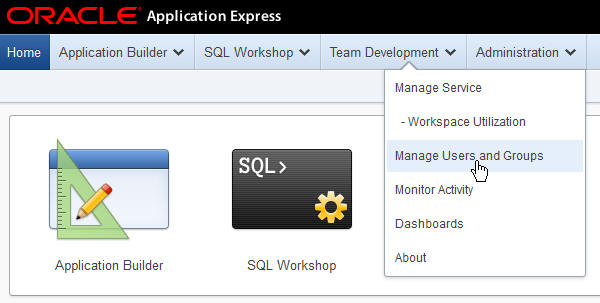
Click Create User.
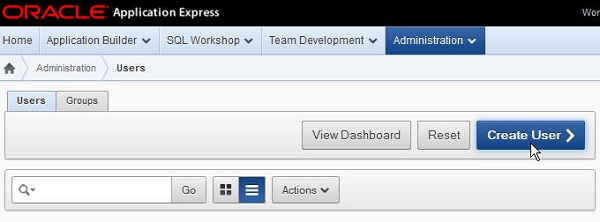
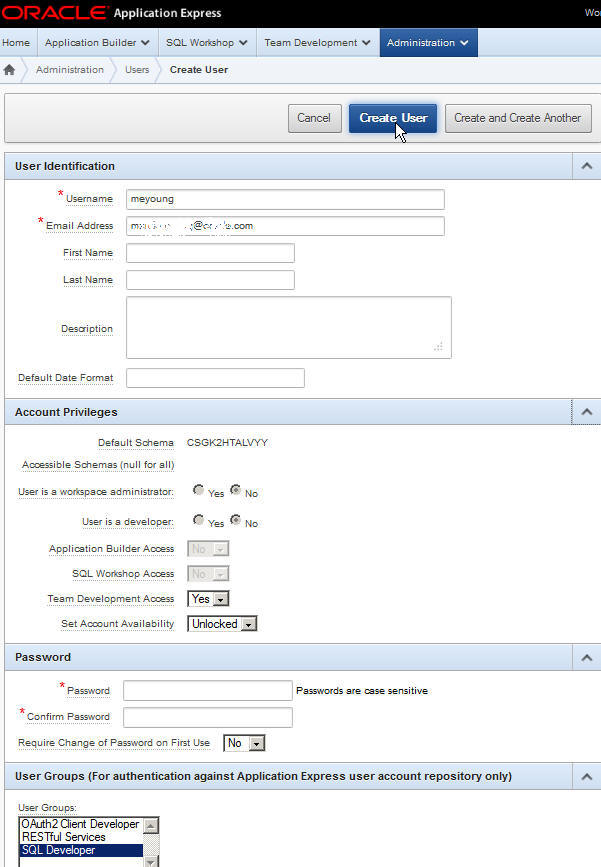
Enter the required information (Username, Email
Address, Password). Change Require Change of Password
on first User to No,
and select SQL Developer from the
list of User Groups. Then click Create User.
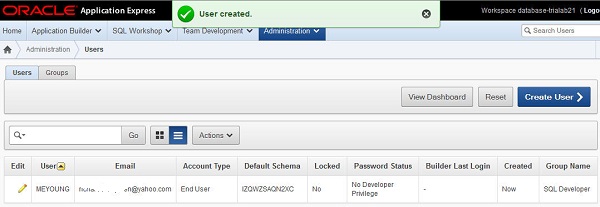
The user was created successfully. Next, you create a Cloud Connection in SQL Developer.
Create a Cloud Connection in SQL Developer
You need to create a connection to your Database Cloud Service from SQL Developer. Perform the following steps:
Open SQL Developer. Note: You must have release 3.2.10.09 or later.
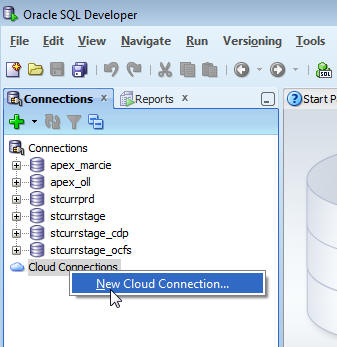
From the Connections window, Right-click Cloud Connections and select New Cloud Connection...
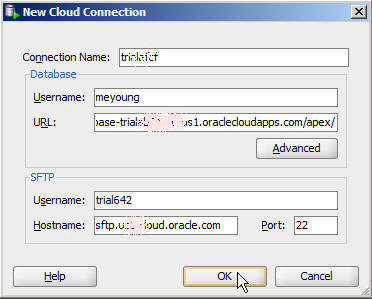
Enter the following information and click OK.
Connection Name: <identity
domain of your service>
Database Username: <name
of user with SQL Developer user group>
Database URL: <URL to
Database Cloud service, which you saw in My Services
-> database -> Details -> Overview tab,
as shown earlier in the screenshot of Step 2 in the
"Create a Cloud Connection User in Your Database
Cloud Service" section of this OBE>
SFTP Username: <user
from email that you changed password for>
SFTP Hostname: <sftp
hostname from email>
SFTP Port: <sftp
port which you
saw in My Services -> database -> Details
-> Overview tab>
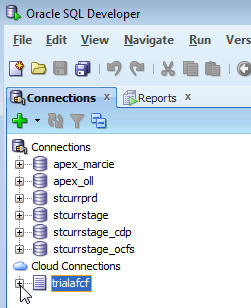
The Cloud Connection was created. Expand the node to connect.
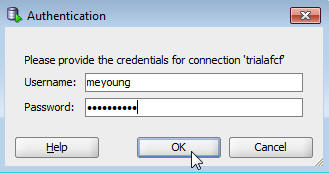
Enter the password of the user you created in your database cloud service and click OK.
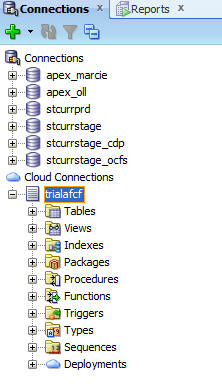
The connection to your Database Cloud Service was successful. You are now ready to load data into your Database Cloud Service..
Loading Data into your Database Cloud Service from SQL Developer
In this section, you add some tables from another database into your Cart and deploy to the cloud. Perform the following steps:
Select View > Cart.
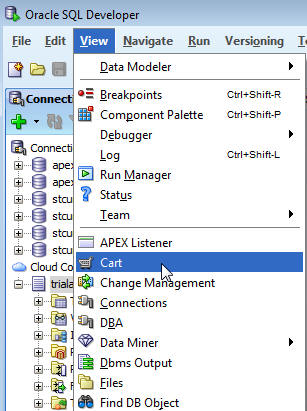
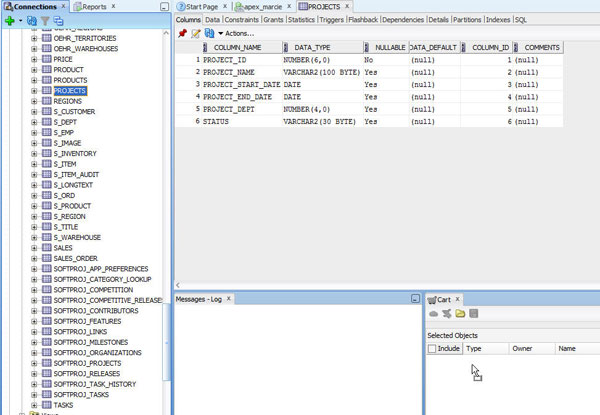
Open a connection to the database that contains the data you want to load. Drag the database objects to the cart. In this example, you drag the PROJECTS table to the cart. You can drag additional tables into the cart as required.
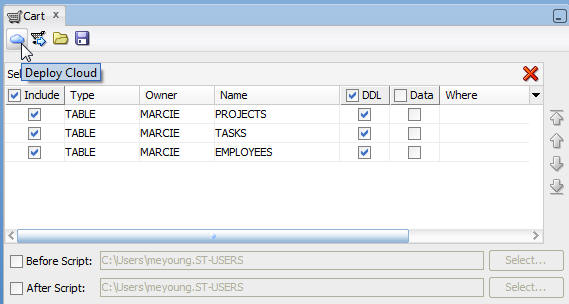
You can deploy the DDL and/or the Data and also specify a Where clause. Once all the objects you want to load are in the cart, click the Deploy Cloud icon.
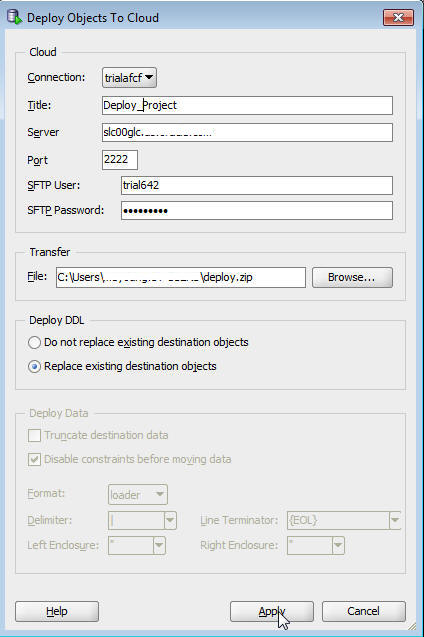
Enter a Title (no spaces) and click Replace
existing destination objects for Deploy DDL and
click Apply.
Note that the Deploy Data section is not available because
you only only selected the DDL option (from the cart).
Click Apply.
(If an error message appears, check your SFTP User and
Password settings. If Port 2222 does not work, try 22.)
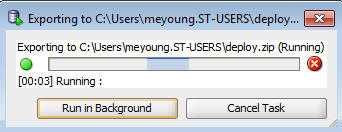
The file deploy.zip will be created and uploaded to the SFTP server and then executed into your database cloud service.
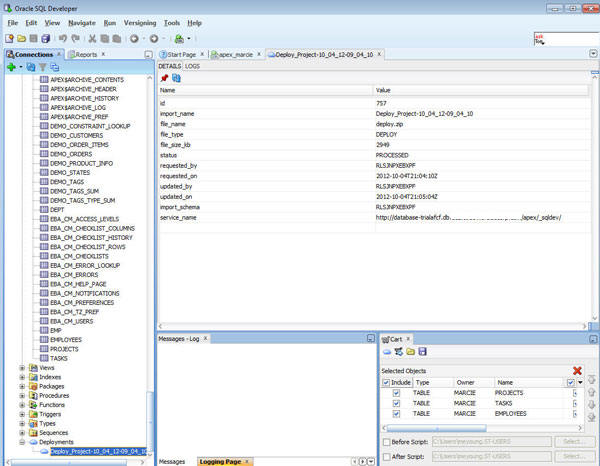
Expand Deployments and select the deployment you just created. Review the details. You may need to click the Refresh button. When the status is PROCESSED this means the deployment completed successfully.
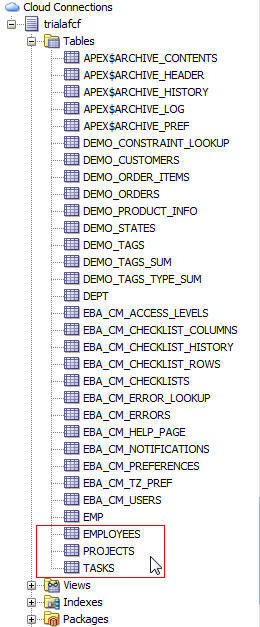
If you review the list of tables now, you see the tables you just deployed in the list.
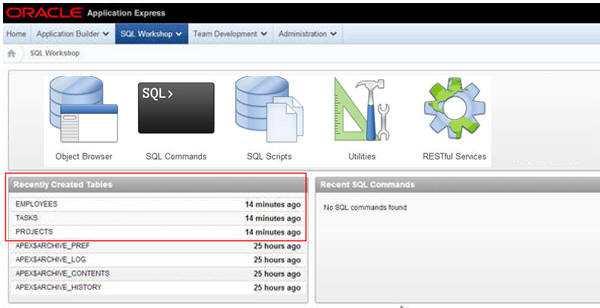
You can also switch to your database service and review SQL Workshop to see that the tables you deployed are now listed in the Recently Created Tables area.
Summary
- Set up your Database Cloud Service to allow for data uploads from SQL Developer
- Load data into your Database Cloud Service from SQL Developer
- Oracle Cloud Home Page
- To learn more about Oracle Application Express, refer to additional OBEs in the Oracle Learning Library
In this tutorial, you have learned how to:
 Overview