Enhancing Your Oracle Application Express Application: Part 2
Overview
- Have access to an Oracle Database 11g database that has the sample schema installed.
- Have installed Application Express Release 4.1.1 into your Oracle Database 11g database.
- Created a workspace called HR that is based off the HR schema with the admin username of HR and a password of oracle.
- Performed the Building an Application using Oracle Application Express: Part 1 tutorial or import the f100.sql application which contains the application that was created in this tutorial..
- Downloaded and unzipped the files.zip into your working directory.
Purpose
This tutorial covers how to enhance the application you built in part 1. You will examine how to create and switch to a different theme, add a chart, dynamic actions and plugins and create and manipulate a tabular form.
Time to Complete
Approximately 60 minutes
Introduction
Oracle Application Express (Oracle APEX) is a rapid web application development tool for the Oracle database. Using only a web browser and limited programming experience, you can develop and deploy professional applications that are both fast and secure. Oracle APEX is a fully supported, no cost option of the Oracle database.
In this tutorial, you use Oracle APEX Release 4.1.1 to refine the application you built in part 1 of this workshop.
Prerequisites
Before starting this tutorial, you should:
Creating and Switching to a Different Theme
- Run the /home/oracle/Desktop/solutions/apexp1_lab/deinstall.sql to delete the supporting database objects.
- Import the application instead from the /home/oracle/Desktop/solutions/apexp1_lab/f100.sql. Make sure you install the supporting objects.
In this topic, you create a different theme and then switch to the new theme to make it the current theme.
Run the Application you created in the previous lab. If you were unable to perform the entire lab (or would like to reset your environment for this lab), you can perform the following:
Review the look and feel of the tabs. You want to utilize another theme. Click the Application button in the developer toolbar.
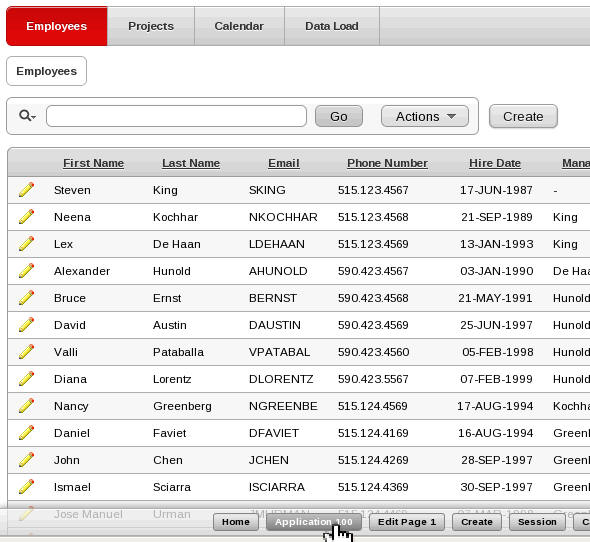
Click Shared Components.
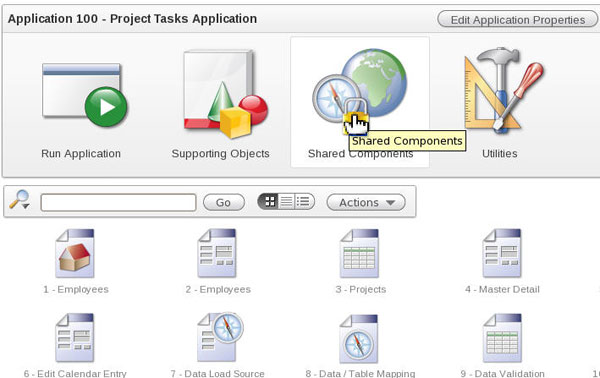
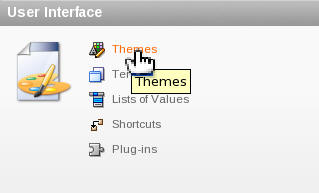
Under User Interface, select Themes.
Click Create.

Accept the default and click Next.

Scroll down and select Theme 22 box or select the Theme 22 radio button and click Next.
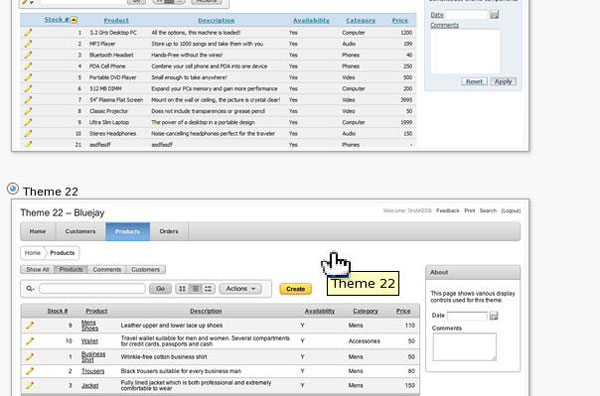
Click Create.

The theme was created in your application. To switch to the new theme, click Switch Theme.
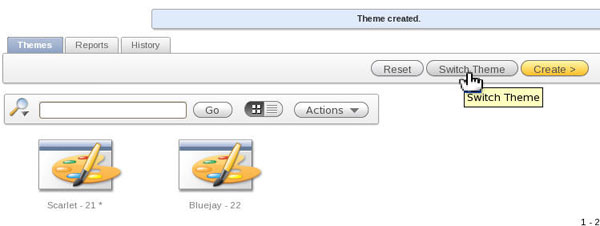
Accept the default 22. Bluejay and click Next.

A theme compatability comparison is displayed. Accept the default and click Next.
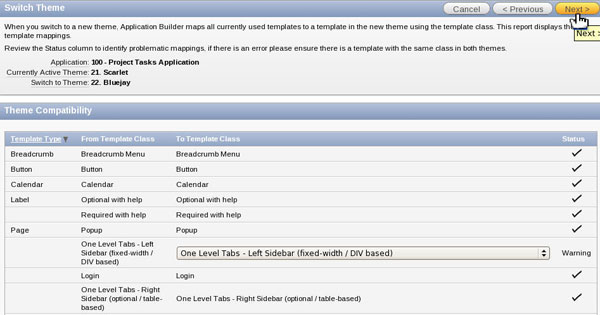
Click Switch Theme.

You can run your application to see the next theme. Click Run Page 1 icon in the upper right of the window.
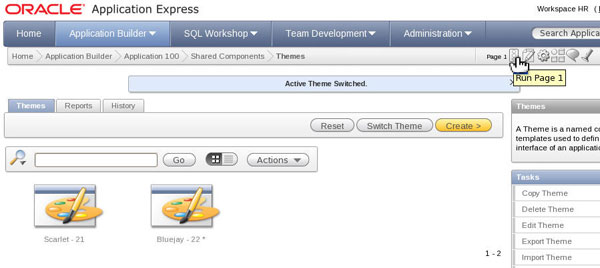
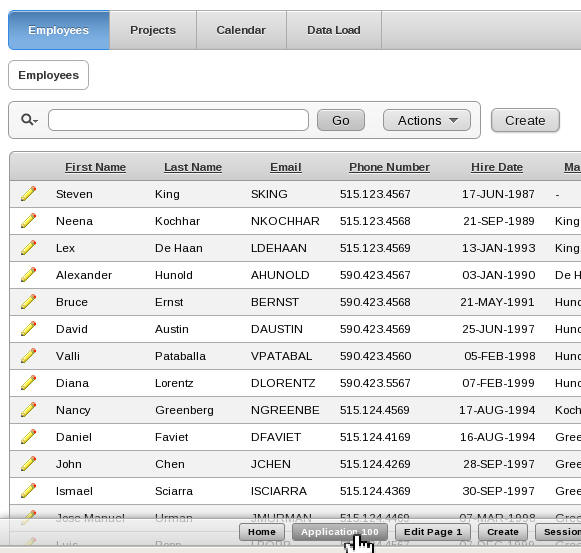
Notice the look and feel has changed to the new theme colors. Select the Application button in the Developer Toolbar. In the next topic, you create a chart.
Creating a Chart
In this topic, you create a 2D pie chart that shows the number of tasks per project. Then, you convert this 2D pie chart into a 3D pie chart and make a couple of display settng changes.
From the Application page, click Create Page.
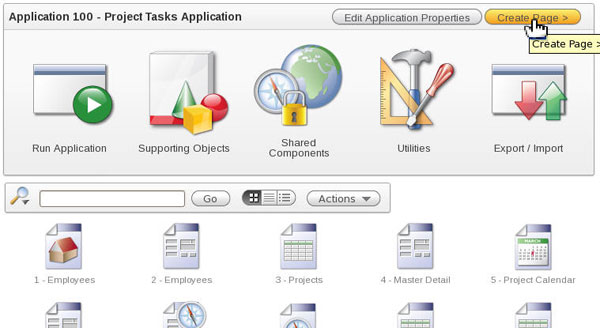
Select the Chart page type and click Next.
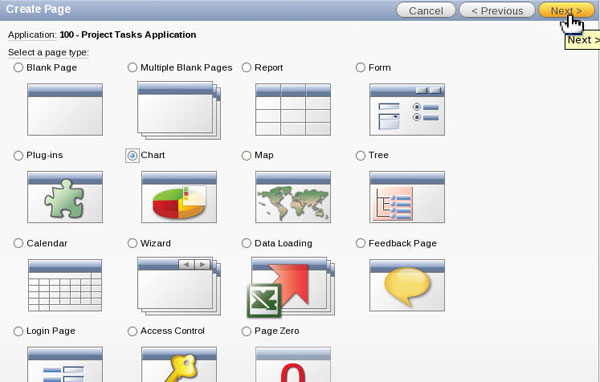
Make sure Flash Chart is selected and click Next.

Select the Pie & Doughnut chart type and click Next.
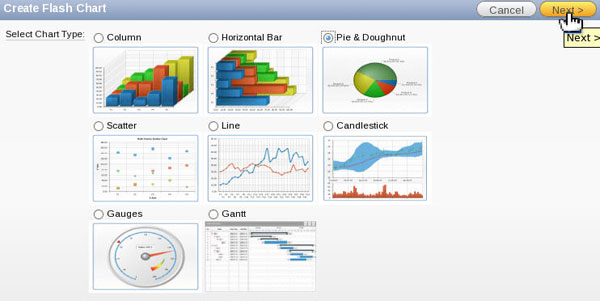
Select 2D Pie and click Next.
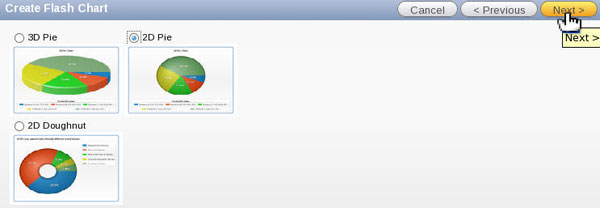
Enter Tasks per Project Chart for both Page and Region Name and click Next.

Select Use an existing tab set and create a new tab within the existing tab set, enter Chart for Tab Label and click Next.

Enter Tasks per Project Chart for Chart Title, select Side From Left for chart Animation, select Solid Color for Background Type, enter #FFFFFF for Background Color 1 and select Bottom for Show Legend and click Next.
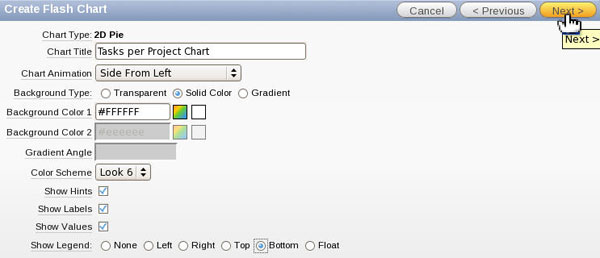
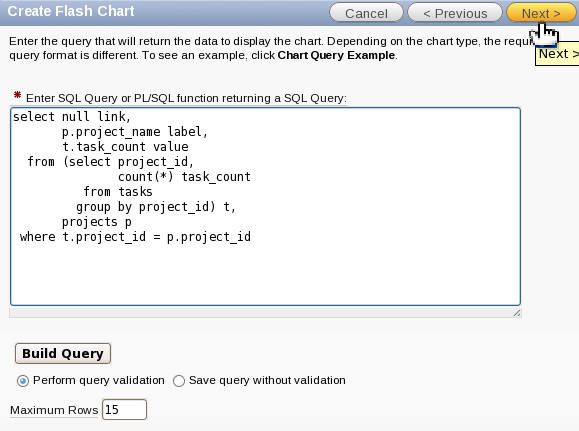
Enter the following SQL Query or copy the query from the /home/oracle/Desktop/solutions/apexp2_lab/chart.txt file. Then click Next.
select null link,
       p.project_name label,
       t.task_count value
  from (select project_id,
               count(*) task_count
          from tasks
         group by project_id) t,
       projects p
 where t.project_id = p.project_id
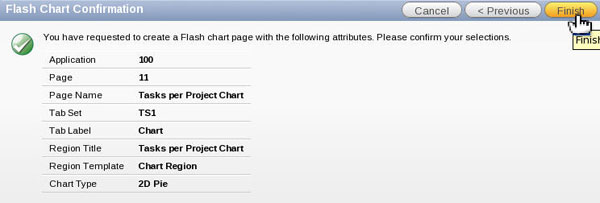
Click Finish.
Click Run Page.
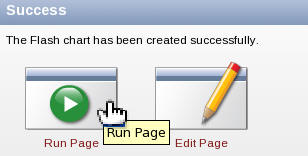
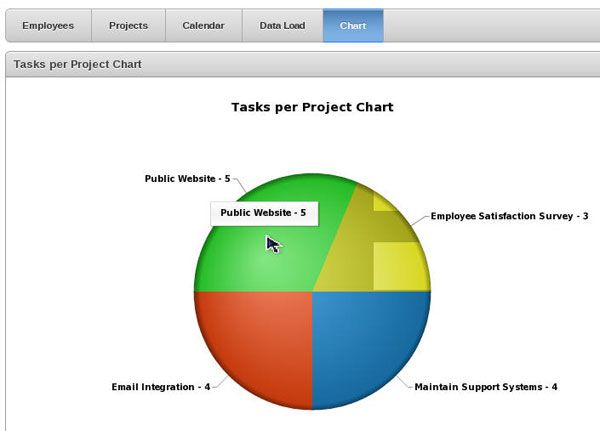
The chart is displayed. Notice when you place your cursor over one of the slices in the pie chart, a popup appears. Click one of the pie slices.
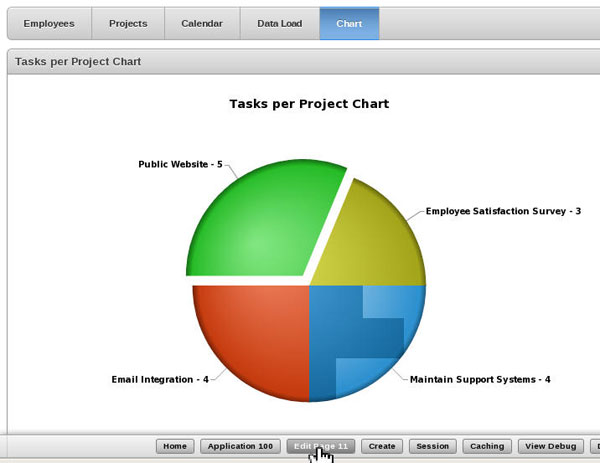
Notice the exploded slice you clicked. You want to make some additional changes. Click Edit Page button in the developer toolbar.
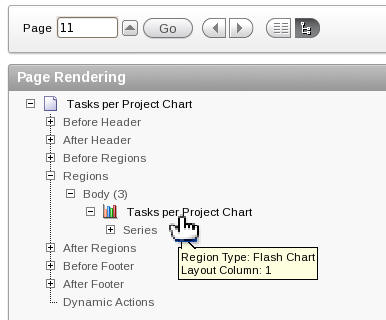
Under Page Rendering, double-click the region Tasks per Project Chart.
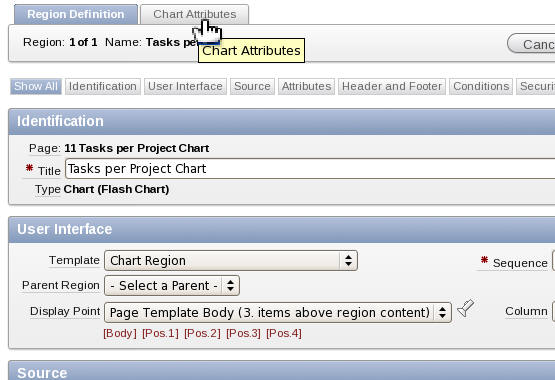
Click the Chart Attributes tab.
Change the Chart Type to 3D Pie and click the Display Settings subtab.
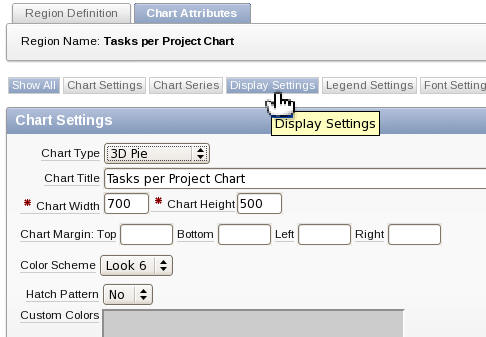
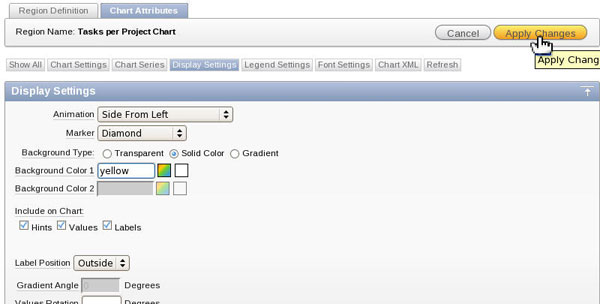
Select Diamond for Marker, enter yellow for Background Color 1 and click Apply Changes.
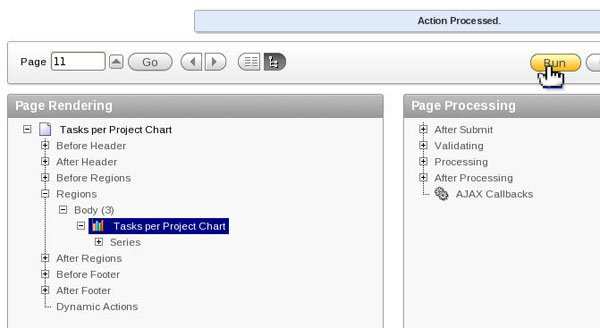
Click Run.
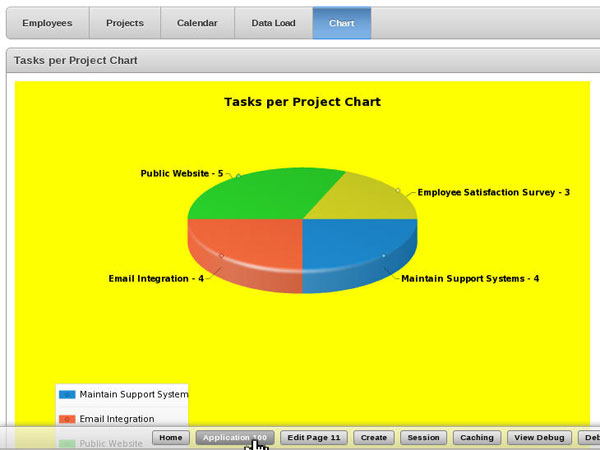
The changes to your chart are displayed. Click the Application button in your developer toolbar. In the next topic, you create and use a dynamic action.
Enabling/Disabling Page Items Using a Dynamic Action
Dynamic Actions provide developers with a way to define client-side behavior declaratively without the need to know JavaScript. Using a simple wizard, developers can select a page item, a condition, enter a value, and select an action (for example, Show, Hide, Enable, and Disable). Previously, this involved hand crafting JavaScript and AJAX but now many Dynamic Actions require zero coding using the built-in wizards.
In this topic, you create a dynamic action to enable the commission percentage item if the job is a sales job. If it is not a sales job, the commission percentage item will be disabled.
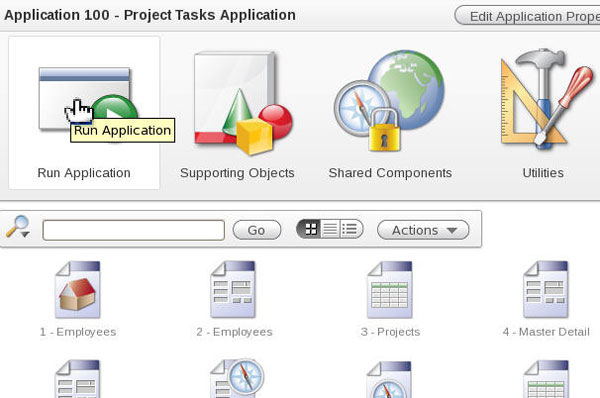
From the Application page, Click Run Application.
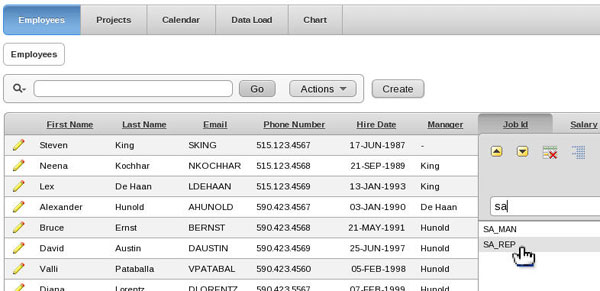
You want to filter just the employees who are in sales. Select the Job Id header and enter sa in the search field and select SA_REP.
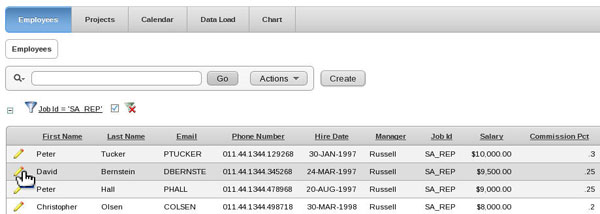
Select one of the edit icons in front of one of the rows.
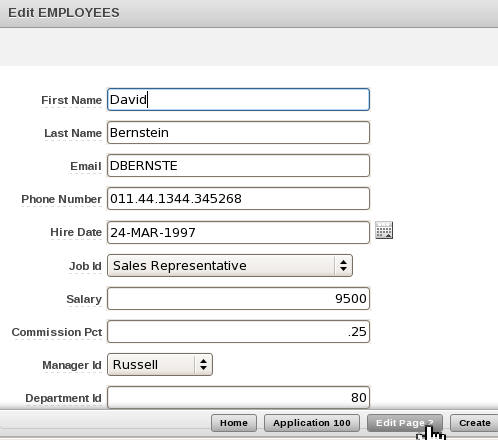
You want to create a dynamic action so that the Commission Pct is enabled when the job id is either SA_REP or SA_MAN. Click the Edit Page button in the Developer Toolbar.
Right-click P2_JOB_ID and select Create Dynamic Action.
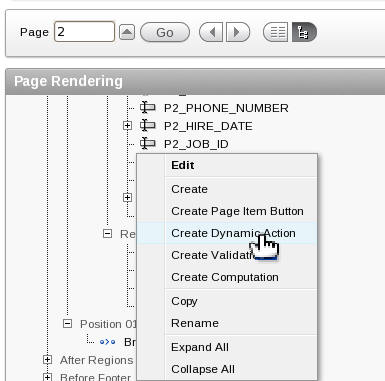
Select Standard for the type of dynamic action and click Next.

Enter Job is Sales for Name and click Next.

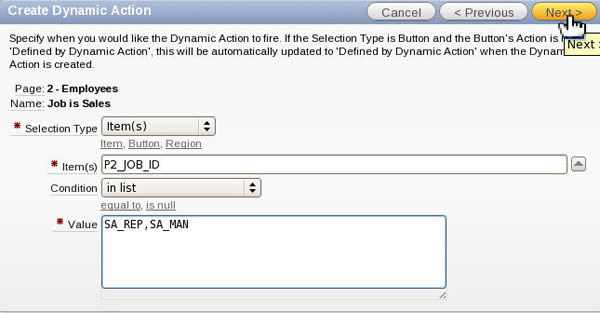
Make sure Item(s) is set to P2_JOB_ID, select in list for Condition and enter SA_REP, SA_MAN for Value and click Next.
Select Enable for the True Action and click Next.

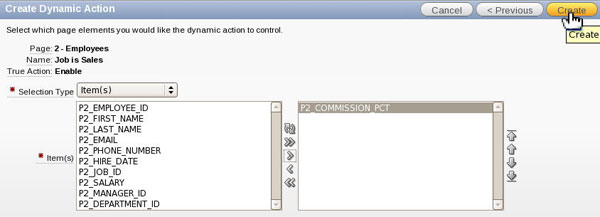
Select Item(s) for Selection Type, select P2_COMMISSION_PCT from the list of Item(s) and move it to the right and click Create.
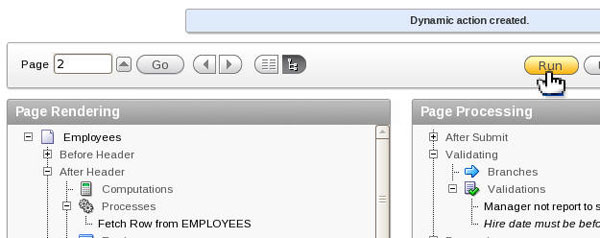
Your dynamic action was created successfully. Click Run.
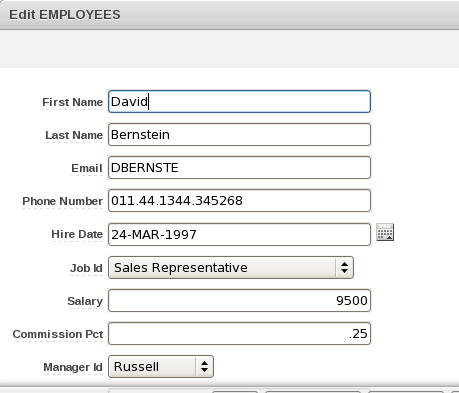
Notice that the Commission Pct item is enabled because the Job Id is set to Sales Representative (or SA_REP).
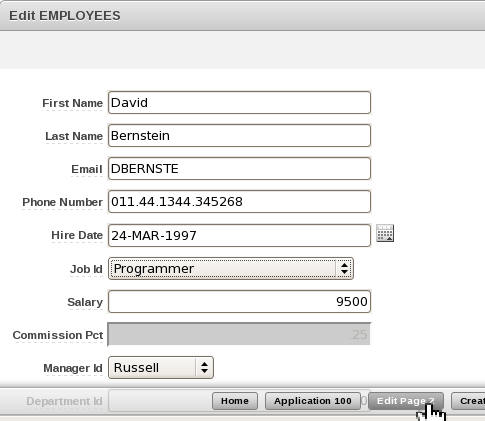
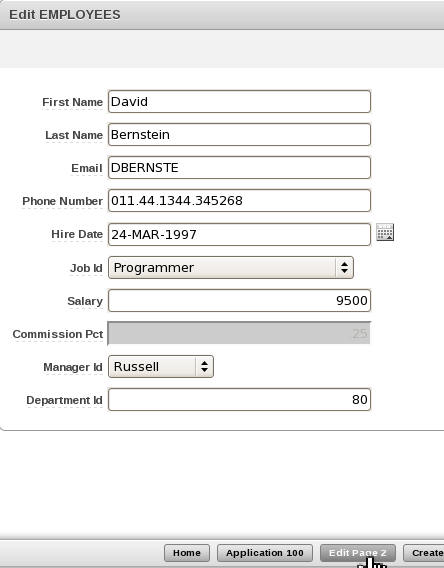
Change the Job Id to a non-sales job, such as Programmer. Notice that the Commssion Pct item is now disabled. Click Edit Page in the Developer Toolbar. In the next topic, you create a new region and show/hide the region using a dynamic action.
Showing/Hiding Regions Using a Dynamic Action
In this topic, you create a region with page items and then create a dynamic action to only show the region if the commission percentage is not null.
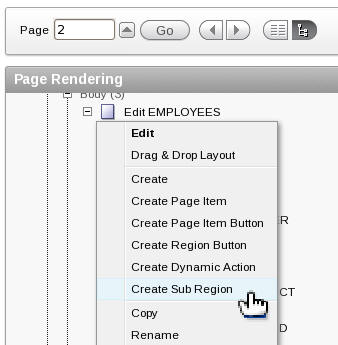
You want to create a subregion under the Edit EMPLOYEES region. Right-click Edit EMPLOYEES and select Create Sub Region.
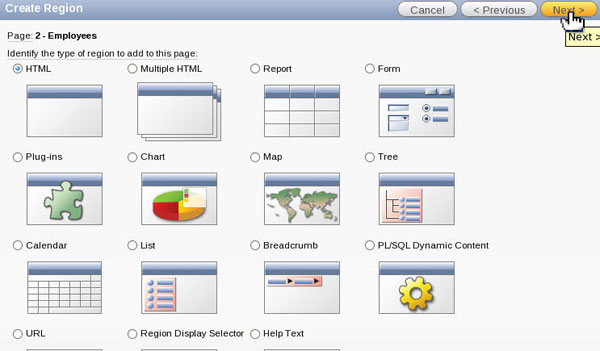
Select HTML for region type and click Next.
Accept the default and click Next.

Enter Sales Specific Information for Title and click Create.

The Sub Region was created successfully.
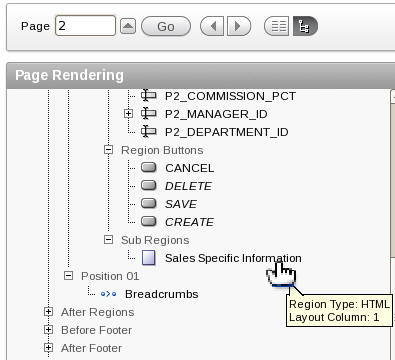
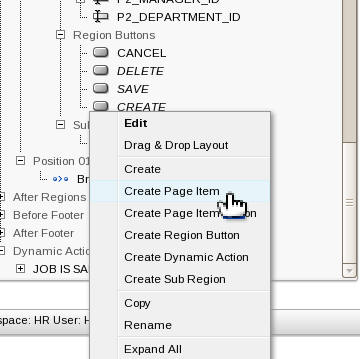
You want to create a couple of page items in the new sub region. Right-click the Sales Specific Information sub region and select Create Page Item.
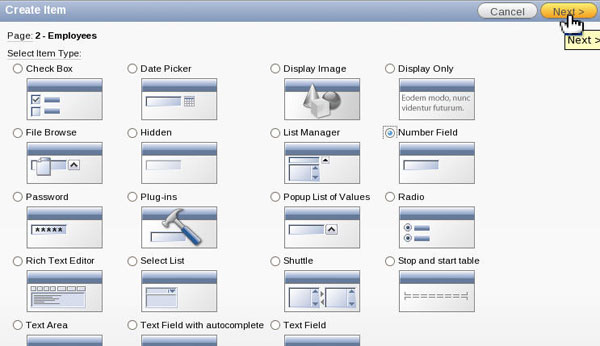
Select Number Field for Item Type and click Next.
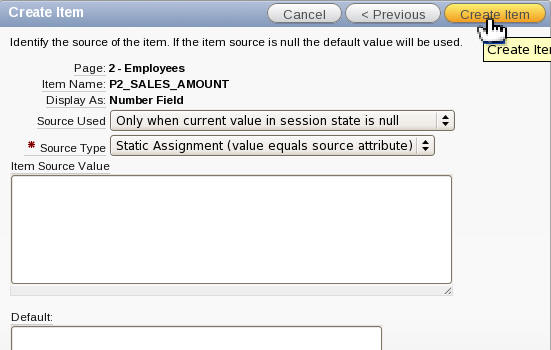
Enter P2_SALES_AMOUNT for Item Name and click Next.

Accept the default and click Next.

Accept the default and click Next.

Click Create Item.
You want to create another Page Item to display bonus information based on the P2_SALES_AMOUNT value. Right-click the Sales Specific Information sub region and select Create Page Item again.
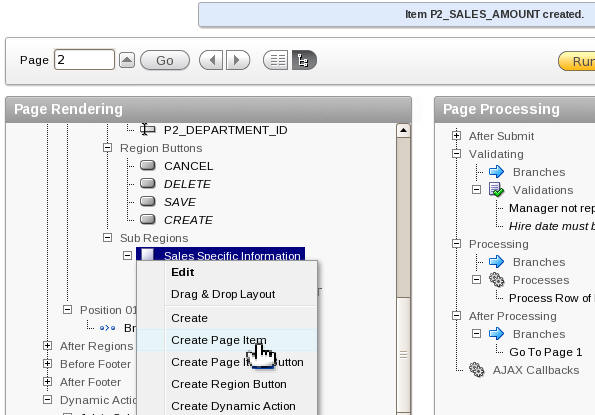
Select Display Only for Item Type and click Next.
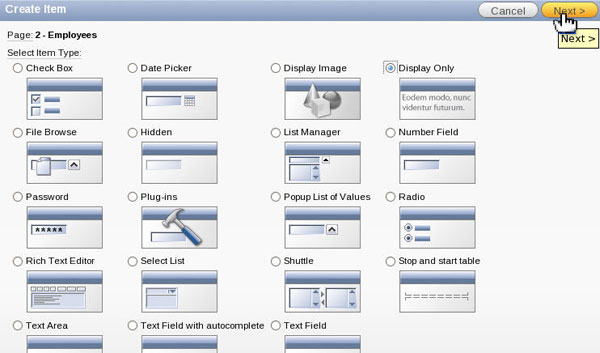
Enter P2_BONUS for Item Name and click Next.

Enter Sales Bonus for Label and click Next.

Accept the default and click Next.

Click Create Item.
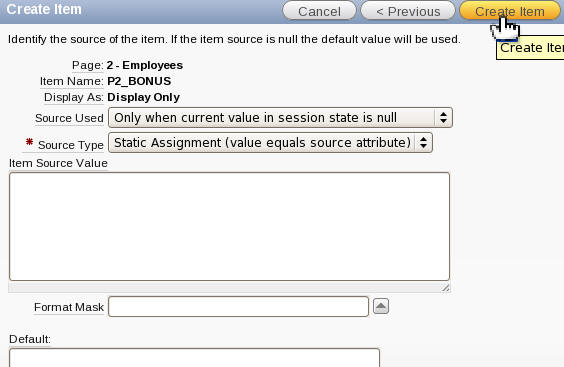
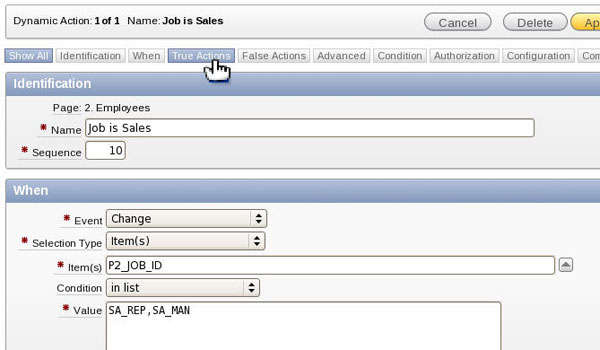
The P2_BONUS page item was created successfully. You want to show the region if the Job Id is set to a Sales job. You can just add another true and false action to the Job is Sales dynamic action you created previously. Double-click the Job is Sales Dynamic Action.
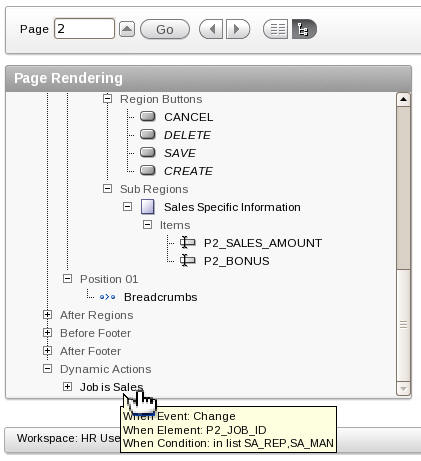
Click the True Actions subtab.
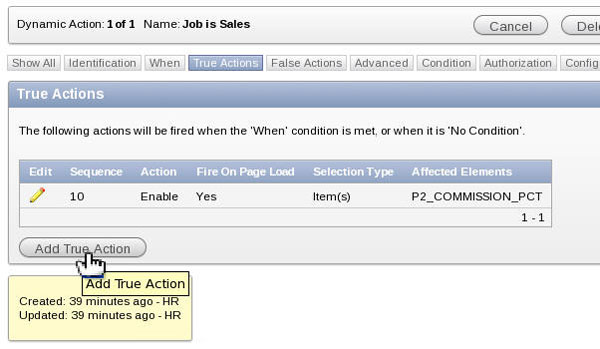
Click the Add True Action button.
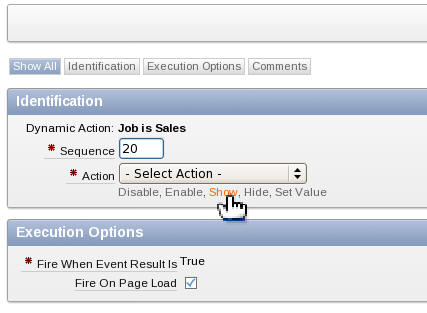
Select the Show quick pick link.
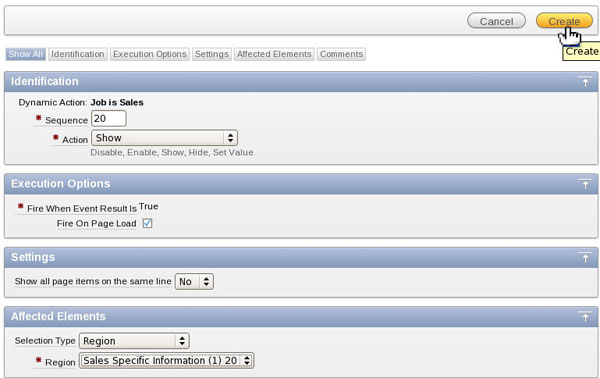
Under Affected Elements, select Region for Selection Type and select Sales Specific Information for Region and click Create.
Because you are modifying an existing dynamic action, the false action is not automatically created so you need to create it. Scroll down to the False Actions section and click Add False Action.
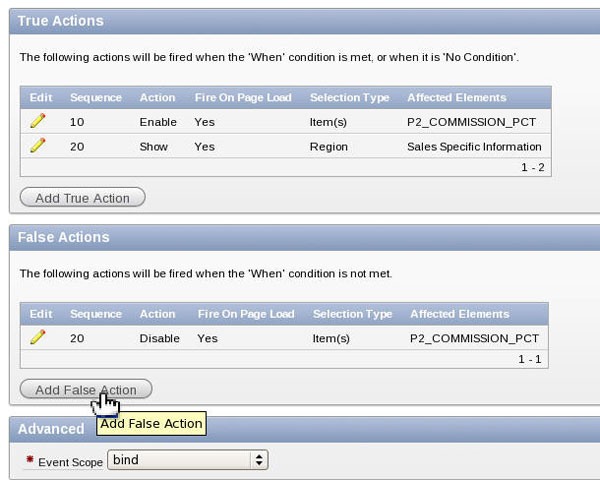
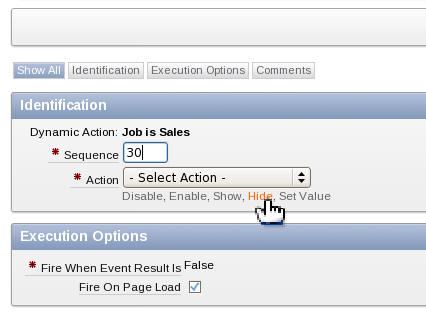
Select the Hide quick pick link.
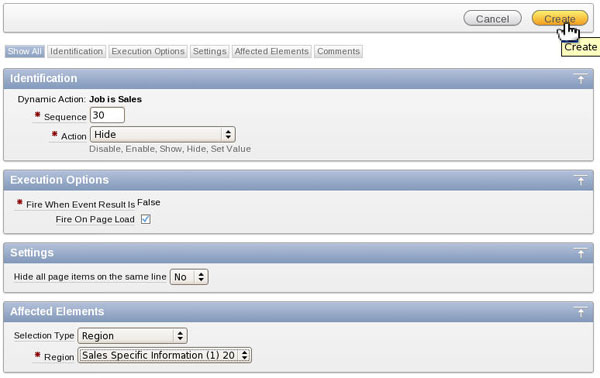
Under Affected Elements, select Region for Selection Type, select Sales Specific Information for Region and click Create.
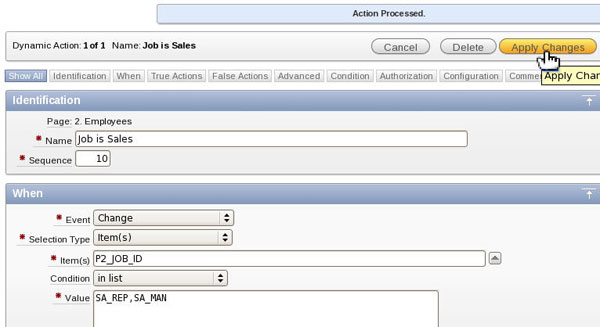
Click Apply Changes.
Click Run.

Notice the Commission Pct page item is enabled and the Sales Specific Information region is displayed.
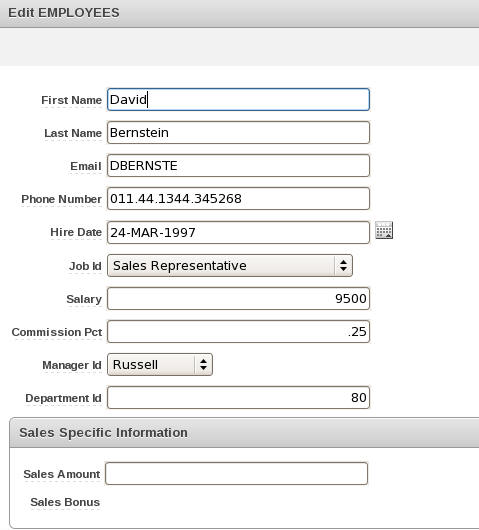
If you change the Job Id to a different non-sales job, you notice that the Commission Pct page item is disabled and the Sales Specific Information region is hidden. Click the Edit Page button in the Developer Toolbar. in the next topic, you create a dynamic action that shows and calculates the Sales Bonus when the value of Sales Amount changes.
Calculating and Displaying a Page Items Value Using a Dynamic Action
In this topic, you create a dynamic action that shows the Sales Bonus when the Sales Amount is not null or changes.
Right-click Dynamic Actions and select Create.
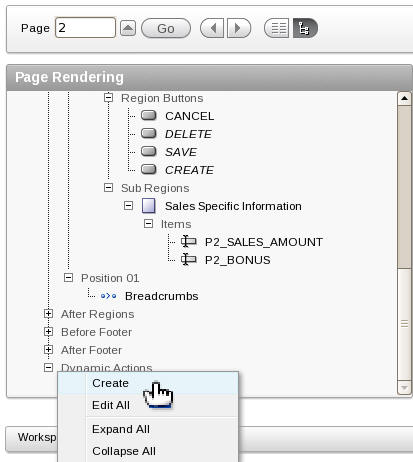
Select Advanced for type of dynamic action and click Next.

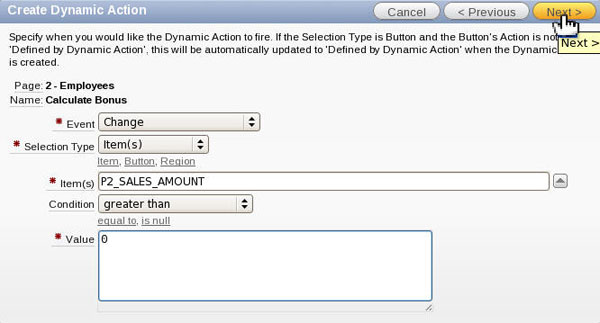
Enter Calculate Bonus for Name and click Next.

Make sure the following fields are set: Event = Change, Selection Type = Item(s), Item(s) = P2_SALES_AMOUNT, Conditon = greater than and Value = 0. Then click Next.
Select Execute PL/SQL Code for Action and enter the following for PL/SQL Code (or copy the code from /home/oracle/Desktop/solutions/apexp2_lab/dynaction01.txt)
declare
  l_commission number;
begin
  SELECT commission_pct INTO l_commission
  FROM employees
  WHERE employee_id = :P2_EMPLOYEE_ID;

  :P2_BONUS := :P2_SALES_AMOUNT*l_commission;
end;
Enter P2_EMPLOYEE_ID,P2_SALES_AMOUNT for Page Items to Submit and enter P2_BONUS for Page Items to Return and click Next.

You don't want to create a false action. Click Next.

Click Create.

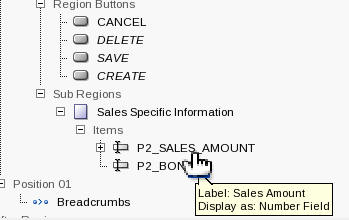
You want to set the default for P2_SALES_AMOUNT to 0, Double-click P2_SALES_AMOUNT Page Item.
Click the Default subtab.
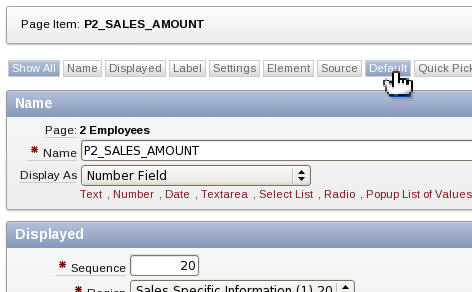
Enter 0 for default value and click Apply Changes.

Click Run.

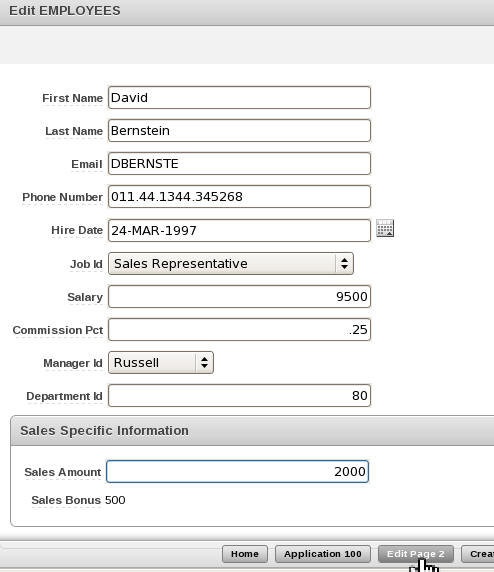
Enter 2000 for Sales Amount and press enter. Notice that the value of Sales Bonus changes to 500 because the Commission Pct is .25. Click the Edit Page button in the Developer Toolbar. In the next topic, you examine how a plug-in works.
Importing and Using a Plug-In
Plug-Ins allow for the Application Express framework to be readily extended with custom item types, region types, application processes and Dynamic Actions. Once defined, plug-in based components are created and maintained very much like standard Application Express components. Plug-ins enable developers to create highly customized components to enhance the functionality, appearance and user friendliness of their applications.
In this topic, you import the slider plug-in and then use it for the Salary page item in your form.
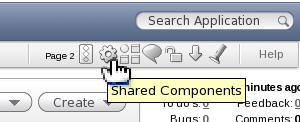
Click the Shared Components icon in the upper right area of the window..
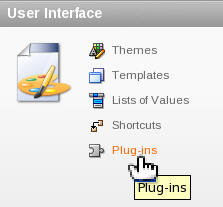
Under User Interface, click Plug-ins.
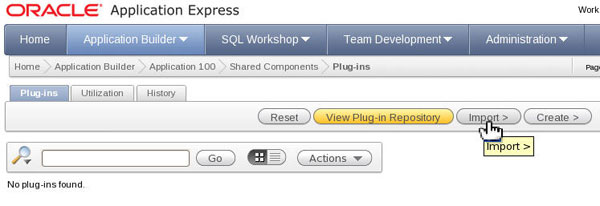
You want to import the file with the slider plugin. Click Import.
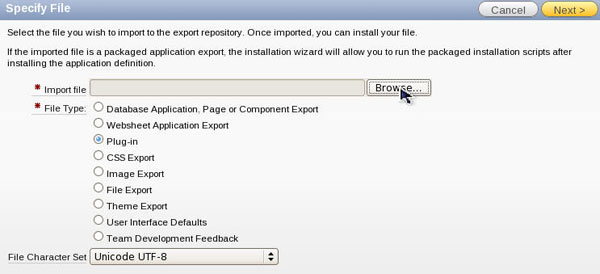
Click Browse....
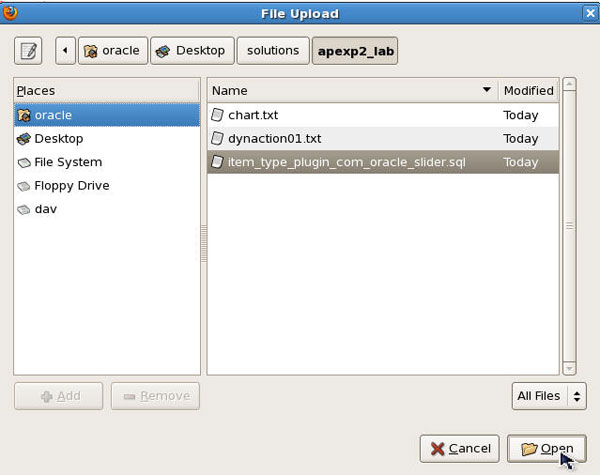
Navigate to the /home/oracle/Desktop/solutions/apexp2_lab directory and select the item_type_plugin_com_oracle_slider.sql file and click Open.
Click Next.
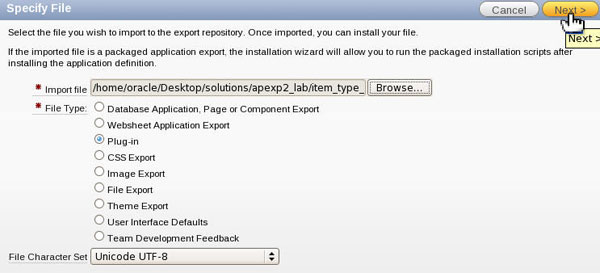
Click Next.

Make sure your Project Tasks Application is selected for Install Into Application and click Install Plug-in.

The Plug-in was installed successfully. You want to edit your page to use the plug-in. Click the Edit Page 2 icon.

Double-click the P2_SALARY page item.
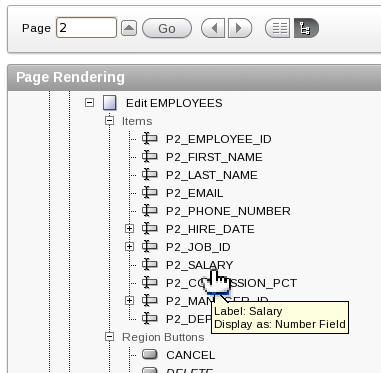
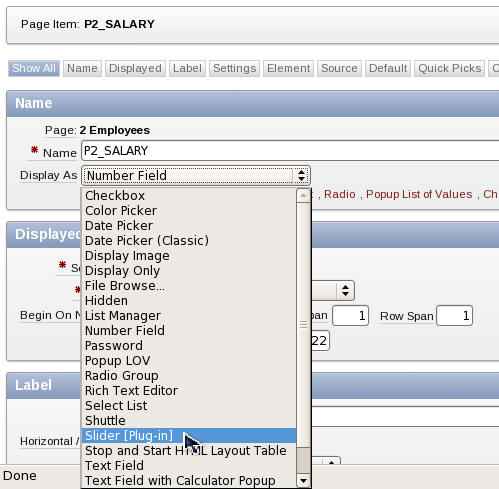
Change Display As to Slider (Plug-in).
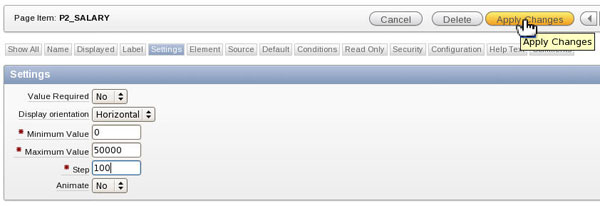
Click the Settings subtab.
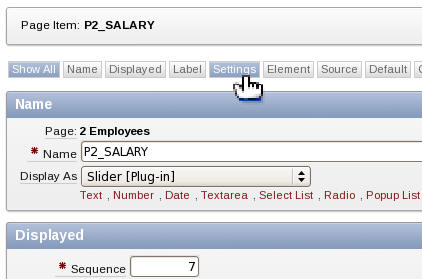
This section is specific to the Slider Plug-in. Set the Maximum Value to 50000 and the Step to 100 and click Apply Changes.
Click Run.

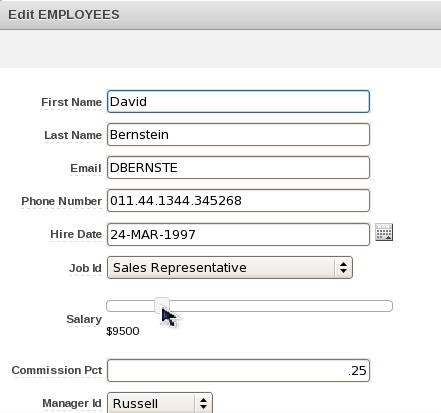
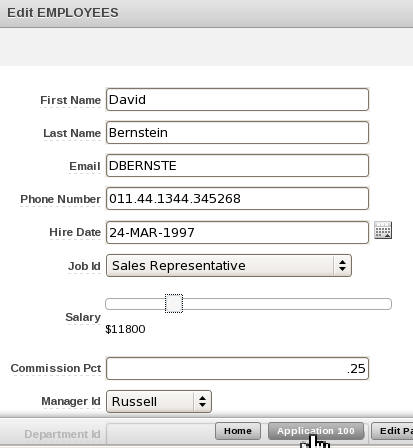
Notice that you now see the Slider for the Salary page item. Move the slider to a slightly bigger value. The salary will change as you slide it.
Click the Application button in the Developer Toolbar. In the next topic, you create a tabular form.
Creating a Tabular Form
In this topic, you create a tabular form on the DEPARTMENTS table.
From the Application page, click Create Page.
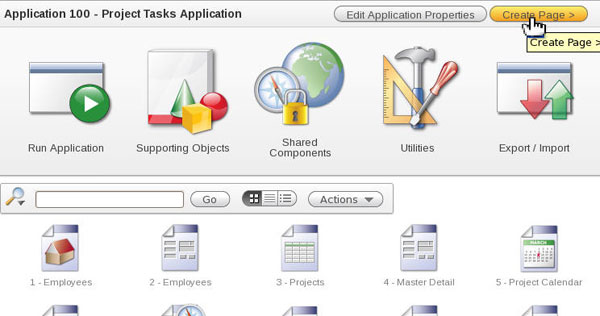
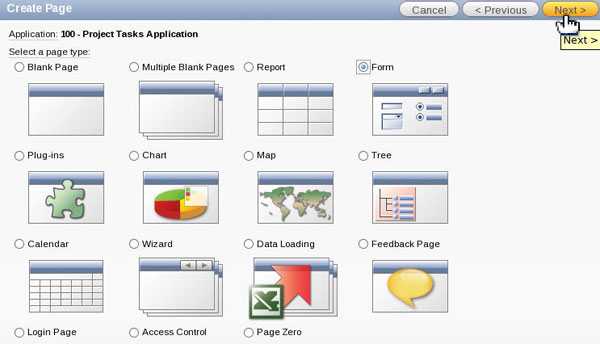
Select Form and click Next.
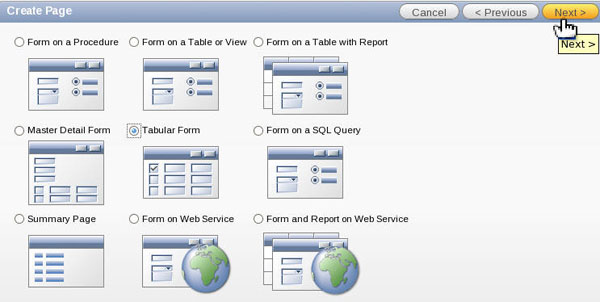
Select Tabular Form and click Next.
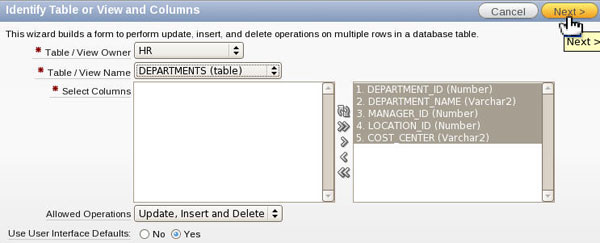
Select DEPARTMENTS for Table/View Name. Make sure all the columns are selected and click Next.
Select Select Primary Key Column(s) for Primary Key Type, select DEPARTMENT_ID for Primary Key Column 1 and click Next.

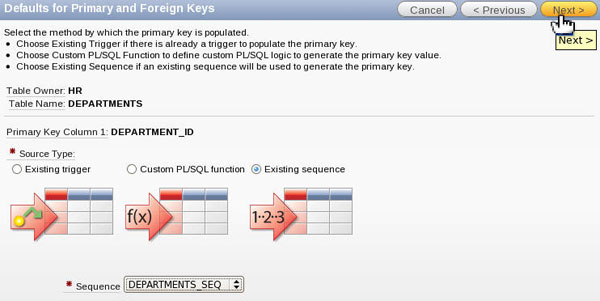
Select Existing sequence for Source Type and select DEPARTMENTS_SEQ for Sequence. Then click Next.
Make sure all the columns are updateable (on the right side) and click Next.

Change Page Name and Region Title to Update Departments and click Next.
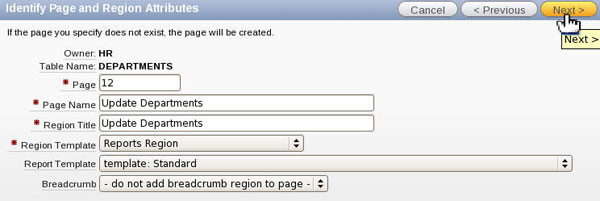
Select Use an existing tab set and create a new tab within the existing tab set and enter Departments for New Tab Label and click Next.

Accept the default button labels and branch pages and click Next.

Click Finish.
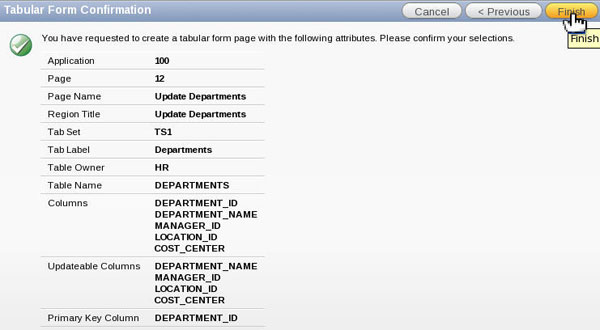
Click Run Page.
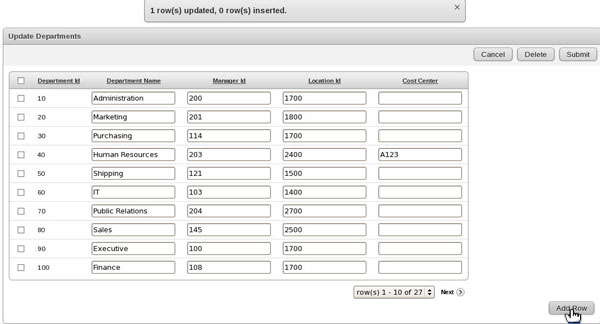
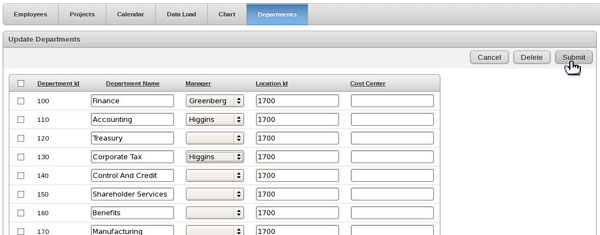
The Tabular form is displayed. You can change the data. Enter something in one of the Cost Center rows and click Submit.
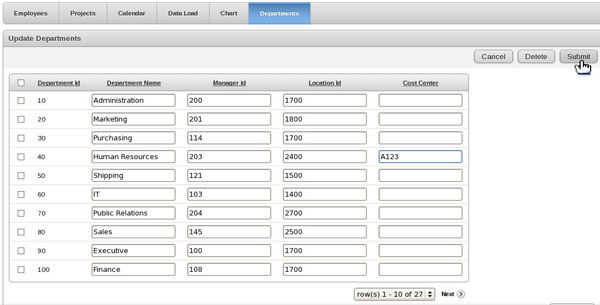
The row was updated. You can also add a row. Click Add Row.
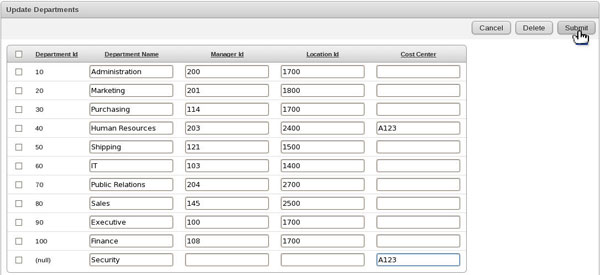
Enter a new departments information and click Submit.
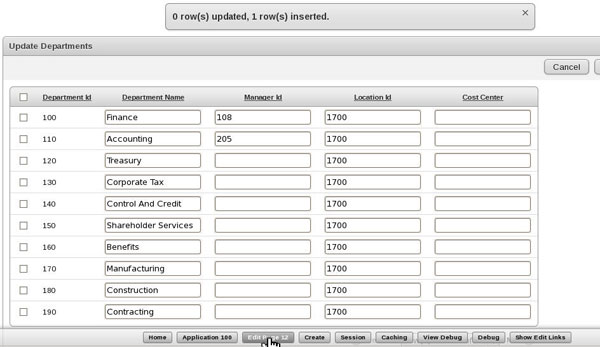
The row was added. Note that the number of rows was incremented by one.You want to change the Manager id column so that it shows the Managers last name. Click the Edit Page button in the Developer Toolbar.
Under Page Rendering, double-click Update Departments.
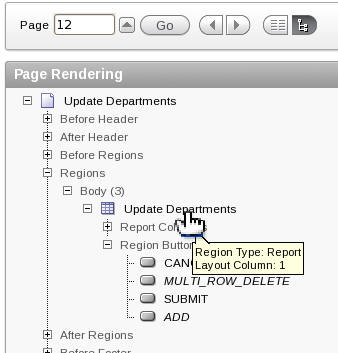
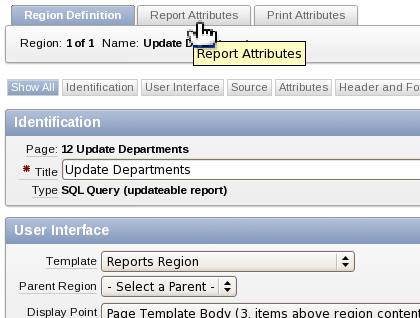
Click the Report Attributes tab.
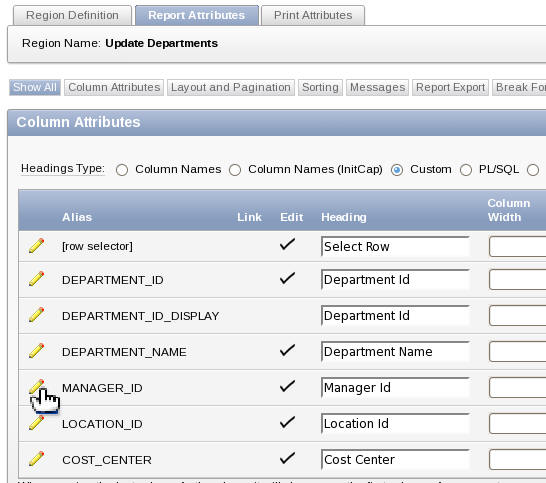
Click the Edit icon in front of the MANAGER_ID Column Attribute.
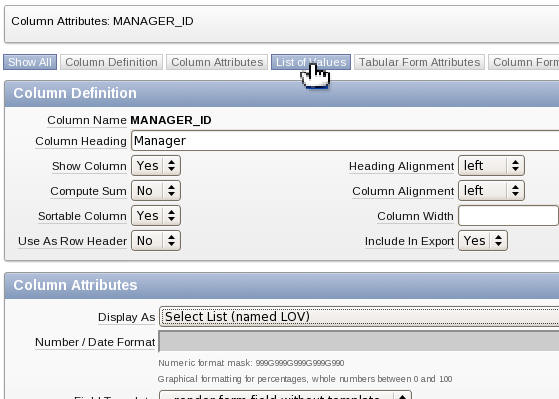
Change the Column Heading to Manager. You can use the same Shared LOV you created in the previous lab. Select Select List (named LOV) for Display As. Then select the List of Values subtab.
Select EMPLOYEE_LIST for Named LOV and click Apply Changes.

Click Run Page.

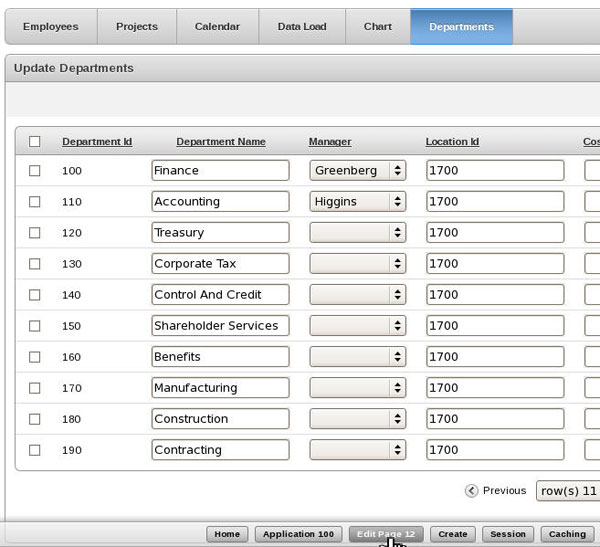
Notice the Manager column is now a select list with the last name of the manager. Click the Edit Page button in the Developer Toolbar. In the next topic, you add a tabular form validation.
Adding a Tabular Form Validation
In this topic, you add a validation to your tabular form that checks to make sure that a manager is only assigned to one department.
Under Page Processing, right-click Validating > Validations and select Create.
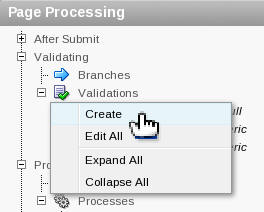
Select Tabular Form from the list of Tabular Forms, select the Column validation level and click Next.

Select the MANAGER_ID column and click Next.

Enter Manager only assigned to one department for Validation Name and click Next.

Select SQL for validation type and click Next.
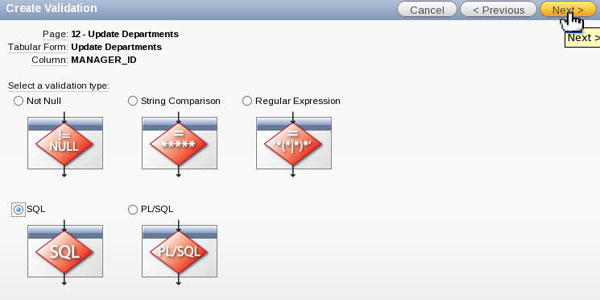
Select NOT Exists for type of validation and click Next.

Enter select manager_id from departments for Validation Code, enter something in the Error Message field, select Yes to Always Execute and click Create Validation.
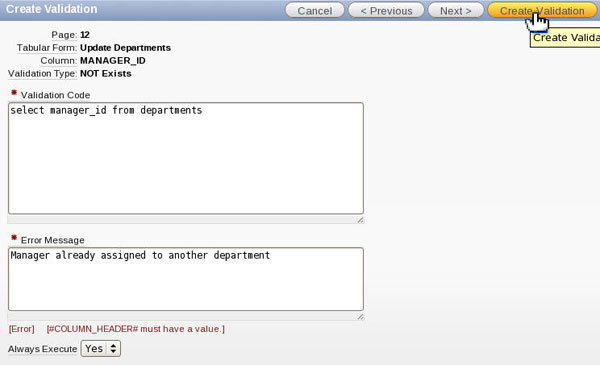
Your validation was created. Click Run.
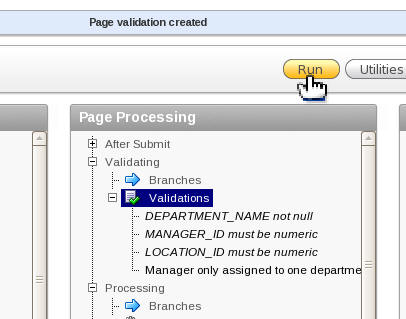
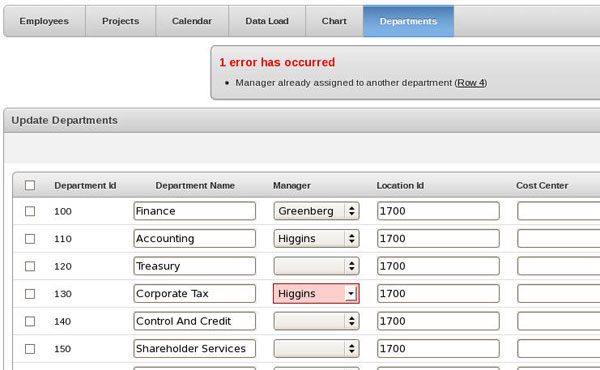
Change the Manager for one of the departments so that it has the same name as another department and click Submit. Notice that Higgins is also the manager for another department so you should get an error.
The error is displayed. Note the error message includes a clickable link to the corresponding row with the error.
Summary
- Create and switch to a different theme
- Create a chart
- Enable/Disable page items using a dynamic action
- Show/Hide regions using a dynamic action
- Calculate and display a page item value using a dynamic action
- Import and use a plug-in
- Create a tabular form
- Add a tabular form validation
In this tutorial, you have learned how to:
Resources
To help navigate this Oracle by Example, note the following:
- Hiding Header Buttons:
- Click the Title to hide the buttons in the header. To show the buttons again, simply click the Title again.
- Topic List Button:
- A list of all the topics. Click one of the topics to navigate to that section.
- Expand/Collapse All Topics:
- To show/hide all the detail for all the sections. By default, all topics are collapsed
- Show/Hide All Images:
- To show/hide all the screenshots. By default, all images are displayed.
- Print:
- To print the content. The content currently displayed or hidden will be printed.
To navigate to a particular section in this tutorial, select the topic from the list.