Oracle GoldenGate for Oracle to Java Messaging System (JMS) on Oracle WebLogic Server (WLS)
Overview
- Manager:
- Starts and stops the other processes on both the source and target hosts. Not required once Extract or Replicat is running.
- Initial Load:
- Optional. Used to populate the target tables one time. It can read either from the source tables directly or from logs. This OBE will not use an Initial Load.
- Extract:
- Runs on the source to capture transaction data to trail files.
- Data Pump:
- Optional, but highly recommended. Sends trail files from the source to the target over an IP network. Technically it is a secondary Extract.
- Replicat:
- Delivers data to the target database. Normally the Replicat
runs on the target. In this OBE Replicat is not used, as data
delivery to a JMS server is accomplished using a specialized
Extract process.
- Two Linux hosts: one source and one target. The example uses Oracle Enterprise Linux OEL 5.7, 64-bit. A different version of the Oracle GoldenGate software will run on Windows, or 32-bit Linux as well. It is possible to have the source and target be on the same host, but that is conceptually harder to visualize what is happening.
- Oracle GoldenGate on Oracle, Linux-64 ( Oracle Software Delivery Cloud ), version 11.2.1.0.2, part number V34339-01. This is the part number for 64-bit Linux.
- Oracle GoldenGate Application Adapters 11.1.1.0.0 for JMS and Flat File Media Pack ( Oracle Software Delivery Cloud ), version 11.1.1.0.1, part number V22250-01. This is the part number for 64-bit Linux.
- Oracle WebLogic Server 12c.
- Oracle 11gR2 Database installed on the Red host.
- Oracle DDL and DML files needed by this OBE, which can be
downloaded here.
- Have root access to the Linux software (write access to /etc)
- Have web access to download the software and documentation.
- Create a database instance with SID=ogg11r2 on host01 (Red Host)
- Some_Command
- You type this as a command or a value. Example:
Enter ./ggsci to start the command line interpreter.
- Some_Prompt
- The system responds with this as a prompt or reply.
Example:
After the welcome splash banner, you can enter commands at the GGSCI (host01) 1> prompt.
- Some_Button
- Click this on-screen button. Example:
After selecting the version you want, click Continue to start the download.
- Some_Variable
- A variable that you substitute with a real value. Example:
Enter your userid/password at the prompt.
- Some_Filename
- A filename, path, or folder/directory. Example:
Edit the hosts file in the /etc directory.
- Some_Code
- A keyword or code element. Example:
Change the parameter HandleCollisions to NoHandleCollisions after the initial load.
- p=process=
- e(xtract), p(ump), r(eplicat), i(nitial), d(efgen), s(tartup).
- xxxx=project=
- All files related to a common project xxxx, for example hr, sales, engr.
- hh=host-to-host=
- aa, ab, ba, bb, as indicated by source and target host names where a=host01, and b=host02. Later on you will see that you cannot use numbers as part of some file names, so better not to go there at all.
- ext=extension=
- prm=parameter (stored in dirprm/), dsc=discard, rpt=report (stored in dirrpt/), def=definition (stored in dirdef/), oby=obey (stored in installation directory), sql=SQL (stored in dirsql/).
Purpose
This Oracle-By-Example (OBE) tutorial covers installing, configuring, and managing Oracle GoldenGate version 11.2.1.0.2 on a pair of Linux hosts running the Oracle 11g RDBMS and the Oracle WebLogic Server version 12c.
Time to Complete
Approximately 2 hours
Introduction
Oracle GoldenGate provides very fast replication of heterogeneous databases by reading transaction logs and writing the changes to one or more target databases. There are five processes involved in a typical environment:
Scenario
There are two Linux hosts (or two Virtual Machines) running a 64 bit version of Linux. One (the Red Host, host01) is running Oracle 11g. The other (the Green Host, host02) is running Oracle WebLogic 12c. Host01 has a user/schema src_user01 with a password of Welcome1. The user/schema src_user01 is used when Oracle is a replication source.
Host02 has Oracle WebLogic release 12c installed. The JMS queue, whose JNDI name is myq receives the inserts, updates and deletes, in form of XML messages, performed on three Oracle tables, defined in the source environments, - ECONOMIC_ENTITY, GDP_BY_YEAR and GDP_GROWTH_BY_YEAR - containing world economic data. In the real world, such XML data would be parsed and the transactions performed on the source database perhaps stored somewhere, maybe in a Java J2EE environment.
Pay attention to the color of the screen banners to know which commands are going to which host. Also note whether you are entering GGSCI commands, SQL commands, or OS commands (the prompt will guide you).
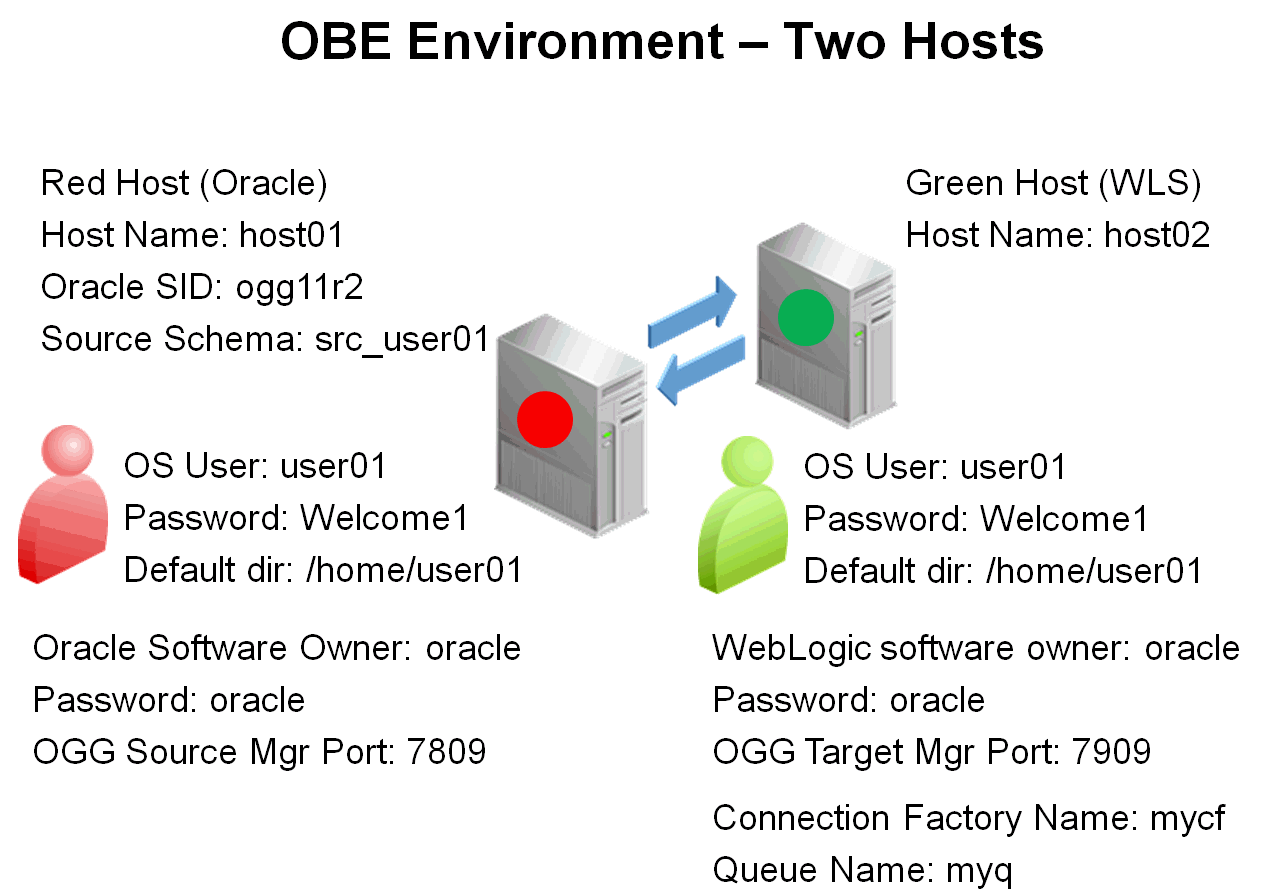
In summary, the environment is:
| Host Name | Color | OS | SID/DB Name | User | Password | Mgr Port Source | Default Directory |
|---|---|---|---|---|---|---|---|
| host01 | Red | Linux 64-bit | ogg11r2 | user01 | Welcome1 | 7809 | /home/user01 |
| host02 | Blue | Linux 64-bit | N/A | user01 | Welcome1 | 7909 | /home/user01 |
The Oracle RDBMS has been installed in "standard" directory locations. ORACLE_HOME points to /u01/app/oracle/product/11.2.0/dbhome_1.
The user "user01" in the Red host (Oracle) has the following directory structure
| Directory | Purpose |
|---|---|
| /home/user01 | Default Directory |
| /home/user01/oracle | Oracle Replication Software |
| /home/user01/oracle/ggs_src | Oracle GoldenGate installation for Replication Source |
The user "user01" in the Green Host (host02) has the following directory structure
| Directory | Purpose |
|---|---|
| /home/user01 | Default Directory |
| /home/user01/oracle | Oracle Replication Software |
| /home/user01/oracle/ggs_trg | Oracle GoldenGate installation for Replication Target and Java |
Alternative Configuration
This OBE can also be run on a single host, where both the Oracle RDBMS and the Oracle WebLogic Server 12c are installed on the same computer.

In summary, the environment is:
| Host Name | Color | OS | SID | User | Password | Mgr Port Source | Mgr Port Target | Default Directory |
|---|---|---|---|---|---|---|---|---|
| host01 | Red/Blue | Linux 64-bit | ogg11r2 | user01 | Welcome1 | 7809 | 7909 | /home/user01 |
The user "user01" in the Single host (Red/Green) has the following directory structure
| Directory | Purpose |
|---|---|
| /home/user01 | Default Directory |
| /home/user01/oracle | Oracle Replication Software |
| /home/user01/oracle/ggs_src | Oracle GoldenGate installation for Oracle Replication Source |
| /home/user01/oracle/ggs_trg | Oracle GoldenGate installation for Oracle Replication Target plus Java User Exits |
When a single host simulates two environments it may be helpful to change the /etc/hosts file to make aliases for host01.example.com and host02.example.com.
Hardware and Software Requirements
The following is a list of hardware and software requirements:
Hardware
Software
Prerequisites
Before starting this tutorial, you should:
Bear in mind that there are two hosts: host01 and host02; and that each host has three environment prompts: OS, GGSCI, and SQL. That makes six different places in which you could be typing! Try to be extra careful about which command you enter in which location. The wrong command in the wrong context is the most common error.
Typographic Conventions
Text color and font in the directions and in the screens should be interpreted as follows:
File and Process Naming Conventions
File and process naming conventions can be whatever works for
you or your company. Here are the sample conventions used in
this OBE:
pxxxxhh.ext
where:
1. Installing the Software
The installation of the software is simply fetching the zip files from the web and unzipping them. To install the Oracle GoldenGate software, perform the following steps:
1.1 Accessing Oracle GoldenGate Documentation
Access the documentation library.
Using a web browser, go to http://www.oracle.com/technetwork/middleware/goldengate/documentation/index.html. You have the option to either read the documents online, or to download the library to your local workstation as either PDF or HTML format.
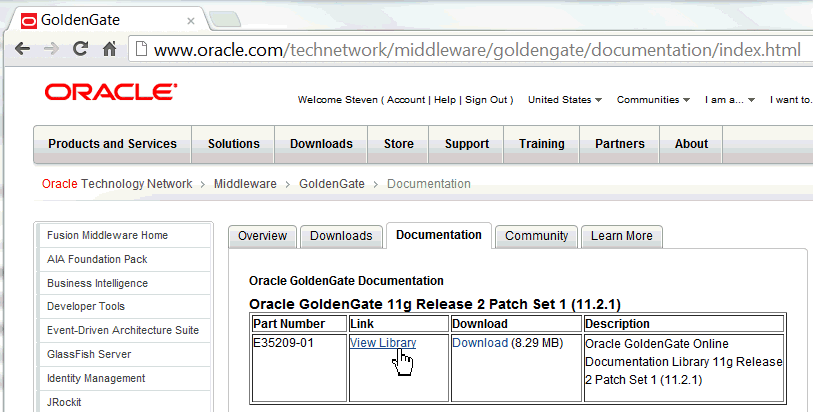
Click View Library.
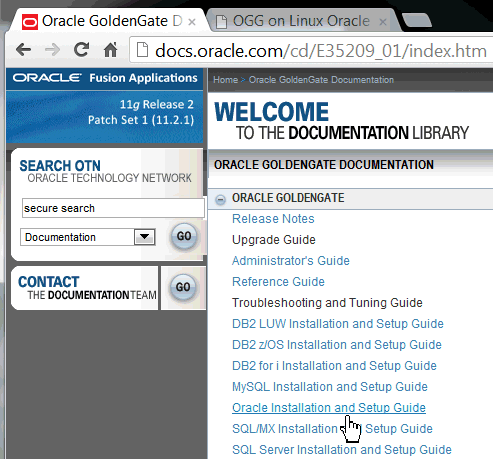
Click Oracle Installation and Setup Guide. Read the Installation Guide for Oracle.
You have successfully accessed Oracle GoldenGate documentation as a prerequisite for installing the software.
1.2 Installing Oracle GoldenGate on Linux
Copy the software from Oracle Software Delivery Cloud.
Using a web browser, go to https://edelivery.oracle.com and click Sign In. On the Terms and Conditions page, select Yes for both agreements, and click Continue.
On the Media Pack Search page, select Product Pack = Oracle Fusion Middleware, and Platform = Linux x86-64.

Click Go.
Select Oracle GoldenGate on Oracle v11.2.1 Media Pack for Linux x86-64.
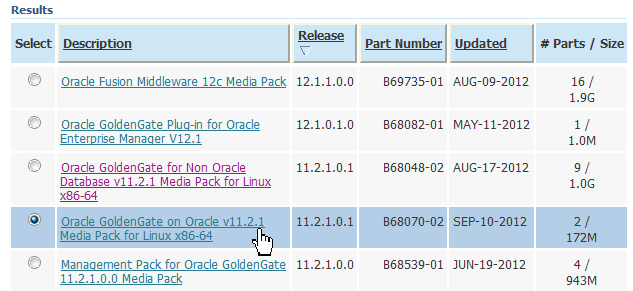
Click Continue.
Make sure you are looking at part number V34339-01 for "Oracle GoldenGate V11.2.1.0.3 for Oracle 11g on Linux x86-64."

Click Download.
Click the Back browser button.
Select Oracle GoldenGate Application Adapters 11.1.1.0.0 for JMS and Flat File Media Pack.

Select Oracle GoldenGate V11.1.1.0.0 For Java on Linux 64-bit for OGG v11.1.1.0.0.
Make sure you are looking at part number V22250-01

Click Download.
Copy or use FTP to move the files V34339-01.zip and V22250-01.zip file to the Green Host (host02)
Download the Oracle Weblogic Server release 12c.
Create the installation directories to receive the Oracle GoldenGate software.
Unpack the Oracle GoldenGate for Oracle software in its directory on host01 (red).
Create the installation directories to receive the Oracle GoldenGate software.
| Host01 - Linux |
[user01@host01 ~]$ cd ~ [user01@host01 ~]$ mkdir -p oracle/ggs_src [user01@host01 ~]$ cd ~/oracle/ggs_src [user01@host01 ggs_src]$ |
Copy the downloaded zip from wherever you downloaded it to ~/oracle/ggs_src/. Unzip it and untar (extract) it.
Be mindful of the trailing dot in the copy command.
| Host01 - Linux |
[user01@host01 ggs_src]$ cp /stage/V34339-01.zip . [user01@host01 ggs_src]$ unzip V34339-01.zip Archive: V34339-01.zip inflating: fbo_ggs_Linux_x64_ora11g_64bit.tar inflating: Oracle_GoldenGate_11.2.1.0.3_README.doc inflating: Oracle GoldenGate_11.2.1.0.3_README.txt inflating: OGG_WinUnix_Rel_Notes_11.2.1.0.3.pdf [user01@host01 ggs_src]$ tar -xvpf fbo_ggs_Linux_x64_ora11g_64bit.tar UserExitExamples/ UserExitExamples/ExitDemo_more_recs/ UserExitExamples/ExitDemo_more_recs/Makefile_more_recs.HPUX ... many lines omitted for clarity ... ulg.sql usrdecs.h zlib.txt [user01@host01 ggs_src]$ |
Start the GoldenGate Software Command Interface
(GGSCI). Create the default empty subdirectories.
IMPORTANT! GGSCI for Oracle
will not start if the LD_LIBRARY_PATH
environment variable is either undefined or if it does
not point to the ${ORACLE_HOME}/lib
directory.
Make sure LD_LIBRARY_PATH is correctly set before launching GGSCI.
| Host01 - Linux |
[user01@host01 ggs_src]$ ./ggsci Oracle GoldenGate Command Interpreter for Oracle Version 11.2.1.0.3 14400833 OGGCORE_11.2.1.0.3_PLATFORMS_120823.1258_FBO Linux, x64, 64bit (optimized), Oracle 11g on Aug 23 2012 20:20:21 Copyright (C) 1995, 2012, Oracle and/or its affiliates. All rights reserved. GGSCI (host01) 1> Create Subdirs Creating subdirectories under current directory /home/user01/oracle/ggs_src Parameter files /home/user01/oracle/ggs_src/dirprm: already exists Report files /home/user01/oracle/ggs_src/dirrpt: created Checkpoint files /home/user01/oracle/ggs_src/dirchk: created Process status files /home/user01/oracle/ggs_src/dirpcs: created SQL script files /home/user01/oracle/ggs_src/dirsql: created Database definitions files /home/user01/oracle/ggs_src/dirdef: created Extract data files /home/user01/oracle/ggs_src/dirdat: created Temporary files /home/user01/oracle/ggs_src/dirtmp: created Stdout files /home/user01/oracle/ggs_src/dirout: created GGSCI (host01) 2> Exit [user01@host01 ggs_src]$ |
If a directory already exists, the installation leaves the contents of that directory alone.
Do the same steps for the target replication directory (ggs_trg) on the Green Host (WLS). Unpack the software in its directory (ggs_trg).
Change directory to the replication target directory to receive the Oracle GoldenGate software.
| Host02 - Linux |
[user01@host02 ~]$ cd ~ [user01@host02 ~]$ mkdir -p oracle/ggs_trg [user01@host02 ~]$ cd ~/oracle/ggs_trg [user01@host02 ggs_trg]$ |
Copy the downloaded zip from wherever you downloaded it to ggs_trg/. Unzip it and untar (extract) it.
| Host02 - Linux |
[user01@host02 ggs_trg]$ cp /stage/V34339-01.zip . [user01@host02 ggs_trg]$ unzip V34339-01.zip Archive: V34339-01.zip inflating: fbo_ggs_Linux_x64_ora11g_64bit.tar inflating: Oracle_GoldenGate_11.2.1.0.3_README.doc inflating: Oracle GoldenGate_11.2.1.0.3_README.txt inflating: OGG_WinUnix_Rel_Notes_11.2.1.0.3.pdf [user01@host01 ggs_trg]$ tar -xvpf fbo_ggs_Linux_x64_ora11g_64bit.tar UserExitExamples/ UserExitExamples/ExitDemo_more_recs/ UserExitExamples/ExitDemo_more_recs/Makefile_more_recs.HPUX ... many lines omitted for clarity ... ulg.sql usrdecs.h zlib.txt [user01@host02 ggs_trg]$ |
Start the GoldenGate Software Command Interface (GGSCI). Create the default empty subdirectories.
IMPORTANT! GGSCI for Oracle will not start if the LD_LIBRARY_PATH environment variable is either undefined or if it does not point to the ${ORACLE_HOME}/lib directory.Make sure LD_LIBRARY_PATH is correctly set before launching GGSCI.
| Host02 - Linux |
[user01@host02 ggs_trg]$ ./ggsci Oracle GoldenGate Command Interpreter for Oracle Version 11.2.1.0.3 14400833 OGGCORE_11.2.1.0.3_PLATFORMS_120823.1258_FBO Linux, x64, 64bit (optimized), Oracle 11g on Aug 23 2012 20:20:21 Copyright (C) 1995, 2012, Oracle and/or its affiliates. All rights reserved. GGSCI (host02) 1> Create Subdirs Creating subdirectories under current directory /home/user01/oracle/ggs_trg Parameter files /home/user01/oracle/ggs_trg/dirprm: already exists Report files /home/user01/oracle/ggs_trg/dirrpt: created Checkpoint files /home/user01/oracle/ggs_trg/dirchk: created Process status files /home/user01/oracle/ggs_trg/dirpcs: created SQL script files /home/user01/oracle/ggs_trg/dirsql: created Database definitions files /home/user01/oracle/ggs_trg/dirdef: created Extract data files /home/user01/oracle/ggs_trg/dirdat: created Temporary files /home/user01/oracle/ggs_trg/dirtmp: created Stdout files /home/user01/oracle/ggs_trg/dirout: created GGSCI (host02) 2> Exit [user01@host02 ggs_trg]$ |
If a directory already exists, the installation
leaves the contents of that directory alone. You have
successfully installed Oracle GoldenGate
on the Red Host for both the source and target
GoldenGate instances.
| Host02 - Linux |
[user01@host02 ~]$ cd ~ [user01@host02 ~]$ cd oracle/ggs_trg [user01@host02 ggs_trg]$ |
Copy the downloaded zip from wherever you downloaded it to ~/oracle/ggs_trg/. Unzip it and untar (extract) it.
| Host02 - Linux |
[user01@host02 ggs_trg]$ cp /stage/V22250-01.zip . [user01@host02 ggs_src]$ unzip V22250-01.zip Archive: V22250-01.zip inflating: ggs_JavaAdapter_Linux_x64_v11_1_1_0_0_007.tar inflating: README.txt inflating: OGG_Java_Rel_Notes_11.1.1.0.0_007.pdf extracting: ggs_Linux_x64_Generic_64bit_v11_1_1_0_0_078.zip [user01@host02 ggs_src]$ tar -xvpf ggs_JavaAdapter_Linux_x64_v11_1_1_0_0_007.tar gendef ggjava/ ggjava/resources/ ggjava/resources/lib/ ggjava/resources/lib/gguserexitapi-11.1.1.0.0.006.jar ... many lines omitted for clarity ... sample-dirprm/javaue.prm sample-dirprm/capture.prm sample-dirprm/mgr.prm [user01@host02 ggs_trg]$ |
You have successfully installed Oracle GoldenGate on the Green Host for both Oracle and Java on the target GoldenGate instance.
1.3 Creating the Oracle user on the Green Host (if it does not yet exist) and define environment variables
If you are running this OBE on a single host, the
Oracle user already exists. If you are using a
dedicated host (or virtual machine) for the Oracle
RDBMS (Red Host) and one host for the Oracle WebLogic
Server (Green Host) you must create the Oracle user,
which will be the owner of the WebLogic software.
Connect as root to the Green Host (host02) and create
the Oracle user (password "oracle") and the
directories in which the Oracle software will be
installed.
| Host02 - Linux |
[root@host02 ~]# groupadd -g 1000 oinstall [root@host02 ~]# useradd -u 1100 -g oinstall oracle [root@host02 ~]# passwd oracle [root@host02 ~]# mkdir -p /u01/app/oracle/middleware [root@host02 ~]# chown -R oracle:oinstall /u01 [root@host02 ~]# chmod -R 775 /u01/ [root@host02 ~]# |
1.4 Installing Java JDK 7 update
7 and Oracle Weblogic 12c on Linux (Green Host)
On the Green Host (host02,) using a Web browser, go to http://www.oracle.com/technetwork/java/javase/downloads/index.html to download the JDK version 7.
IMPORTANT!
JDK 7 Update 7 was the current version when this OBE
was released. If you download a more recent version of
the JDK make sure you reflect the new directory
structure when setting the various environment
variables, such as JAVA_HOME.
JAVA_HOME for
the update 7 of the JDK version 7 points to /usr/java/jdk1.7.0_07.
If you download and install JDK 7 Update 10, it is
likely that JAVA_HOME
will point to /usr/java/jdk1.7.0_10.
Remember to set JAVA_HOME
and the other environment variables appropriately in
the next steps for this OBE if your JDK is not update
7.
Download the file jdk-7u7-linux-x64.rpm to the /tmp directory.
In this example, the file jdk-7u7-linux-x64.rpm is downloaded on the /tmp directory. Connect as root to the Green Host and use the RPM application to install the JDK.
| Host02 - Linux |
[root@host02 ~]# cd /tmp [root@host02 tmp]# rpm -ivh jdk-7u7-linux-x64.rpm Preparing... ########################################### [100%] 1:jdk ########################################### [100%] [root@host02 tmp]# |
Edit the /home/oracle/.bash_profile file. You must define a few environment variables which are needed for a successful installation of the Oracle WebLogic Server software.
| Host02 - Linux |
[root@host02 ~]#  vi /home/oracle/.bash_profile
MW_HOME=/u01/app/oracle/middleware; export MW_HOME
WLS_HOME=$MW_HOME/wlserver_12.1; export WLS_HOME
JAVA_HOME=/usr/java/jdk1.7.0_07; export JAVA_HOME
PATH=$JAVA_HOME/bin:$PATH; export PATH
# JDK 7 Requirement
USER_MEM_ARGS="-Xms32m -Xmx200m -XX:MaxPermSize=350m"
[root@host02 ~]#
|
Save the .bash_profile file. Remember to modify JAVA_HOME if you installed a JDK different from update 7.
On the Green Host (host02,) connect as the "oracle" user and make sure that the environment variables are defined.
| Host02 - Linux |
[oracle@host02 ~]$ echo $WLS_HOME /u01/app/oracle/middleware/wlserver_12.1 [oracle@host02 ~]$ echo $MW_HOME /u01/app/oracle/middleware [oracle@host02 ~]$ echo $JAVA_HOME /usr/java/jdk1.7.0_07 [oracle@host02 ~]$ |
Accept the license agreement, and select the Generic Installer, suitable for 64-bit platforms.

Download the file wls1211_generic.jar to the /tmp directory.
Connected as "oracle", change directory to /tmp and launch the WebLogic Installer.
| Host02 - Linux |
[oracle@host02 ~]$ cd /tmp [oracle@host02 tmp]$ java -Xmx1024m -jar wls1211_generic.jar Extracting 0%......................................................................................100% [oracle@host02 tmp]$ |
When the WebLogic Installer starts and displays its first form, click Next.
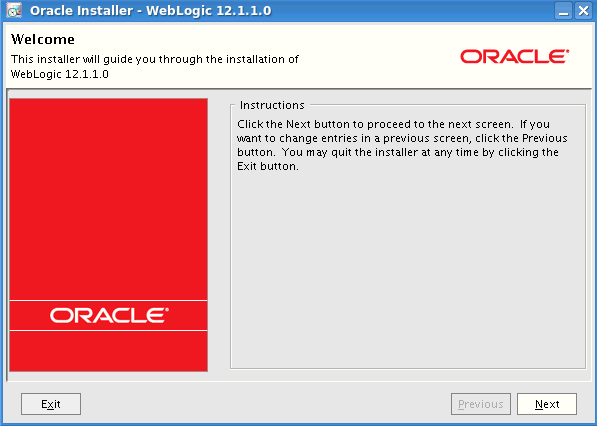
Start the Weblogic Installer and click Next.
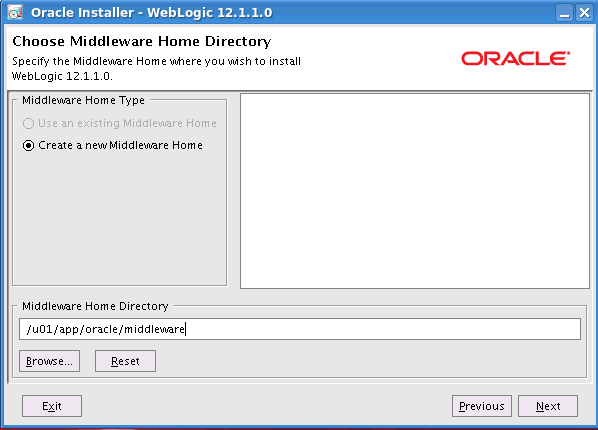
Enter /u01/app/oracle/middleware as the Weblogic Middleware Home and click Next.
Either enter your support details, or attempt to deselect the security updates checkbox. The box does not actually deselect, but displays a warning dialog window.
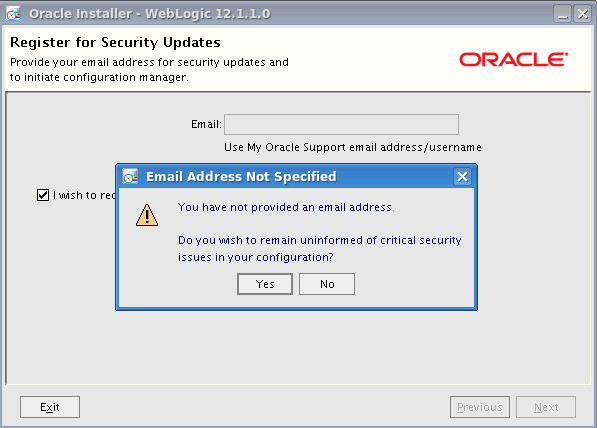
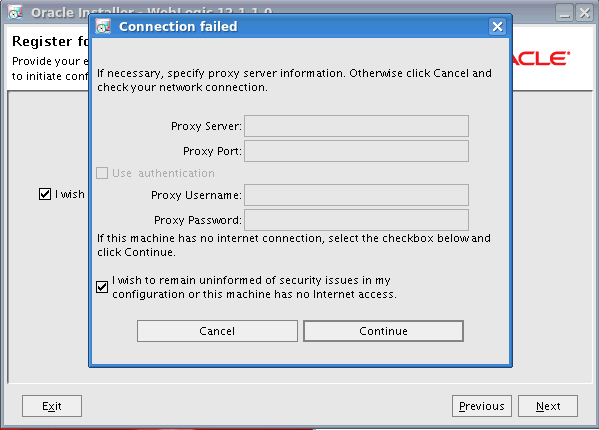
If you want not to be informed about security issues, click Yes.

Click Continue to proceed with the installation without being informed about security issues
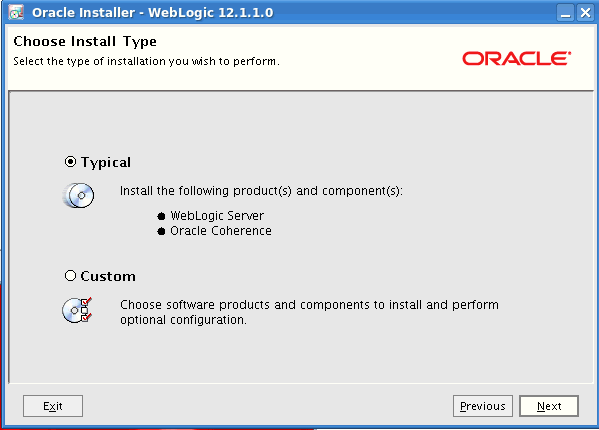
Accept the default, a typical installation of the Weblogic Server and Oracle Coherence. Click Next.
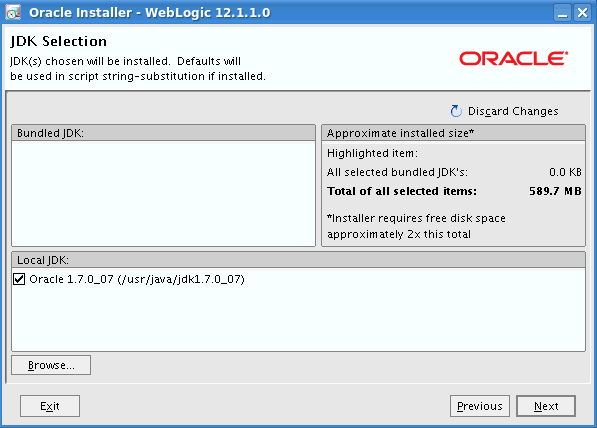
The installer finds the JDK location pointed to by JAVA_HOME. Click Next to accept the JDK.
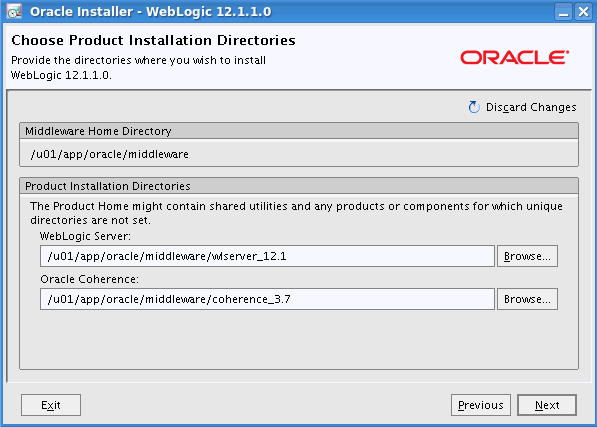
Accept the default locations proposed by the installer for the Weblogic Server and Coherence. Click Next.
Review the list of products being installed and click Next.

The installer will take a few minutes to install the Oracle Weblogic software and Coherence into the chosen directories.

When the installation completes, make sure to accept the default Run Quickstart checkbox and click Done.

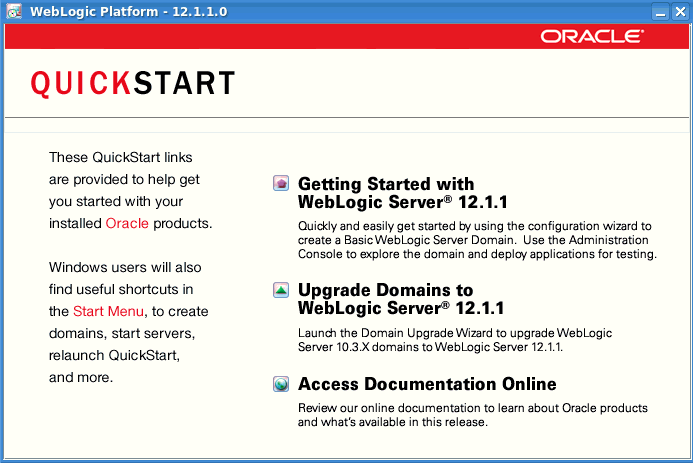
The Quickstart wizard displays on screen. Click on Getting Started with WebLogic Server 12.1.1.
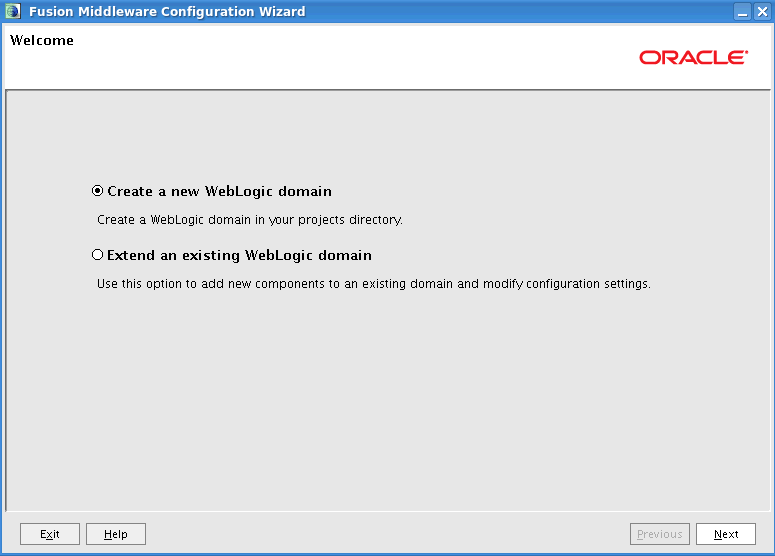
Accept the default Create a new WebLogic domain. Click Next.
Accept the default Generate a domain configured automatically. Click Next.

Enter ogg2wls as domain name, and accept the default directory location for the domain. Click Next.

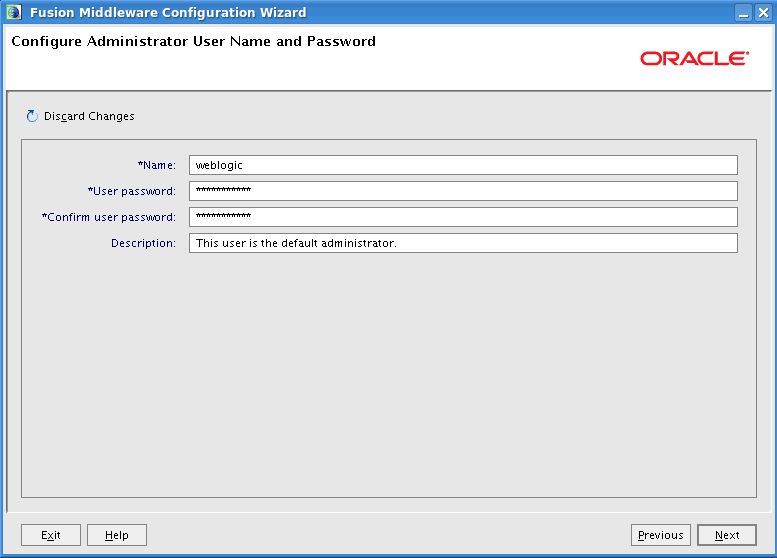
Enter weblogic as the Administrator user name. Enter and confim the password WebLogic12c. Click Next.
Accept the defaults (Development Mode using the Sun JDK 7 Update 7.) Click Next.

Click Next skipping optional configuration

Click Create to have the installer create the Weblogic domain.

The final dialog window of the Quickstart wizard displays a progress bar and information about the creation of the domain. Click Done to dismiss the dialog window when the domain is created successfully.

1.5 Create a JMS Connection Factory and a Queue
Connect to the Green Host (host02) as the "oracle" user
| Host01 - Linux |
[user01@host02 ~]$ su - oracle Password: [oracle@host02 ~]$ cd $MW_HOME/user_projects/domains/ogg2wls [oracle@host02 ogg2wls]$ ./startWebLogic.sh |
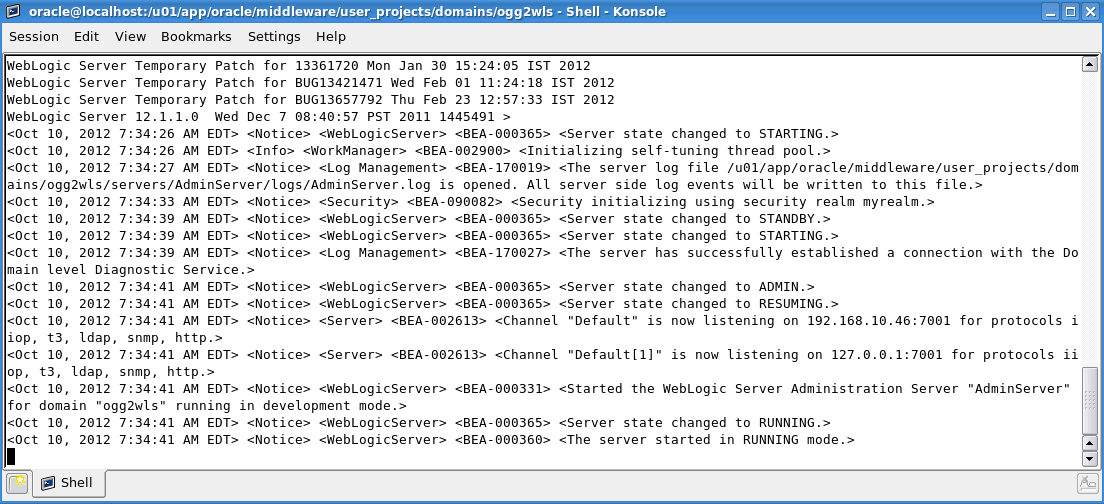
When Weblogic has completed startup, the last
line displays the string
<The server started in RUNNING mode.>
After the Weblogic has started, you can use your
browser to connect to the Weblogic console.
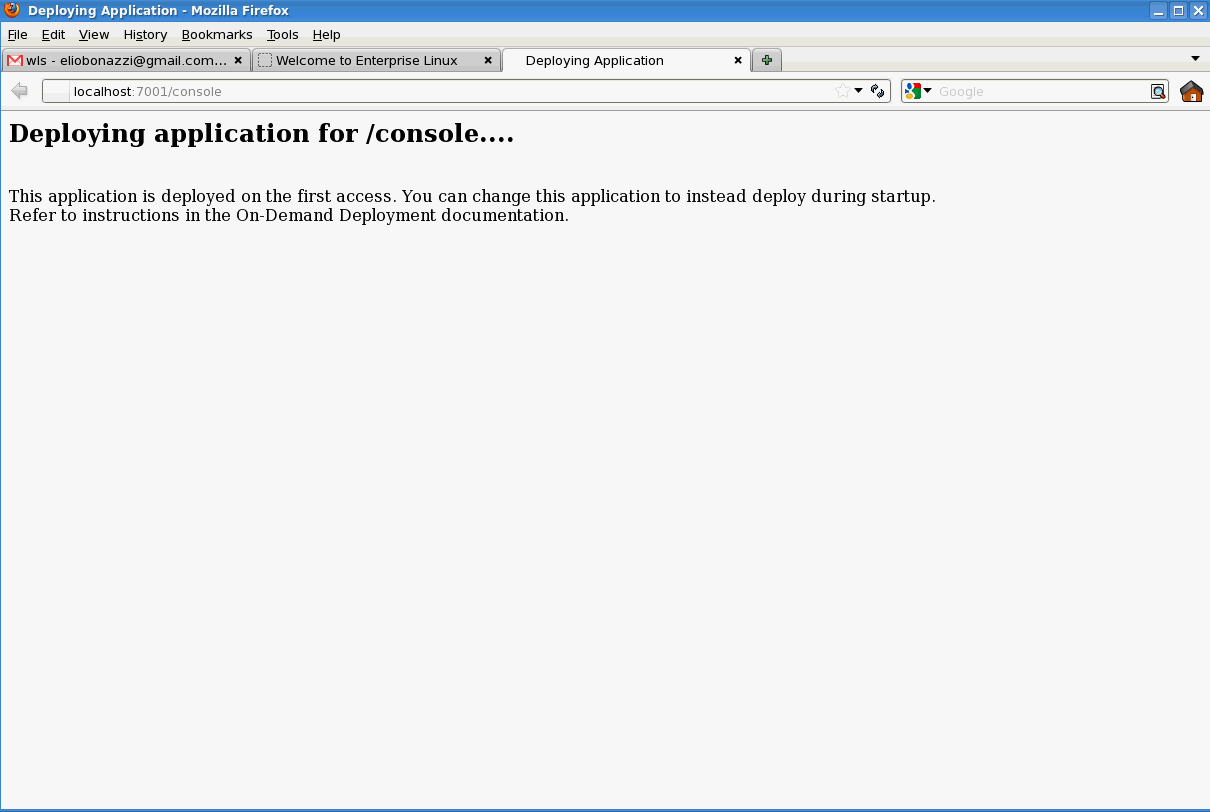
The first time you access the Weblogic console at the URL http://localhost:7001/console the console application is deployed
After the console application deploys, the
Weblogic Administration Console Welcome screen
appears.
Enter weblogic
as the Username and WebLogic12c
as the Password. Click Login.

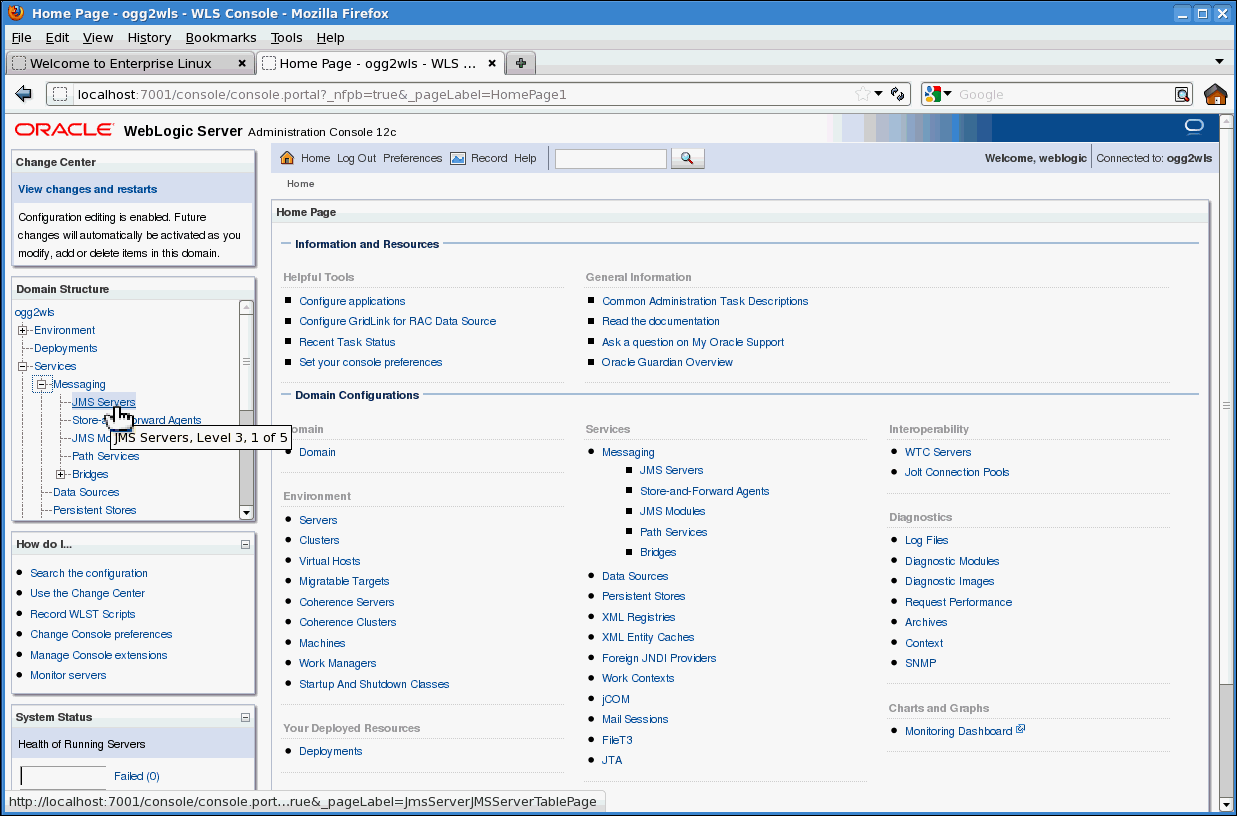
In the Domain Structure, go to Services > Messaging > JMS Servers. Click New.
Accept the default paramaters for the creation of a JMS Server and Click Next.
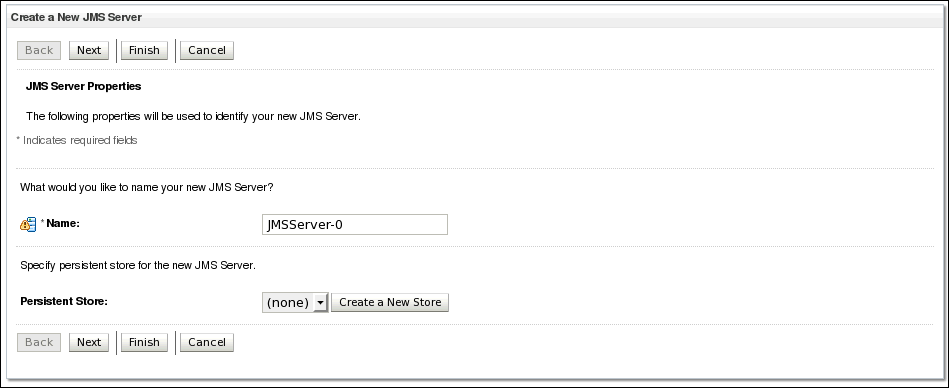
On the Target dropdown, select AdminServer. Click Finish.

You should now have a JMS server called JMSServer-0, targeted for AdminServer with Health OK.

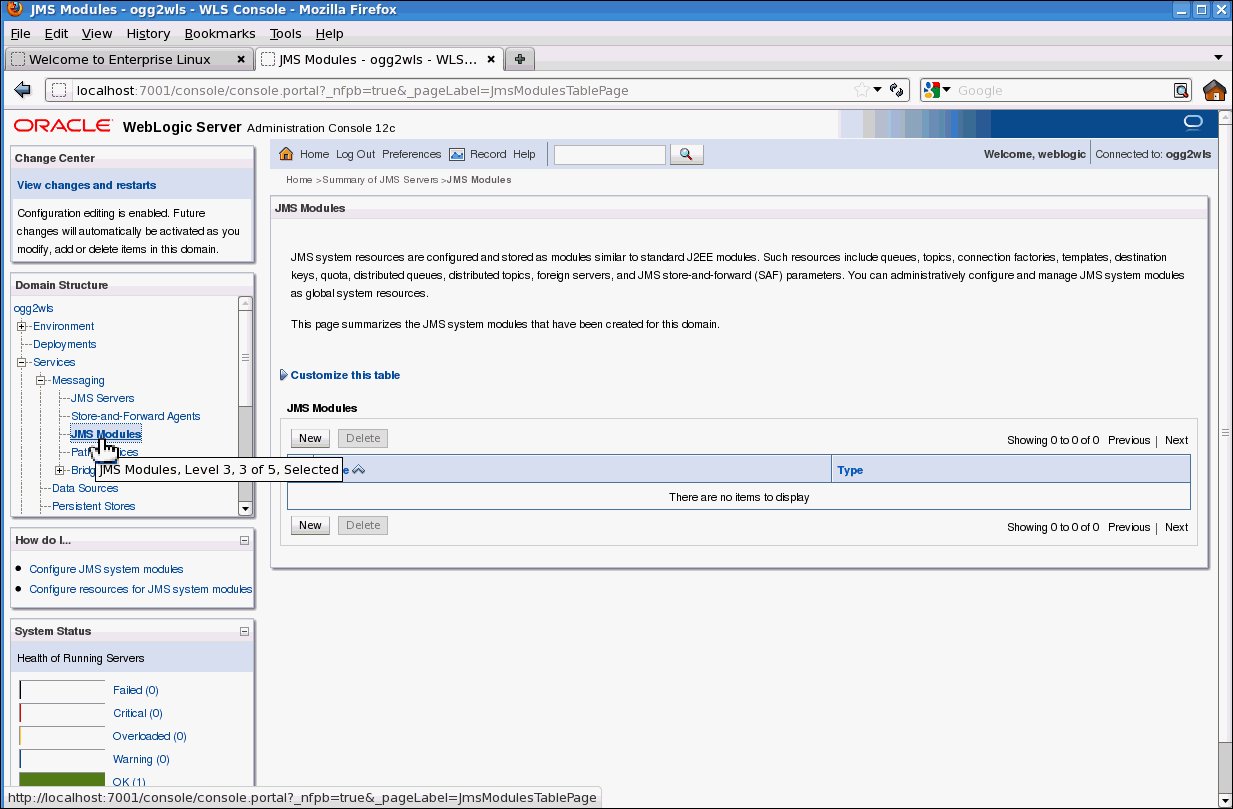
In the Domain Structure, go to Services > Messaging > JMS Modules. Click New.
Accept the defaults and select the AdminServer checkbox. Click Next.
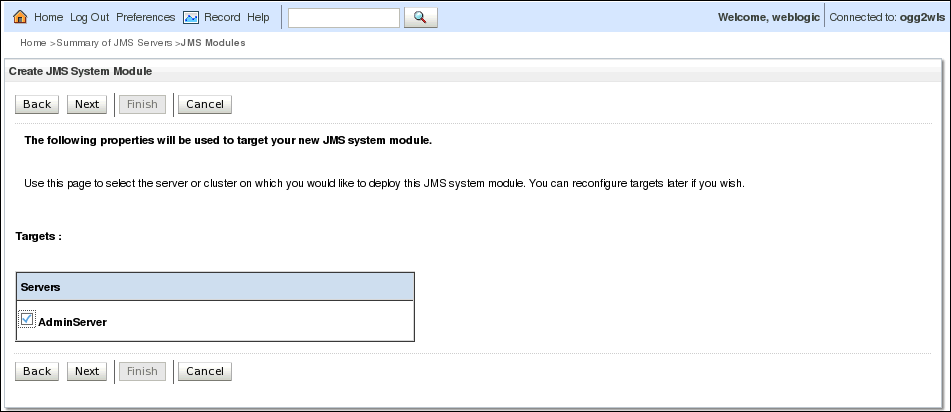
You should now have a System Module called SystemModule-0 with no resources.

In Summary of Resources, click New. Select Connection Factory and click Next.
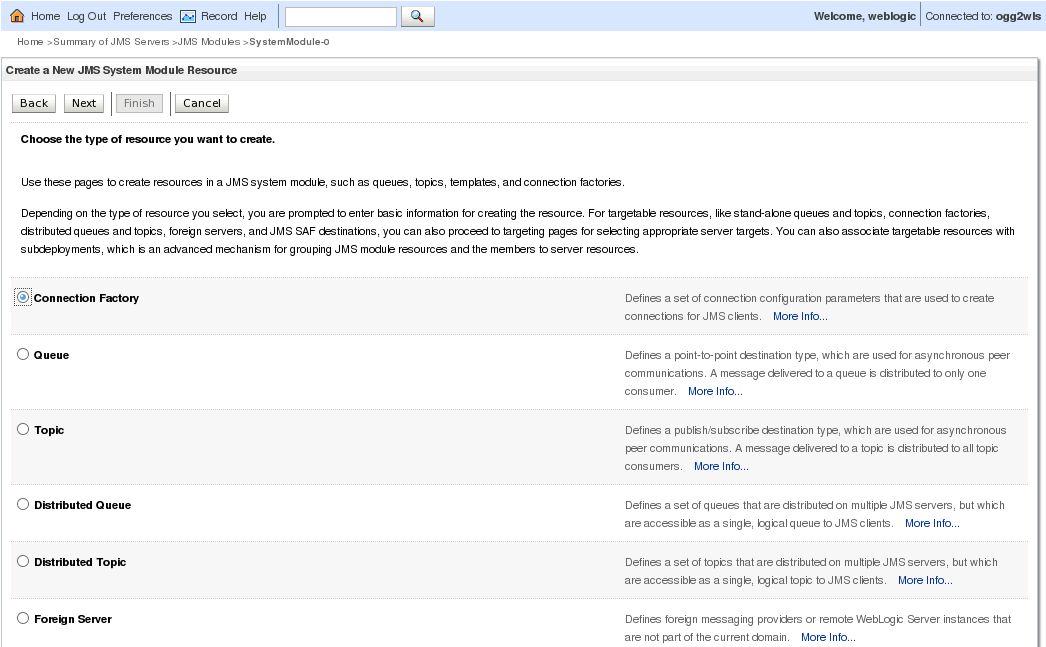
Accept all defaults, but change the JNDI Name to mycf and click Next.

Click Advanced Targeting.
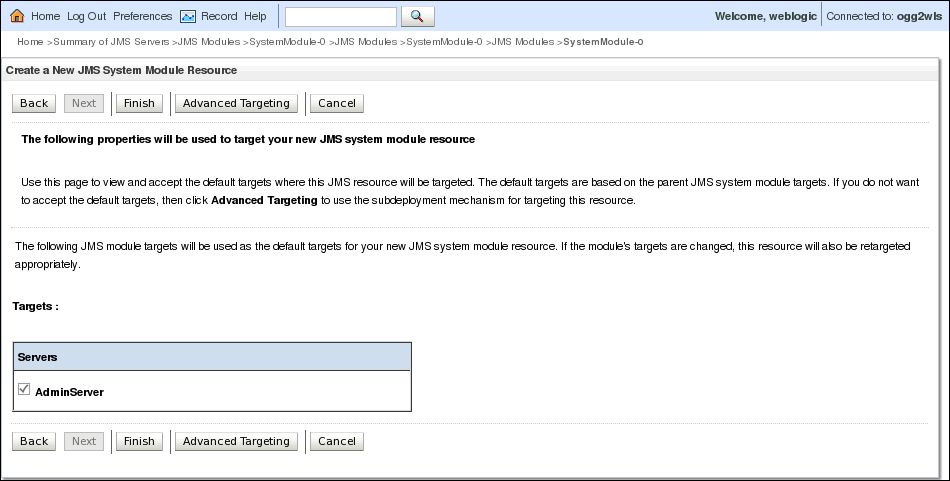
Click Create a New Subdeployment.
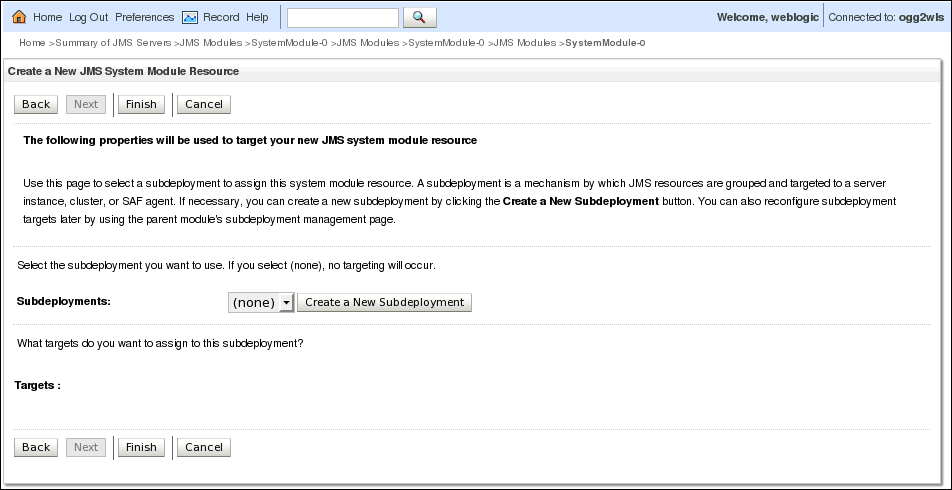
Accept the default name, ConnectionFactory-0 and click Ok.

You should now have a ConnectionFactory-0 element named mycf subdeployed to ConnectionFactory-0 targeted to JMSServer-0.

In Summary of Resources, click New. Select Queue and click Next.
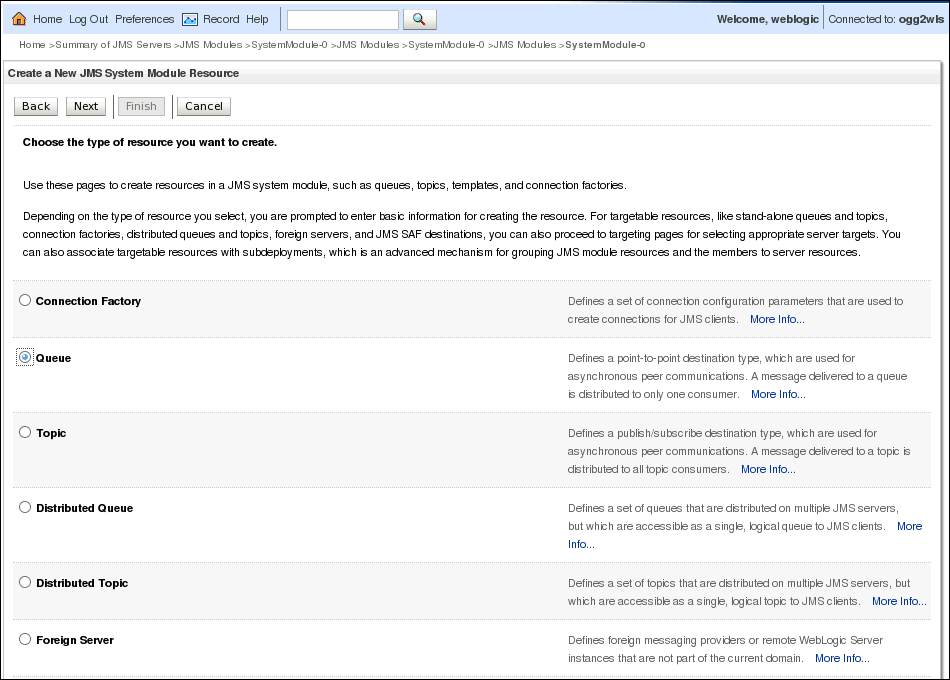
Accept all defaults, but change the JNDI Name to myq and click Next.
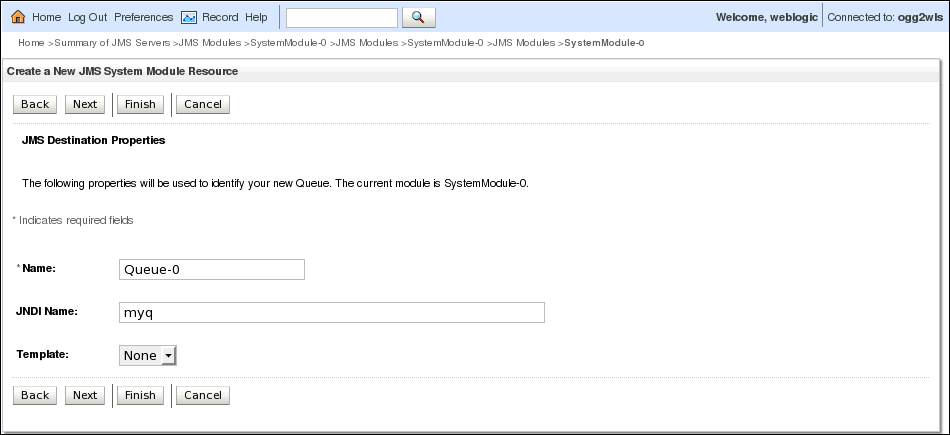
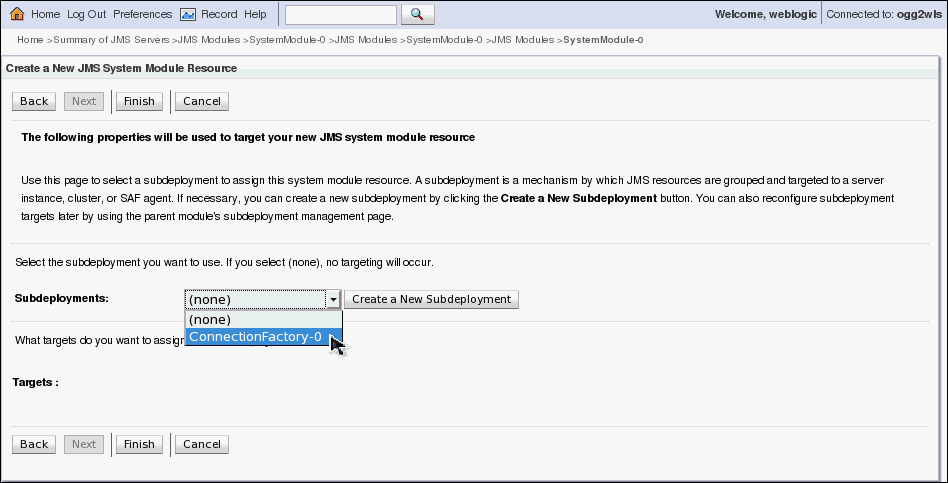
On the Subdeployments dropdown, select ConnectionFactory-0 (which in turn selects JMSServer-0), click Finish.
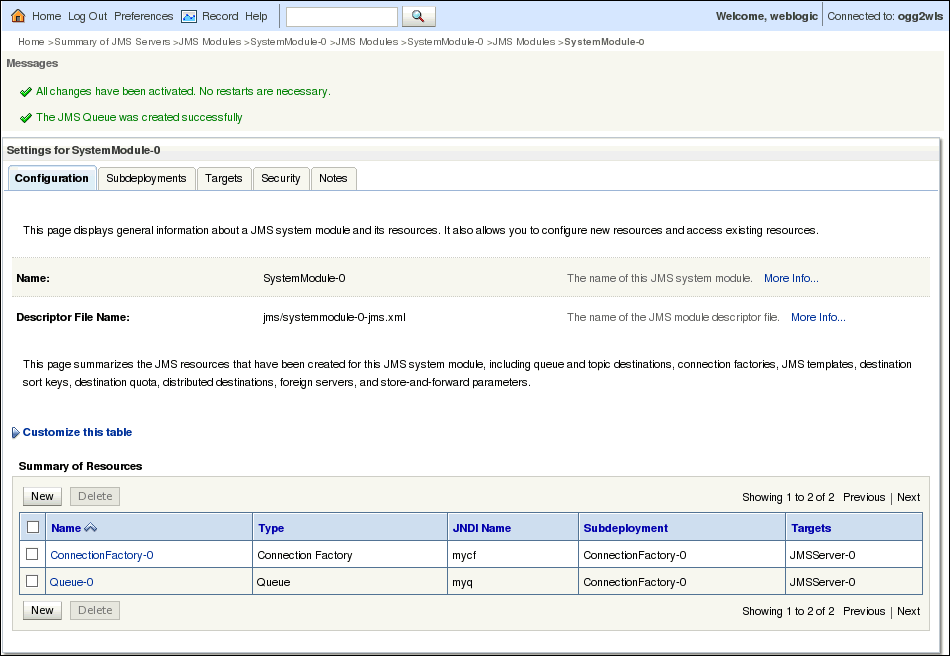
You should now have a ConnectionFactory-0
element named mycf
subdeployed to ConnectionFactory-0
targeted to JMSServer-0
and
a Queue element Queue-0
named myq
subdeployed to ConnectionFactory-0,
targeted to JMSServer-0.
1.6 Creating a wlfullclient.jar library
The Weblogic Server installer does not deploy one
single combined JMS client JAR file that would be
needed for clients, such as GoldenGate,
to connect to the JMS servers provided by the Weblogic
Server.
To create this combined JAR file, perform the following steps:
Connect to the Green Host as the "oracle" user
| Host02 - Linux |
[oracle@host01 ~]$ cd $WLS_HOME/server/lib [oracle@host02 lib]$ pwd [oracle@host02 lib]$ /u01/app/oracle/middleware/wlserver_12.1/server/lib |
Run the wljarbuilder application to create the wlfullclient.jar client library.
| Host02 - Linux |
[oracle@host02 lib]$ java -jar wljarbuilder.jar
Integrating jar -->(0)/(0)//u01/app/oracle/middleware/wlserver_12.1/server/lib/weblogic.jar
Filtering Entry weblogic/diagnostics/snmp/muxer/ProtocolHandlerSNMP.class
Filtering Entry weblogic/diagnostics/snmp/muxer/Utils.class
Filtering Entry weblogic/diagnostics/snmp/agent/SNMPV3Agent.class
 ... many lines omitted for clarity ...
Integrating jar <--(1)/(37956)/(43)//u01/app/oracle/middleware/modules/javax.security.auth.message_2.0.jar
Created new jar file: /u01/app/oracle/middleware/wlserver_12.1/server/lib/wlfullclient.jar
[oracle@host02 lib]$
|
You can leave the wlfullclient.jar file in the directory where it was created. The Oracle GoldenGate User Exit will refer to the JMS full client library using a full directory path.
2. Creating and Preparing the Database
On the Red Host (Oracle - host01) you must create the OGG11R2
instance using the DBCA
utility. If you already have an Oracle instance running on the
Red Host, perhaps because you chose to install the default ORCL
instance
at the moment of the Oracle software installation, you should
shut it down to preserve memory.
After the instance is created, you will create the src_user01 user/schema and run some DDL scripts to create the required replication objects.
2.1 Creating Directories for Database Files
On the Red Host you must create the containers for the database files.
Change ownership of the newly created directory to the oracle user.
| Host01 - Linux |
[root@host01 ~]# mkdir -p /u02/oradata [root@host01 ~]# chown -R oracle.oinstall /u02/oradata |
2.2 Creating the Oracle OGG11R2 Instance
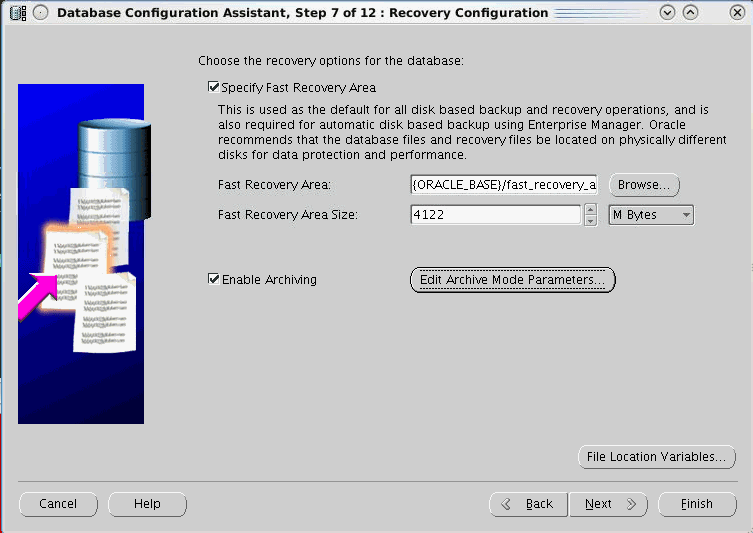
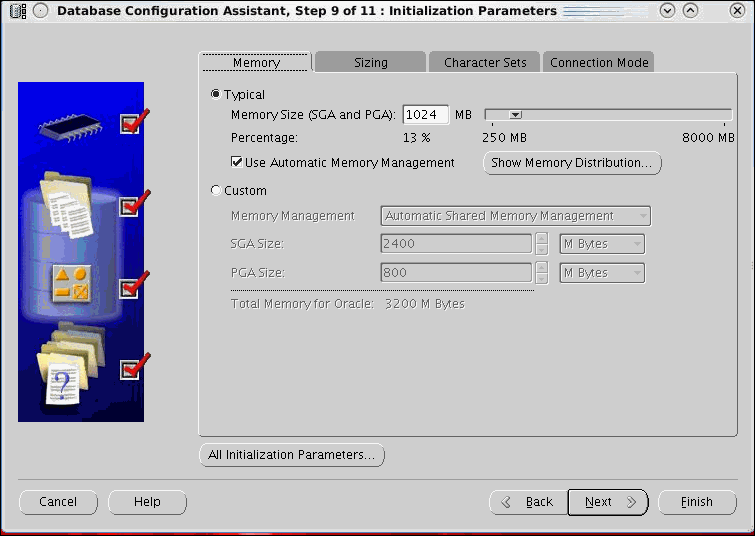
The database creation step starts. After a while a
"Database Configuration Feedback" page is displayed on
screen stating that the database has been correctly
configured.
Click Exit.
You must now set up the Oracle Listener (if a
listener is not already created) and the TNS
entry for the newly created database. Launch the NETCA application
by typing netca
at the OS prompt.
The Oracle Net Configuration Assistant wizard dialog
window will appear on screen.
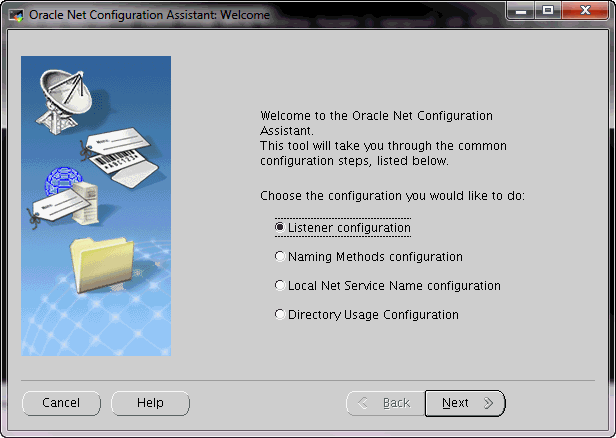
Select Listener configuration and click Next. If the only option available is Add and the other options such as Reconfigure, Delete and Rename are greyed out, it means that no listener was created. In this case accept the only available option, Add, and click Next.
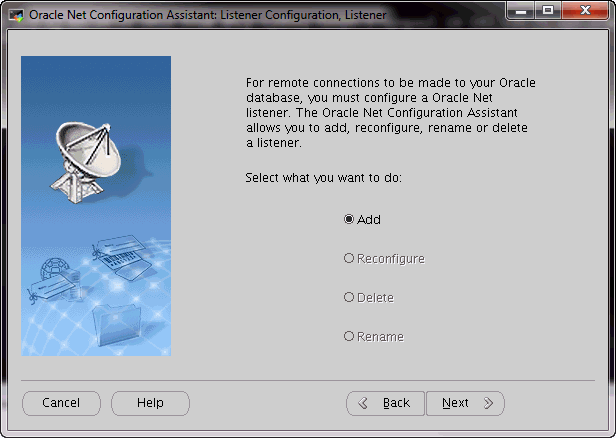
Otherwise, if all the other options are available, (which means a listener has been configured) click on Reconfigure and make sure that a listener named LISTENER has been configured:

If the listener named LISTENER appears in the drop-down list box, you can click on the Back button until you reach the initial screen, which allows you to choose the option Local Net Service Name Configuration.
If the listener LISTENER
does not exist, proceed to create it. If the listener
LISTENER does
exist, skip the steps below until you choose the
option Local
Net Service Name Configuration.
Click Listener Configuration then click Add. Enter LISTENER in the Listener name field and click Next.

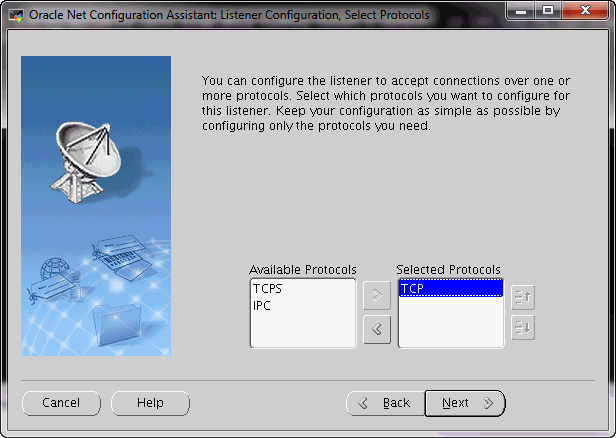
Select TCP as the listener protocol and click Next.
Accept the default port number (1521) to be used by the listener named LISTENER. Click Next

Accept the default option (No) when asked if you want to create another listener. Click Next
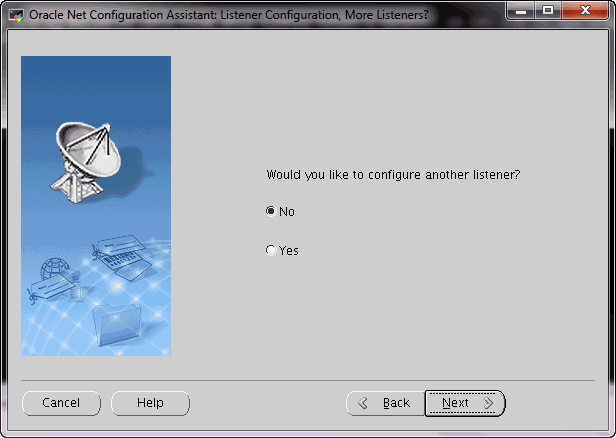
You are back to the initial screen, which allows you to choose the option Local Net Service Name Configuration. Click Next

Select Add to create a new net service name. Click Next
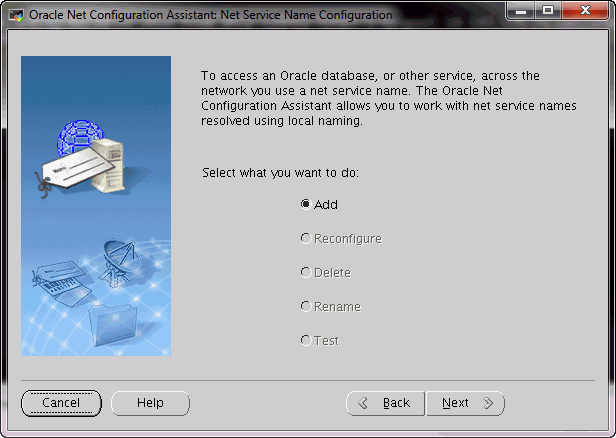
Enter ogg11r2 as the new service name. Click Next

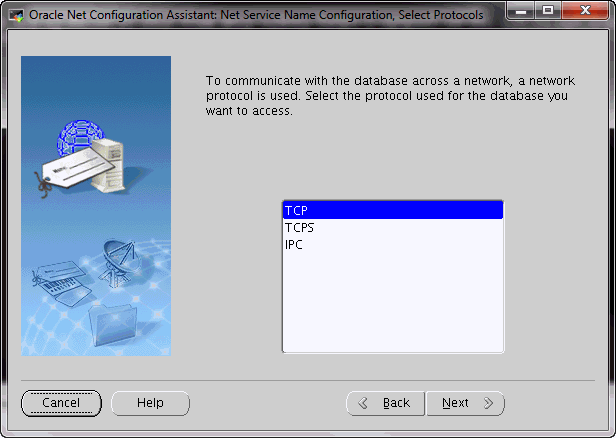
Select TCP as the protocol used by ogg11r2. Click Next
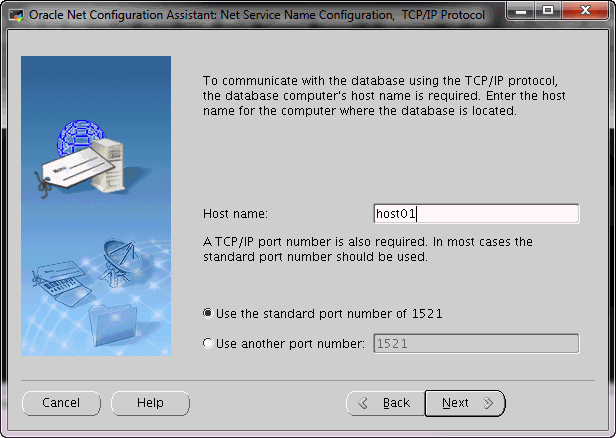
Enter host01 as the Host name for the service name ogg11r2. Accept the default (1521) for the TCP/IP port number. Click Next
Accept the default (No do not test) to skip the database test. Click Next

Enter ogg11r2 to accept the new Net service Name. Click Next
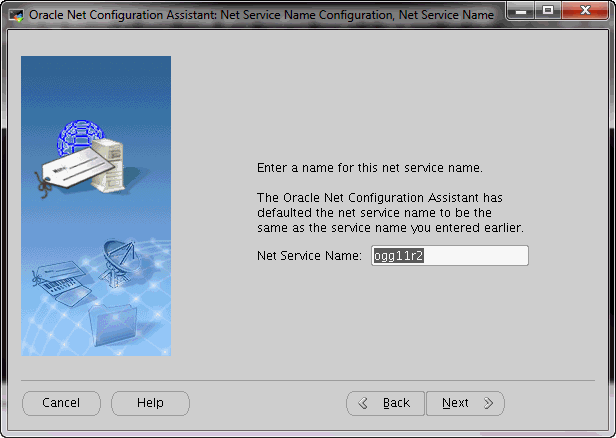
Accept the default (No) to opt not to configure another service name and click Next
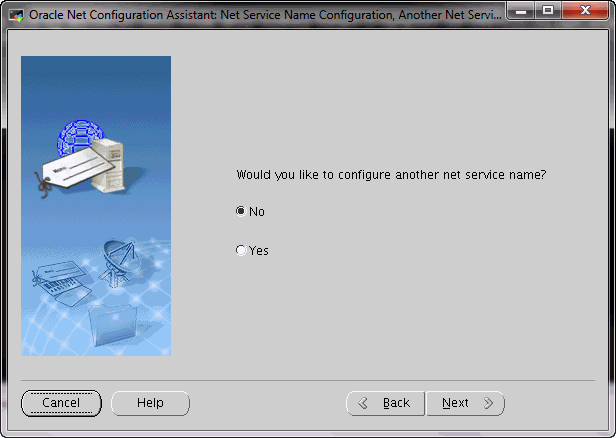
The Net Service Name Configuration wizard is complete. Click Next then click Finish to exit the configuration wizard.
| Host01 - Linux |
[oracle@host01 ~] cd /u02/oradata/ogg11r2/ [user01@host01 ~]$ ls -l total 1725748 -rw-r-----. 1 oracle oinstall 9781248 Oct 15 10:50 control01.ctl -rw-r-----. 1 oracle oinstall 52429312 Oct 14 15:04 redo01.log -rw-r-----. 1 oracle oinstall 52429312 Oct 15 02:00 redo02.log -rw-r-----. 1 oracle oinstall 52429312 Oct 15 10:48 redo03.log -rw-r-----. 1 oracle oinstall 754982912 Oct 15 10:40 sysaux01.dbf -rw-r-----. 1 oracle oinstall 754982912 Oct 15 10:46 system01.dbf -rw-r-----. 1 oracle oinstall 30416896 Oct 14 23:04 temp01.dbf -rw-r-----. 1 oracle oinstall 78651392 Oct 15 10:46 undotbs01.dbf -rw-r-----. 1 oracle oinstall 5251072 Oct 15 05:15 users01.dbf [oracle@host01 ogg11r2]$ chmod +r *.log [oracle@host01 ogg11r2]$ ls -l total 1725748 -rw-r-----. 1 oracle oinstall 9781248 Oct 15 10:50 control01.ctl -rw-r--r--. 1 oracle oinstall 52429312 Oct 14 15:04 redo01.log -rw-r--r--. 1 oracle oinstall 52429312 Oct 15 02:00 redo02.log -rw-r--r--. 1 oracle oinstall 52429312 Oct 15 10:50 redo03.log -rw-r-----. 1 oracle oinstall 754982912 Oct 15 10:50 sysaux01.dbf -rw-r-----. 1 oracle oinstall 754982912 Oct 15 10:46 system01.dbf -rw-r-----. 1 oracle oinstall 30416896 Oct 14 23:04 temp01.dbf -rw-r-----. 1 oracle oinstall 78651392 Oct 15 10:50 undotbs01.dbf -rw-r-----. 1 oracle oinstall 5251072 Oct 15 05:15 users01.dbf [oracle@oraol62 ogg11r2]$ |
Make sure the user user01 can access the Oracle Redo log files. Open a terminal window, connect to the Red Host as user01 and use the command ls to display the content of the directory /u02/oradata/ogg11r2.
Logout from the "oracle" account
2.3 Unloading and Unpacking the SQL scripts
Create
a ddl directory
under the default directory and expand the OBE_DDL_files.zip
there.In this example the OBE_DDL_files.zip file is downloaded into the /tmp directory.
| Host01 - Linux |
[user01@host01 ~] cd ~ [user01@host01 ~]$ mkdir ddl [user01@host01 ~]$ cd ddl [user01@host01 ddl]$ unzip /tmp/OBE_DDL_files.zip Archive: /tmp/OBE_DDL_files.zip inflating: oracle_table_creation.sql inflating: drop_tables.sql inflating: economic_entity.sql inflating: gdp_by_year.sql inflating: gdp_by_year_2008.sql inflating: gdp_by_year_2009.sql inflating: gdp_by_year_2010.sql inflating: gdp_growth_by_year.sql inflating: gdp_growth_by_year_2008.sql inflating: gdp_growth_by_year_2009.sql inflating: gdp_growth_by_year_2010.sql |
3. Configuring the Environment
- DBLogin:
- Connects to the DB using the userid@SID/password specified. The @SID is optional if there is no ambiguity.
- Start Mgr:
- If the Manager is already started, there is no harm in trying to start it again. This is persistent between sessions.
- Info Mgr:
- Reports if the Manager started successfully, and if so, the port number being used.
- Set Editor:
- The default is vi. You can temporarily change that to a GUI editor such as gedit.
The configuration of the environment is done by editing ASCII files and running OS utilities. To configure the environment, perform the following steps:
3.1 Configuring the Oracle 11g Database on the Red Host
This section must be done in SQL*Plus as sysdba. You must connect as "oracle," the Oracle software owner.
On host01, verify that LOG_MODE is set to ARCHIVELOG.
| Host01 - Linux |
[user01@host01 ~]$ su - oracle Password: ***** [oracle@host01 ~]$ sqlplus / as sysdba SQL*Plus: Release 11.2.0.3.0 Production on Mon Sep 17 17:19:01 2012 Copyright (c) 1982, 2011, Oracle. All rights reserved. Connected to: Oracle Database 11g Enterprise Edition Release 11.2.0.3.0 - 64bit Production With the Partitioning, OLAP, Data Mining and Real Application Testing options SQL> SELECT log_mode FROM v$database; LOG_MODE ------------ ARCHIVELOG SQL> |
The result should be ARCHIVELOG. You specified ARCHIVELOG mode when you created the database using DBCA. If you did not create the database in ARCHIVELOG mode, do the following:
| Host01 - Linux |
LOG_MODE ------------ NOARCHIVELOG SQL> shutdown immediate Database closed. Database dismounted. ORACLE instance shut down. SQL> startup mount ORACLE instance started. Total System Global Area 3340451840 bytes Fixed Size 2232960 bytes Variable Size 1811942784 bytes Database Buffers 1509949440 bytes Redo Buffers 16326656 bytes Database mounted. SQL> ALTER DATABASE ARCHIVELOG; Database altered. SQL> ALTER DATABASE OPEN; Database altered. SQL> SELECT log_mode FROM v$database; LOG_MODE ------------ ARCHIVELOG SQL> |
Verify that supplemental logging and forced logging are set properly.
| Host01 - Linux |
SQL> SELECT force_logging, supplemental_log_data_min FROM v$database;

FOR SUPPLEME
--- --------
YES YES

SQL>
|
The results should both be YES. If it is, then skip to the next step. If either result is NO, then do the following:
| Host01 - Linux |
FOR SUPPLEME --- -------- NO NO SQL> ALTER DATABASE ADD SUPPLEMENTAL LOG DATA; Database altered. SQL> ALTER DATABASE FORCE LOGGING; Database altered. SQL> ALTER SYSTEM SWITCH LOGFILE; System altered. SQL> SELECT force_logging, supplemental_log_data_min FROM v$database; FOR SUPPLEME --- -------- YES YES SQL> |
There is no harm in doing the commands twice.
Create the Oracle GoldenGate Administrator and the user/schema owners on host01.
In real life, the user/schema owner would probably have more privileges, and the administrator would have less privileges. The DBMS_GOLDENGATE_AUTH package is not needed for this OBE, but is commonly used in more advanced configurations, so it is a good idea to see it here. Oddly, the DBA role is not sufficient for advanced scenarios; you must also run the DBMS_GOLDENGATE_AUTH package. When keying in the DBMS_GOLDENGATE_AUTH command, the entire string after EXEC is without spaces or line breaks.
| Host01 - Linux |
SQL> CREATE USER src_user01 IDENTIFIED BY Welcome1; User created. SQL> CREATE USER oggadm IDENTIFIED BY Welcome1; User created. SQL> GRANT CONNECT, RESOURCE, UNLIMITED TABLESPACE TO src_user01; Grant succeeded. SQL> GRANT dba TO oggadm; Grant succeeded. SQL> EXEC DBMS_GOLDENGATE_AUTH.GRANT_ADMIN_PRIVILEGE (grantee=>'OGGADM',privilege_type=>'capture',grant_select_privileges=>true, do_grants=>TRUE); PL/SQL procedure successfully completed. SQL> exit [user01@host01 ~]$ |
The database on host01 is configured to support Oracle Goldengate. One user and an administrator are provisioned for the Red Host.
3.2 Creating Startup Files and Managers
Create the optional startup.oby (Obey) file on the Red Host in the Oracle GoldenGate installation directory.
These are GGSCI commands that are done almost every time you start GGSCI, and they do not persist between sessions, so you will find yourself entering them many, many times, and therefore it is convenient to create a startup obey file.
If you have several different databases or schemas that you login to on a regular basis, you may want to make startup01.oby, startup02.oby, startup03.oby, and so on. This will be revisited later in the naming conventions of process files.
| Host01 - Linux |
[user01@host01 ~] cd ~/oracle/ggs_src [user01@host01 ggs_src]$ vi startup.oby DBLogin UserID oggadm@ogg11r2, Password Welcome1 Start Mgr Info Mgr Set Editor gedit [user01@host01 ggs_src]$ |
Create the Manager parameter (mgr.prm) file on the Red Host in dirprm/.
Start GGSCI. Edit the file with no extension. Add the two lines.
| Host01 - Linux |
[user01@host01 ~]$ cd ~/oracle/ggs_src [user01@host01 ggs_src]$ ./ggsci Oracle GoldenGate Command Interpreter for Oracle Version 11.2.1.0.3 14400833 OGGCORE_11.2.1.0.3_PLATFORMS_120823.1258_FBO Linux, x64, 64bit (optimized), Oracle 11g on Aug 23 2012 20:20:21 Copyright (C) 1995, 2012, Oracle and/or its affiliates. All rights reserved. GGSCI (host01) 1> Edit Param mgr Port 7809 PurgeOldExtracts ./dirdat/*, UseCheckpoints GGSCI (host01) 2> Info mgr Manager is DOWN! GGSCI (host01) 3> exit [user01@host01 ggs_src]$ |
Note: If you do it correctly, GGSCI automatically adds the .prm extension and stores the file in the dirprm/ directory. If you wrongly add the extension yourself, GGSCI converts the filename to UPPERCASE and stores it in the installation directory which renders the file practically unusable.
Create the optional startup.oby (Obey) file on the Green Host in the Oracle GoldenGate installation directory (ggs_trg.)
| Host02 - Linux |
[user01@host01 ~] cd ~/oracle/ggs_trg [user01@host01 ggs_src]$ vi startup.oby DBLogin UserID oggadm@ogg11r2, Password Welcome1 Start Mgr Info Mgr Set Editor gedit [user01@host01 ggs_trg]$ |
Create the Manager parameter (mgr.prm) file on the Green Host (host02) in dirprm/ for the replication target directory.
| Host02 - Linux |
[user01@host02 ggs_trg]$ cd ~/oracle/ggs_trg [user01@host02 ggs_trg]$ ./ggsci Oracle GoldenGate Command Interpreter for Oracle Version 11.2.1.0.3 14400833 OGGCORE_11.2.1.0.3_PLATFORMS_120823.1258_FBO Linux, x64, 64bit (optimized), Oracle 11g on Aug 23 2012 20:20:21 Copyright (C) 1995, 2012, Oracle and/or its affiliates. All rights reserved. GGSCI (host02) 1> Edit Param mgr Port 7909 PurgeOldExtracts ./dirdat/*, UseCheckpoints GGSCI (host02) 2> Info mgr Manager is DOWN! GGSCI (host02) 3> exit [user01@host01 ggs_trg]$ |
Start the Manager on the Red Host, replication source instance, using the Obey files. Alternatively, you could type each of the lines every time you start GGSCI.
| Host01 - Linux |
[user01@host01 ~]$ cd ~/oracle/ggs_src [user01@host01 ggs_src]$ ./ggsci Oracle GoldenGate Command Interpreter for Oracle Version 11.2.1.0.3 14400833 OGGCORE_11.2.1.0.3_PLATFORMS_120823.1258_FBO Linux, x64, 64bit (optimized), Oracle 11g on Aug 23 2012 20:20:21 Copyright (C) 1995, 2012, Oracle and/or its affiliates. All rights reserved. GGSCI (host01) 1> Obey startup.oby GGSCI (host01) 2> DBLogin UserID oggadm@ogg11r2, Password Welcome1 Successfully logged into database. GGSCI (host01) 3> Start Mgr Manager started. GGSCI (host01) 4> Info Mgr Manager is running (IP port host01.example.com.7809). GGSCI (host01) 5> Set Editor gedit GGSCI (host01) 6> exit [user01@host01 ggs_src]$ |
Start the Manager for the replication target instance.
| Host02 - Linux |
[user01@host02 ggs_src]$ cd ~/oracle/ggs_trg [user01@host02 ggs_trg]$ ./ggsci Oracle GoldenGate Command Interpreter for Oracle Version 11.2.1.0.3 14400833 OGGCORE_11.2.1.0.3_PLATFORMS_120823.1258_FBO Linux, x64, 64bit (optimized), Oracle 11g on Aug 23 2012 20:20:21 Copyright (C) 1995, 2012, Oracle and/or its affiliates. All rights reserved. GGSCI (host01) 1> Obey startup.oby GGSCI (host01) 2> DBLogin UserID oggadm@ogg11r2, Password Welcome1 Successfully logged into database. GGSCI (host01) 3> Start Mgr Manager started. GGSCI (host01) 4> Info Mgr Manager is running (IP port host01.example.com.7909). GGSCI (host01) 5> Set Editor gedit GGSCI (host01) 6> exit [user01@host01 ggs_trg]$ |
The global and startup files are all created, and the
background Manager processes are started. You can verify
which processes are running at any time by entering the
command:
GGSCI (host) >
Info All
3.3 Creating Tables
Create empty source sample tables on the Red Host in the schema src_user01.
You can use any SQL utility you like to run the script. If you have no preference, use sqlplus.
| Host01 - Linux |
[user01@host01 ~] cd ~/ddl [user01@host01 ddl]sqlplus src_user01/Welcome1@ogg11r2 SQL*Plus: Release 11.2.0.3.0 Production on Tue Sep 18 14:38:50 2012 Copyright (c) 1982, 2011, Oracle. All rights reserved. Connected to: Oracle Database 11g Enterprise Edition Release 11.2.0.3.0 - 64bit Production With the Partitioning, OLAP, Data Mining and Real Application Testing options SQL> @oracle_table_creation.sql Table created. Table created. Table created. SQL> select * from cat; TABLE_NAME TABLE_TYPE ------------------------------ ----------- ECONOMIC_ENTITY TABLE GDP_BY_YEAR TABLE GDP_GROWTH_BY_YEAR TABLE SQL> exit [user01@host01 ddl]$ |
3.4 Adding Transaction Data
Restart GGSCI and run Add TranData for the whole user schema used as a replication source (ggs_src.)
| Host01 - Linux |
[user01@host01 ~]$ cd ~/oracle/ggs_trg [user01@host01 ggs_trg]$ ./ggsci Oracle GoldenGate Command Interpreter for Oracle Version 11.2.1.0.3 14400833 OGGCORE_11.2.1.0.3_PLATFORMS_120823.1258_FBO Linux, x64, 64bit (optimized), Oracle 11g on Aug 23 2012 20:20:21 Copyright (C) 1995, 2012, Oracle and/or its affiliates. All rights reserved. GGSCI (host01) 1> dblogin userid oggadm@ogg11r2, password Welcome1 Successfully logged into database. GGSCI (host01) 2> info trandata src_user01.* Logging of supplemental redo log data is disabled for table SRC_USER01.ECONOMIC_ENTITY. Logging of supplemental redo log data is disabled for table SRC_USER01.GDP_BY_YEAR. Logging of supplemental redo log data is disabled for table SRC_USER01.GDP_GROWTH_BY_YEAR. GGSCI (host01) 3> add trandata src_user01.* Logging of supplemental redo data enabled for table SRC_USER01.ECONOMIC_ENTITY. Logging of supplemental redo data enabled for table SRC_USER01.GDP_BY_YEAR. Logging of supplemental redo data enabled for table SRC_USER01.GDP_GROWTH_BY_YEAR. GGSCI (host01) 4> info trandata src_user01.* Logging of supplemental redo log data is enabled for table SRC_USER01.ECONOMIC_ENTITY. Columns supplementally logged for table SRC_USER01.ECONOMIC_ENTITY: ENTITY_ID. Logging of supplemental redo log data is enabled for table SRC_USER01.GDP_BY_YEAR. Columns supplementally logged for table SRC_USER01.GDP_BY_YEAR: ENTITY_ID, GDP_YEAR. Logging of supplemental redo log data is enabled for table SRC_USER01.GDP_GROWTH_BY_YEAR. Columns supplementally logged for table SRC_USER01.GDP_GROWTH_BY_YEAR: ENTITY_ID, GDP_YEAR. GGSCI (host01) 5> exit [user01@host01 ggs_trg]$ |
Note that you can add transaction data for an individual table or for wildcards. The wildcards can be for a whole schema, but there is a better way to do whole schemas. There is no harm in adding transaction data twice.
The transaction data has been enabled for all user tables involved with Oracle GoldenGate.
3.5 Creating Column Definitions (defgen)
Create the column mapping from source to target tables using the OS utility.
This utility is required if the tables have a different (heterogeneous) structure, but is still highly recommended even if the tables have the same (homogeneous) structure. If they do have the same structure, you may be able to use the AssumeTargetDefs parameter instead of the SourceDefs parameter. This is covered later.
Please review the File and Process Naming Conventions in the Overview Topic.
| Host01 - Linux |
[user01@host01 ~]$ cd ~/oracle/ggs_src [user01@host01 ggs_src]$ ./ggsci Oracle GoldenGate Command Interpreter for Oracle Version 11.2.1.0.3 14400833 OGGCORE_11.2.1.0.3_PLATFORMS_120823.1258_FBO Linux, x64, 64bit (optimized), Oracle 11g on Aug 23 2012 20:20:21 Copyright (C) 1995, 2012, Oracle and/or its affiliates. All rights reserved. GGSCI (host01) > Edit Param defgen -- defgen column definitions for src_user01.* from host01 (a) to host02 (b) DefsFile dirdef/twest.def, Purge UserID oggadm@ogg11r2, Password Welcome1 Table src_user01.*; GGSCI (host01) > Exit [user01@host01 ggs_src] ./defgen paramfile dirprm/defgen.prm *********************************************************************** Oracle GoldenGate Table Definition Generator for Oracle ... many lines omitted for clarity ... DefsFile dirdef/twest.def, Purge UserID oggadm@ogg11r2, Password ******** Table src_user01.*; Expanding wildcard src_user01.*: Retrieving definition for SRC_USER01.ECONOMIC_ENTITY Retrieving definition for SRC_USER01.GDP_BY_YEAR Retrieving definition for SRC_USER01.GDP_GROWTH_BY_YEAR Definitions generated for 3 tables in dirdef/twest.def [user01@host01 ggs_src]$ |
You can create definitions for a single table, multiple tables (using wildcards), an entire schema, or multiple schemas at a time. Having "excess" (that is, unused by Oracle GoldenGate) definitions in the file is not a problem. You may want to examine the contents of dirdef/twest.def before sending it over to host02.
Copy the files from source host01 to target host02.
Use whatever method you wish to copy the .def files to the target dirdef directory: cut-n-paste, scp, ftp, and so on. The example will use secure shell copy (scp). Do not break the command line, the scp command is entered all on one line.
| Host01 - Linux |
[user01@host01 ggs_src] scp dirdef/twest.def user01@host02:/home/user01/oracle/ggs_trg/dirdef The authenticity of host 'host02 (127.0.0.1)' can't be established. RSA key fingerprint is 82:e2:d9:21:9e:a7:9c:7d:d8:c9:cf:92:ee:80:13:9e. Are you sure you want to continue connecting (yes/no)? yes Warning: Permanently added 'host02' (RSA) to the list of known hosts. user01@host02's password: ******** twest.def 100% 1816 1.8KB/s 00:00 [user01@host01 ggs_src]$ |
Of course you replace the asterisks with your password, for example Welcome1.
Make sure the files arrived intact on host02 in the proper directory.
| Host02 - Linux |
[user01@host02 ~]$ cd ~/oracle/ggs_trg [user01@host02 ggs_trg]$ ls -l dirdef total 4 -rw-r--r--. 1 user01 oggusers 1816 Oct 2 18:29 twest.def [user01@host02 ggs_trg]$ |
The column definitions are created and copied. If the table structure changes, you need to do this again.
4. Configuring Data Capture Using Extract
- -- :
- A comment. Useful for self-documenting files, as well as storing parameters inline that may be used later.
- SETENV:
- You have to define SID (the Database System Identifier) somewhere: either in the .profile or in the UserID or here in the SETENV. Only one place is necessary, though if you define it here it overrrides any previous definitions in the .profile.
- ExtTrail:
- Not really "external" if you are using a data pump.
- ew:
- A sequence number is appendeded to this alphabetic prefix. For example, the trail files are named ew000000, ew000001, ew000002, and so on, rolling over as the file grows beyond the specified size (default 100 MB).
- Table:
- You can have multiple Table statements, each with one table name (with optional wildcards) resolving to zero, one, or more tables. You cannot use a wildcard in the schema name.
Data capture, also known as Extract, is done on the source side. A primary extract is required; a secondary extract, known as a Data Pump, is optional but highly recommended. To configure data capture, perform the following steps:
4.1 Configuring the Primary Extract on the Oracle source instance
On source host01, create the primary Extract parameter file.
Using the naming conventions discussed in the Overview, the path/filename.ext will be dirprm/extwest.prm. The path and extension will be added automatically.
| Host01 - Linux |
[user01@host01 ~] cd ~/oracle/ggs_src [user01@host01 ogg01] ./ggsci Oracle GoldenGate Command Interpreter for Oracle ... many lines omitted for clarity ... GGSCI (host01) 1> Obey startup.oby ... many lines omitted for clarity ... but make sure everything started. GGSCI (host01) > Edit Param extwest -- Primary Extract from host01 to host02 -- SETENV(ORACLE_SID = "ogg11r2") EXTRACT extwest USERID oggadm@ogg11r2, PASSWORD Welcome1 EXTTRAIL ./dirdat/ew TABLE src_user01.*; GGSCI (host01) > |
Some of the parameters:
It is possible to encrypt the passwords in the file, but that is beyond the scope of this exercise.
You can check your work by entering View Param extwest any time.
Create the Extract group and the local Extract trail file.
| Host01 - Linux |
GGSCI (host01) > Add Extract extwest, TranLog, Begin Now EXTRACT added. GGSCI (host01) > Add ExtTrail ./dirdat/ew, Extract extwest, Megabytes 5 EXTTRAIL added. GGSCI (host01) > |
The Megabytes 5 is optional. The default is 100 Megabytes.
The primary Extract has been created and configured, but not started. Leave GGSCI running for the next step.
4.2 Configuring the Data Pump
Create the secondary Extract (data pump) parameter file.
Using the naming conventions discussed in the Overview,
the path/filename.ext
will be dirprm/pwest.prm.
The path and extension will be added automatically.
The remote host RmtHost
is host02 in the
example. If you are running this OBE in one
environment simulating both source and target, be sure
to have host02
defined in /etc/hosts,
poinitng to 127.0.0.1.
Perform a ping
host02 to make sure that the address is
correctly resolved to 127.0.0.1.
If the hostname host02
cannot be resolved into a valid IP Address, the
Extract pump won't start.
| Host01 - Linux |
GGSCI (host01) > Edit Param pwest
-- Data pump (secondary Extract) from host01 to host02
Extract pwest
RmtHost host02, MgrPort 7909, Compress
RmtTrail ./dirdat/pe
Passthru
Table src_user01.*;

GGSCI (host01) >
|
This Table schema is the source.
You can check your work by entering View Param pwest any time.
Create the data pump group and the remote Extract trail file.
| Host01 - Linux |
GGSCI (host01) > Add Extract pwest, ExtTrailSource ./dirdat/ew EXTRACT added. GGSCI (host01) > Add RmtTrail ./dirdat/pe, Extract pwest, Megabytes 5 RMTTRAIL added. GGSCI (host01) > |
The Megabytes 5 is optional. The default is 100 Megabytes.
The data pump reads from the local trail file ew and writes to the remote trail file pe. The remote trail file that will be created will be named dirdat/pe000000, then when that one fills up the next will be dirdat/pe000001, then dirdat/pe000002, and so on. Since the two sets of trail files are on different hosts, the files could be named the same thing (for example ew). The different file name is chosen just to illustrate that the parameter RmtTrail is creating a different trail file.
The secondary Extract has been created and configured, but not started. Leave GGSCI running for the next step.
4.3 Verify the Extract Processes (Optional)
Make sure the Extract processes were created and registered correctly.
| Host01 - Linux |
GGSCI (host01) > Info All

Program     Status      Group       Lag at Chkpt  Time Since Chkpt

MANAGER     RUNNING
EXTRACT     STOPPED     EXTWEST    00:00:00      00:03:24
EXTRACT     STOPPED     PWEST      00:00:00      00:01:22

GGSCI (host01) >
|
Since nothing other than the Manager is started yet, the Extract Status should say STOPPED.
Make sure the trail files were created and registered correctly.
| Host01 - Linux |
GGSCI (host01) > Info ExtTrail *

       Extract Trail: dirdat/ew
             Extract: EXTWEST
               Seqno: 0
                 RBA: 0
           File Size: 5M

       Extract Trail: dirdat/pe
             Extract: PWEST
               Seqno: 0
                 RBA: 0
           File Size: 5M


GGSCI (host01) >
|
Since nothing has started yet, the sequence numbers (Seqno) and relative byte addresses (RBA) should say 0.
Leave GGSCI running for the next step.
5. Configuring Data Delivery to the Oracle Weblogic Server
When the replication target is a database, data delivery is accomplished by a Replicat process. In the case of a JMS target, however, data delivery occurs through an Extract process. To configure data delivery, perform the following steps:
5.1 Configuring the shell environment for GGSCI
The GGSCI process running the Oracle Goldengate Manager must have access to several Linux shared objects stored in subdirectories under the JDK. In addition, the manager process needs access to the JAVA_HOME directory location. The environment variables LD_LIBRARY_PATH and JAVA_HOME must be set BEFORE GGSCI is launched from the command line. Connect to the Green Host (host02) as user user01, change directory to ~/oracle/ggs_trg and create the file setenv.sh. Define the environment variables LD_LIBRARY_PATH and JAVA_HOME in that file, which will be sourced before invoking GGSCI. The example below uses vi as the editor of choice, but feel free to use gedit instead. Be sure that if you installed a later version of Java that you edit the directory name appropriately. (For example, JDK 1.7_09 instead of jdk1.7.0_07)
| Host02 - Linux |
[user01@host02 ~]$ cd ~/oracle/ggs_trg [user01@host02 ggs_trg]$ vi setenv.sh LD_LIBRARY_PATH=/u01/app/oracle/product/11.2.0/dbhome_1/lib:/usr/java/jdk1.7.0_07/jre/lib/amd64:/home/user01/oracle/ggs_trg:/usr/java/jdk1.7.0_07/jre/lib/amd64/server export LD_LIBRARY_PATH JAVA_HOME=/usr/java/jdk1.7.0_07 export JAVA_HOME |
Leave the editor saving the file setenv.sh. Source the file using the dot command (.) and verify that the environment variables have been correctly set by echoing their values on the screen.
| Host02 - Linux |
[user01@host02 ggs_trg]$ . setenv.sh [user01@host02 ggs_trg]$ echo $JAVA_HOME /usr/java/jdk1.7.0_07 [user01@host02 ggs_trg]$ echo $LD_LIBRARY_PATH /u01/app/oracle/product/11.2.0/dbhome_1/lib:/usr/java/jdk1.7.0_07/jre/lib/amd64:/home/user01/oracle/ggs_trg:/usr/java/jdk1.7.0_07/jre/lib/amd64/server |
You can now start GGSCI, which will inherit the environment variables which will allow the process to locate the required shared objects needed by the Oracle GoldenGate User Exit to work.
IMPORTANT! If the GGSCI Manager process is running, you must stop it and restart it so that it inherits the environment variables set by sourcing the file setenv.sh.
| Host02 - Linux |
[user01@host02 ggs_trg]$ ./ggsci racle GoldenGate Command Interpreter for Oracle Version 11.2.1.0.1 OGGCORE_11.2.1.0.1_PLATFORMS_120423.0230_FBO Linux, x64, 64bit (optimized), Oracle 11g on Apr 23 2012 08:32:14 Copyright (C) 1995, 2012, Oracle and/or its affiliates. All rights reserved. GGSCI (host02) 1 > info all Program Status Group Lag at Chkpt Time Since Chkpt MANAGER RUNNING GGSCI (host02) 2 > stop mgr Manager process is required by other GGS processes. Are you sure you want to stop it (y/n)? y Sending STOP request to MANAGER ... Request processed. Manager stopped. GGSCI (host02) 3 > start mgr Manager started. GGSCI (host02) 4 > |
If the manager process was not running, you can now start it before configuring the JAVAUE delivery Extract.
5.2 Configuring the JAVAUE Extract
On target Green Host, create the data delivery Extract parameter file.
| Host02 - Linux |
GGSCI (host02) > Obey startup.oby ... many lines omitted for clarity ... but make sure everything started. GGSCI (host02) > Edit Param javaue -- Delivery from host01 to host02 EXTRACT javaue setEnv ( GGS_USEREXIT_CONF = "dirprm/javaue.properties" ) GetEnv (JAVA_HOME) GetEnv (PATH) GetEnv (LD_LIBRARY_PATH) GetEnv (LIBPATH) CUserExit libggjava_ue.so CUSEREXIT PASSTHRU INCLUDEUPDATEBEFORES sourceDefs ./dirdef/twest.def getUpdateBefores TABLE src_user01.*; GGSCI (host02) > |
Leave the GGSCI
session open, open a terminal window, change directory
to ~/oracle/ggs_trg/dirprm
and configure the javaue.properties
file.
| Host02 - Linux |
[user01@host02 ggs_trg]$ cd ~/oracle/ggs_trg/dirprm [user01@host02 dirprm]$ vi javaue.properties ### javaue.properties (GoldenGate Java Extract properties file) gg.handlerlist=myjms1 java.naming.provider.url=t3://localhost:7001 java.naming.factory.initial=weblogic.jndi.WLInitialContextFactory java.naming.security.principal=weblogic java.naming.security.credentials=WebLogic12c gg.handler.myjms1.type=jms gg.handler.myjms1.destination=myq gg.handler.myjms1.connectionFactory=mycf gg.handler.myjms1.format=xml ### native library config ### goldengate.userexit.nochkpt=TRUE goldengate.userexit.timestamp=utc goldengate.log.logname=cuserexit goldengate.log.level=INFO goldengate.log.tofile=true goldengate.userexit.writers=javawriter #javawriter.stats.time=3600 #javawriter.stats.numrecs=10000 javawriter.stats.full=TRUE javawriter.stats.display=TRUE javawriter.bootoptions=-Xmx512m -Xms256m -Djava.class.path=ggjava/ggjava.jar:dirprm:/u01/app/oracle/middleware/wlserver_12.1/server/lib/wlfullclient.jar |
exit the editor saving the file.
Inside the GGSCI session, create the data delivery Extract process.
| Host02 - Linux |
GGSCI (host02) > ADD extract javaue, extTrailSource dirdat/pe
EXTRACT added.

GGSCI (host02) >
|
You can check your work by entering View Param javaue any time.
Make sure the Extract process was created and registered correctly.
| Host02 - Linux |
GGSCI (host02) > Info All

Program     Status      Group       Lag at Chkpt  Time Since Chkpt

MANAGER     RUNNING
EXTRACT     STOPPED     JAVAUE      00:00:00      00:00:33

GGSCI (host02) >
|
Since nothing other than the Manager is started yet, the Extract Status should say STOPPED.
5.3 Starting All Processes
Start all Extract processes on the source.
| Host01 - Linux |
GGSCI (host01) > Start Extract *

Sending START request to MANAGER ...
EXTRACT EXTWEST starting

Sending START request to MANAGER ...
EXTRACT PWEST starting

GGSCI (host01) >
|
Alternatively, you could have entered, Start *, or Start e01* and Start p01*.
Start the Extract process on the target.
| Host02 - Linux |
GGSCI (host02) > Start Extract javaue

Sending START request to MANAGER ...
EXTRACT JAVAUE starting

GGSCI (host02) >
|
Alternatively, you could have entered, Start *, or Start jav*.
Display information about all processes on the target.
Display summary information.
| Host02 - Linux |
GGSCI (host02) > Info All

Program     Status      Group       Lag at Chkpt  Time Since Chkpt

MANAGER     RUNNING
EXTRACT     RUNNING     JAVAUE      00:00:00      00:00:03

GGSCI (host02) >
|
Display more information.
| Host02 - Linux |
GGSCI (host02) > Info javaue

EXTRACT    JAVAUE    Last Started 2012-10-13 23:27   Status RUNNING
Checkpoint Lag       00:00:00 (updated 00:42:15 ago)
Log Read Checkpoint  File dirdat/pe000000
                     First Record  RBA 0


GGSCI (host02) >
|
Display the most detailed information.
| Host02 - Linux |
GGSCI (host02) > Info javaue, Detail

EXTRACT    JAVAUE    Last Started 2012-10-13 23:27   Status RUNNING
Checkpoint Lag       00:00:00 (updated 00:42:56 ago)
Log Read Checkpoint  File dirdat/pe000000
                     First Record  RBA 0
                     *** No TARGETEXTTRAILS specified yet ***

  Extract Source                          Begin             End

  dirdat/pe000000                         * Initialized *   First Record
  dirdat/pe000000                         * Initialized *   First Record


Current directory    /home/user01/oracle/ggs_trg

Report file          /home/user01/oracle/ggs_trg/dirrpt/JAVAUE.rpt
Parameter file       /home/user01/oracle/ggs_trg/dirprm/javaue.prm
Checkpoint file      /home/user01/oracle/ggs_trg/dirchk/JAVAUE.cpe
Process file         /home/user01/oracle/ggs_trg/dirpcs/JAVAUE.pce
Stdout file          /home/user01/oracle/ggs_trg/dirout/JAVAUE.out
Error log            /home/user01/oracle/ggs_trg/ggserr.log


GGSCI (host02) >
|
In all cases, the Status should be RUNNING, and the time since the last update or checkpoint should be under 10 seconds.
Display information about all processes on the source.
Display summary information.
| Host01 - Linux |
GGSCI (host01) > Info All

Program     Status      Group       Lag at Chkpt  Time Since Chkpt

MANAGER     RUNNING
EXTRACT     RUNNING     EXTWEST      00:14:14      00:00:00
EXTRACT     RUNNING     PWEST        00:00:00      00:04:09


GGSCI (host01) >
|
Display detailed information.
| Host01 - Linux |
GGSCI (host01) > Info Extract * EXTRACT EXTWEST Last Started 2012-10-14 14:25 Status RUNNING Checkpoint Lag 00:00:00 (updated 00:00:09 ago) Log Read Checkpoint Oracle Redo Logs 2012-10-14 15:09:46 Seqno 35, RBA 12338688 SCN 0.1821954 (1821954) EXTRACT PWEST Last Started 2012-10-13 23:25 Status RUNNING Checkpoint Lag 00:00:00 (updated 00:00:03 ago) Log Read Checkpoint File dirdat/ew000001 2012-10-14 14:25:25.580137 RBA 1102 GGSCI (host01) > Exit [user01@host01 ggs_src]$ |
Similar to the Extract on the Green Host, the Status should be RUNNING, and the time since the last update or checkpoint should be under 10 seconds.
Everything should show a status of RUNNING. The source tables are still empty. No data has flowed yet, nothing has replicated yet.
6. Generating Data
There is a difference in how you replicate an existing table (more complicated) versus starting with a new empty table (simpler). To generate sample data against an empty set of tables, perform the following steps:
6.1 Generating INSERTs (Initial Load)
Run the SQL script to INSERT rows.
On source host01, at the OS prompt, run the economic_entity.sql script in sqlplus, which populates the ECONOMIC_ENTITY table.
| Host01 - Linux |
[user01@host01 ~]$ cd ~/ddl [user01@host01 ddl]$ sqlplus src_user01/Welcome1@ogg11r2 @economic_entity.sql SQL*Plus: Release 11.2.0.3.0 Production on Wed Sep 19 19:27:03 2012 Copyright (c) 1982, 2011, Oracle. All rights reserved. Connected to: Oracle Database 11g Enterprise Edition Release 11.2.0.3.0 - 64bit Production With the Partitioning, OLAP, Data Mining and Real Application Testing options 1 row created. ... many lines omitted for clarity ... 1 row created. Commit complete. SQL> |
There should not be any errors. Leave SQL*Plus running for the next step.
Verify that the rows were inserted into the source tables.
| Host01 - Linux |
SQL> SELECT count(*) FROM economic_entity; COUNT(*) ---------- 235 SQL> set linesize 132 SQL> column economic_entity format a60 SQL> set pagesize 999 SQL> SELECT * FROM economic_entity WHERE continent = 'EUROPE' order by ENTITY_ID; ENTITY_ID ECONOMIC_ENTITY CONTINENT ---------- --------------------------------------- -------------------- 48 Austria EUROPE 49 Belgium-Luxembourg EUROPE 50 Belgium EUROPE 51 Luxembourg EUROPE 52 Denmark EUROPE 53 Finland EUROPE 54 France EUROPE 55 Germany EUROPE 56 Greece EUROPE 57 Ireland EUROPE 58 Italy EUROPE 59 Netherlands EUROPE 60 Portugal EUROPE 61 Spain EUROPE 62 Sweden EUROPE 63 United Kingdom EUROPE 65 Bulgaria EUROPE 66 Cyprus EUROPE 67 Czech Republic EUROPE 68 Estonia EUROPE 69 Hungary EUROPE 70 Latvia EUROPE 71 Lithuania EUROPE 72 Malta and Gozo EUROPE 73 Poland EUROPE 74 Romania EUROPE 75 Slovakia EUROPE 76 Slovenia EUROPE 77 Other Europe EUROPE 79 Iceland EUROPE 80 Norway EUROPE 81 Switzerland EUROPE 83 Albania EUROPE 84 Bosnia Herzegovina EUROPE 85 Croatia EUROPE 86 Macedonia EUROPE 87 Serbia EUROPE 89 Russia EUROPE 90 Ukraine EUROPE 92 Armenia EUROPE 93 Azerbaijan EUROPE 94 Belarus EUROPE 95 Georgia EUROPE 96 Kazakhstan EUROPE 97 Kyrgyzstan EUROPE 98 Moldova EUROPE 99 Tajikistan EUROPE 100 Turkmenistan EUROPE 101 Uzbekistan EUROPE 49 rows selected. SQL> exit [user01@host01 ddl]$ |
Verify that the source GGSCI Extract processes are still running.
On source Red Host (host01), enter the following command:
| Host01 - Linux |
[user01@host01 ~]$ cd ~/oracle/ggs_src [user01@host01 ggs_src]$ ./ggsci GGSCI (host01) 1> Info All Program Status Group Lag at Chkpt Time Since Chkpt MANAGER RUNNING EXTRACT RUNNING EXTWEST 00:00:00 00:00:07 EXTRACT RUNNING PWEST 00:00:00 00:00:08 GGSCI (host01) 2> Exit [user01@host01 ggs_src]$ |
If the Status says ABENDED, then check the process reports (covered as a later topic) to see what the error was.
Verify that the target GGSCI Extract process is still running.
On the Green Host (host02), GGSCI should still be running. Enter the following command:
| Host02 - Linux |
GGSCI (host02) > Info All Program Status Group Lag at Chkpt Time Since Chkpt MANAGER RUNNING EXTRACT RUNNING JAVAUE 00:00:00 00:00:07 GGSCI (host02) > Exit [user01@host02 ggs_trg]$ |
If the Status says ABENDED, then check the process reports (covered as a later topic) to see what the error was.
Verify that 235 JMS messages arrived on the JMS queue myq .
Open your browser to URL
http://localhost:7001/console/ and log in. The userid
is weblogic,
and the password is WebLogic12c.
In Domain Structure, click Services
> Messaging > JMS Modules > SystemModule-0
> Queue-0, then click the Monitoring
tab.
Select the queue named SystemModule-0|Queue-0.
Click Show
messages.

The Summary of JMS Messages dialog window appears. Click on any message ID to display its contents.
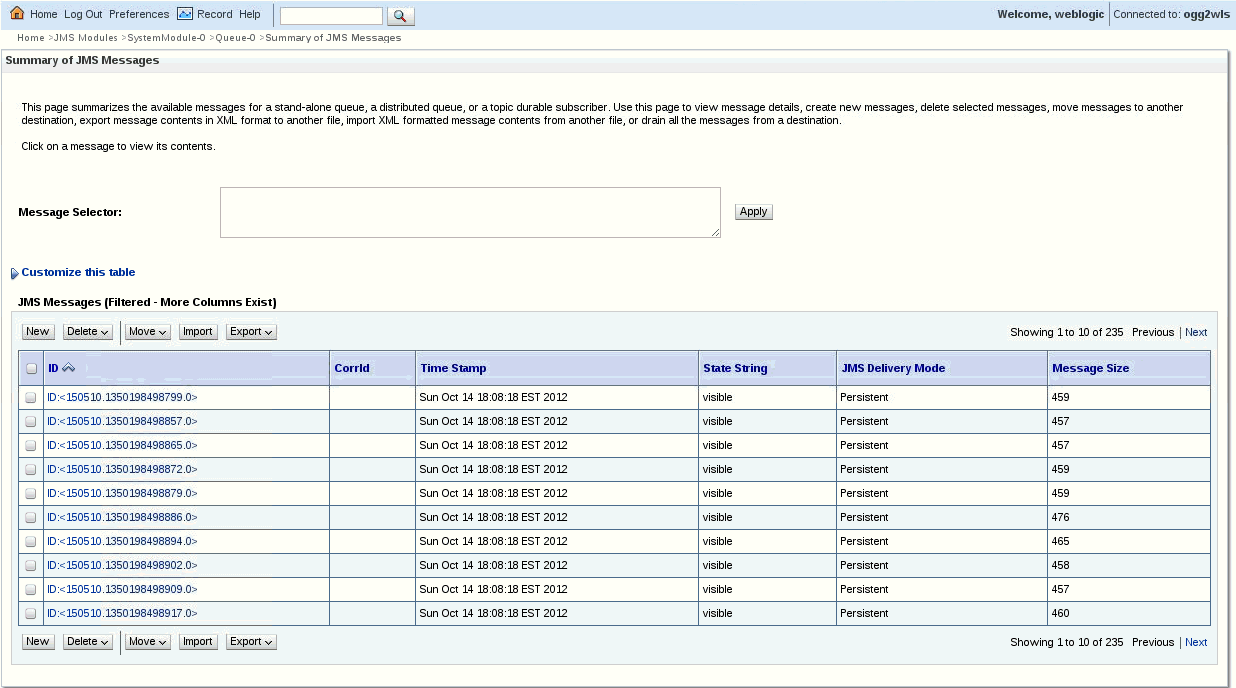
The JMS Message shows the Before and After image values for each column.

Upload more economic data to the replication source (ggs_src on the Red Host.) The ddl directory contains several SQL scripts. The gdp_by_year.sql and gdp_growth_by_year.sql scripts upload World GDP data into the GDP_BY_YEAR and GDP_GROWTH_BY_YEAR tables, respectively.
On the Red Host, at the OS prompt, run the two SQL scripts.
| Host01 - Linux |
[user01@host01 ~]$ cd ~/ddl [user01@host01 ddl]$ sqlplus src_user01/Welcome1@ogg11r2 @gdp_by_year.sql SQL*Plus: Release 11.2.0.3.0 Production on Wed Oct 3 01:14:24 2012 Copyright (c) 1982, 2011, Oracle. All rights reserved. Connected to: Oracle Database 11g Enterprise Edition Release 11.2.0.3.0 - 64bit Production With the Partitioning, OLAP, Data Mining and Real Application Testing options 1 row created. ... many lines omitted for clarity ... 1 row created. commit; Commit complete. SQL> @gdp_growth_by_year.sql 1 row created. ... many lines omitted for clarity ... 1 row created. commit; SQL> select count(*) from gdp_by_year; COUNT(*) ---------- 705 SQL> select count(*) from gdp_growth_by_year; COUNT(*) ---------- 705 SQL> exit [user01@host01 ddl]$ |
Verify that all rows have generated an identical
number of JMS messages queued to the myq queue. You
should find a total of 1645 messages on the SystemModule-0|Queue-0
queue.
235 messages were originated by the insertions into
the ECONOMIC_ENTITY
table, 705 messages were originated by the insertions
into the GDP_BY_YEAR
table and another 705 messages
were originated by the insertions into the GDP_GROWTH_BY_YEAR
table, for a total of 1645 JMS messages.

6.2 Generating UPDATEs/DELETEs
On the Red Host, at the OS prompt, connect to sqlplus as the
src_user01
user.
In the ECONOMIC_ENTITY
table all economic entities which are not single
countries, like "East Asia Less Japan" or "Other
Western Europe" are listed as "N/A"
in the CONTINENT
column. Change "N/A"
to "Not a continent".
In addition, the GDP_BY_YEAR
and GDP_GROWTH_BY_YEAR
tables contain economic data for the years 2005-2007.
Erase all entries pertaining to the year 2005.
| Host01 - Linux |
[user01@host01 ~] sqlplus src_user01/Welcome1@ogg11r2 SQL*Plus: Release 11.2.0.3.0 Production on Wed Oct 3 01:14:24 2012 Copyright (c) 1982, 2011, Oracle. All rights reserved. Connected to: Oracle Database 11g Enterprise Edition Release 11.2.0.3.0 - 64bit Production With the Partitioning, OLAP, Data Mining and Real Application Testing options SQL> UPDATE ECONOMIC_ENTITY set CONTINENT = 'Not a continent' WHERE CONTINENT = 'N/A'; 36 rows updated. SQL> DELETE FROM GDP_BY_YEAR where GDP_YEAR=2005; 235 rows deleted. SQL> DELETE FROM GDP_GROWTH_BY_YEAR where GDP_YEAR=2005; 235 rows deleted. SQL>commit; Commit complete. SQL>exit [user01@host01 ~]$ |
Verify that the rows updated and deleted in the
source tables generated a corresponding number of JMS
messages.
The UPDATE DML
statement performed on the ECONOMIC_ENTITY
table generated 36 modifications, while 235 rows were
deleted from the GDP_BY_YEAR
table
and another 235 were deleted from the GDP_GROWTH_BY_YEAR
table, for a total of 506 JMS messages. Adding 506 to
1645, which is the number of JMS messages generated so
far, gives 2151.
You should find 2151 JMS messages in the SystemModule-0|Queue-0
queue.

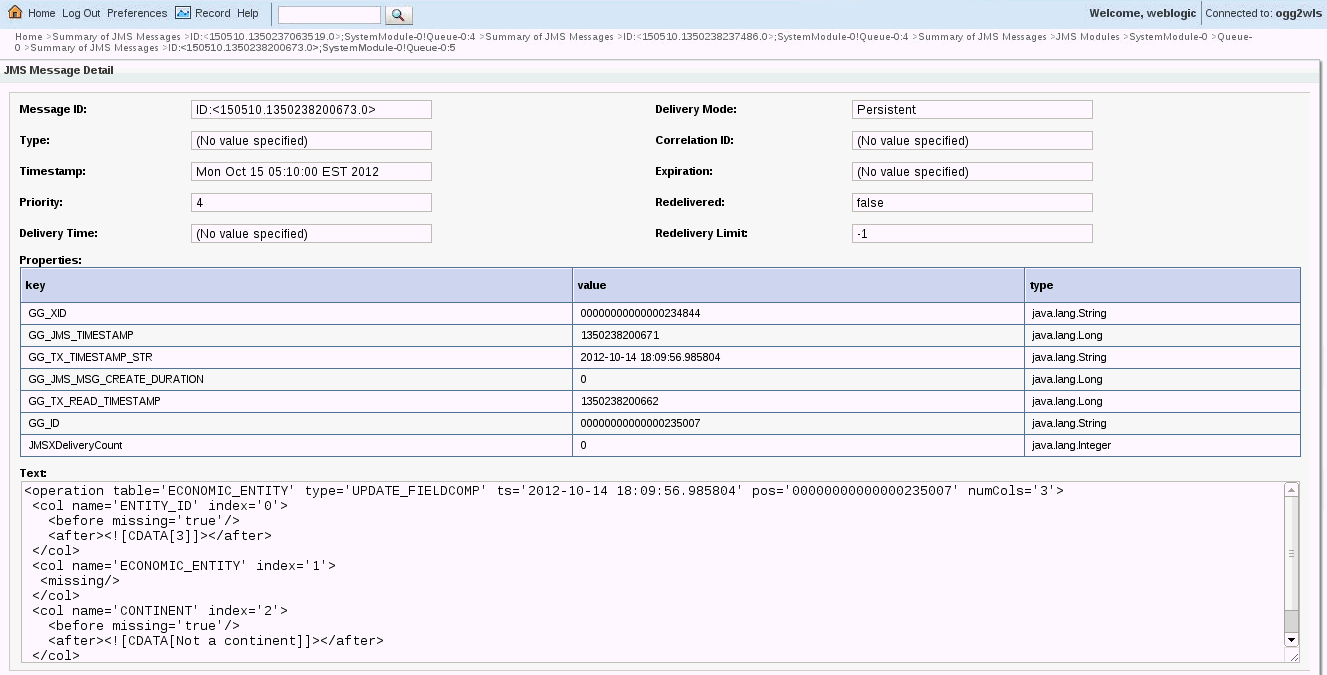
Browse the JMS queue and try and find a message which shows an UPDATE to see how the UPDATE operation is reported in the XML generated for the JMS message.
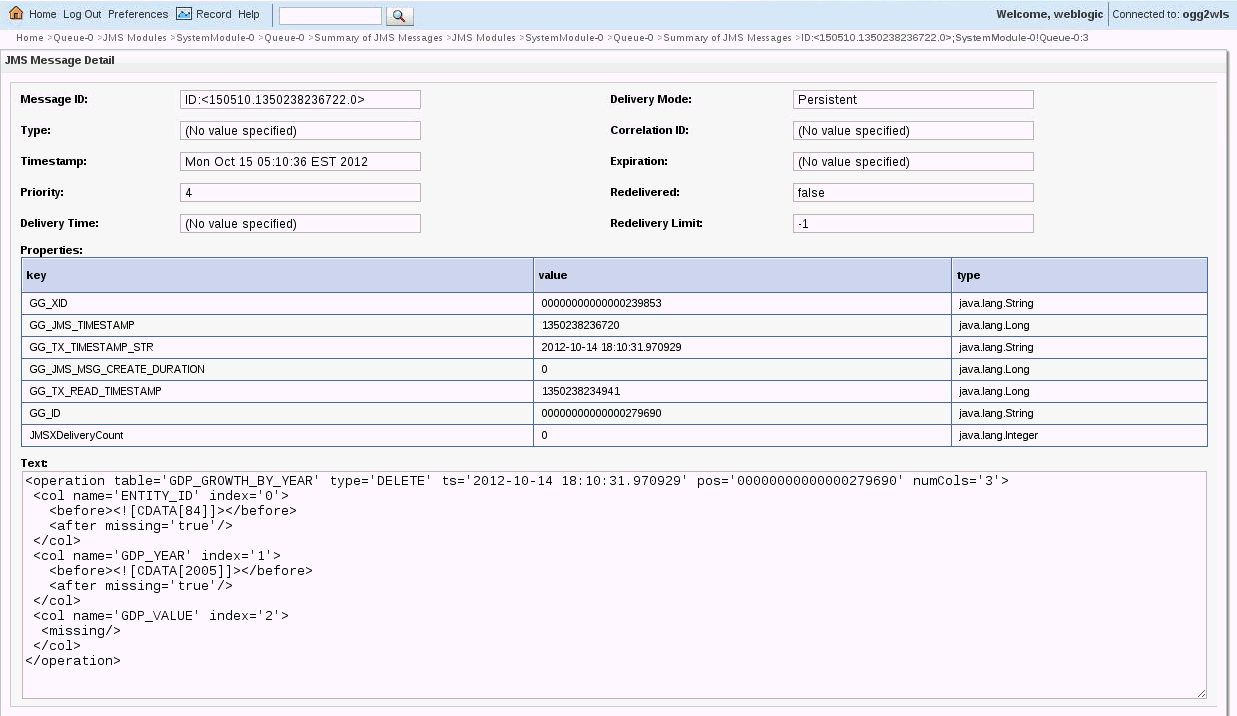
Browse the JMS queue and try and find a message which shows a DELETE to see how the DELETE operation is reported in the XML generated for the JMS message.
Verify that the source GGSCI Extract processes are still running.
On source hostA, enter the following command:
| Host01 - Linux |
[user01@host01 ~]$ cd ~/oracle/ggs_src [user01@host01 ggs_src]$ ./ggsci Oracle GoldenGate Command Interpreter for Oracle Version 11.2.1.0.0 OGGCORE_11.2.1.0.0_PLATFORMS_120131.1910_FBO Linux, x64, 64bit (optimized), Oracle 11g on Feb 1 2012 00:55:59 Copyright (C) 1995, 2012, Oracle and/or its affiliates. All rights reserved. GGSCI (host01) 1> Info All Program Status Group Lag at Chkpt Time Since Chkpt MANAGER RUNNING EXTRACT RUNNING EXTWEST 00:00:00 00:00:07 EXTRACT RUNNING PWEST 00:00:00 00:00:05 GGSCI (host01) 2> |
Verify that the GGSCI Delivery Extract process is still running.
On the Green Host target GGSCI should still be running. Enter the following command:
| Host02 - Linux |
[user01@host02 ~]$ cd ~/oracle/ggs_trg [user01@host02 ggs_trg]$ ./ggsci Oracle GoldenGate Command Interpreter for Oracle Version 11.2.1.0.0 OGGCORE_11.2.1.0.0_PLATFORMS_120131.1910_FBO Linux, x64, 64bit (optimized), Oracle 11g on Feb 1 2012 00:55:59 Copyright (C) 1995, 2012, Oracle and/or its affiliates. All rights reserved. GGSCI (host02) > Info All Program Status Group Lag at Chkpt Time Since Chkpt MANAGER RUNNING EXTRACT RUNNING JAVAUE 00:00:00 00:00:07 GGSCI (host02) > |
The Status should still be RUNNING.
This completes the configuration and operation of the basic heterogeneous unidirectional functionality of Oracle GoldenGate: Extract, Data Pump, and Delivery Extract.
7. Managing the Oracle GoldenGate Environment
There are reports generated during and after the processes run. These reports contain information, warnings, and errors (if any) related to that run of the process. To view the reports, perform the following steps:
7.1 Viewing Reports
View the process reports on the source.
View the process report for the Extract.
| Host01 - Linux |
GGSCI (host01) > Send Extract extwest, Report Sending REPORT request to EXTRACT EXTWEST... Request processed. GGSCI (host01) > View Report extwest *********************************************************************** Oracle GoldenGate Capture for Oracle Version 11.2.1.0.0 OGGCORE_11.2.1.0.0_PLATFORMS_120131.1910_FBO Linux, x64, 64bit (optimized), Oracle 11g on Feb 1 2012 01:04:34 Copyright (C) 1995, 2012, Oracle and/or its affiliates. All rights reserved. Starting at 2012-10-14 14:25:24 *********************************************************************** ... many lines omitted for clarity ... |
You can press [Enter] to move one line at a time, or press [Space] to move a page at a time. Go to the bottom of the report.
You can do the same thing to view the Data Pump pwest report.
View the process reports for the target.
On the Green Host target, view the process reports for the Delivery Extract JAVAUE.
| Host02 - Linux |
GGSCI (host02) > Send Extract javaue, Report Sending REPORT request to EXTRACT JAVAUE ... Request processed. GGSCI (host02)> View Report javaue *********************************************************************** Oracle GoldenGate Capture for Oracle Version 11.2.1.0.0 OGGCORE_11.2.1.0.0_PLATFORMS_120131.1910_FBO Linux, x64, 64bit (optimized), Oracle 11g on Feb 1 2012 01:04:34 Copyright (C) 1995, 2012, Oracle and/or its affiliates. All rights reserved. Starting at 2012-10-13 23:27:14 *********************************************************************** |
You can press [Enter] to move one line at a time, or press [Space] to move a page at a time. Go to the bottom of the report.
The count of inserts/updates/deletes for the Replicat should match the number for the Extract. If there were any discards, they should be examined for the reason why they were discarded.
Reports are generated when you ask for a report to be sent (as you just did), or when a process stops. Reports are named/numbered processname.rpt for the most current one, and then processname0.rpt, processname1.rpt, processname2.rpt for the most recent, up to processname9.rpt for the oldest. As each new report is created, all the old reports "move down one" getting renamed/renumbered until the oldest is discarded. No more than 11 (the most recent with no number and the previous 0-9) are kept at a time.
7.2 Viewing Statistics
View statistics for the source Extract.
| Host01 - Linux |
GGSCI (host01) > Send Extract extwest, Stats

Sending STATS request to EXTRACT EXTWEST ...

Start of Statistics at 2012-10-15 06:26:37.

Output to dirdat/ew:

Extracting from SRC_USER01.ECONOMIC_ENTITY to SRC_USER01.ECONOMIC_ENTITY:

*** Total statistics since 2012-10-14 18:08:17 ***
        Total inserts                                    235.00
        Total updates                                     36.00
        Total deletes                                      0.00
        Total discards                                     0.00
        Total operations                                 271.00

*** Daily statistics since 2012-10-15 00:00:00 ***
        Total inserts                                      0.00
        Total updates                                     36.00
        Total deletes                                      0.00
        Total discards                                     0.00
        Total operations                                  36.00

*** Hourly statistics since 2012-10-15 06:00:00 ***

        No database operations have been performed.

*** Latest statistics since 2012-10-14 18:08:17 ***
        Total inserts                                    235.00
        Total updates                                     36.00
        Total deletes                                      0.00
        Total discards                                     0.00
        Total operations                                 271.00

Extracting from SRC_USER01.GDP_BY_YEAR to SRC_USER01.GDP_BY_YEAR:

*** Total statistics since 2012-10-14 18:08:17 ***
        Total inserts                                    705.00
        Total updates                                      0.00
        Total deletes                                    235.00
        Total discards                                     0.00
        Total operations                                 940.00

*** Daily statistics since 2012-10-15 00:00:00 ***
        Total inserts                                    705.00
        Total updates                                      0.00
        Total deletes                                    235.00
        Total discards                                     0.00
        Total operations                                 940.00

*** Hourly statistics since 2012-10-15 06:00:00 ***

        No database operations have been performed.

*** Latest statistics since 2012-10-14 18:08:17 ***
        Total inserts                                    705.00
        Total updates                                      0.00
        Total deletes                                    235.00
        Total discards                                     0.00
        Total operations                                 940.00

Extracting from SRC_USER01.GDP_GROWTH_BY_YEAR to SRC_USER01.GDP_GROWTH_BY_YEAR:

*** Total statistics since 2012-10-14 18:08:17 ***
        Total inserts                                    705.00
        Total updates                                      0.00
        Total deletes                                    235.00
        Total discards                                     0.00
        Total operations                                 940.00

*** Daily statistics since 2012-10-15 00:00:00 ***
        Total inserts                                    705.00
        Total updates                                      0.00
        Total deletes                                    235.00
        Total discards                                     0.00
        Total operations                                 940.00

*** Hourly statistics since 2012-10-15 06:00:00 ***

        No database operations have been performed.

*** Latest statistics since 2012-10-14 18:08:17 ***
        Total inserts                                    705.00
        Total updates                                      0.00
        Total deletes                                    235.00
        Total discards                                     0.00
        Total operations                                 940.00

End of Statistics.


GGSCI (host01) >
|
The command Stats extwest does the same thing. If the process stops for any reason, all statistics are lost.
View statistics for the target delivery Extract JAVAUE.
| Host02 - Linux |
GGSCI (host02) > Send Extract javaue, Stats

Sending STATS request to EXTRACT JAVAUE ...

Start of Statistics at 2012-10-15 06:30:32.

Output by User Exit:

Extracting from SRC_USER01.GDP_BY_YEAR to SRC_USER01.GDP_BY_YEAR:

*** Total statistics since 2012-10-14 18:08:18 ***
        Total inserts                                    705.00
        Total updates                                      0.00
        Total deletes                                    235.00
        Total discards                                     0.00
        Total operations                                 940.00

*** Daily statistics since 2012-10-15 00:00:00 ***

        No database operations have been performed.

*** Hourly statistics since 2012-10-15 06:00:00 ***

        No database operations have been performed.

*** Latest statistics since 2012-10-14 18:08:18 ***
        Total inserts                                    705.00
        Total updates                                      0.00
        Total deletes                                    235.00
        Total discards                                     0.00
        Total operations                                 940.00

Extracting from SRC_USER01.GDP_GROWTH_BY_YEAR to SRC_USER01.GDP_GROWTH_BY_YEAR:

*** Total statistics since 2012-10-14 18:08:18 ***
        Total inserts                                    705.00
        Total updates                                      0.00
        Total deletes                                    235.00
        Total discards                                     0.00
        Total operations                                 940.00

*** Daily statistics since 2012-10-15 00:00:00 ***

        No database operations have been performed.

*** Hourly statistics since 2012-10-15 06:00:00 ***

        No database operations have been performed.

*** Latest statistics since 2012-10-14 18:08:18 ***
        Total inserts                                    705.00
        Total updates                                      0.00
        Total deletes                                    235.00
        Total discards                                     0.00
        Total operations                                 940.00

Extracting from SRC_USER01.ECONOMIC_ENTITY to SRC_USER01.ECONOMIC_ENTITY:

*** Total statistics since 2012-10-14 18:08:18 ***
        Total inserts                                    235.00
        Total updates                                     36.00
        Total deletes                                      0.00
        Total discards                                     0.00
        Total operations                                 271.00

*** Daily statistics since 2012-10-15 00:00:00 ***

        No database operations have been performed.

*** Hourly statistics since 2012-10-15 06:00:00 ***

        No database operations have been performed.

*** Latest statistics since 2012-10-14 18:08:18 ***
        Total inserts                                    235.00
        Total updates                                     36.00
        Total deletes                                      0.00
        Total discards                                     0.00
        Total operations                                 271.00

End of Statistics.

GGSCI (host02) >
|
There are other kinds of statistics that are available as well.
7.3 Stopping and Deleting Processes
Do not do this yet, but if you ever needed to stop an individual process, you simply enter Stop Extract extwest, or Stop * to stop all of them on a host. Obviously you would replace extwest with the process name you wish to stop.
Do not do this yet, but if you ever needed to delete an individual process, you must first make sure you are connected to the database (DBLogin) and you enter Delete Extract extwest, or Delete ER * to delete all of them on a host. GGSCI will prompt you, "Are you sure?" and you say, y. You can eliminate the question by appending an exclamation point to the end of the command. For example, Delete ER * ! assumes the answer is "yes."
Summary
- Install and configure the Oracle GoldenGate software
- Configure and start Extract, Data Pump, and data delivery Extract processes in a heterogeneous environment, comprising the Oracle RDBMS and the Oracle Weblogic Server
- Generate sample data and test the validity of the replication
- Manage the reports produced by the processes
- Oracle GoldenGate Product Documentation version 11.2.1 (E35209-01) and other older versions
- Courses from Oracle University
- External Web sites for related information
- To learn more about Oracle GoldenGate, refer to additional OBEs in the Oracle Learning Library
- Lead Curriculum Developer: Elio Bonazzi.
- Other Contributors: Richard Johnston, Hadi Koesnodihardjo, Simon Whitworth, Joe deBuzna, Chris Lawless.
Oracle GoldenGate can do far more than was demonstrated in this simple exercise.
In this tutorial, you have learned how to:
Resources
Credits
To help navigate this Oracle by Example, note the following:
- Hiding Header Buttons:
- Click the Title to hide the buttons in the header. To show the buttons again, simply click the Title again.
- Topic List Button:
- A list of all the topics. Click one of the topics to navigate to that section.
- Expand/Collapse All Topics:
- To show/hide all the detail for all the sections. By default, all topics are collapsed.
- Show/Hide All Images:
- To show/hide all the screenshots. By default, all images are displayed.
- Print:
- To print the content. The content currently displayed or hidden will be printed.
To navigate to a particular section in this tutorial, select the topic from the list.