Installing Oracle Entitlements Server 11g, Release 2
Overview
- 1 CPU @ 1.5 GHz
- 2-4 GB RAM
- 15 GB of free disk space
- Repository Creation Utility (RCU) 11g, release 2 (11.1.2.0.0) (download)
- Oracle Administration Server 11g, release 2 (11.1.2.0.0) (download 1) (download 2)
- Oracle Security Modules Client 11g, release 2 (11.1.2.0.0) (download)
Purpose
This tutorial covers how to install Oracle Entitlements Server (OES) 11g, release 2, including the OES Administration and OES Client software products. This tutorial also covers how to create a sample Oracle WebLogic Server (WLS) domain that is OES -enabled with a WLS- Security Module (SM).
Time to Complete
Approximately 1 hour
Introduction
You may have difficulty installing OES if you have never used it. After performing this tutorial, you will be able to get started quickly with OES-based applications.
Hardware and Software Requirements
The following is a list of hardware requirements: Note: Before clicking any of the download links, open the http://edelivery.oracle.com website in your browser, sign in using your account, and accept any agreements that allow you to use the site and download software. The links work after this process.
- All download files used for installation are unpackaged within the /stage/fmw folder. You perform the downloading and unpackaging yourself.
- Java Platform, Standard Edition (Java SE) is installed in/u01/app/oracle/fmw/jdk1.6.0_34.
- Middleware Home is /u01/app/oracle/fmw.
- WebLogic Home is /u01/app/oracle/fmw/wlserver_10.3.
- IDM Home is $MW_HOME/Oracle_IDM1.
- OES Client Home is $MW_HOME/oes_client.
- OES Administration Server domain is $MW_HOME/user_projects/domains/oes_admin.
- Your WebLogic domains are created in $MW_HOME/user_projects/domains.
Assumptions
The following are assumed for the remainder of this tutorial:
- Have access to a 64-bit processor operating system and architecture. This hardware is required because OES 11g, release 2 is available only for 64-bit systems. Your installed platform should be based only on 64-bit products. This tutorial is based on Oracle Linux 5.5.
- Have installed a supported version of Oracle Database as per the documentation.
- Have installed the latest version of Java 2 Platform, Standard Edition (J2SE) 1.6.0 (preferably 1.6.0_34 or later).
- Have installed WLS 10.3.6.
- Have downloaded and unpackaged Repository Creation Utility 11g, release 2 for creating database schemas for Oracle products.
- Have downloaded the OES 11g, release 2 Administration and Client product binaries (11.1.2.0.0).
- Have downloaded the Repository Creation Utility 11g, release 2 product binaries (11.1.2.0.0).
Prerequisites
Before starting this tutorial, you should:
Installing the OES Administration Server
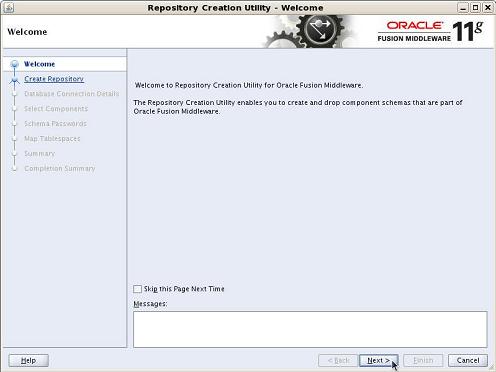
- On the Welcome page, click Next.
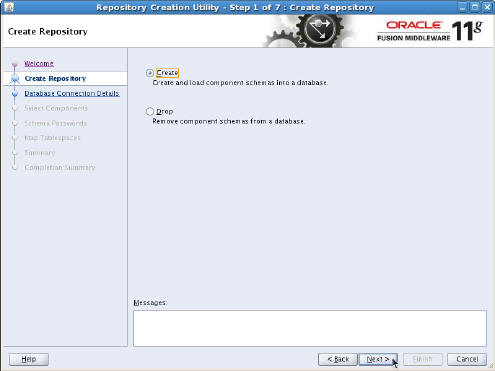
- On the Create Repository page, accept Create (the
default option) and click Next.
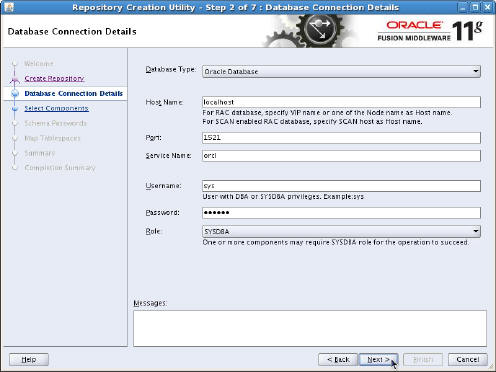
- On the Database Connection Details page, accept
the default setting for Database Type (Oracle
Database), enter the fields in the following table,
and then click Next.
Parameter Value Host Name: localhost Port: 1521 Service Name: orcl Username: sys Password: oracle Role: SYSDBA
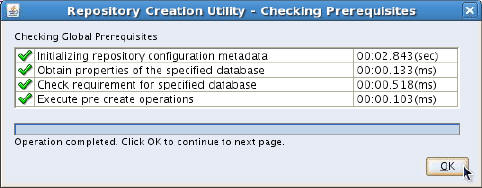
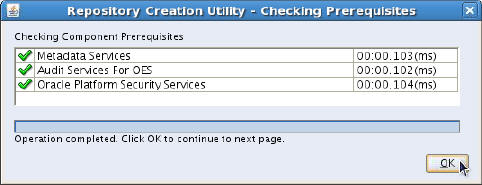
- In the Repository Creation Utility - Checking
Prerequisites dialog box, ensure that all
prerequisite checks passed (look for green check marks in the first column), and click OK.
- On the Select Components page, perform the following actions:
- accept the default setting of DEV for the "Create a new Prefix" value.
- In the Component column, expand AS Common Schemas and the select Metadata Services, Audit Services for OES, and Oracle Platform Security Services (OPSS) check boxes.
- Ensure that the schema names are DEV_MDS for Metadata Services and DEV_OPSS for Oracle Platform Security Services.
- Click Next.
- In the Repository Creation Utility - Checking
Prerequisites dialog box, click OK.
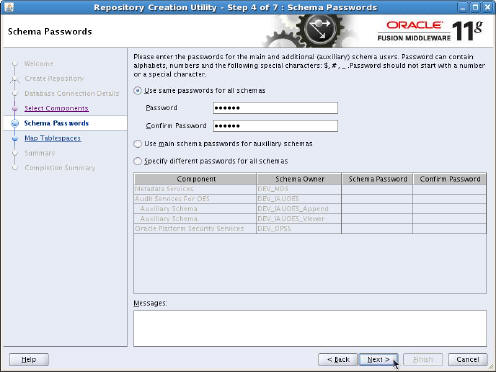
- On the Schema Passwords page, accept the default
selection ("Use the same passwords for all
schemas"), enter
oraclein the Password and Confirm Password fields, and then click Next.
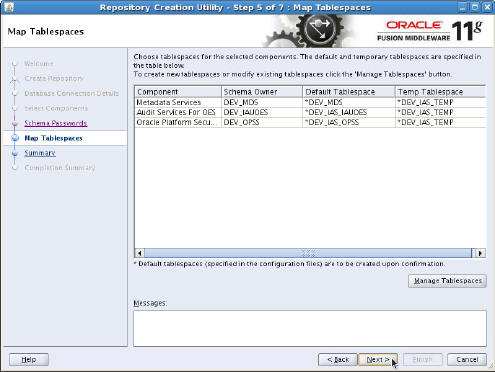
- On the Map Tablespaces page, a row for Metadata
Services and OPSS is displayed.
Because OES provides authorization features for OPSS, use this entry to create the schema used for OES.
Perform the following actions:- Accept the default settings for tablespaces.
- Click Next.
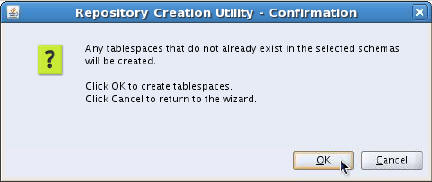
- The Repository Creation Utility dialog box
indicates that the tablespaces do not exist and will
be created.
Click OK to create the tablespaces.
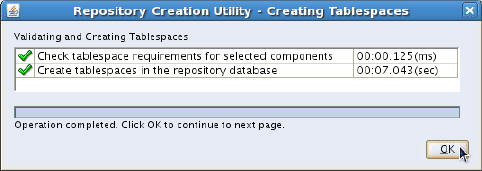
- In the Repository Creation Utility - Creating
Tablespaces dialog box, click OK.
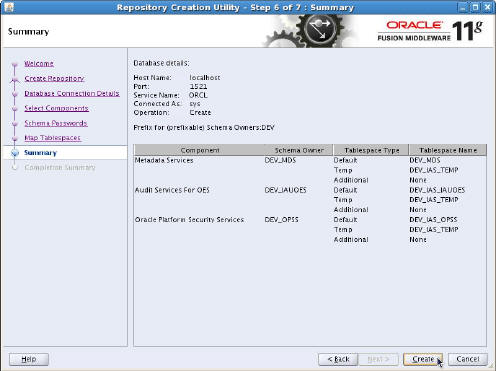
- On the Summary page, confirm that the settings
are correct and click Create.
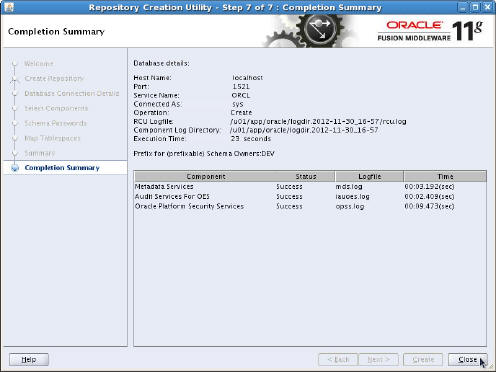
- On the Completion Summary page, confirm
successful creation of the component schemas and
click Close.
- Welcome: Click Next.

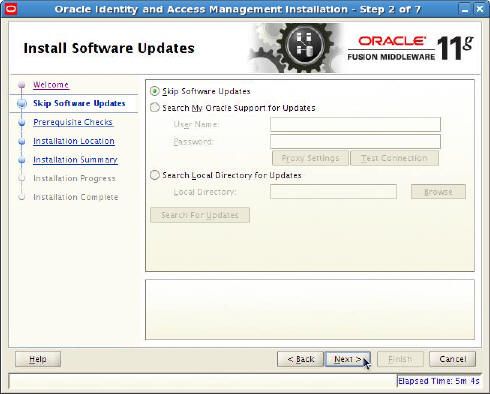
- Install Software Updates: Select Skip Software
Updates and click Next.
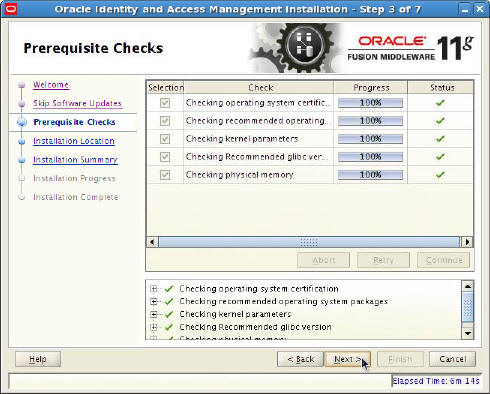
- Prerequisite Checks: Verify that all
prerequisites passed and click Next.
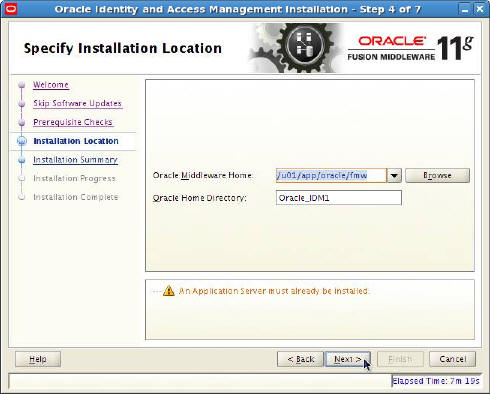
- Specify Installation Location: Accept the default
values (
/u01/app/oracle/fmwfor Oracle Middleware Home andOracle_IDM1for Oracle Home Directory) and click Next.
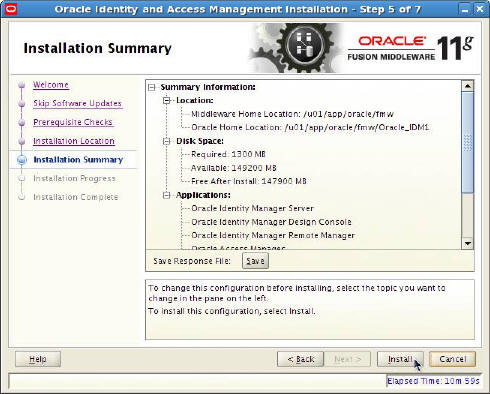
- Installation Summary: Click Install.
- Installation Progress: When the Progress bar
displays 100%, click Next.

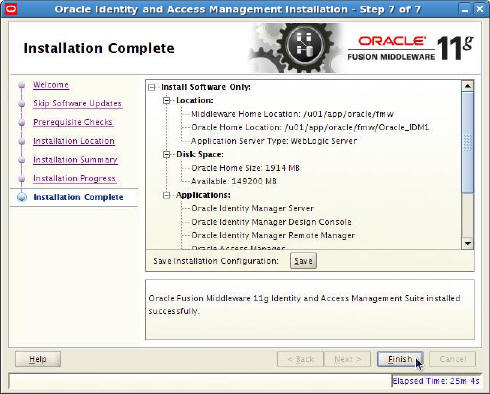
- Installation Complete: Click Finish.
Installing the OES Administration Server involves multiple steps. First, the database must be running. Next, you run RCU to create the database schema used by OES. Then, you install and configure the OES Administration Server, including installing the product bits, creating the OES Administration Server domain, configuring the server to use a database security store, and running the server.
Creating the OES Database Schema
You create the OES database schema by using RCU.
In a terminal window, execute RCU as follows:
$ /stage/fmw/rcu/bin/rcu
After the RCU installation window opens, perform the following steps to create the OES schemas:

Now that you have created the OES database schemas, you can install the OES Administration Server.
Installing OES Administration Software
In a terminal window, execute the OES Administration Server installation program as follows:
$ cd
/stage/fmw/iamsuite/Disk1
$ ./runInstaller -jreLoc /u01/app/oracle/fmw/jdk1.6.0_34
The OES Administration installation window opens. Perform the following steps to install the OES Administration Server product:
Now that you have installed the OES Administration product, you can install, create, and configure the OES Administration Server domain.
Creating and Configuring the OES Administration Server Domain
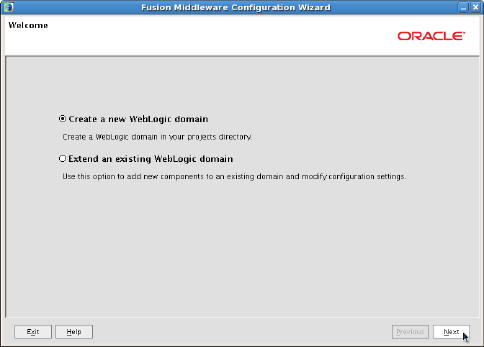
- Welcome: Select "Create a new WebLogic domain"
and click Next.
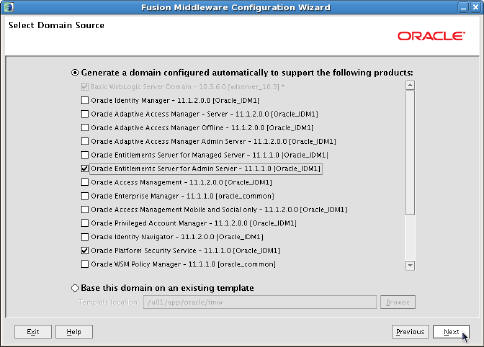
- Select Domain Source: Select Oracle Entitlements
Server for Admin Server - 11.1.1.0 [Oracle_IDM1],
accept the automatically selected Oracle Platform
Security Service - 11.1.1.0 [Oracle_IDM1], and click
Next.
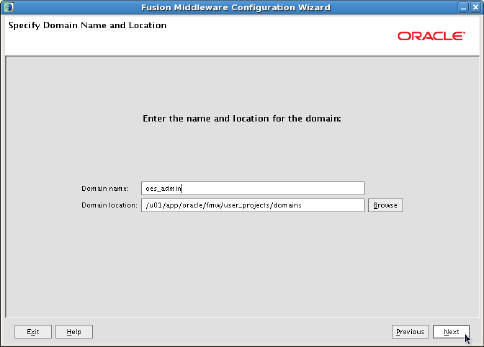
- Specify Domain Name and Location: Enter the
following information and then click Next:
Domain name: oes_admin
Domain location: /u01/app/oracle/fmw/user_projects/domains
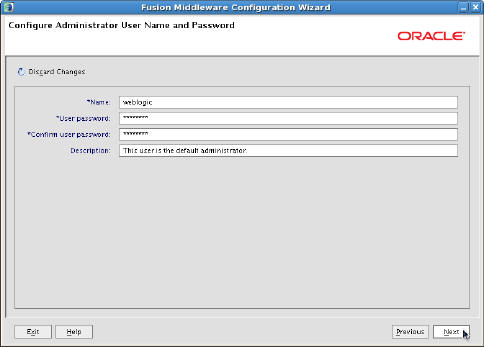
- Configure Administrator User Name and Password:
Enter the following information and then click Next:
Name: weblogic
User password: welcome1
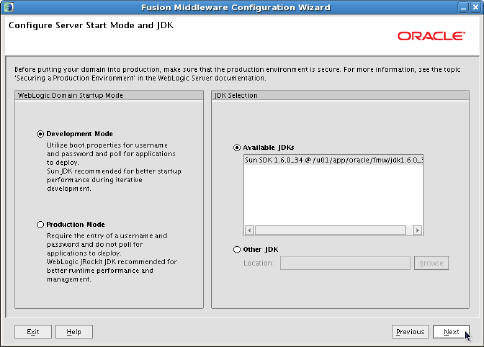
- Configure Server Start Mode and JDK: Perform the following actions:
- Select Development Mode.
- Select Available JDKs and Sun SDK 1.6.0_34.
- Click Next.
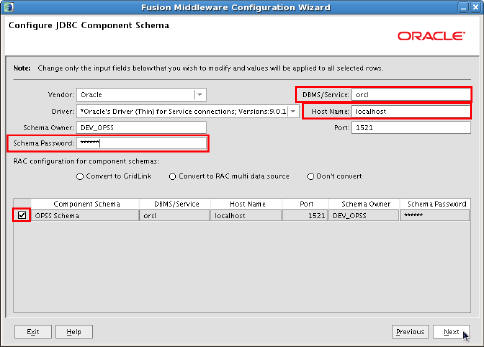
- Configure JDBC Component Schema: Perform the following actions:
- Select the OPSS Schema.
- Enter localhost as the host name.
- Enter oracle as the Schema password.
- Leave the rest as the default values.
- Click Next.
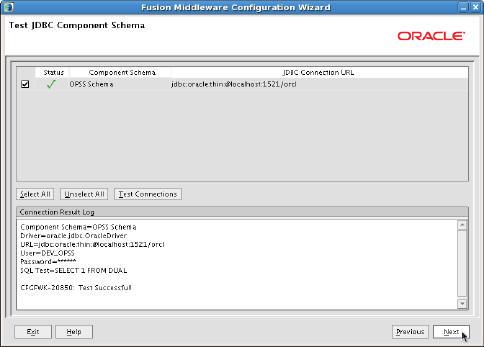
- Test JDBC Component Schema: Verify that the test
was successful and click Next.
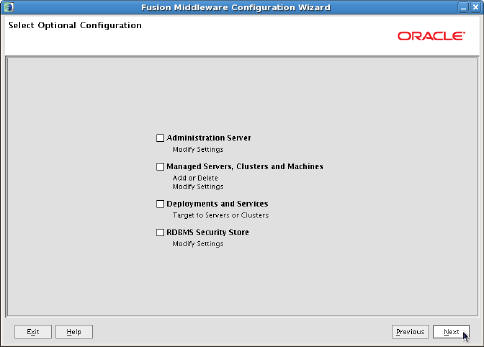
- Select Optional Configuration: Click Next.
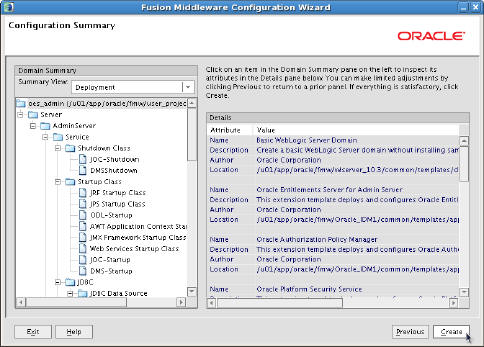
- Configuration Summary: Click Create and wait for
installation processing to complete.
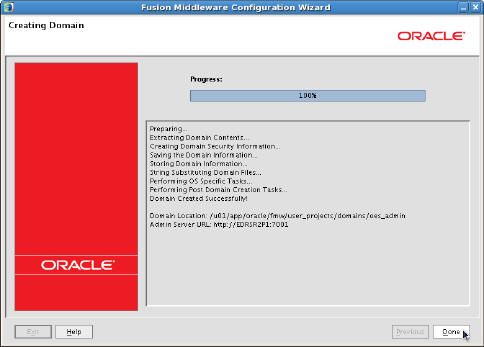
- Creating Domain: When the Progress bar displays
100%, click Done.
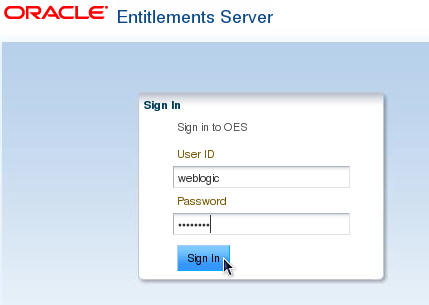
- Open a web browser and go to http://localhost:7001/apm.

- Log in to the OES APM console by using weblogic
as the user ID and welcome1
as the password.
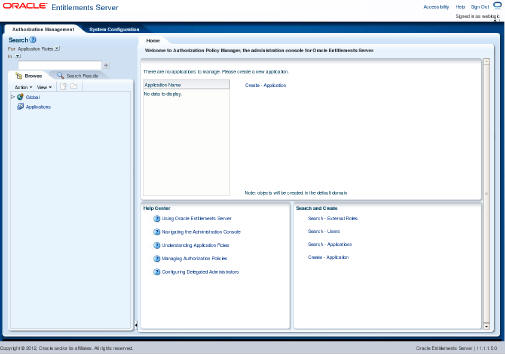
The main APM page is displayed.
After installing the OES Administration software, you must create a domain that contains the OES Administration domain and then configure it to work with a database security store. You deploy the OES Application Policy Management (APM) Administration Console on the AdminServer of this domain.
Creating the OES Administration Domain
In a terminal window, perform the following commands to create the OES Administration Domain:
$ cd
/u01/app/oracle/fmw/Oracle_IDM1/common/bin
$ ./config.sh
After the Configuration Wizard opens, perform the following steps to create the domain:
Now that you have created the OES Administration domain, you can configure it to use the database for the security store.
Assume the following:
$MW_HOME=/u01/app/oracle/fmw
$IDM_HOME=$MW_HOME/Oracle_IDM1
In a terminal window, perform the following commands to configure OES to use a database security store:
$ cd
/u01/app/oracle/fmw/Oracle_IDM1/common/bin
$ $MW_HOME/oracle_common/common/bin/wlst.sh
$MW_HOME/Oracle_IDM1/common/tools/configureSecurityStore.py
-d $MW_HOME/user_projects/domains/oes_admin -t
DB_ORACLE -j cn=jpsroot -m create -p oracle
| Option | Purpose |
|---|---|
| -d | Specifies the name and location of the OES Administration domain |
| -t | Specifies the type of security store to
associate with the OES Administration server |
| -j | Specifies the jpsroot value of the OES security store |
| -m | Specifies the tool mode, which indicates if the tool will create, drop, or join an OES database security store |
| -p | Specifies the password to the OES database |
Your output should be similar to the following:
Initializing WebLogic Scripting Tool (WLST) ...
Welcome to WebLogic Server Administration Scripting Shell
Type help() for help on available commands
Info: Data source is:
opss-DBDS
Info: DB JDBC driver: oracle.jdbc.OracleDriver
Info: DB JDBC URL:
jdbc:oracle:thin:@localhost:1521/orcl
INFO: Found persistence provider
"org.eclipse.persistence.jpa.PersistenceProvider".
OpenJPA will not be used.
INFO: Found persistence provider
"org.eclipse.persistence.jpa.PersistenceProvider".
OpenJPA will not be used.
[oracle.security.jps.internal.config.db.DbCredStoreServiceConfigurator]
checkServiceSetup - done
Dec 1, 2012 3:52:30 AM
oracle.security.jps.internal.config.ldap.LdapCredStoreServiceConfigurator
schemaCompatibleHandler
INFO: Credential store schema upgrade not required.
Store Schema version 11.1.1.6.0 is compatible to the
seed schema version 11.1.1.4.0
[oracle.security.jps.internal.config.db.DbCredStoreServiceConfigurator]
checkServiceSchema - Store schema has been seeded
completely
[oracle.security.jps.internal.config.db.DbCredStoreServiceConfigurator]
updateServiceConfiguration - done
Dec 1, 2012 3:52:36 AM
oracle.security.jps.internal.tools.utility.JpsUtilMigrationCredImpl
migrateCredentialData
INFO: Migration of Credential Store data in
progress.....
Dec 1, 2012 3:52:37 AM
oracle.security.jps.internal.tools.utility.JpsUtilMigrationCredImpl
migrateCredentialData
INFO: Migration of Credential Store data completed,
Time taken for migration is 00:00:00
[oracle.security.jps.internal.config.db.DbCredStoreServiceConfigurator]
migrateData - done
[oracle.security.jps.internal.config.db.DbCredStoreServiceConfigurator]
testJpsService - done
[oracle.security.jps.internal.config.db.DbKeyStoreServiceConfigurator]
checkServiceSetup - done
Dec 1, 2012 3:52:37 AM
oracle.security.jps.internal.config.ldap.LdapKeyStoreServiceConfigurator
schemaCompatibleHandler
INFO: Keystore schema upgrade not required. Store
Schema version 11.1.1.6.0 is compatible to the seed
schema version 11.1.1.4.0
[oracle.security.jps.internal.config.db.DbKeyStoreServiceConfigurator]
checkServiceSchema - Store schema has been seeded
completely
[oracle.security.jps.internal.config.db.DbKeyStoreServiceConfigurator]
updateServiceConfiguration - done
[oracle.security.jps.internal.config.db.DbKeyStoreServiceConfigurator]
migrateData - done
[oracle.security.jps.internal.config.db.DbKeyStoreServiceConfigurator]
testJpsService - done
[oracle.security.jps.internal.config.db.DbPolicyStoreServiceConfigurator]
checkServiceSetup - done
Dec 1, 2012 3:52:40 AM
oracle.security.jps.internal.config.ldap.LdapPolicyStoreServiceConfigurator
schemaCompatibleHandler
INFO: Policy schema upgrade not required. Store Schema
version 11.1.1.6.0 is compatible to the seed schema
version 11.1.1.4.0
[oracle.security.jps.internal.config.db.DbPolicyStoreServiceConfigurator]
checkServiceSchema - Store schema has been seeded
completely
[oracle.security.jps.internal.config.db.DbPolicyStoreServiceConfigurator]
updateServiceConfiguration - done
WLS ManagedService is not up running. Fall back to use
system properties for configuration.
Dec 1, 2012 3:52:52 AM
oracle.security.jps.internal.tools.utility.destination.apibased.JpsDstPolicy
migrateData
INFO: Migration of Admin Role Members started
[oracle.security.jps.internal.config.db.DbPolicyStoreServiceConfigurator]
migrateData - done
Dec 1, 2012 3:52:53 AM
oracle.security.jps.internal.tools.utility.destination.apibased.JpsDstPolicy
migrateData
INFO: Migration of Admin Role Members completed in
00:00:00
[oracle.security.jps.internal.config.db.DbPolicyStoreServiceConfigurator]
testJpsService - done
[oracle.security.jps.internal.config.db.DbAuditStoreServiceConfigurator]
checkServiceSetup - done
Dec 1, 2012 3:52:53 AM
oracle.security.jps.internal.config.ldap.LdapAuditServiceConfigurator
schemaCompatibleHandler
INFO: Audit store schema upgrade not required. Store
Schema version 11.1.1.6.0 is compatible to the seed
schema version 11.1.1.4.0
[oracle.security.jps.internal.config.db.DbAuditStoreServiceConfigurator]
checkServiceSchema - Store schema has been seeded
completely
[oracle.security.jps.internal.config.db.DbAuditStoreServiceConfigurator]
updateServiceConfiguration - done
Dec 1, 2012 3:52:53 AM
oracle.security.jps.internal.tools.utility.JpsUtilMigrationAuditStoreImpl
migrateAuditStoreData
INFO: Migration of Audit Store data in progress.....
[oracle.security.jps.internal.config.db.DbAuditStoreServiceConfigurator]
migrateData - done
Dec 1, 2012 3:53:15 AM
oracle.security.jps.internal.tools.utility.JpsUtilMigrationAuditStoreImpl
migrateAuditStoreData
INFO: Migration of Audit Store data completed, Time
taken for migration is 00:00:21
[oracle.security.jps.internal.config.db.DbAuditStoreServiceConfigurator]
testJpsService - done
persist to output:
/u01/app/oracle/fmw/user_projects/domains/oes_admin/config/fmwconfig
- done
INFO: Found persistence provider
"org.eclipse.persistence.jpa.PersistenceProvider".
OpenJPA will not be used.
INFO: Found persistence provider
"org.eclipse.persistence.jpa.PersistenceProvider".
OpenJPA will not be used.
[oracle.security.jps.internal.config.db.DbCredStoreServiceConfigurator]
checkServiceSetup - done
[oracle.security.jps.internal.config.db.DbCredStoreServiceConfigurator]
updateServiceConfiguration - done
[oracle.security.jps.internal.config.db.DbKeyStoreServiceConfigurator]
checkServiceSetup - done
[oracle.security.jps.internal.config.db.DbKeyStoreServiceConfigurator]
updateServiceConfiguration - done
[oracle.security.jps.internal.config.db.DbPolicyStoreServiceConfigurator]
checkServiceSetup - done
[oracle.security.jps.internal.config.db.DbPolicyStoreServiceConfigurator]
updateServiceConfiguration - done
Dec 1, 2012 3:53:25 AM
oracle.security.jps.internal.config.ldap.LdapAuditServiceConfigurator
checkIfConfigurationValid
INFO: Audit store re-association not supported.
[oracle.security.jps.internal.config.db.DbAuditStoreServiceConfigurator]
checkServiceSetup - Audit store re-association not
supported.
persist to output:
/u01/app/oracle/fmw/user_projects/domains/oes_admin/config/fmwconfig
- done
INFO: Found persistence provider
"org.eclipse.persistence.jpa.PersistenceProvider".
OpenJPA will not be used.
Using default context in
/u01/app/oracle/fmw/user_projects/domains/oes_admin/config/fmwconfig/jps-config-migration.xml
file for credential store.
Credential store location :
jdbc:oracle:thin:@localhost:1521/orcl
Credential with map
Oracle-IAM-Security-Store-Diagnostics key Test-Cred
stored successfully!
Credential for map
Oracle-IAM-Security-Store-Diagnostics and key
Test-Cred is:
GenericCredential
Info: diagnostic credential created in the credential
store.
Info: Create operation has completed successfully.
Verifying Installation of OES Administration Software
The easiest way to verify that the installation was successful is to start your newly created OES Administrative domain and log in to the APM Administration Console. if login is successful, the installation process was successful. If the server starts successfully and the APM console application functions properly, the server is properly connected to the database security store. If the installation is not successful, the server does not start or the APM console does not appear after you log in.
In a terminal window, perform the following commands to start the OES Administration Server:
$ cd
$MW_HOME/user_projects/domains/oes_admin
$ ./startWebLogic.sh
Wait for the console to display the following message: "Server started in RUNNING mode."

Perform the following steps to open the OES APM console and verify that it functions correctly:
Keep the server running for the remainder of this tutorial.
Now that the OES Administration domain is ready, you can install the OES SM Client product.
Installing the OES Client
- The OES Administration side manages OES policies and their related artifacts.
- The OES Security Module (SM) Client side provides policy enforcement and decision points for applications.
-
In a terminal window, navigate to the folder containing product binaries and execute the OES SM Client installer:
$ cd /stage/fmw/oes_client/Disk1
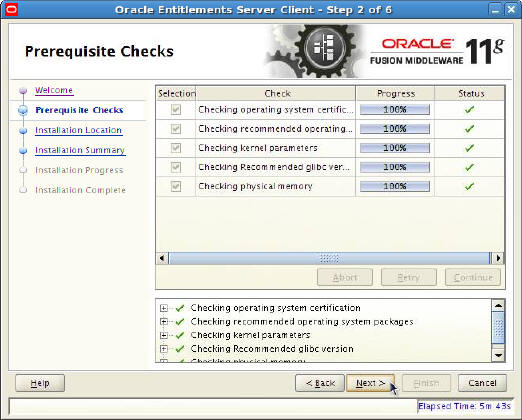
$ ./runInstaller -jreLoc /u01/app/oracle/fmw/jdk1.6.0_34 - Welcome: Click Next.
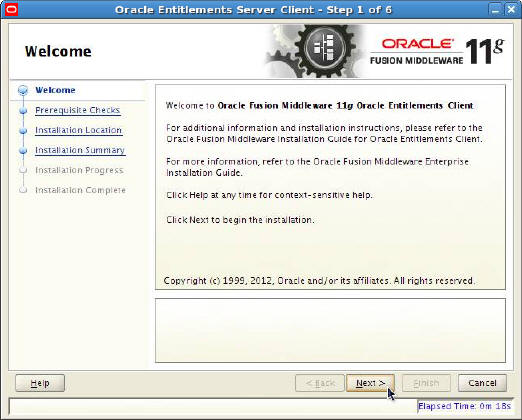
- Prerequisite Checks: Verify that all prerequisites
passed and click Next.
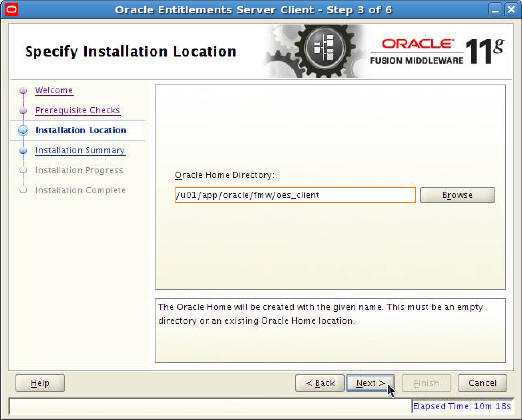
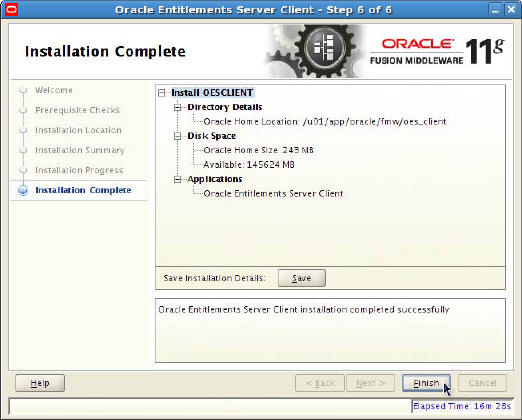
- Installation Location: Enter the Oracle Home Directory:
/u01/app/oracle/fmw/oes_client.
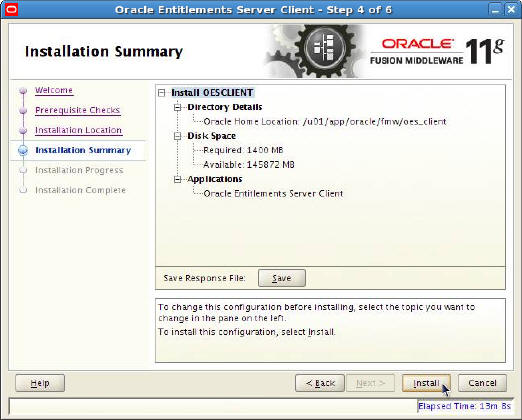
- Installation Summary: Click Install.
- Installation Progress: When the Progress bar displays
100%, click Next.
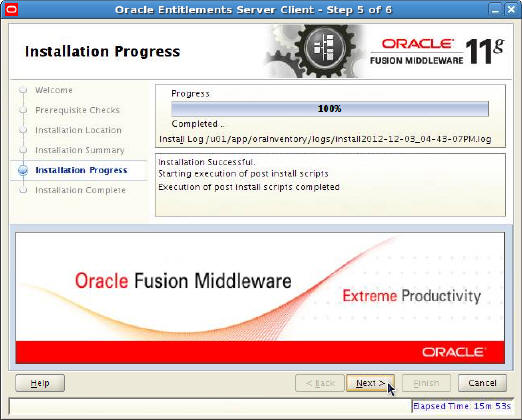
- Installation Complete: Click Finish.
The OES architecture is composed of two components that work together to form the overall solution of the product:
This section shows you how to install the OES SM Client product. This process installs the product's files only on the file system. It does not include any configuration or association with any applications. The next section covers how to create an SM instance by using the OES SM Client product.
Perform the following steps to install the OES SM Client product:
Now that you have installed the OES SM Client product, you are ready to create a new WebLogic domain. You will configure it to use an OES WebLogic SM instance.
Creating and Configuring an OES WLS SM Instance
- The SM configuration file (often referred to as the SMConfig file) contains the configuration used to set up the OES SM aspect of the configuration. It provides the policy distribution, policy decision, and policy enforcement points.
- The WebLogic domain is the application server used to deploy your applications. When creating an OES WebLogic SM, you run WebLogic Configuration Wizard as part of the process.
- Although WebLogic Configuration Wizard runs automatically,
you must select one of the following SM options. This tutorial
shows you how to create a non-JRF WebLogic SM.
- Non-JRF WebLogic SM
- JRF WebLogic SM
- Web Service SM on WebLogic
- Oracle Service Bus (OSB) SM on WebLogic
- Other options for Managed Servers
- Navigate to the OES SM Client bin folder:
$ cd ../bin
- Execute the SMConfigTool as follows to create the
SM instance and invoke the WebLogic domain
Configuration Wizard:
$ ./config.sh -smConfigId people -smType wls -onWLS -serverLocation $WL_HOME -prpFileName ../SMConfigTool/wls_smconfig.prp
First, this creates an SM instance in the $MW_HOME/oes_client/oes_sm_instances folder called people. The first thing you must know about a WebLogic SM is that the files in this folder are mainly ignored and are not used by your WebLogic domain. The files for your domain are created for this type of SM in the $DOMAIN_HOME/config/oeswlssmconfig folder. Each server configured for the domain will have a folder that matches its server name within this folder. Each folder contains the OES SM configuration for that particular server. In this case, there will be only an AdminServer folder because you are creating a single server domain.
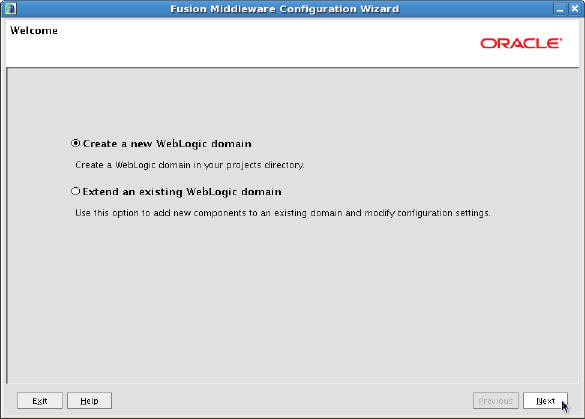
- Welcome: Select "Create a new WebLogic domain"
and click Next.
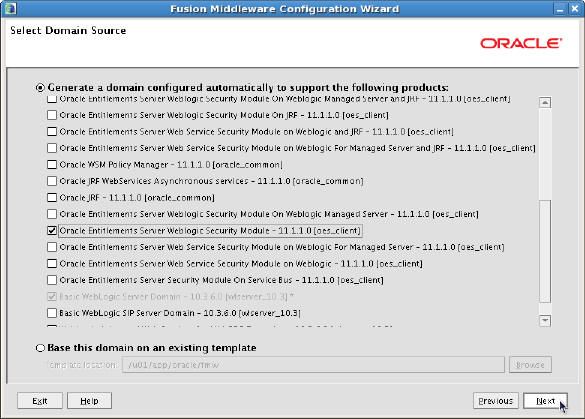
- Select Domain Source: Select Oracle Entitlements
Server WebLogic Security Module - 11.1.1.0
[oes_client] and click Next.
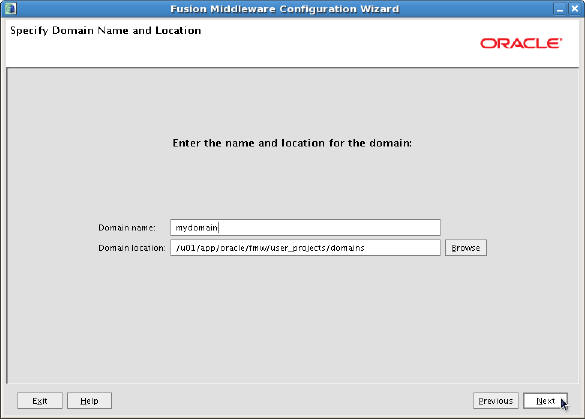
- Specify Domain Name and Location: Enter the
values listed in the following table and then click
Next:
Field Value Domain name: mydomain Domain location: /u01/app/oracle/fmw/user_projects/domains
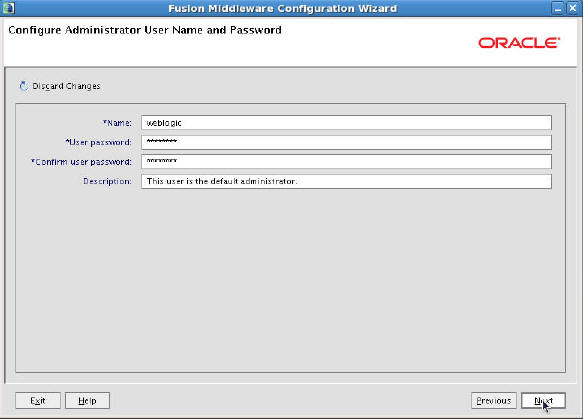
- Configure Administrator User Name and Password:
Enter weblogic
as the user name and welcome1
as the password, and click Next.
- Configure Server Start Mode and JDK: Leave all default values, and click
Next.

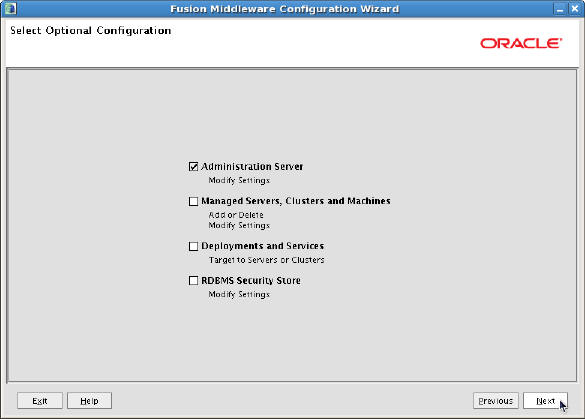
- Select Optional Configuration: Select
Administration Server and click Next.
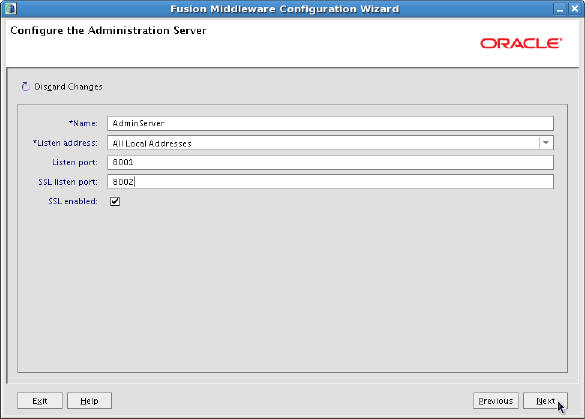
- Configure the Administration Server: Enter the
values listed in the following table and then click
Next:
Field Value Listen Port: 8001 Enable SSL: True SSL Listen Port: 8002
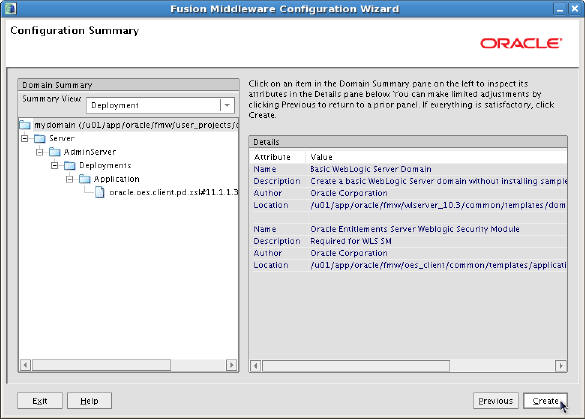
- Configuration Summary: Click Create.
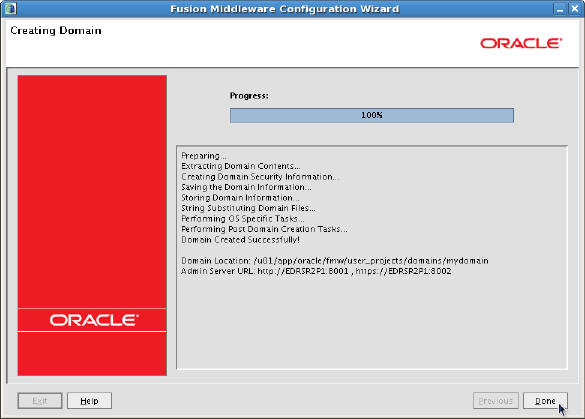
- Creating Domain: Click Done.
The requirements for creating an OES SM instance depend on the type of SM that you create. Detailing the configuration settings for each type of SM is beyond the scope of this tutorial. For this reason, you will focus on creating a WebLogic SM because it is one of the most common SM types.
When creating a WebLogic SM instance, consider these points:
Configuring the SMConfig Properties File
You create all OES SMs by using the SMConfigTool. This tool uses a configuration file called SMConfig, which contains the settings used to configure an SM instance. This section guides you through configuring an SM and running the SMConfigTool to create a WebLogic SM instance and domain.
In a terminal window, navigate to the OES folder that contains sample SMConfig files, copy the smconfig.prp file to a new file named wls_smconfig.prp, and open the new file for editing:
$ cd
$MW_HOME/oes_client/oessm/SMConfigTool
$ cp
smconfig.prp wls_smconfig.prp
$ gedit
wls_smconfig.prp &
Use the following table to change the settings in the file:
| Property | Value | Purpose |
|---|---|---|
| oracle.security.jps.runtime.pd.client.policyDistributionMode | controlled-push | Sets the distribution mode for how the SM obtains its OES policy set |
| oracle.security.jps.runtime.pd.client.RegistrationServerHost | localhost | The host of the OES Administration Server that is used for registering the SM instance with the Administration side. |
| oracle.security.jps.runtime.pd.client.RegistrationServerPort | 7002 | The SSL port of the OES Administration Server that is used for registering the SM instance with the Administration side. |
| oracle.security.jps.policystore.type | DB_ORACLE | Specifies the repository type used for the OES security store. OES policies and related artifacts are stored in this store. |
| oracle.security.jps.farm.name | cn=oes_admin | Defines the root distinguished name (RDN) format of the domain node in the LDAP policy store. This name matches the domain name used when the OES Administration Server was created. If the name does not match, policy distribution does not work properly, and the policy set does not work. |
| oracle.security.jps.ldap.root.name | cn=jpsroot | Defines the top (root) entry of the LDAP policy store directory information tree (DIT). |
| oracle.security.jps.pd.clientPort | 8002 | The SSL port used by the SM instance for policy distribution in a controlled-push distribution model. |
| oracle.security.jps.runtime.pd.client.sm_name | people | The name of the SMConfigID that correlates a policy set defined in an application to a particular SM instance. This ID is configured within the OES Administration console and is bound to the People application that contains the policy used for this tutorial. |
Running the SMConfigTool
After the SMConfig file is ready, you run the SMConfigTool, which reads the SMConfig file and some parameters for instructions about creating your SM instance.
In a terminal window, execute the following steps to create a WebLogic SM instance by using the OES SMConfigTool:
Now that you have created your domain, you can start it and deploy an application to it for testing.
Deploying and Testing the Installation
- Click the System Configuration tab
- Open the Security Modules page
- Click New and enter people as the SMConfigID.
- Log in to the OES Administration console
- Open the People application
- Click the Policy Distribution tab
- Expand the people SMConfigID
- Click Distribute
- Click Refresh until the distribution is 100% complete
This tutorial includes a sample People application to verify that the installation works properly. The People application works as a stand-alone Java program or as a deployed web application. For this tutorial, you run the stand-alone version to programmatically create the OES policy set for the application. After creating the policy set, you bind the People application to the people SMConfigID, distribute the policy set, deploy the People application, start the server, and test the application.
Deploying the Sample Application
This section guides you through the steps required to set up the People application and prepare it for testing.
Save the People.zip file to your file system and extract the contents to a folder of your choice:
$ unzip People.zip
Navigate to the folder where you extracted the People.zip file, and perform the following command to create the People application and OES policy set:
$ ./people.sh people
Your output should resemble the following:
[###]Creating Application
[People]...
[###]Deleting Application... [People] does not exist,
nothing to delete
[###]Create Application
[People] success
[###]Creating Attribute... [userLevel] success
[###]Creating ResourceType... [document] success
[###]Creating Resource...Name: [/classified], type:
[document] success
[###] Creating Rule............ [rule_level] success
[###] Creating Resource Action List.....success
[###] Creating Policy.......... [policy_classified]
success
Enter 'exit' or 'x' to quit
Enter user access level (admin/customer): exit
Log in to the OES Administration Console again and verify that the People application was created.


Click the Add button in the Bound to Applications panel, and select the People application that you want to bind to the people SMConfigID.

Copy the People.war file to the domain's autodeploy folder:
$ cp People.war /u01/app/oracle/fmw/user_projects/domains/mydomain/autodeploy
Navigate to the mydomain folder and start the server:
$ cd
/u01/app/oracle/fmw/user_projects/domains/mydomain
$ ./startWebLogic.sh
Testing the Sample Application
This section shows you how to run the People web application to test that the OES policies are working in this environment.
Open your web browser and browse to http://localhost:8001/People/webstart.
This page displays a usage message and the status of
authorization requests. It displays a result of
DENIED because you
have not yest distributed the initial policy set.


Now that you have distributed the policy set, the application should work. Because this is an installation tutorial, the details of how the application works are not covered. Merely seeing the application work is enough to verify that the installation was successful.
Browse to http://localhost:8001/People/webstart?userLevel=customer.
The request displays DENIED again. This access status is normal because the customer user is not granted access by the configured policy set.

Browse to http://localhost:8001/People/webstart?userLevel=admin.
The request is now granted because the weblogic user is hard-coded as the user within the code, and the policy grants access to users when the userLevel attribute is equal to admin.

Congratulations! You have successfully installed OES 11g, release 2.
Summary
- OES 11gR2 Installation Guide
- OES 11gR2 Administration Guide
- OES 11gR2 Developers Guide
- D69409GC20: Oracle Entitlements Server 11g, Release 2: Develop Secure Applications
- To learn more about OES 11g and Oracle Identity Management, refer to additional OBEs in the Oracle Learning Library.
- Lead Curriculum Developer: Mark Lindros
You just installed OES 11g, release 2 and can begin setting up and developing your own OES 11g, release 2 applications.
In this tutorial, you learned how to install OES 11g, release 2.
Resources
Credits
To help navigate this Oracle by Example, note the following:
- Hiding Header Buttons:
- Click the Title to hide the buttons in the header. To show the buttons again, simply click the Title again.
- Topic List Button:
- A list of all the topics. Click one of the topics to navigate to that section.
- Expand/Collapse All Topics:
- To show/hide all the detail for all the sections. By default, all topics are collapsed
- Show/Hide All Images:
- To show/hide all the screenshots. By default, all images are displayed.
- Print:
- To print the content. The content currently displayed or hidden will be printed.
To navigate to a particular section in this tutorial, select the topic from the list.