Java EE 7: Using JAX-RS Client API to consume RESTful Web Services
Overview
- Download and install the Java Platform, Enterprise Edition 7 (Java EE 7) software development kit from http://www.oracle.com/technetwork/java/javaee/downloads/index.html
- Download and install NetBeans integrated development environment (IDE) 7.3.1 from http://www.netbeans.org/downloads/index.html
- Download and install Oracle GlassFish Server 4.0 from http://glassfish.java.net/download.html
- Knowledge of the Java programming language.
- Intermediate knowledge of Java EE 7.
- Basic knowledge of HTML.
Purpose
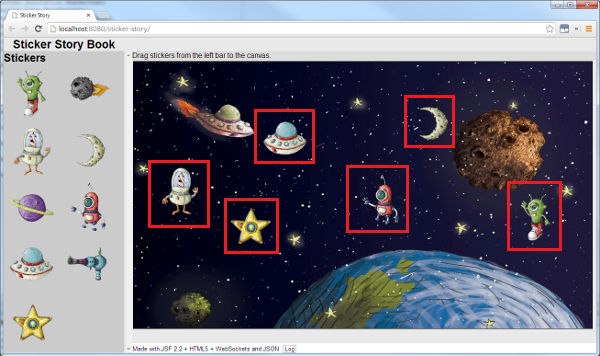
The purpose of this tutorial is to create a sticker story web application in which users can collaborate to create a story by dragging images into a book or canvas. When a sticker is dropped onto the canvas, it is rendered in all other web browsers that are connected to the server. A sticker's state is also saved on the server so information is saved if a session ends.
Time to Complete
Approximately 1 hour
Scenario
You will start with a bare client interface and a minimal REST server. To complete the sticker story application, you'll use the Java API for RESTful Web Services (JAX-RS) 2.0 and the Java API for JSON Processing to handle client-server communication. Finally, you'll save the data in the server to for saving a sticker's current state.
Software Requirements
The following is a list of software requirements needed to accomplish this tutorial:
Prerequisites
Before starting this tutorial, you should have:
Introduction to JAX-RS 2.0 and the Java API for JSON Processing
- Resource identification through URIs, which provide a global addressing space for resource and service discovery.
- Uniform interface, where resources are manipulated using a fixed set of four operations: PUT, GET, POST, and DELETE.
- Self-descriptive messages, that allow resources to be decoupled from their representation.
- Stateful interaction through links, which allow self-contained requests for client-server interactions.
This section gives a brief introduction to the Java API for RESTful Web Services and the Java API for JSON Processing.
JAX-RS (JSR-339) makes it easy for developers to build RESTful web services in Java EE 7. With JAX-RS, you can build simple, lightweight and fast applications by using a stateless comunication protocol (typically HTTP) and standarized interfaces.
Some principles that RESTful web services typically include are:
JAX-RS 2.0 simplifies development for REST architectural-style applications and services by providing Java annotations. These annotations might contain resources configuration, helper classes, artifacts generated, and the resources exposed to clients once the application is deployed.
JSON is a lightweight data exchange format widely used in web services and other connected applications. The Java API for JSON Processing (JSR-353) provides an API to parse, transform, and query JSON data using the object model or the streaming model.
Preparing the Project
In this section, you create a Java EE 7 web application on which you’ll build the book registration application on.
Download the sticker-story and the sticker-story-rest-server files, which contain the projects’ source files you’ll work with throughout the tutorial.
Open the Netbeans IDE.
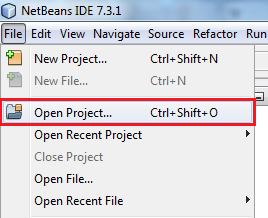
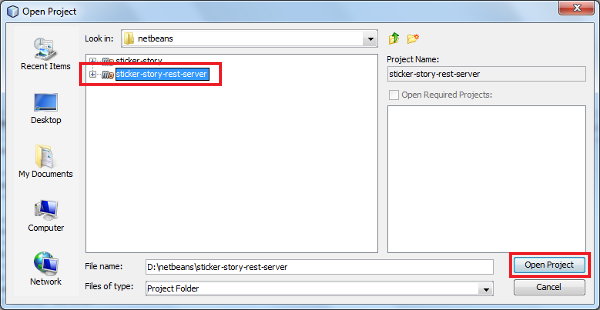
From the File menu, select Open Project.
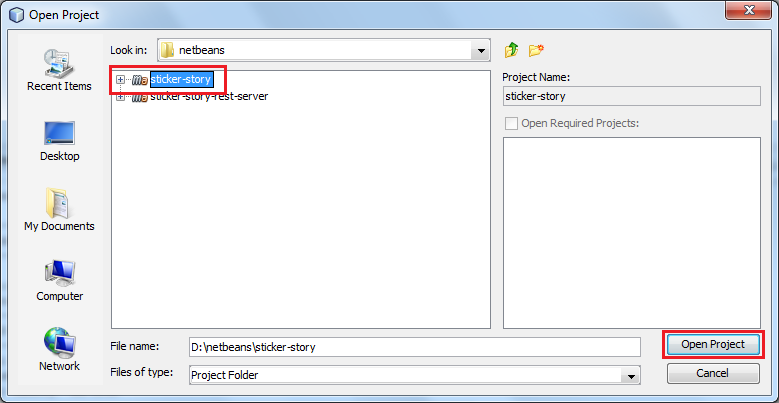
Browse to the location where the sticker-story project is located.
Select the sticker-story project and click Open Project.
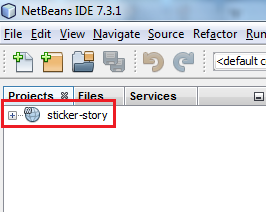
The sticker-story project is added to the Projects pane in NetBeans.
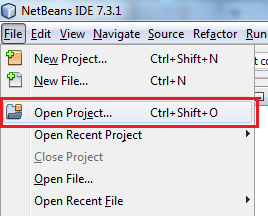
Select File > Open Project.
Browse to the location where the sticker-story-rest-server project is located.
Select the sticker-story-rest-server project and click Open Project.
The sticker-story-rest-server project is added to the Projects pane in NetBeans.

Right-click the sticker-story project and click Clean and Build.
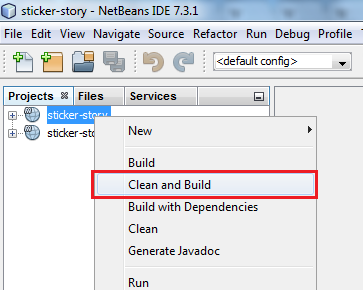
Note: The Clean and Build option downloads all dependencies from the maven repository and builds them. This might take a few minutes.
Right-click the sticker-story-rest-server project and click Clean and Build.
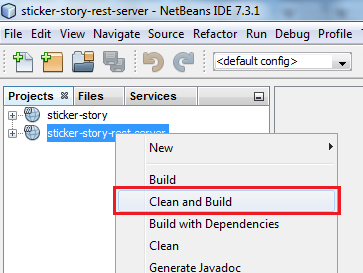
Note: The Clean and Build option downloads all dependencies from the maven repository and builds them. This might take a few minutes.
Right-click the sticker-story project and click Run to build and deploy the project
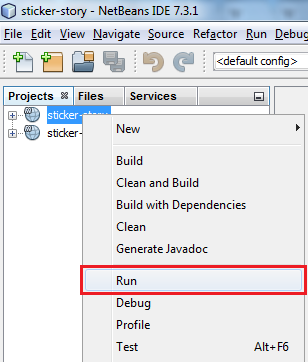
Select GlassFish Server from the server list and click OK.
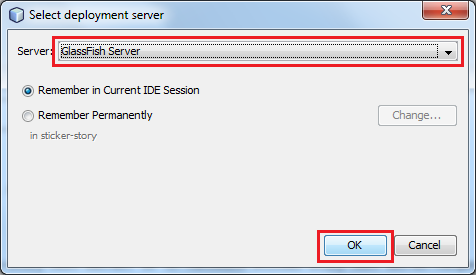
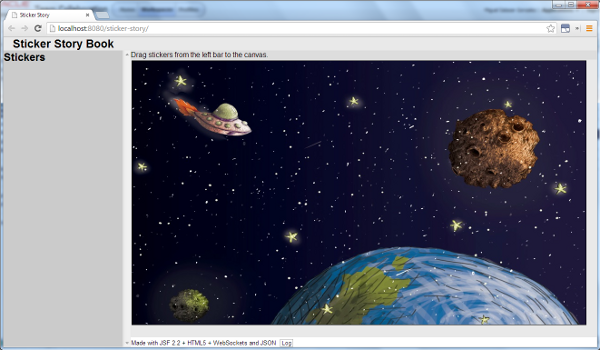
The sticker-story project is started and a web browser opens and displays the story book page.
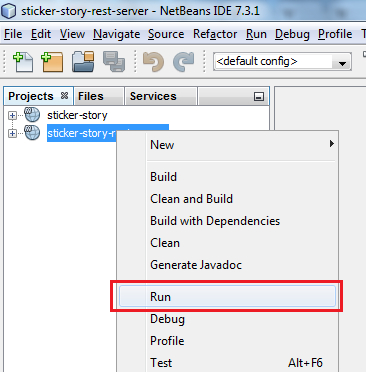
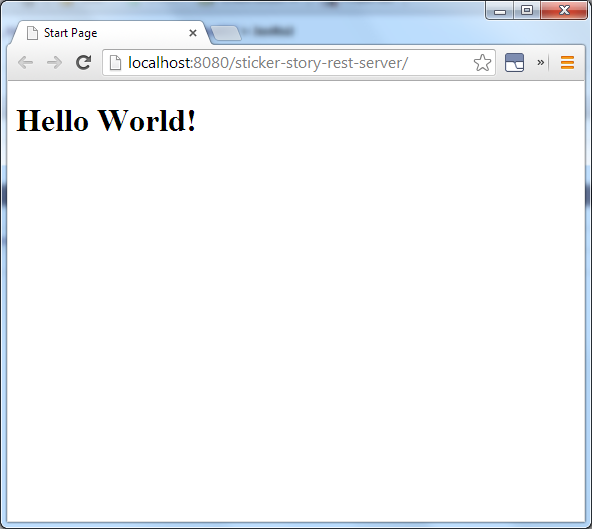
Right-click the sticker-story-rest-server project and click Run to build and deploy the project.
Select GlassFish Server from the server list and click OK.
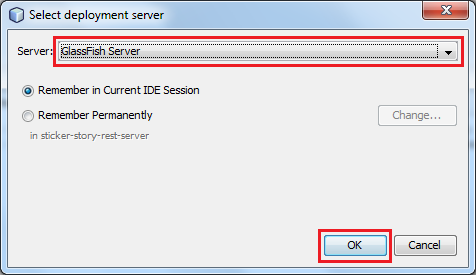
The sticker-story-rest-server project is started and a web browser opens and displays a Hello, World! message.
The sticker-story and sticker-story-rest-server projects are running. You are now ready to start modifying them.
Generating a JSON List of Images
In this section, you learn how to generate a JSON list that contains the names of the sticker images that are available for the users to interact with. To accomplish this, you must modify the getImageList() method of the StickersResource class. Once the list of sticker names is generated, they can be accessed in the following URL: http://localhost:8080/sticker-story-rest-server/rest/stickers.
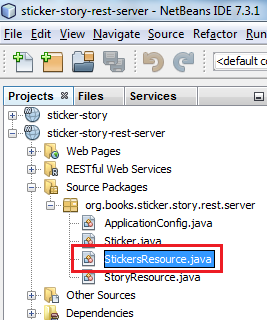
Open the StickersResource.java class, located in the org.books.sticker.story.rest.server package of the sticker-story-rest-server project.
Create a JSONArray model for storing the sticker image names by adding the following code to the getImageList() method.
@GET
@Produces("application/json")
public JsonArray getImageList() {
    JsonArrayBuilder arrayBld = Json.createArrayBuilder();
}
Iterate over the image names and add them to a JSONArray model by adding the following code:
@GET
@Produces("application/json")
public JsonArray getImageList() {
    JsonArrayBuilder arrayBld = Json.createArrayBuilder();
    for (String imageName : imageNames) {
      arrayBld.add(imageName);
    }
}
The JSONArray model now contains the sticker image names.
Build the JSONArray model and specify it as a return value by adding the following code:
@GET
@Produces("application/json")
public JsonArray getImageList() {
    JsonArrayBuilder arrayBld = Json.createArrayBuilder();
    for (String imageName : imageNames) {
      arrayBld.add(imageName);
    }
    return arrayBld.build();
}
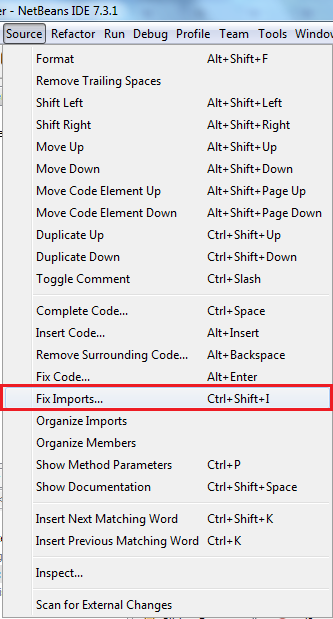
Select Source > Fix Imports to import the required packages.

Select File > Save to save the file.

Go to a web browser and open the following URL: http://localhost:8080/sticker-story-rest-server/rest/stickers.

The list of sticker names is displayed in the browser. You may also see each individual sticker image by opening the following URL: http://localhost:8080/sticker-story-rest-server/rest/stickers/<sticker name>, where <sticker name> is replaced by each individual sticker name, such as star.png.
Retrieving the JSON List of Images
In this section, you retrieve the JSON list of sticker images generated in Section 3. To accomplish this, you modify the getAllStickers() method of the StickerSheet class.
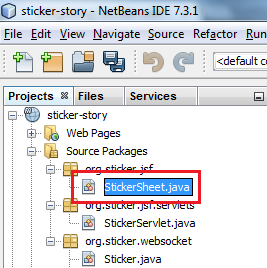
Open the StickerSheet.java class, located in the org.sticker.jsf package of the sticker-story project.
Create an ArrayList for storing the sticker image names by adding the following code:
public List<String> getAllStickers() {
   List<String> allStickers = new ArrayList<>();
   return allStickers;
}
Create a JAX-RS 2.0 Client instance by adding the following code:
public List<String> getAllStickers() {
   List<String> allStickers = new ArrayList<>();
   Client client = ClientBuilder.newClient();

   return allStickers;
}
The Client class builds and executes requests for calling a REST service. The ClientBuilder class creates a Client object to make such requests.
Specify a JAX-RS 2.0 WebTarget object by adding the following code:
public List<String> getAllStickers() {
   List<String> allStickers = new ArrayList<>();
   Client client = ClientBuilder.newClient();
   WebTarget target = client.target("http://localhost:8080/sticker-story-rest-server/rest/stickers");
   return allStickers;
}
Note: A WebTarget object represents a JAX-RS 2.0 resource where a Client object can make requests to. In this case, the requested resource is the JSON list of sticker names whose URI is http://localhost:8080/sticker-story-rest-server/rest/stickers/. The Client object created in the previous step can now request the JSON list of stickers.
Create a JsonArray object to store the target’s response by adding the following code:
public List<String> getAllStickers() {
   List<String> allStickers = new ArrayList<>();
   Client client = ClientBuilder.newClient();
   WebTarget target = client.target("http://localhost:8080/sticker-story-rest-server/rest/stickers");
   JsonArray response = target.request(MediaType.APPLICATION_JSON).get(JsonArray.class);
    return allStickers;
}
Iterate over the response JsonArray object and store its values on the allStickers ArrayList by adding the following code:
public List<String> getAllStickers() {
   List<String> allStickers = new ArrayList<>();
   Client client = ClientBuilder.newClient();
   WebTarget target = client.target("http://localhost:8080/sticker-story-rest-server/rest/stickers");
   JsonArray response = target.request(MediaType.APPLICATION_JSON).get(JsonArray.class);
   for (JsonValue sticker : response) {
      allStickers.add(((JsonString) sticker).getString());
   }
   return allStickers;
}
The different strings of the sticker image names are now stored in the allStickers ArrayList.
Select Source > Fix Imports to import the required packages.

Select File > Save to save the file.

Go to a web browser and open the following URL: http://localhost:8080/sticker-story
Notice how the Stickers section now displays some broken link images. The browser tried to download the sticker images, but failed. This is part of the tutorial, and you will learn how to display them in the next section.
Note: Some browsers, such as Mozilla Firefox, may not display a broken link image. You may try opening the Error Console to see the attempts from the browser to download such images and failed to do so.
A list of images is now obtained by the client.
Displaying the Images on the Client
In this section you learn how to display the sticker images in the web browser. To accomplish this, you will modify the StickerServlet class using JAX-RS 2.0 clients to make asynchronous calls to the server.
Creating an Asynchronous Request to the Server
Open the StickerServlet.java class, located in the org.sticker.jsf.servlets package of the sticker-story project.
Create a JAX-RS 2.0 Client instance by adding the following code:
@WebServlet(name = "StickerServlet", urlPatterns = {"/StickerServlet"})
public class StickerServlet extends HttpServlet {

  @Override
  protected void doGet(HttpServletRequest request, HttpServletResponse response)
          throws ServletException, IOException {
    Client client = ClientBuilder.newClient();
  }
}
Specify a JAX-RS 2.0 WebTarget object by adding the following code:
@WebServlet(name = "StickerServlet", urlPatterns = {"/StickerServlet"})
public class StickerServlet extends HttpServlet {

  @Override
  protected void doGet(HttpServletRequest request, HttpServletResponse response)
          throws ServletException, IOException {
    Client client = ClientBuilder.newClient();
    String url = "http://localhost:8080/sticker-story-rest-server/rest/stickers/" + request.getParameter("name");
    WebTarget target = client.target(url);

  }
}
Add client support for making asynchronous calls to the server by using the AsyncContext class. Add the following code:
@WebServlet(name = "StickerServlet", urlPatterns = {"/StickerServlet"}, asyncSupported = true)
public class StickerServlet extends HttpServlet {

  @Override
  protected void doGet(HttpServletRequest request, HttpServletResponse response)
          throws ServletException, IOException {
    Client client = ClientBuilder.newClient();
    String url = "http://localhost:8080/sticker-story-rest-server/rest/stickers/" + request.getParameter("name");
    WebTarget target = client.target(url);

  }
}
Note: The javax.servlet.AsyncContex class is required for this step. You will import this and the rest of the required packages in the following steps.
The JAX-RS 2.0 Client can now make asynchronous calls to the server (specified in the WebTarget object).
Add the following code to specify the MIME type response of the request.
@WebServlet(name = "StickerServlet", urlPatterns = {"/StickerServlet"})
public class StickerServlet extends HttpServlet {

  @Override
  protected void doGet(HttpServletRequest request, HttpServletResponse response)
          throws ServletException, IOException {
    Client client = ClientBuilder.newClient();
    String url = "http://localhost:8080/sticker-story-rest-server/rest/stickers/" + request.getParameter("name");
    WebTarget target = client.target(url);

    response.setContentType("image/png");

  }
}
Specify the asychronous context request to put the request in asynchronous mode by adding the following code:
@WebServlet(name = "StickerServlet", urlPatterns = {"/StickerServlet"})
public class StickerServlet extends HttpServlet {

  @Override
  protected void doGet(HttpServletRequest request, HttpServletResponse response)
          throws ServletException, IOException {
    Client client = ClientBuilder.newClient();
    String url = "http://localhost:8080/sticker-story-rest-server/rest/stickers/" + request.getParameter("name");
    WebTarget target = client.target(url);

    response.setContentType("image/png");

    AsyncContext asyncContext = request.startAsync();

  }
}
Add an asynchronous target request and specify a target callback function by adding the following code:
@WebServlet(name = "StickerServlet", urlPatterns = {"/StickerServlet"})
public class StickerServlet extends HttpServlet {

  @Override
  protected void doGet(HttpServletRequest request, HttpServletResponse response)
          throws ServletException, IOException {
    Client client = ClientBuilder.newClient();
    String url = "http://localhost:8080/sticker-story-rest-server/rest/stickers/" + request.getParameter("name");
    WebTarget target = client.target(url);

    response.setContentType("image/png");

    AsyncContext asyncContext = request.startAsync();

    target.request("image/png").async().get(new StickerCallback(asyncContext));
  }
}
The StickerCallback class is now defined as the callback function of the asynchronous request.
Note: The StickerCallback class has not been created yet. You will do this in the following steps.
Select Source > Fix Imports to import the required packages.

Select File > Save to save the file.

Defining the Callback Function
In the StickerServlet.java class, click the exclamation mark that highlights StickerCallback and click Create class “StickerCallback” with constructor… to create the StickerCallback class.

The StickerCallback.java class is created.
Implement the InvocationCallback class by adding the following code:
public class StickerCallback implements InvocationCallback<InputStream> {
  public StickerCallback(AsyncContext asyncContext) {
   this.asyncContext = asyncContext;
  }
}
Specify the completed() method by adding the following code:
public class StickerCallback implements InvocationCallback<InputStream> {

   private final AsyncContext asyncContext;

  public StickerCallback(AsyncContext asyncContext) {
    this.asyncContext = asyncContext;
  }


  public void completed(InputStream response) {
  }

  public void failed(Throwable throwable) {
  }

}
Note: The completed() method is executed if the asynchronous response is completed. Similarly, the failed method is executed if the asynchronous called failed.
Implement the completed() method by adding the following code:
public class StickerCallback implements InvocationCallback<InputStream> {

private final AsyncContext asyncContext;

  public StickerCallback(AsyncContext asyncContext) {
    this.asyncContext = asyncContext;
  }

  @Override
  public void completed(InputStream response) {
    try (InputStream input = response; OutputStream output = asyncContext.getResponse().getOutputStream()) {
      byte[] buffer = new byte[1024];
      int read;
      while ((read = input.read(buffer)) > 0) {
        output.write(buffer, 0, read);
      }
    } catch (Exception e) {
    }
    asyncContext.complete();
  }

  public void failed(Throwable throwable) {
  }

}
The completed method copies the response stream from the asynchronous context to another stream, called output, which is used for debugging purposes.
Implement the failed() method by adding the following code:
public class StickerCallback implements InvocationCallback<InputStream> {

private final AsyncContext asyncContext;

  public StickerCallback(AsyncContext asyncContext) {
    this.asyncContext = asyncContext;
  }

  @Override
  public void completed(InputStream response) {
    try (InputStream input = response; OutputStream output = asyncContext.getResponse().getOutputStream()) {
      byte[] buffer = new byte[1024];
      int read;
      while ((read = input.read(buffer)) > 0) {
        output.write(buffer, 0, read);
      }
    } catch (Exception e) {
    }
    asyncContext.complete();
  }

  @Override
  public void failed(Throwable throwable) {
    asyncContext.complete();
  }

}
Select Source > Fix Imports to import the required packages.

Select File > Save to save the file.

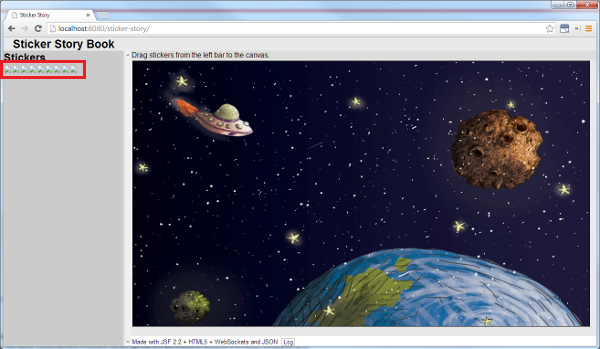
Go to a web browser and open the following URL: http://localhost:8080/sticker-story.
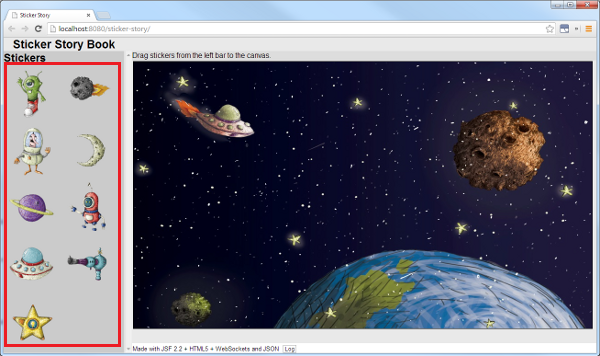
The sticker story application is displayed and the sticker images are now rendered in the Stickers section.
Tip: To see how the WebSocket API is used in this example, open a new browser window and place the two browser windows side-by-side. Then drag and drop a sticker of any window into its corresponding story board. The stickers are rendered in both (or all connected) browsers.
Drag the stickers and drop them in the canvas.
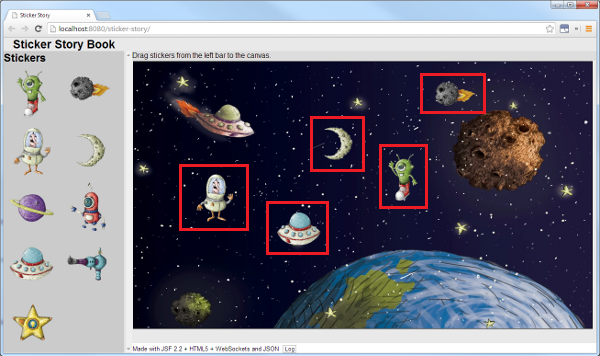
The sticker images stay where they are dropped.
Open a new web browser and go to the following URL: http://localhost:8080/sticker-story.

The sticker story application is displayed again, but the stickers aren't in the story board anymore! What happened? They haven't been saved yet. You will learn how to store the sticker's positions in the server in the following section.
Saving Stickers' States in the REST Server
- Create a client-side request with the sticker’s data
- Send the sticker’s data to the server
- Store the new sticker’s data in the server
- A new client (or user) connects to the server.
- A sticker is dropped in the sticker board.
- onOpen(), which is executed when a new connection to the server is made.
- onMessage(), which is executed when a sticker is dropped in the sticker board. You will modify this method to store a sticker’s type and position when it is dropped in the board.
- The client.target() method specifies the URI of the requested resource.
- The request() method specifies the type of media that is retrieved from the server; in this case, a JSON object.
- The get() method invokes the HTTP GET method and specifies the Java type that the response entity is converted to, in this case a JsonArray class.
In this section, you learn how to store a sticker’s state in the server. To accomplish this, you must:
Preparing the Request to the Server
In this section, you prepare an HTTP POST request to the server. These requests are made when one of the following events occur:
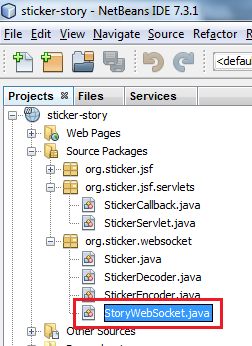
Open the StoryWebSocket.java class located in the org.sticker.websocket package of the sticker-story project.
The StoryWebSocket.java class contains the following methods:
Create a JSON object with the sticker’s data by adding the following code to the onMessage() method:
@OnMessage
public void onMessage(Session session, Sticker sticker) {
  JsonObject jsonSticker = Json.createObjectBuilder()
          .add("name", sticker.getImage())
          .add("x", sticker.getX())
          .add("y", sticker.getY())
          .build();

Set<Session> openSessions = session.getOpenSessions();
  for (Session openSession : openSessions) {
    try {
      openSession.getBasicRemote().sendObject(sticker);
    } catch (IOException | EncodeException ex) {
      Logger.getLogger(StoryWebSocket.class.getName()).log(Level.SEVERE, null, ex);
    }
  }
}
A JSON representation of a sticker, which contains its name and coordinates, is created.
Create a Client object using the JAX-RS 2.0 ClientBuilder class by adding the following code:
@OnMessage
public void onMessage(Session session, Sticker sticker) {
   JsonObject jsonSticker = Json.createObjectBuilder()
          .add("name", sticker.getImage())
          .add("x", sticker.getX())
          .add("y", sticker.getY())
          .build();

   Client client = ClientBuilder.newClient();

Set<Session> openSessions = session.getOpenSessions();
  for (Session openSession : openSessions) {
    try {
      openSession.getBasicRemote().sendObject(sticker);
    } catch (IOException | EncodeException ex) {
      Logger.getLogger(StoryWebSocket.class.getName()).log(Level.SEVERE, null, ex);
    }
  }
}
Specify the target of the request resource by adding the following line:
@OnMessage
public void onMessage(Session session, Sticker sticker) {
   JsonObject jsonSticker = Json.createObjectBuilder()
          .add("name", sticker.getImage())
          .add("x", sticker.getX())
          .add("y", sticker.getY())
          .build();

   Client client = ClientBuilder.newClient();
   client.target("http://localhost:8080/sticker-story-rest-server/rest/story")
          .request();

Set<Session> openSessions = session.getOpenSessions();
  for (Session openSession : openSessions) {
    try {
      openSession.getBasicRemote().sendObject(sticker);
    } catch (IOException | EncodeException ex) {
      Logger.getLogger(StoryWebSocket.class.getName()).log(Level.SEVERE, null, ex);
    }
  }
}
Do a chain-invoked HTTP POST request by adding the following line:
@OnMessage
public void onMessage(Session session, Sticker sticker) {
   JsonObject jsonSticker = Json.createObjectBuilder()
          .add("name", sticker.getImage())
          .add("x", sticker.getX())
          .add("y", sticker.getY())
          .build();

   Client client = ClientBuilder.newClient();
   client.target("http://localhost:8080/sticker-story-rest-server/rest/story")
          .request().post(Entity.entity(jsonSticker, MediaType.APPLICATION_JSON));

Set<Session> openSessions = session.getOpenSessions();
  for (Session openSession : openSessions) {
    try {
      openSession.getBasicRemote().sendObject(sticker);
    } catch (IOException | EncodeException ex) {
      Logger.getLogger(StoryWebSocket.class.getName()).log(Level.SEVERE, null, ex);
    }
  }
}
This line of code makes an HTTP POST request to the server by sending the jsonSticker object (the object that contains the sticker’s data) and specifying it as a type JSON object.
The client is now configured for sending the sticker’s data to the server.
Select Source > Fix Imports to import the required packages.

Select File > Save to save the file.
Requesting Current Stickers
When a new connection is made to the server, the onOpen() method is invoked. This method requests the list of active stickers when connecting to the server and keeps a list of active sessions in the server.
Open the StoryWebSocket.java class.
Create a Client object by adding the following code:
@OnOpen
public void onOpen(Session session) {
   sessions.add(session);

   Client client = ClientBuilder.newClient();
   JsonArray jsonStickers =
           client.target("http://localhost:8080/sticker-story-rest-server/rest/story")
           .request(MediaType.APPLICATION_JSON).get(JsonArray.class);

}
A Client object is defined.
Create a JsonArray object for storing the list of stickers sent by the server.
@OnOpen
public void onOpen(Session session) {
   sessions.add(session);

   Client client = ClientBuilder.newClient();
   JsonArray jsonStickers;

}
Specify the target of the resource and do a chain-invoked HTTP GET request by adding the following line:
@OnOpen
public void onOpen(Session session) {
   sessions.add(session);

   Client client = ClientBuilder.newClient();
   JsonArray jsonStickers =
           client.target("http://localhost:8080/sticker-story-rest-server/rest/story")
           .request(MediaType.APPLICATION_JSON).get(JsonArray.class);

}
Iterate over the jsonSticker object to obtain its values and create new Sticker objects by adding the following code:
@OnOpen
public void onOpen(Session session) {
   sessions.add(session);

   Client client = ClientBuilder.newClient();
   JsonArray jsonStickers =
           client.target("http://localhost:8080/sticker-story-rest-server/rest/story")
           .request(MediaType.APPLICATION_JSON).get(JsonArray.class);

   for (JsonValue jsonValue : jsonStickers) {
     JsonObject jsonSticker = (JsonObject) jsonValue;
     Sticker sticker = new Sticker();
     sticker.setImage(jsonSticker.getString("name"));
     sticker.setX(jsonSticker.getInt("x"));
     sticker.setY(jsonSticker.getInt("y"));
     try {
       session.getBasicRemote().sendObject(sticker);
     } catch (IOException | EncodeException ex) {
       Logger.getLogger(StoryWebSocket.class.getName()).log(Level.SEVERE, null, ex);
     }
   }
}
Select Source > Fix Imports to import the required packages.
Select File > Save to save the file.

Handling Requests in the Server
In this section you process the HTTP POST and GET requests you defined in the previous sections.
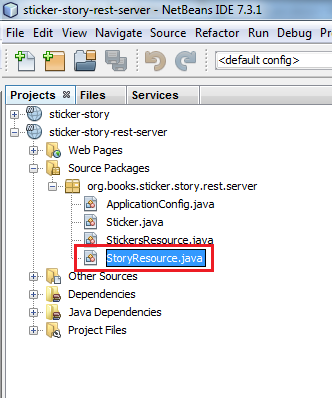
Open the StoryResource.java class, located in the org.books.sticker.story.rest.server package of the sticker-story-rest-server project.
Modify the getStickers() method by building a JsonArray object to store a sticker's information. Add the following code:
@GET
@Produces("application/json")
public JsonArray getStickers() {
    JsonArrayBuilder arrayBld = Json.createArrayBuilder();
}
Notice that the getStickers() method is annotated with the @GET annotation, which processes the HTTP GET requests.
Iterate over the JSON object and set the sticker object’s values by adding the following code:
@Produces("application/json")
public JsonArray getStickers() {
    JsonArrayBuilder arrayBld = Json.createArrayBuilder();
    for (Sticker sticker : stickers) {
    arrayBld.add(Json.createObjectBuilder()
            .add("name", sticker.getName())
            .add("x", sticker.getX())
            .add("y", sticker.getY()));
    }
}
Specify a return value by building the JSON object. Add the following code:
@Produces("application/json")
public JsonArray getStickers() {
    JsonArrayBuilder arrayBld = Json.createArrayBuilder();
    for (Sticker sticker : stickers) {
    arrayBld.add(Json.createObjectBuilder()
            .add("name", sticker.getName())
            .add("x", sticker.getX())
            .add("y", sticker.getY()));
    }
    return arrayBld.build();
}
Modify the addSticker() method by adding the following code:
@POST
@Consumes("application/json")
public void addSticker(JsonObject jsonSticker) {
   Sticker sticker = new Sticker();
   sticker.setName(jsonSticker.getString("name"));
   sticker.setX(jsonSticker.getInt("x"));
   sticker.setY(jsonSticker.getInt("y"));
   stickers.add(sticker);
}
The addSticker() method receives a JSON object with the sticker’s data of each newly-dropped sticker. Notice that this method is annotated with the @POST annotation, which processes HTTP POST requests. Finally, the sticker’s data received from the client is set in the new object and added to the list of stickers.
Select Source > Fix Imports to import the required packages.

Select File > Save to save the file.

Right-click the sticker-story project and select Run.

A new browser window opens and displays the sticker story application.
Drag and drop some of the stickers onto the story board.
The sticker images stay stuck in the board.
Close the web browser window.
Open a new browser window again and go to the following URL: http://localhost:8080/sticker-story/.

The story board loads and displays the sticker images in the same position you left them in Step 9.
Congratulations! You successfully saved the stickers' positions in the server.
Summary
- Use the Client class to build and execute requests for calling a REST service.
- Use the WebTarget class to specify a Client's target for requests.
- Build, process and manipulate JSON files.
- Model and create a save requests.
- Send the stickers' data to the server using HTTP POST.
- Request the stickers' data from the server using HTTP GET.
- Receive JSON data and store it as objects in the server.
- JSR 353: Java API for JSON Processing
- JSR 339: JAX-RS 2.0: The Java API for RESTful Web Services
- Java EE 7 and JAX-RS 2.0
- JAX-RS Client API and GlassFish 4 - Logging HTTP messages
- Java EE 7: New Features.
- The Java EE 7 Tutorial
- The Java EE 7 Tutorial chapter on JSON Processing
- The Java EE 7 Tutorial chapter on Building RESTful Web Services With JAX-RS
- To learn more about Java EE 7, refer to additional OBEs in the Oracle Learning Library.
- Lead Curriculum Developer: Miguel Salazar
- Other Contributors: Eduardo Moranchel
In this tutorial you learned how to use the Java API for RESTful Web Services (JAX-RS 2.0) and the Java API for JSON Processing to build an interactive web application that saves an object's properties in the server.
You also learned how to:
Resources
For more information about the topics in this tutorial, see:
Credits
To help navigate this Oracle by Example, note the following:
- Hiding Header Buttons:
- Click the Title to hide the buttons in the header. To show the buttons again, simply click the Title again.
- Topic List Button:
- A list of all the topics. Click one of the topics to navigate to that section.
- Expand/Collapse All Topics:
- To show/hide all the detail for all the sections. By default, all topics are collapsed
- Show/Hide All Images:
- To show/hide all the screenshots. By default, all images are displayed.
- Print:
- To print the content. The content currently displayed or hidden will be printed.
To navigate to a particular section in this tutorial, select the topic from the list.