Creating Java Message Service (JMS) Resources in WebLogic Server 12c
Overview
- Download and install Oracle WebLogic Server 12c (version
12.1.1 or later) from this link.
Follow the instructions included in the README file in the zip archive to install and set up the server.
This tutorial assumes that you have installed the server to C:\weblogic\wls and created a domain at C:\weblogic\domain.
Note: It is recommended that the path that you choose for WebLogic Server does not contain spaces or non-alphanumeric characters.
- Have installed JDK 7 version 4 or later.
- Have installed NetBeans Enterprise Edition, version 7.1.2 or
later.
- Have installed WebLogic Server 12c version 12.1.1.
- Download and unzip the files.zip
file that contains the NetBeans projects you need to complete
this tutorial.
Note: It is recommended that the directory path where you unzip the NetBeans projects does not contain spaces or non-alphanumeric characters.
Purpose
This tutorial covers how to configure Java Message Service
(JMS) System Modules and JMS Resources in WebLogic Server 12c.
Time to Complete
Approximately 30 minutes
Introduction
Some integrated development environments (IDEs) include wizards
and built-in tools to configure and create JMS resources
directly from the IDE. During deployment, the generated
resources are created on behalf of the developer. One example is
the NetBeans IDE and GlassFish 3.1.2. The tutorial titled Creating
a Simple Java Message Service (JMS) Producer with NetBeans and
GlassFish demonstrated how to use NetBeans to create JMS
resources for GlassFish using the capabilities built into the
IDE.
In this tutorial, you will create the same JMS resources using WebLogic Server 12c's administration console. Finally, you will deploy two provided NetBeans projects, JMSProducer and MDBExample, to demonstrate that your JMS services are working.
Software Requirements
The following software is required to complete this tutorial in Windows platform:
Prerequisites
Before starting this tutorial, you should:
Add WebLogic Server 12c to NetBeans
This section will ensure that you have installed WebLogic
Server 12c properly and can start the server from NetBeans.
Start NetBeans and open the Services Window (Window
-> Services).
Expand the Servers folder - GlassFish Server is included with NetBeans Enterprise Edition and installed automatically.
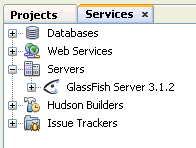
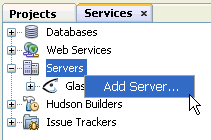
Right-click the Servers folder and select Add
Server...
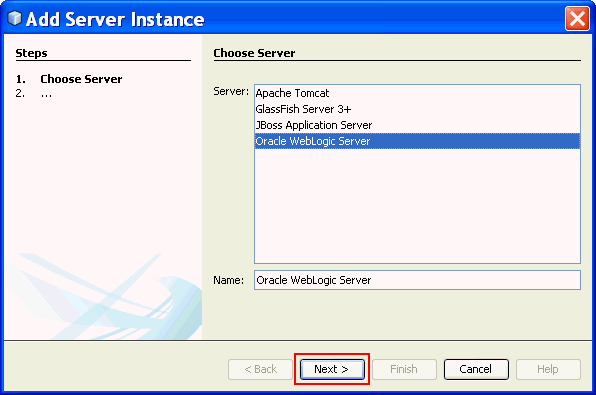
Select Oracle WebLogic Server and click Next.
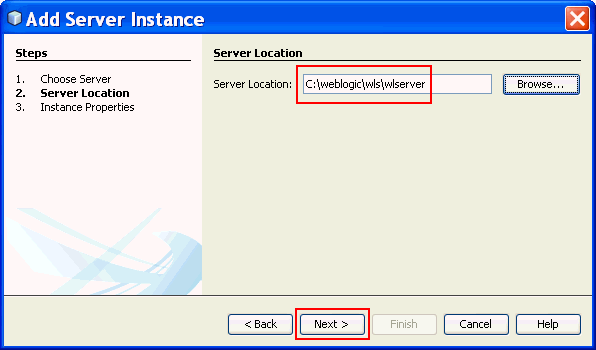
Enter the path to the WebLogic Server 12c instance you
installed. For example, if you installed the server in the
directory C:\weblogic\wls,
the Server location is C:\weblogic\wls\wlserver.
Click Next.
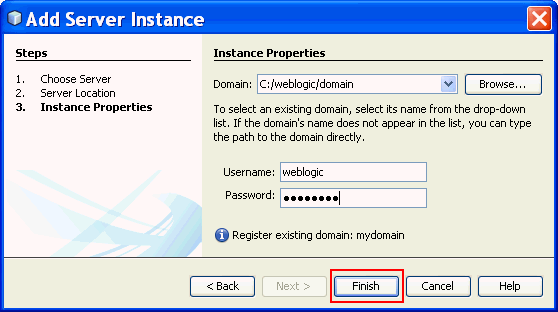
Enter the Weblogic Server username and password you created when you installed WebLogic Server and click Finish.
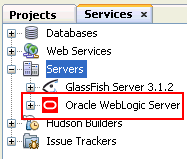
In the Services tab, Oracle WebLogic Server has been added as a Server.
Start WebLogic Server from NetBeans
In this section, you will start the WebLogic Server instance you installed from NetBeans.
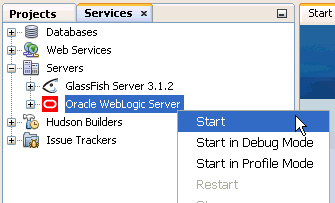
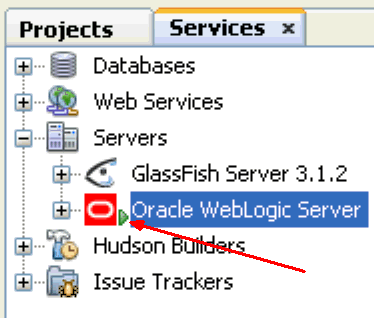
Right-click on Oracle WebLogic Server in the Services tab and select Start.
An hourglass icon will appear beside the Oracle icon as Oracle WebLogic Server starts up.
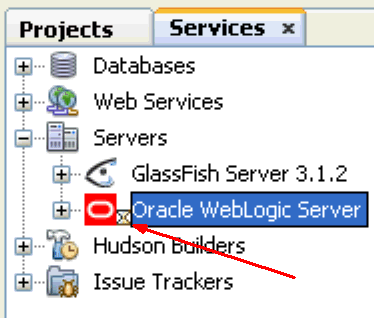
When the server has started, the icon will change to a
green triangle - this indicates that the server is running.
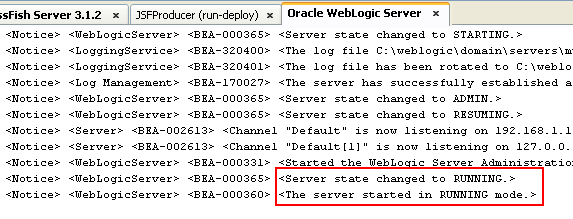
Further, in the output window, a tab will open titled Oracle WebLogic Server. When the console messages indicate the server is in RUNNING mode, the server has started successfully.
Create a JMS Server using the WebLogic Server Admin
Console
In this section, you will use the WebLogic Server Admin Console
to create a JMS Server. A JMS server is the container that
manages JMS queue and topic destinations. A JMS Server can be
configured to persist messages, so they can be delivered even if
the server instance they were received at went down. For more
information on persistent message servers, see the Resources
section of this tutorial.
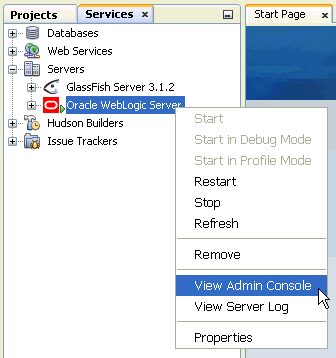
Launch the Admin Console by right-clicking on Oracle WebLogic Server in Services and selecting View Admin Console.
Alternatively, you can open a web browser and enter the URL http://localhost:7001/console
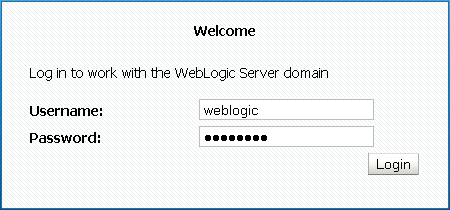
Enter the username and password you created when you installed WebLogic Server
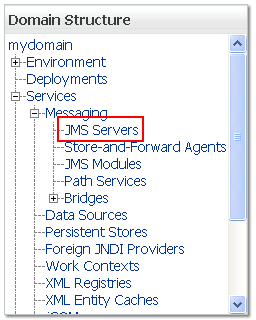
In the Domain Structure panel on the left, expand Services,
expand Messaging, then select JMS Servers.
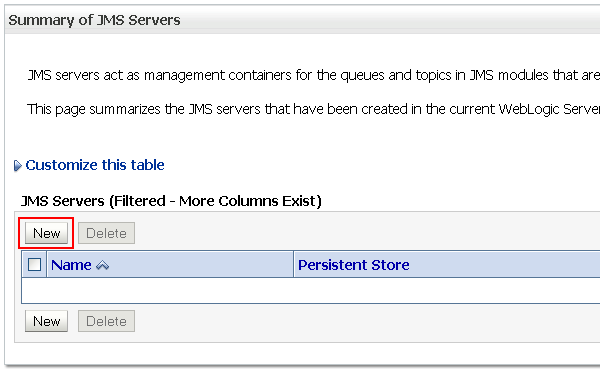
Click New to create a new JMS Server
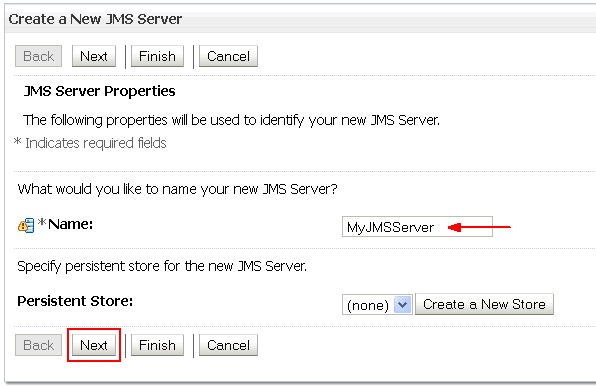
Enter MyJMSServer as the server name and click Next.
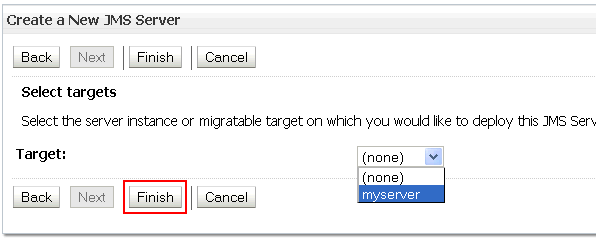
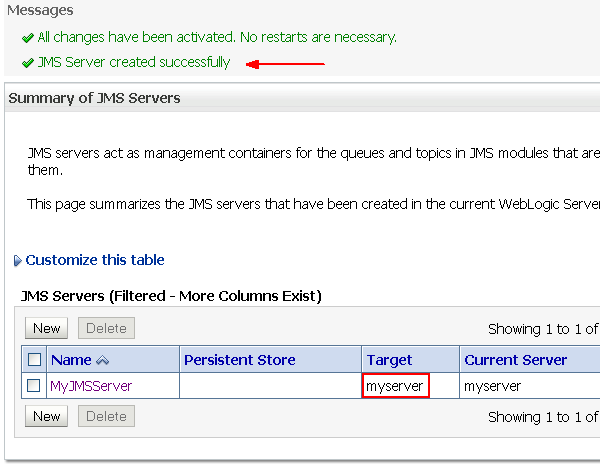
Select myserver as the target for the JMS server
(this is the instance of WLS you are using) and click Finish.
You will a message at the top of the page, indicating that
the JMS Server has been successfully created and targets
myserver, the WLS instance you have running.
Creating a JMS Module
Next you will create a JMS System Module that contains your queue and connection factory.
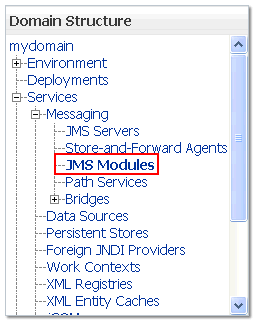
In the left hand panel titled Domain Structure,
click on JMS Modules under Messaging.
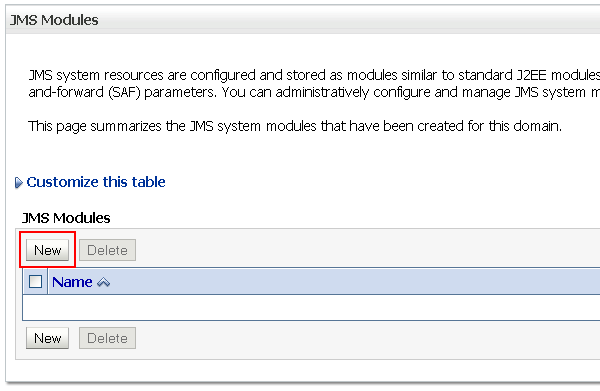
Click New to create a new JMS System Module
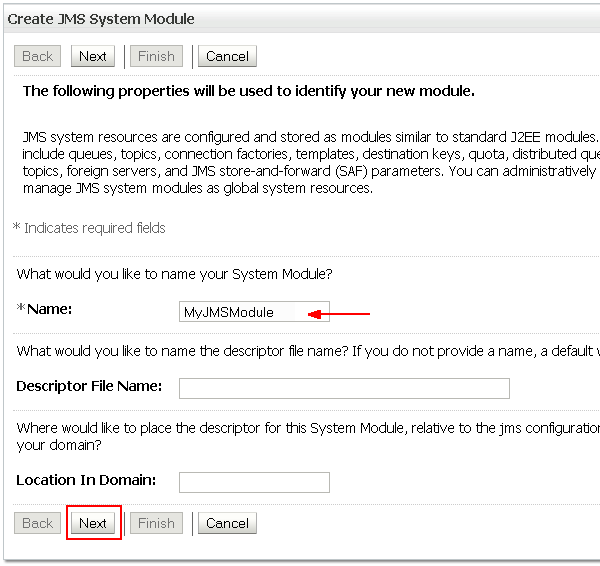
Name the JMS System Module MyJMSModule and click Next.
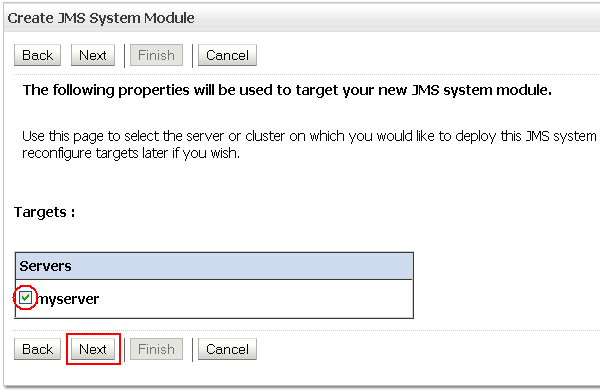
Click myserver to choose your current WLS instance as the target for this module and click Next.
Select the check box to add resource to the new JMS System Module (you will add the queue and connection factory) and click Finish.
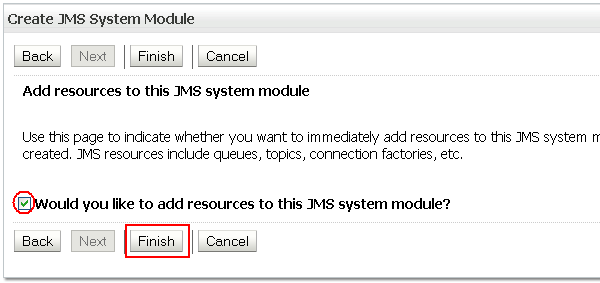
At the top of the page, messages will appear that you successfully created the JMS System Module.

Create a Queue Destination and Connection Factory Resource
In this section you will create the queue destination and
create the connection factory.
Create the Queue Destination
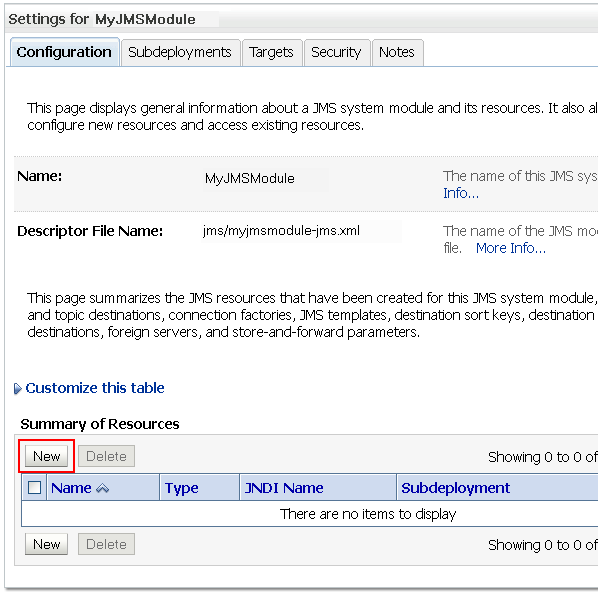
Click New to add a new resource to the system module.
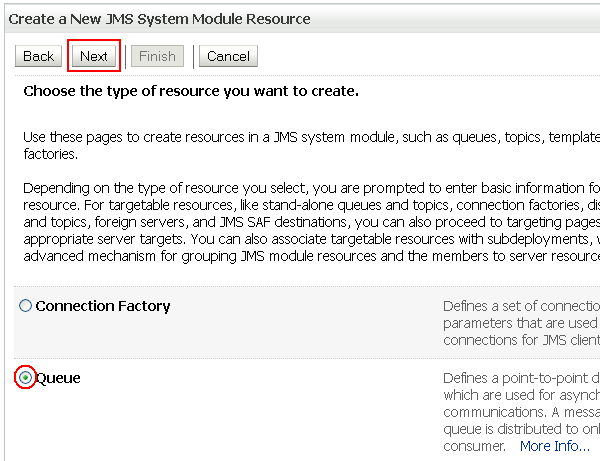
Create a new Queue destination by selecting Queue from options. Click Next.
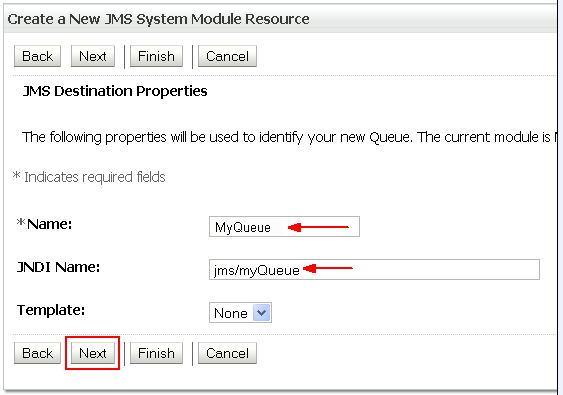
Enter MyQueue as the Name for your queue and jms/myQueue as the JNDI Name for the lookup. Click Next.
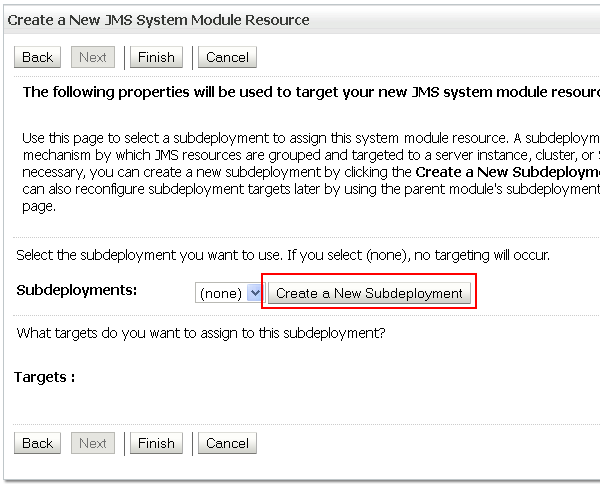
On the next screen, click on Create a New
SubDeployment to create a subdeployment for the
system module. A subdeployment is the mechanism by
which targetable JMS module resources (such as queues,
topics, and connection factories) are grouped and
targeted to a server resource (such as JMS servers,
server instances, or a cluster).
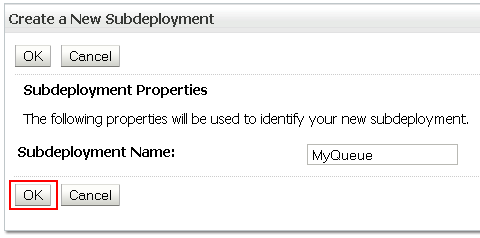
On the next screen, click OK to accept the
default Subdeployment Name.
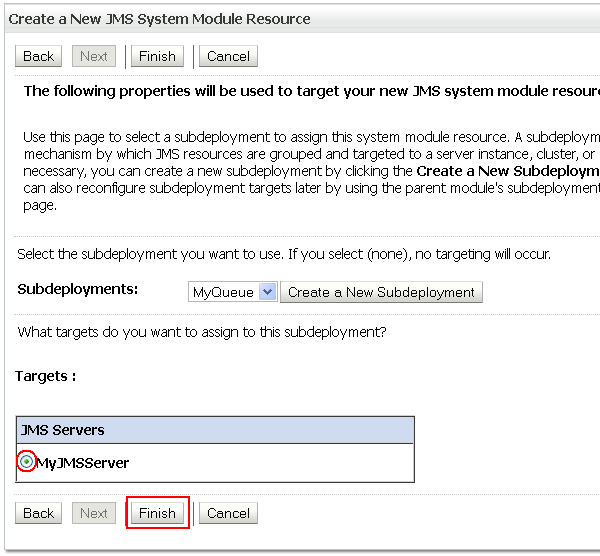
With the new Subdeployment now selected, and your MyJMSServer module as the target, click Finish.
Messages will appear at the top of the page that show you successfully created the queue destination

Near the bottom of the page, the Summary of Resources section will show your new queue resource.

Create the Connection Factory
Click New to add another resource to the JMS
Server Module.
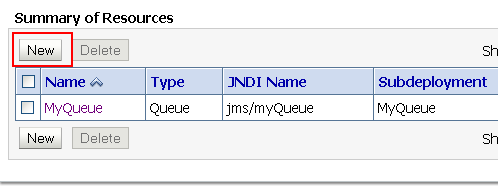
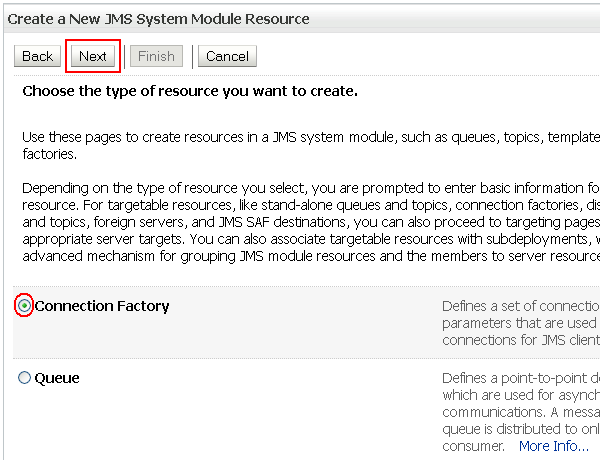
Create a Connection Factory by selecting Connection Factory from the list of resources and click Next.
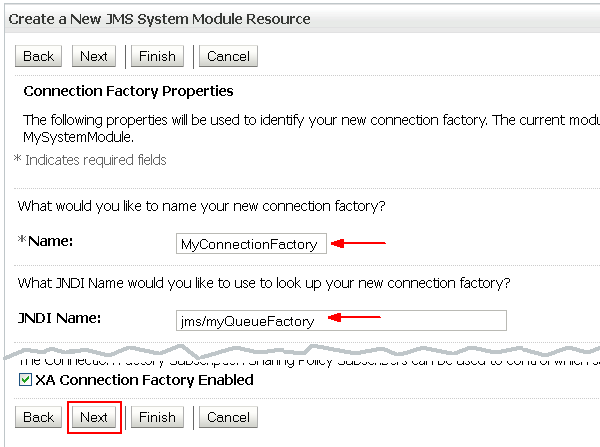
Enter MyConnectionFactory as the name of your
Connection Factory..
Enter jms/myQueueFactory as the JNDI name for
the factory, accept the other options, and click Next.
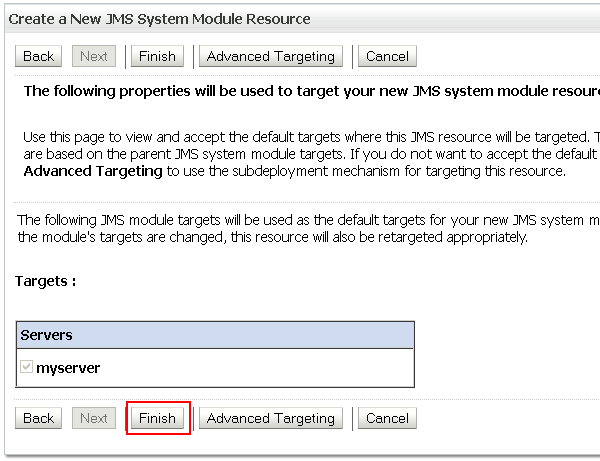
Your JMS Module is automatically associated with the current WLS instance, myserver. Click Finish.
At the top of the page, a message will indicate that you have successfully created the connection factory.

The Connection Factory and Queue will appear as
resources in the Summary of Resources for the
module.

Look at the resources through NetBeans
Open NetBeans and click on the Services tab. Expand Resources, expand the Connector Resources and expand the Admin Object Resources folders.
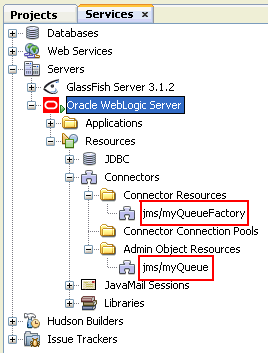
Note: If you can't see any Resources for your Oracle WebLogic Server server instance, and you are using NetBeans 7.1.2, first make sure that Oracle WebLogic Server is running. Second, check the proxy setting for NetBeans. Open the Options menu (Tools -> Options) and change the Proxy Settings from Use System Proxy Settings to No Proxy. Then stop Oracle WebLogic Server, quit NetBeans, and restart NetBeans and Oracle WebLogic Server.
Test the JMS Queue and Connection Factory with the provided NetBeans projects
Two NetBeans projects are included in this tutorial. The JSFProducer project has a JSF page as a front-end to a Managed Bean that sends a text message to the queue, jms/myQueue. The second project, MDBExample, reads the message from the queue using a Message-Driven Bean.
Open the Projects in NetBeans by clicking File -> Open Project.
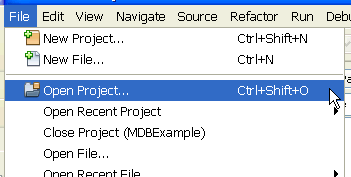
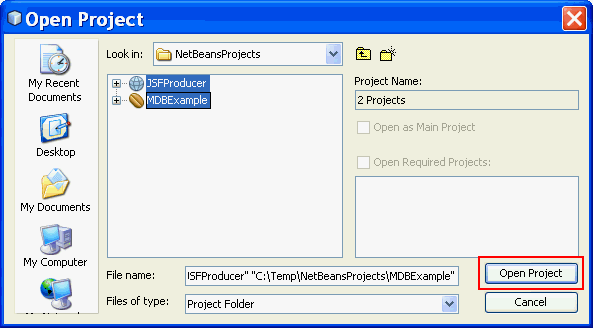
Navigate to the directory where you unzipped files.zip.
Select both the JSFProducer and MDBExample
projects and click Open Project.
The projects have been preconfigured to deploy to the
Oracle WebLogic Server instance.
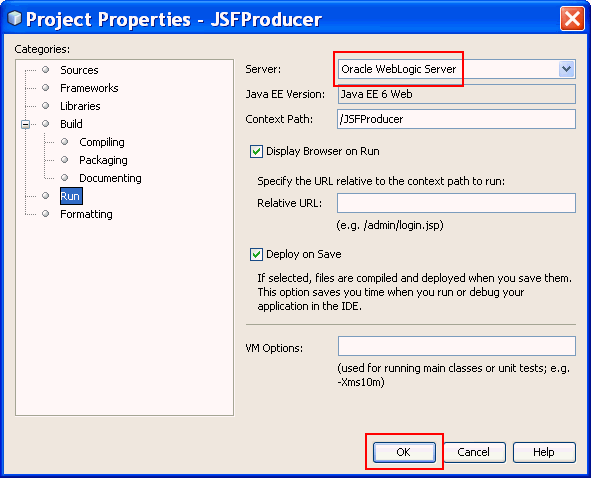
To verify, right-click on the JSFProducer
project and select Properties.
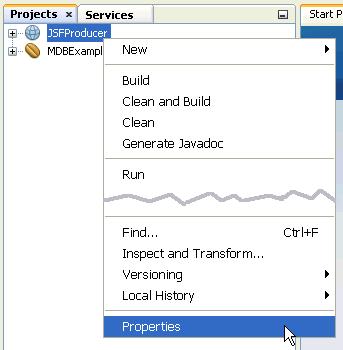
Select Run. The Server listed should be Oracle WebLogic
Server. If necessary, select it from the drop down list.
Click OK.
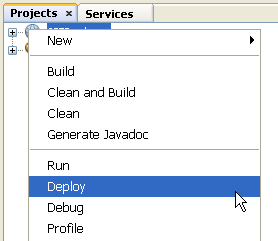
Right-click on the JSFProducer project to
deploy the application to Oracle WebLogic Server. Repeat
this step to deploy MDBExample to Oracle WebLogic
Server.
In a browser, enter the following URL to open the JSFProducer
application:
http://localhost:7001/JSFProducer
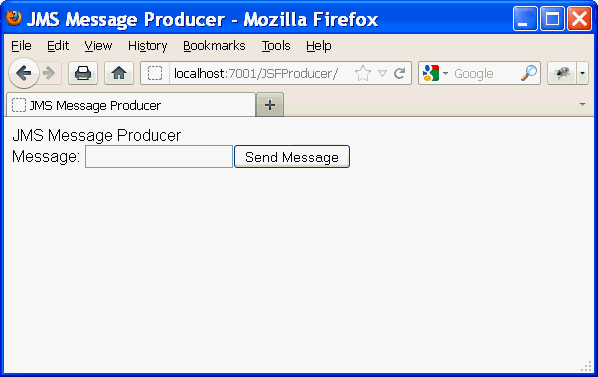
Enter a string in the text box on the page and click the Send Message button.
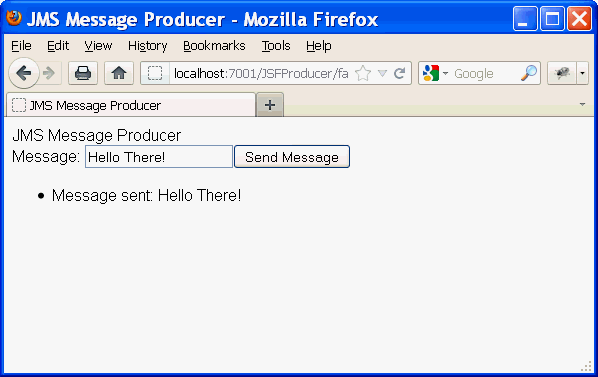
The application will display the message you sent in the browser window, indicating the message was successfully sent. This application writes a text message to the queue jms/myqueue.
In NetBeans, in the Output Window, click on the Oracle WebLogic Server tab and you will see the message(s) you sent to the queue appear in the console.

The MDBExample application uses a message-driven
bean to read the queue, jms/myQueue and display the
text message to the console.
Note: Your console may show additional information.
To clear the console prior to receiving messages, right-click
in the Output window and select Clear, and
send another message to the queue using the JSFProducer
application.
Summary
- Add a WebLogic Server instance to NetBeans
- Create a JMS Queue Destination and Connection Factory using
the WebLogic Server admin console
- View the resources you added to WebLogic server in NetBeans
- Deploy application from NetBeans to WebLogic Server 12c
- Configuring
Messaging (Oracle Fusion Middleware Oracle WebLogic
Server Administration Console Online Help 12c Release 1 -
12.1.1)
- The Java EE 6 Tutorial: Java Message Service
Concepts
- Java Message Service Documentation
- Developing Java EE 6 Applications for the Java EE 6 Platform
- To learn more about Java Message Service and Java EE 6
Technologies, refer to additional tutorials in the Oracle Learning Library
- Lead Curriculum Developer: Tom McGinn
In this tutorial, you have learned how to:
 Overview