Deploying a Maven Application to Oracle Cloud
Overview
- Have an Oracle.com account.
- Have already completed the Oracle by Example tutorial titled Signing Up for a Java Cloud Service.
- Have already completed the Oracle by Example tutorial titled Configuring NetBeans for Oracle Cloud.
Purpose
This tutorial covers how to deploy an Apache Maven application
to Oracle Cloud by using NetBeans.
Time to Complete
Approximately 30 minutes
Introduction
Apache Maven is an open-source project management tool. With
Maven, you can build projects by using a dynamic set of
resources. Maven simplifies the build process by describing how
a project should be assembled based on dependencies defined in a
project object model (POM) XML file. Resources required for the
building of a project can be locally defined or they can exist
on remote servers.
Prerequisites
Before starting this tutorial, you should:
(Optional) Configuring an HTTP Proxy for Maven
If the machine you are using is behind a firewall, you may need
to configure Maven to use a proxy for your HTTP requests.
In an Windows Explorer (or command shell in Unix) navigate
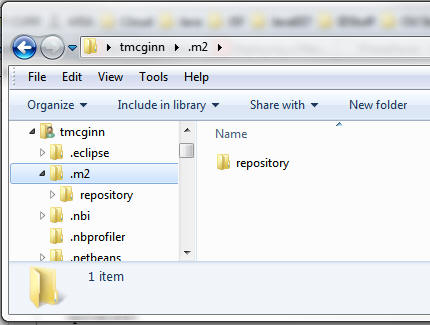
to the location of your <user home>/.m2
directory. For example, in Windows 7, if your user name was
tmcginn, this folder is in C:\Users\tmcginn\.m2.
Right-click in the Explorer window below repository and select New > Text Document.
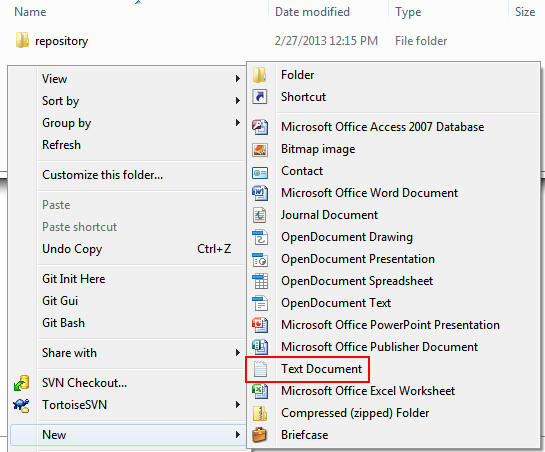
Rename the new text file settings.xml and open it in an editor.

Enter the following text into the settings.xml file:
<?xml version="1.0"
encoding="UTF-8"?>
<settings xmlns="http://maven.apache.org/SETTINGS/1.0.0"
xmlns:xsi="http://www.w3.org/2001/XMLSchema-instance"
xsi:schemaLocation="http://maven.apache.org/SETTINGS/1.0.0
http://maven.apache.org/xsd/settings-1.0.0.xsd">
<proxies>
<proxy>
<active>true</active>
<protocol>http</protocol>
<host>proxy.somewhere.com</host>
<port>port
number</port>
</proxy>
</proxies>
</settings>
Perform the following steps:
a. Replace proxy.somewhere.com with your proxy host.
b. Replace port number with the port number of your proxy host.
c. Save the file.
Installing the Oracle Cloud Maven Plugin
In this section, you install the Oracle Cloud Maven plugin in your local Maven repository. The plugin is part of the software development kit (SDK), and the installation is only required the first time that you use Maven with Oracle Cloud.
In an Explorer window, navigate to the
path where you installed NetBeans, and then navigate to the
java\maven\bin directory.
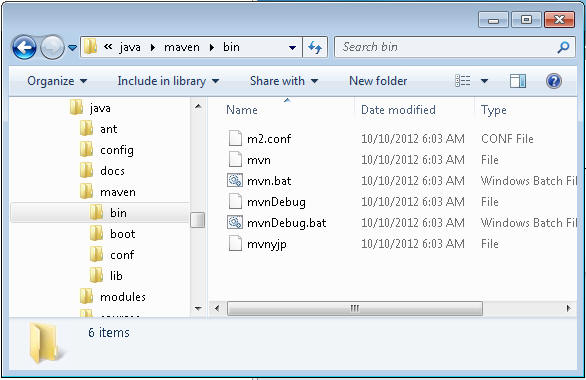
Note: In the example, the full path is C:\Program
Files\NetBeans 7.2.1\java\maven\bin.
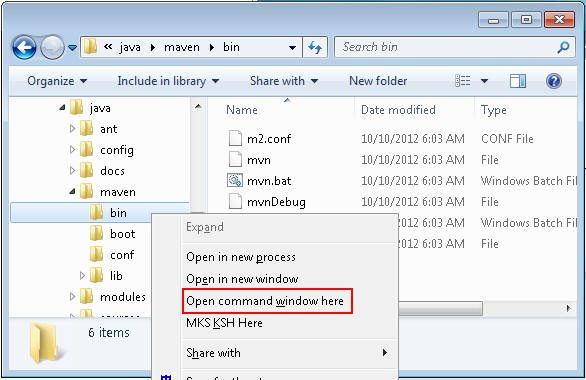
Press Ctrl + Shift and right-click bin and
select Open command window here.
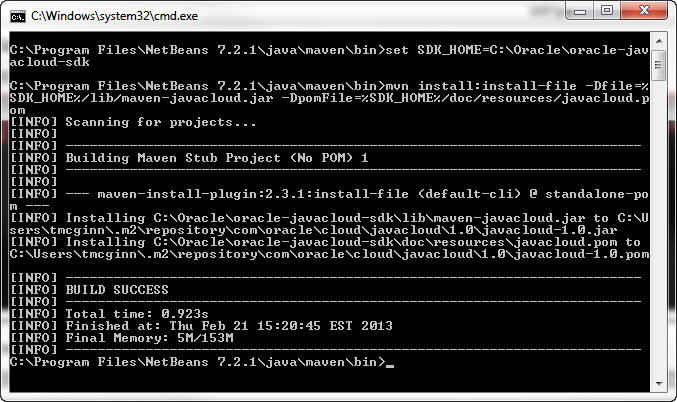
In the cmd window, enter the following line to set the SDK_HOME
environment variable to the path where you
installed the Oracle Cloud SDK:
set
                      SDK_HOME=C:\Oracle\oracle-javacloud-sdk

At the cmd prompt, enter the following command:
mvn install:install-file
                      -Dfile=%SDK_HOME%/lib/maven-javacloud.jar
                      -DpomFile=%SDK_HOME%/doc/resources/javacloud.pom
Opening the Sample Maven Logging Application
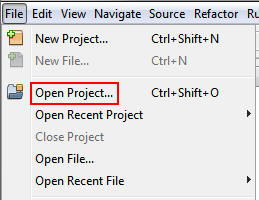
In NetBeans, select File > Open Project.
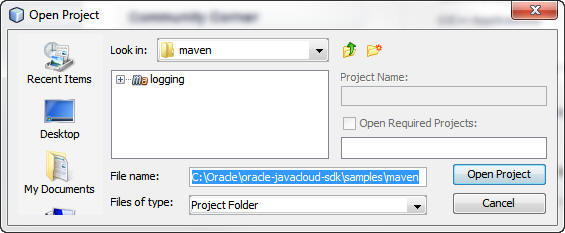
Browse to the oracle-javacloud-sdk\samples\maven
directory.
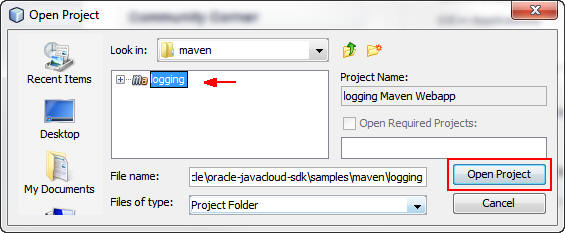
Select logging and click Open Project.
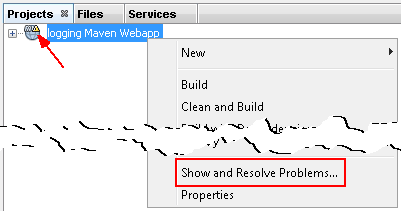
(Optional) If the project opens with a yellow warning
triangle on the project, right-click logging Maven
Webapp and select Show and Resolve Problems.
If you don't see the warning, skip to step 6.
On the Show Problems dialog box, click Priming Build.
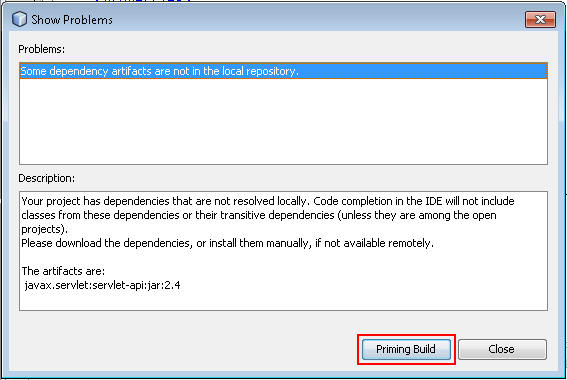
The lower left corner of the IDE will show the progress of the priming.

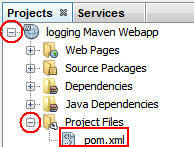
Perform the following steps:
a. Expand logging Maven Webapp and Project Files.
b. Double-click pom.xml to open it in the editor
The pom.xml file will open in the editor.
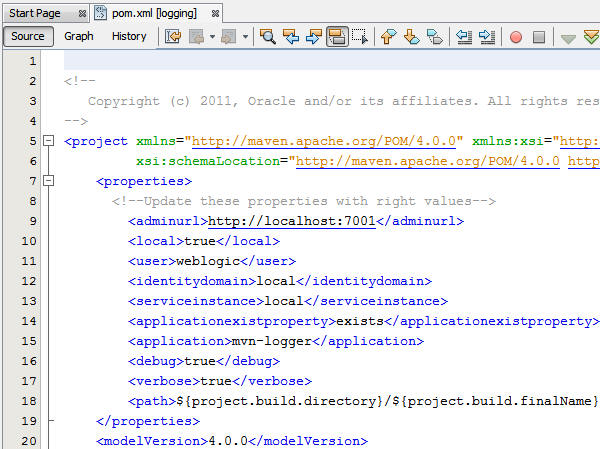
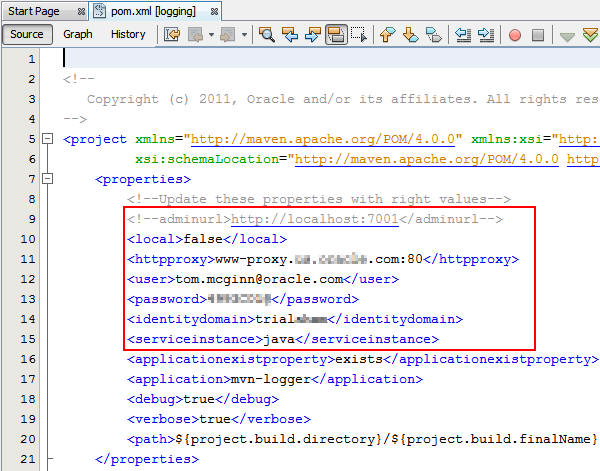
Perform the following steps in the pom.xml file:
a. Comment out the adminurl element.
b. Change the local element value to false.
c. Optional: If your machine is behind a
firewall, add an httpproxy element and
set the value to <your HTTP proxy
host>:<proxy port number>.
For example, if your proxy host is
www-proxy.xyz.com and the proxy port is 8080, the value of
the element is www-proxy.xyz.com:8080.
d. Change the user element value to your Oracle Cloud user name.
e. Add a password element after the user element and enter your Oracle Cloud password.
f. Change the identitydomain element value to your Oracle Cloud identity domain.
g. Change the serviceinstance element value to java.
Setting the SDK_HOME Environment Variable
The Oracle Cloud Maven plugin uses an environment variable,
SDK_HOME, which you must declare in NetBeans.
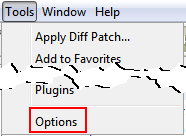
Select Tools > Options.
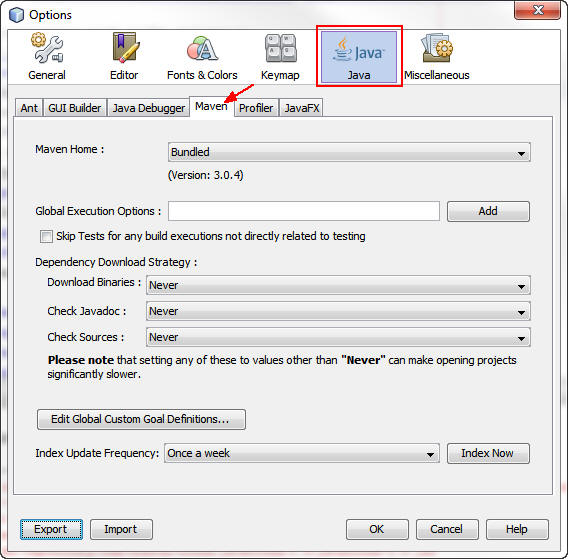
In the Options dialog box, click Java and then
click the Maven tab.
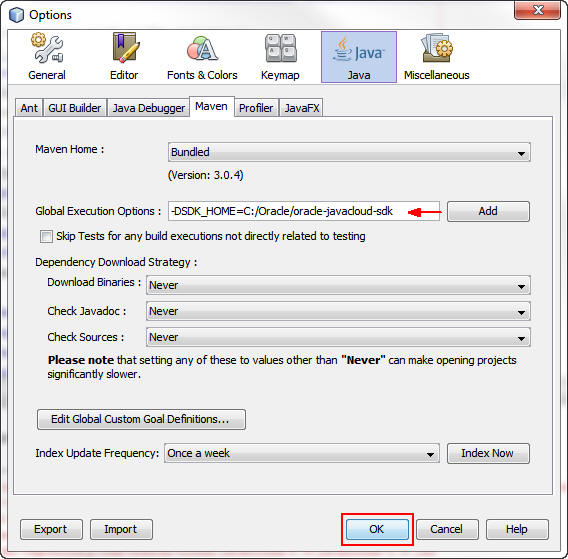
Perform the following steps:
a. In the Global Execution Options box, enter the path to your Oracle Cloud SDK in the following format:
-DSDK_HOME=C:/Oracle/oracle-javacloud-sdk
Note:
Use the full path to your Oracle Cloud SDK installation.
b. Click OK.
Building and Deploying the Application
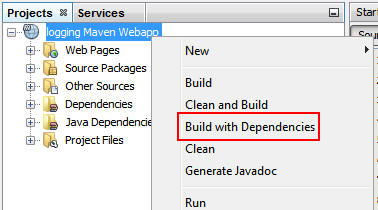
Right-click the logging Maven Webapp project and
select Build with Dependencies.
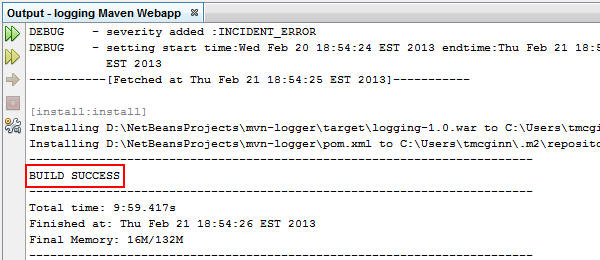
After a few minutes, a message in the Output window
indicates that the build was successful.
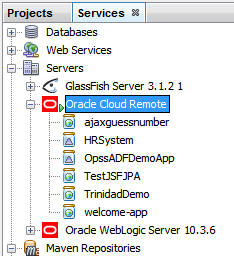
In the Services window, expand Oracle Cloud Remote.
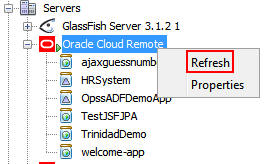
Right-click Oracle Cloud Remote and select Refresh.
Right-click mvn-logger and select View.
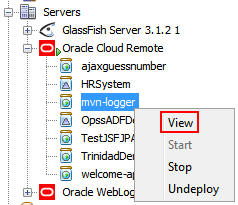
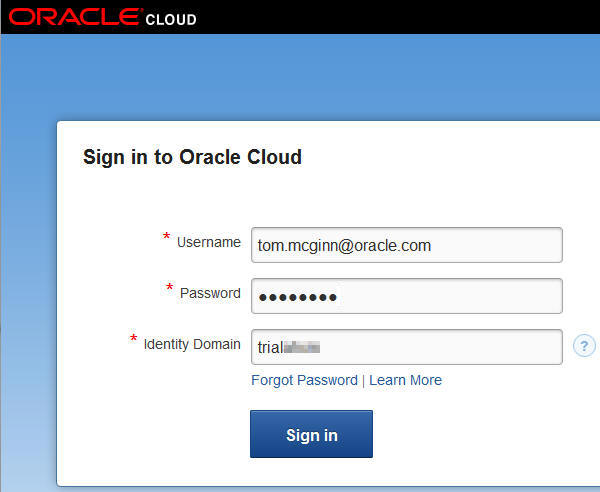
The application opens in a browser window, but you must first log in with your Oracle Cloud credentials.
Enter your user name, password, and identity domain, and
click Sign in.
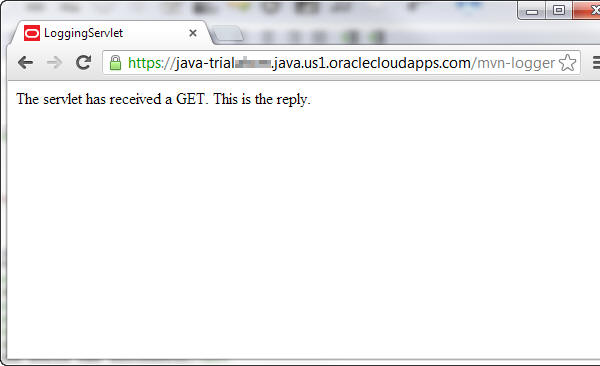
The application runs and displays a simple message.
Summary
- Install the Oracle Cloud Maven plugin
- Open, modify, and deploy a simple Maven application to
Oracle Java Cloud Service
- Oracle Cloud documentation
- NetBeans Maven Quick Start
- Apache
Maven documentation
- To learn more about Oracle
Cloud, refer to additional OBEs in the Oracle Learning Library
- Lead Curriculum Developer: Tom McGinn
In this tutorial, you learned how to:
 Overview