Creating a No-Interface View Session Bean and Packaging in a
WAR File
Overview
Purpose
This tutorial covers creating a EJB 3.1 application that demonstrates the no-interface Local view of a Session Bean and WAR-based packaging.
Time to Complete
Approximately 45 minutes.
Introduction
This example demonstrates the simplified programming and packaging model changes provided in EJB 3.1. Since the mandatory use of Java interfaces has been removed in EJB 3.1, plain old Java objects can be annotated and used as EJB components. It also supports the ability to place EJB components directly inside Web applications, thereby removing the need to produce archives to store the Web and EJB components and combine them together in an enterprise archive (EAR) file.
Normally, accessing this bean from a Servlet would require one .war, ejb-jar, and an .ear file to wrap the two modules together. With the new packaging alternative, everything fits into a single .war thus reducing the complexity of JEE development.
In this tutorial, you will create a Java EE 6 Web Application
and add the following components to it - no-interface
view Stateless Session Bean, Servlet and a
JSP. The index.jsp will contain
a form with a submit button, Run, allowing you to execute
the application. The form will submit to a Servlet which
will invoke sayHello
method in Session bean you will create and the response is
re-directed to response.jsp.
In the Web Application you will create in this
tutorial,@Stateless annotation is provided to
an plain old Java class that exposes it as an EJB session
bean. This is then injected into an Servlet using an
@EJB annotation. The EJB session bean and Servlet
classes are then packaged and deployed together in a single WAR
file, which demonstrates the simplified packaging and deployment
changes available in Java EE 6.
No-interface view
- Each session bean exposes a no-interface Local view.
- This client view has the same semantics as the EJB 3.0 Local business interface, except that it does not require a separate interface.
- All public methods of the bean class are automatically exposed to the caller.
- By default, any session bean that has an empty implements clause and does not define any other Local/Remote client views exposes a no-interface client view.
- A client of the no-interface view always acquires an EJB reference, either through injection or JNDI lookup.
- Download and install Java JDK 7 from this link.
- Download and install NetBeans 7.1.2 with Java EE which includes GlassFish 3.1.2 (Java EE download bundle) from this link. During installation, be sure to check the box to install GlassFish. JUnit is an optional installation and not required for this tutorial.
- Have the software installed as listed under Hardware and Software Requirements section.
- Ensure NetBeans is running.
Hardware and Software Requirements
The following is a list of hardware and software requirements:
Prerequisites
Before starting this tutorial, you should:
Create a Java EE Web Application
To create a Java EE Web Application, perform the
following steps in the NetBeans IDE.
Create a new Web Application.
Select File->New Project from the NetBeans menu.
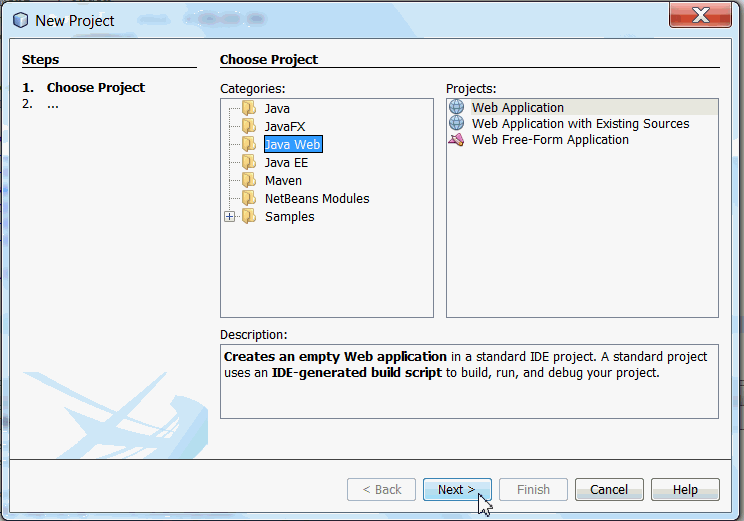
Select the Java Web category and a project type of Web Application.
Click Next.
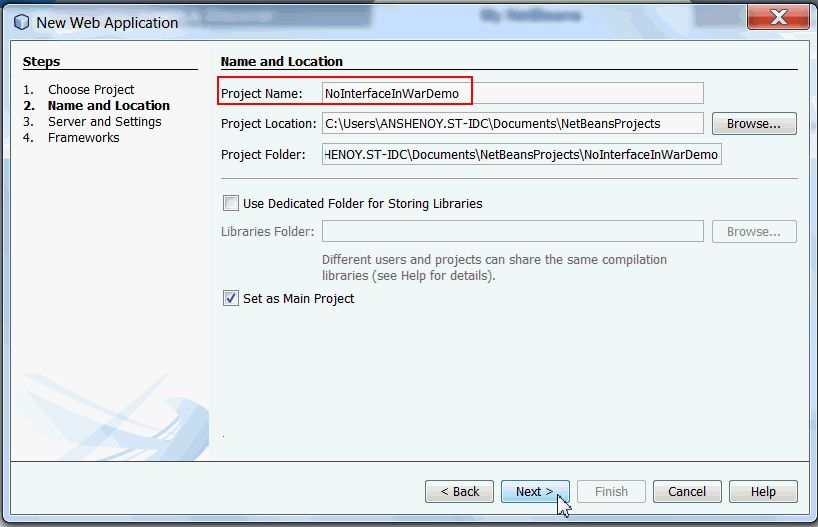
Enter project name as NoInterfaceInWarDemo. Click Next.
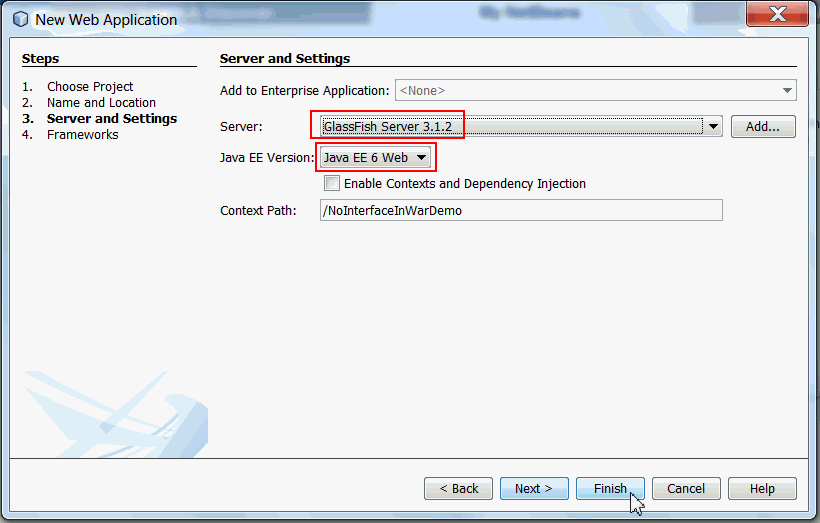
Verify the following :
GlassFish Server 3.1.2 is selected as the server.
Java EE 6 Web is
selected as Java EE Version.
You should now have a Web Application project with an index.jsp file.
Create Session Bean
To create a no-interface stateless session bean, perform the following steps in NetBeans IDE.
Right-click on the
NoInterfaceInWarDemo project
and select New->Java
Class.

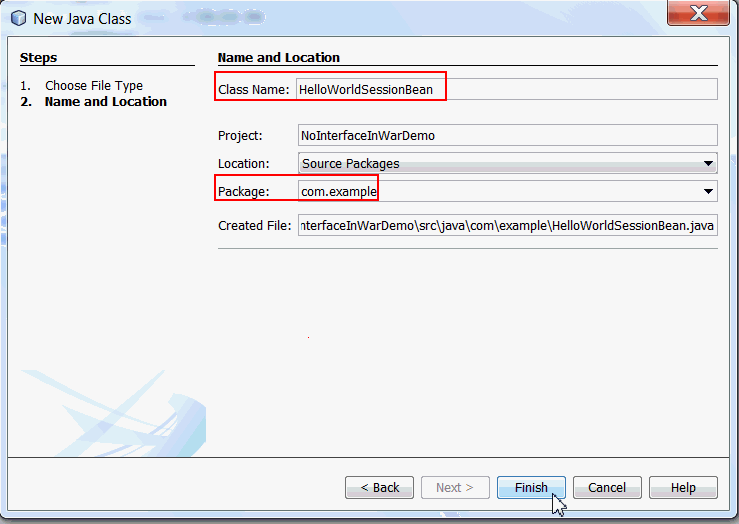
Specify the Session Bean information as follows:
Class Name: HelloWorldSessionBean
Package Name: com.example
Click Finish.
Double-click HelloWorldSessionBean.java in the Source Packages node to open in the code editor.
a. Import the following package.
import
javax.ejb.Stateless;
b. Add @Stateless annotation to the class
@Stateless
c. Implement sayHello
method.
 public String
                        sayHello()

                            {

                                return "Hello
                        EJB World";

                            }
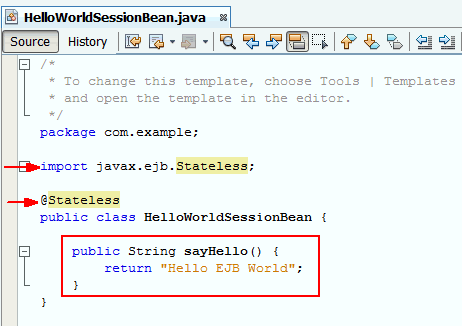
Plain old Java class, HelloWorldSessionBean, is
exposed as an EJB session bean by adding an @Stateless
annotation.
Create Servlet
To create a Servlet, perform the below steps in NetBeans IDE.
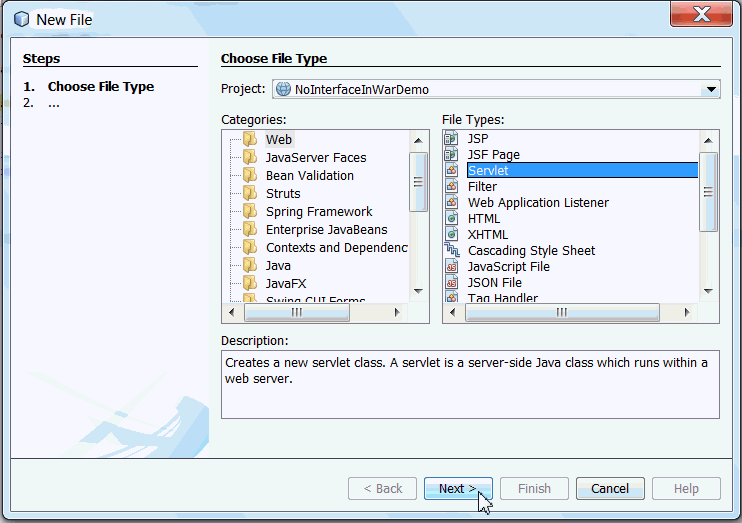
Right-click on the NoInterfaceInWarDemo project and select New->Other.
In the New File window, select a category of Web and a file type of Servlet.
Click Next.
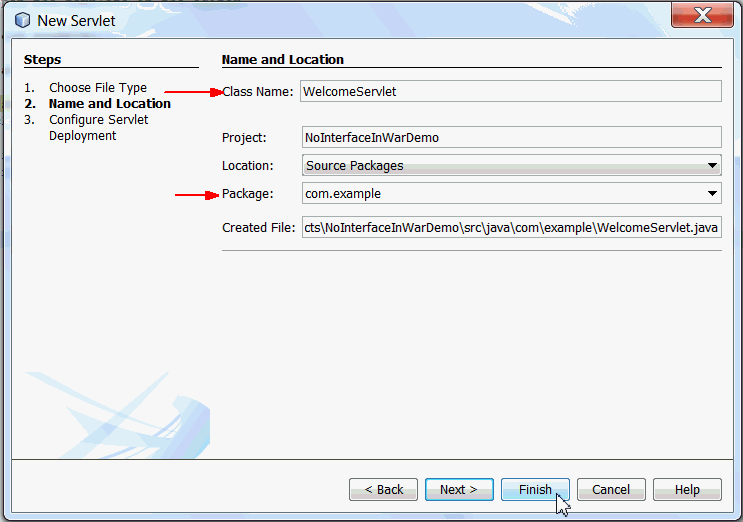
Specify the Servlet information as follows:
Class Name: WelcomeServlet
Package Name: com.example
Click Finish.
Perform the following changes to the WelcomeServlet.
a. Import the following package.
import javax.ejb.EJB;
b. Add a field of type HelloWorldSessionBean named
helloWorldSessionBean.
 @EJB
 private HelloWorldSessionBean helloWorldSessionBean;
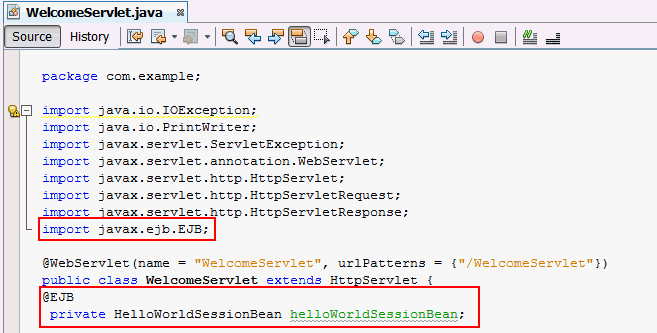
The session bean, HelloWorldSessionBean is injected into WelcomeServlet using an
@EJB annotation.Modify the doGet() method in WelcomeServlet.
Expand the editor fold and add the below lines of code to the doGet() method.
       String str =
                      "Greetings from the Servlet calling the no interface
                      EJB.<br>";

                             String msg = str +
                      helloWorldSessionBean.sayHello();


                      request.setAttribute("message", msg);


                      request.getRequestDispatcher("response.jsp").forward(request,response);

Create JSP
To create response.jsp, perform the following steps in
NetBeans IDE.
Right-click NoInterfaceInWarDemo project and select project and select New->Other.
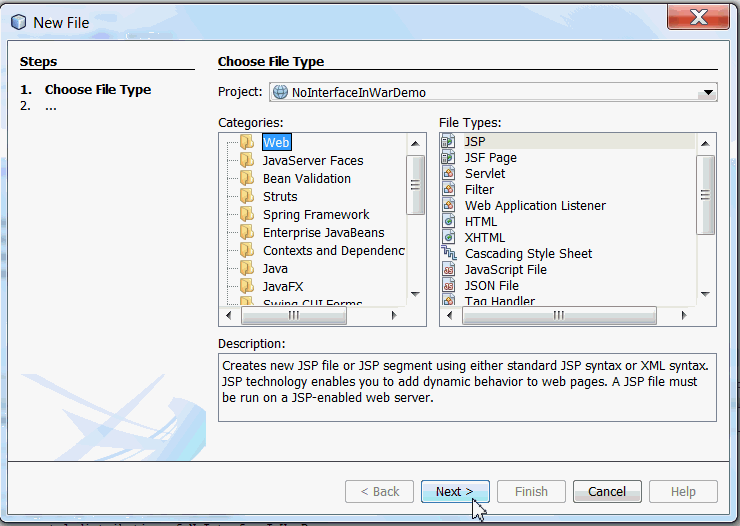
In the New File window, select a category of Web and a file type of JSP.
Click Next.
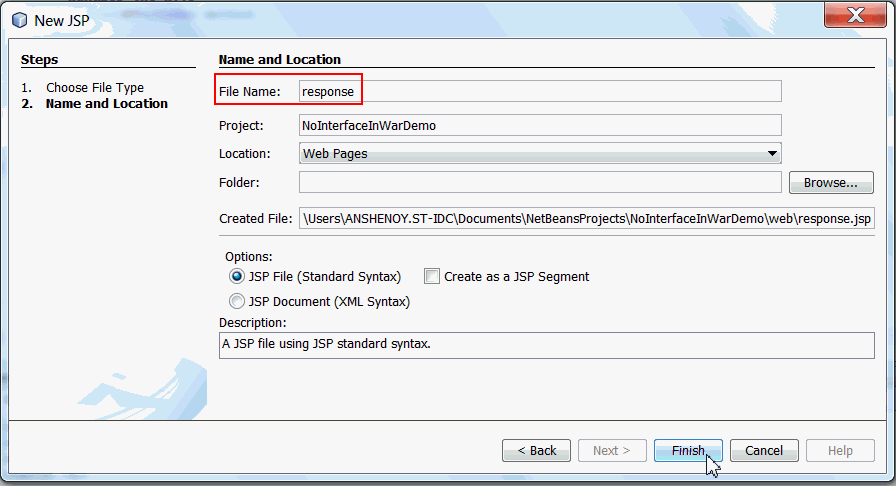
Specify the name as response and click
Finish.
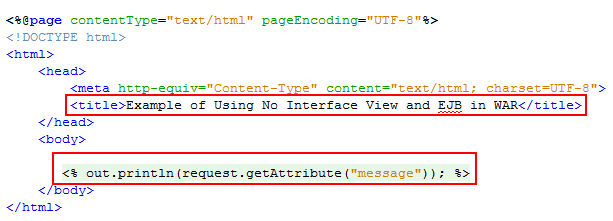
Make the following changes to response.jsp.
a. Modify the title of the page to Example of Using no-interface View and EJB in WAR.
b. Modify the body section, add the below line of code.
<%
out.println(request.getAttribute("message")); %>
Modify index.jsp
To modify index.jsp, perform the following steps in
NetBeans IDE.
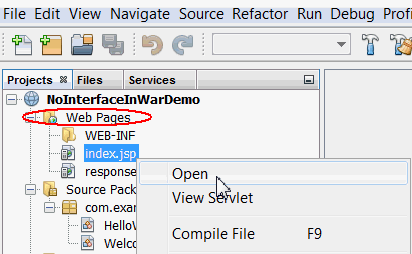
Open the existing index.jsp file from the Web Pages portion of the NoInterfaceInWarDemo project.
Make the following changes to index.jsp.
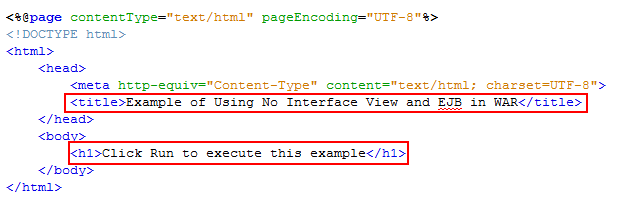
a. Modify the title of the page to Example of Using no-interface View and EJB in WAR.
b. Modify the heading of the page to Click Run to execute this example
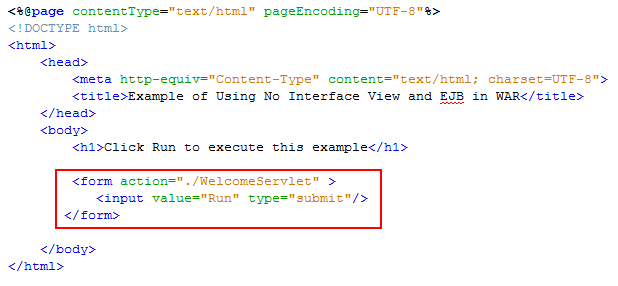
Add a form to the body of the index.jsp page which contains a submit button named, Run.
<form action="./WelcomeServlet"
>
<input value="Run" type="submit"/>
</form>
Deploy the Web Application
To deploy and run the application, perform the following steps in NetBeans IDE.
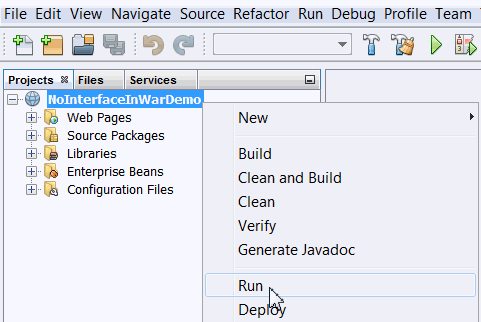
Right-click NoInterfaceInWarDemo project in the projects window and select Build.
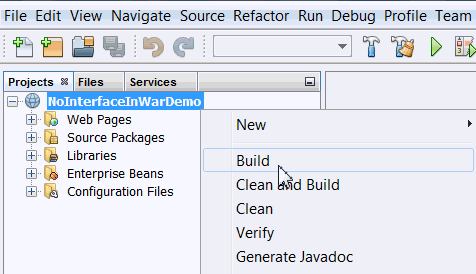
In the Output console, you see a message that NoInterfaceInWarDemo.war has been created.
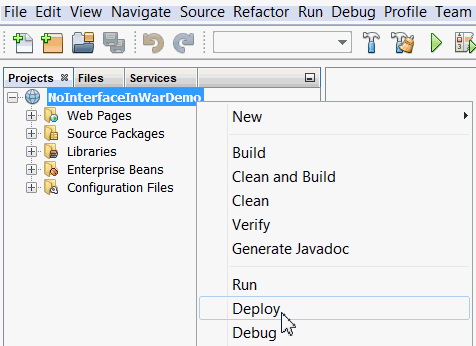
In the Projects window, right-click NoInterfaceInWarDemo
and select Deploy.
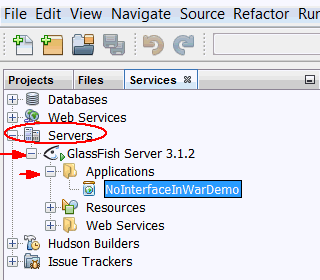
a. In the Services tab, expand the Servers node.
b. Expand the GlassFish Server node.
c. In the GlassFish Server node, expand the Applications node, you see NoInterfaceInWar deployed.
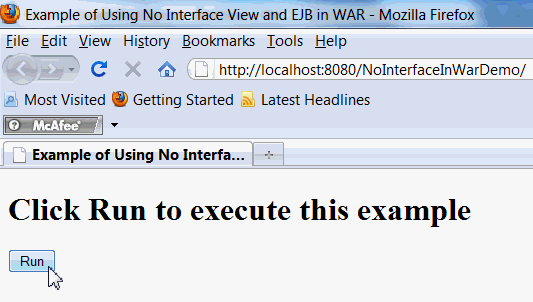
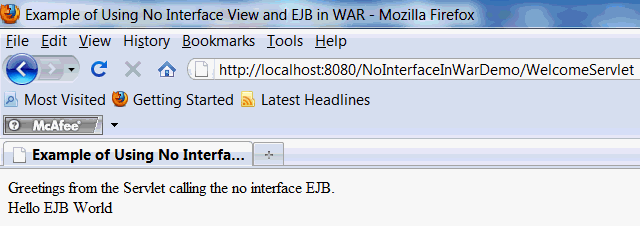
The output will be as shown below.
Summary
- Create a no-interface View Session Bean-
@Statelessannotation is provided to an plain old Java class that exposes it as an EJB session bean. - Access the Session Bean in a Servlet
- Package the application as a WAR file and deploy.
In this tutorial, you have learned how to:
- JSR 318: Enterprise JavaBeans 3.1
- Enterprise JavaBeans Technology
- Creating an Enterprise Application with EJB 3.1
- Lead Curriculum Developer: Anjana Shenoy
 Overview