Creating Asynchronous Methods in EJB 3.1
Overview
- Fire-and-forget asynchronous methods having
voidreturn type.
- Retrieve-result-later asynchronous methods having
Future<?>return type.
Purpose
This tutorial covers creating a EJB 3.1 application that
demonstrates the use of @Asynchronous
annotation in an Enterprise Java Bean(EJB) class or specific
method.
Time to Complete
Approximately 45 minutes.
Introduction
This example demonstrates the use of the EJB 3.1 @Asynchronous
annotation in an EJB class or specific method. In EJB 3.1,
session beans support asynchronous method invocations. Bean
methods annotated with @Asynchronous
are invoked asynchronously. When a client invokes methods with
the @Asynchronous annotation, the container
immediately returns control to the client and invokes the method
in a different thread. The method may return a future object to
allow the client to check on the status of the method
invocation, and retrieve result values that are asynchronously
produced. EJB 3.1 supports this feature by using Future,
which is part of standard java concurrency. Future
represents the result of an asynchronous computation.
Before EJB 3.1, if you want to execute an asynchronous
processing you had to use JMS(Java Messaging Services) and a
MDB(Message Driven Bean), not so easy and rather heavy in most
cases. JMS should be really used where messaging is required –
either publish/subscribe topics or point-to-point queues. Now
with EJB 3.1, you can use a simple session bean with the @Asynchronous
annotation on the method which must be called asynchronously.
Two ways of asynchronous EJB invocations are used:
In this tutorial, you will create a Java EE 6 Web Application
and add the following components to it - a Stateless Session
Bean with two asynchronous methods. We define a Servlet
to call the asynchronous methods and to keep track of the
invocation and completion times to demonstrate the asynchronous
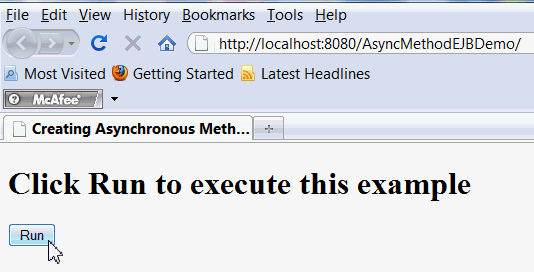
nature of the method calls. The index.jsp
will contain a form with a submit button, Run allowing
you to execute the application. The form will submit to the Servlet
which invokes the asynchronous methods defined in the session
bean and the response is re-directed to response.jsp.
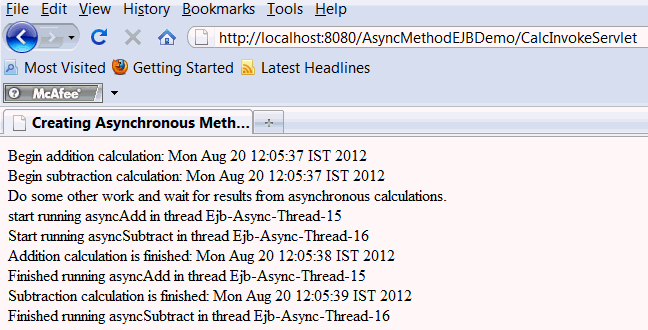
Information about the asynchronous handling procedure is
displayed to users. From this information, users will
notice that the invoker thread and the called asynchronous
thread are working concurrently.
- Download and install Java JDK 7 from this link.
- Download and install NetBeans 7.1.2 with Java EE which includes GlassFish 3.1.2 (Java EE download bundle) from this link. During installation, be sure to check the box to install GlassFish. JUnit is an optional installation and not required for this tutorial.
- Have the software installed as listed under Hardware and Software Requirements section.
- Ensure NetBeans is running.
Hardware and Software Requirements
The following is a list of hardware and software requirements:
Prerequisites
Before starting this tutorial, you should:
Create a Java EE Web Application
To create a Java EE Web Application, perform the
following steps in the NetBeans IDE.
Create a new Web Application.
Select File->New Project from the NetBeans menu.
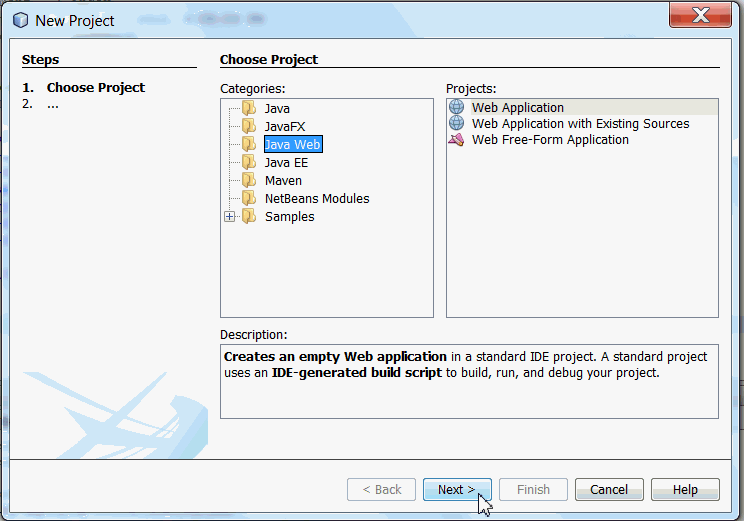
Select the Java Web category and a project type of Web Application.
Click Next.
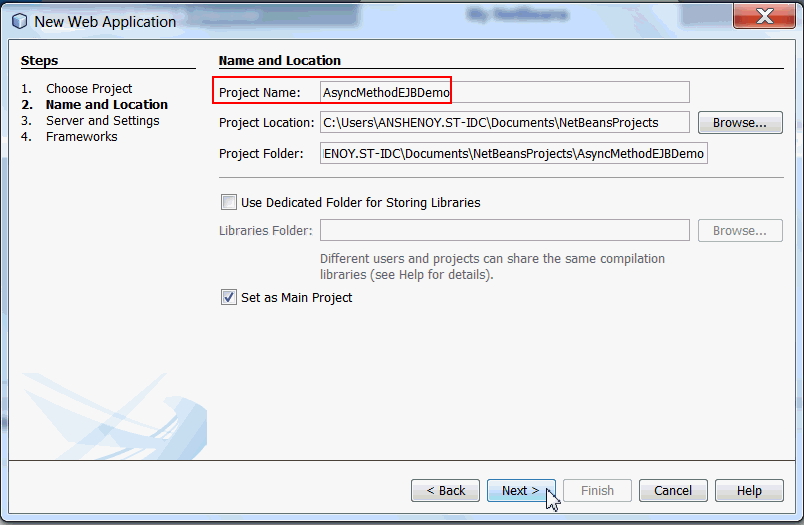
Enter project name as AsyncMethodEJBDemo. Click Next.
Verify the following :
GlassFish Server 3.1.2 is selected as the server.
Java EE 6 Web is
selected as Java EE Version.

You should now have a Web Application project with an index.jsp file.
Create a Session Bean
To create a CalculatorBean session bean which contains asynchronous methods, perform the following steps in NetBeans IDE.
Right-click
AsyncMethodEJBDemo project
and select New->Java
Class.

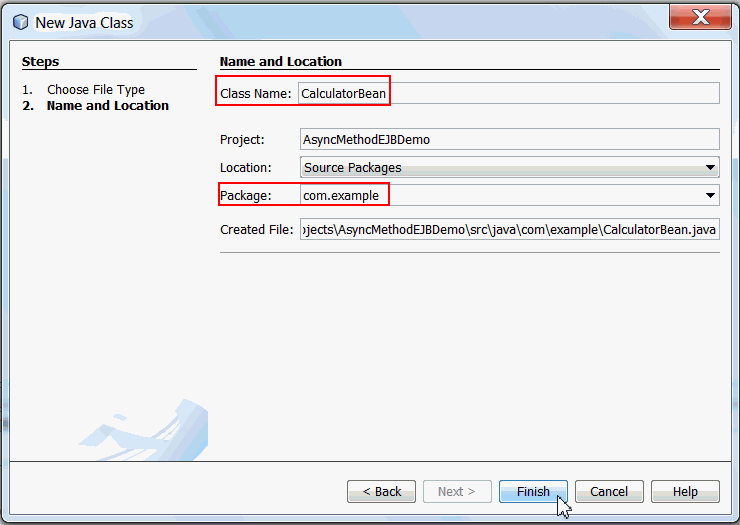
Specify the Session Bean information as follows:
Class Name: CalculatorBean
Package Name: com.example
Click Finish.
Double-click CalculatorBean.java in the Source Packages node to open in the code editor.
a. Import the following packages.
import java.util.Date;

                      import java.util.concurrent.Future;

                      import javax.ejb.Asynchronous;

                      import javax.ejb.AsyncResult;

                      import javax.ejb.Stateless;
b. Add @Stateless and
@Asynchronous
annotations to the class.
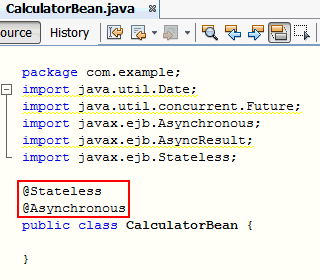
CalculatorBean is a stateless session bean and
is annotated with @Asynchronous to declare all
of its business methods as asynchronous.
c. Implement an
asyncAdd method.
                      public Future<Integer> asyncAdd(StringBuilder sb,
                      int num1, int num2) {
sb.append("start running asyncAdd in thread " +
Thread.currentThread().getName() + "<br/>");
try {
Thread.sleep(1000);
} catch (InterruptedException e) {
System.out.println("Error occured while trying to make this
thread asleep.");
e.printStackTrace();
}
int result = num1 + num2;
sb.append("Addition calculation is finished: " + new Date()
+ "<br/>");
sb.append("Finished running asyncAdd in thread " +
                    Thread.currentThread().getName()+ "<br/>");

                    return new AsyncResult<Integer>(result);
}
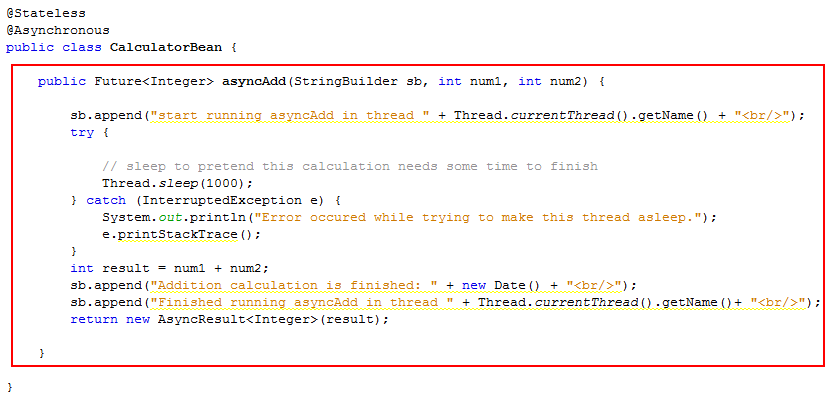
asyncAdd is a asynchronous method and
performs the addition of two integers and returns the result
as a Future object.
d. Implement
an
asyncSubtract method. public Future<Integer> asyncSubtract(StringBuilder sb, int num1, int num2) {
sb.append("Start running asyncSubtract in thread " + Thread.currentThread().getName()+"<br/>");
try {
// sleep to pretend this calculation needs some time to finish
Thread.sleep(2000);
} catch(InterruptedException e) {
System.out.println("Error occured while trying to make this thread asleep.");
e.printStackTrace();
}
int result = num1 - num2;
sb.append("Subtraction calculation is finished: " + new Date() + "<br/>");
sb.append("Finished running asyncSubtract in thread " + Thread.currentThread().getName()+ "<br/>");
return new AsyncResult<Integer>(result);
}
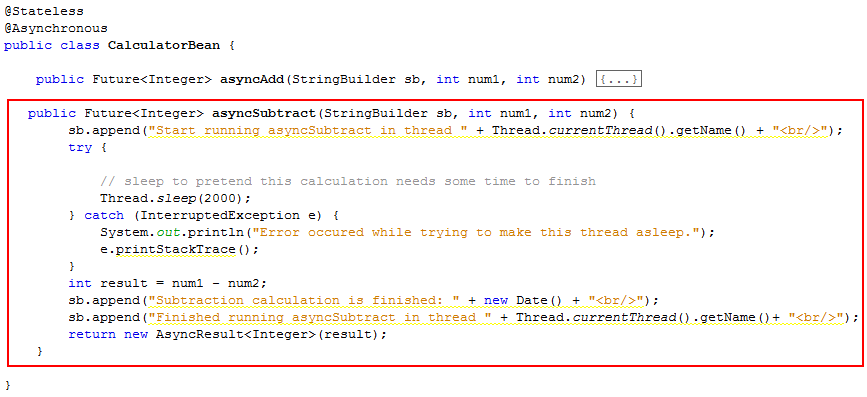
asyncSubtract
is a asynchronous method and performs the
subtraction of two integers and returns the result
as a Future object.Create a Servlet
To create a Servlet, perform the below steps in NetBeans IDE.
Right-click on the AsyncMethodEJBDemo project and select New->Other.
In the New File window, select a category of Web and a file type of Servlet.
Click Next.
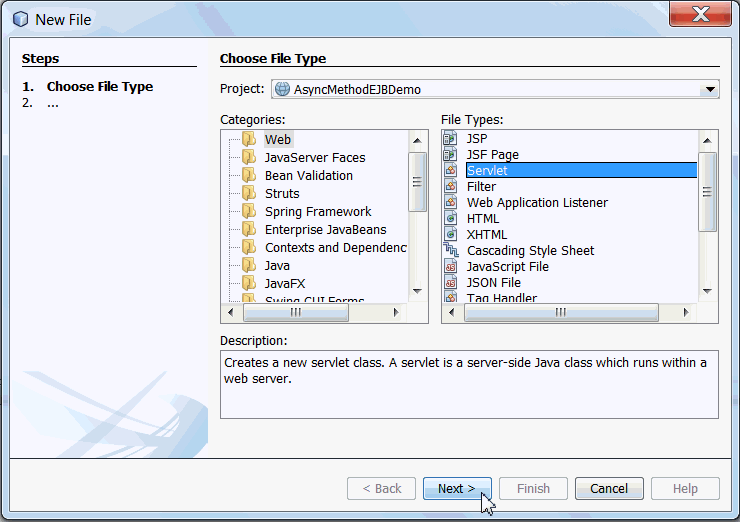
Specify the Servlet information as follows:
Class Name: CalcInvokeServlet
Package Name: com.example
Click Finish.
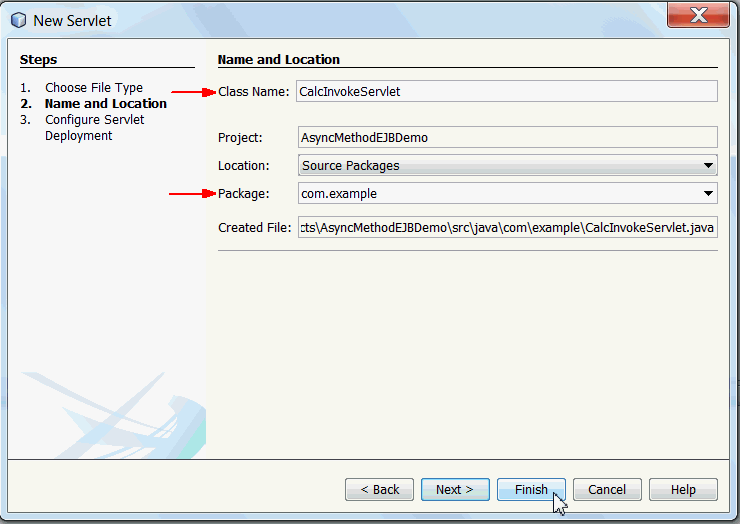
Perform the following changes to the CalcInvokeServlet.
a. Import the following packages.
import javax.ejb.EJB
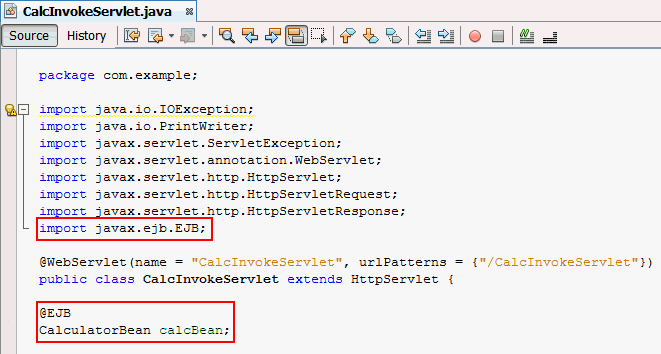
b. Add a field of type CalculatorBean named
calcBean.
@EJB
CalculatorBean calcBean;
The session bean,
CalculatorBean is injected
into CalcInvokeServlet using an @EJB
annotation.Modify the doGet() method in CalcInvokeServlet.
a. Delete any IDE generated code in the doGet
method.
b. Expand the editor fold and add the below lines of code
to the doGet() method to invoke asyncAdd
method.
       StringBuilder sb
                      = new StringBuilder();
                      sb.append("Begin addition calculation: " + new Date() +
                      "<br/>");


                      Future<Integer> addFuture = calcBean.asyncAdd(sb, 1,
                      1);
c. Add the below lines of code to the
doGet() method to invoke asyncSubtract
method.
                          sb.append("Begin subtraction
                      calculation: " + new Date() + "<br/>");

                          Future<Integer> subtractFuture =
                      calcBean.asyncSubtract(sb, 2, 1);

d. Add
the below lines of code to doGet
method to wait for the asynchronous methods of bean
to finish calculation.
     sb.append("Do some
                      other work and wait for results from "
+
"asynchronous calculations." + "<br/>");
while (!addFuture.isDone() || !subtractFuture.isDone()) {
try {
Thread.sleep(100);
     } catch
                      (InterruptedException e) {
                      System.out.println("Error occured while trying to make
                      this thread asleep.");
e.printStackTrace();
return;
}
}
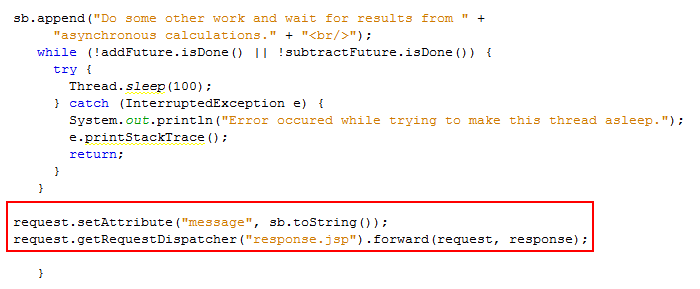
 e. Add the below lines of code
                        to the doGet
method to forward the response
to response.jsp.
    request.setAttribute("message",
                      sb.toString());


                      request.getRequestDispatcher("response.jsp").forward(request,
                      response);
Note: Add any other missing import statements.
Create a JSP
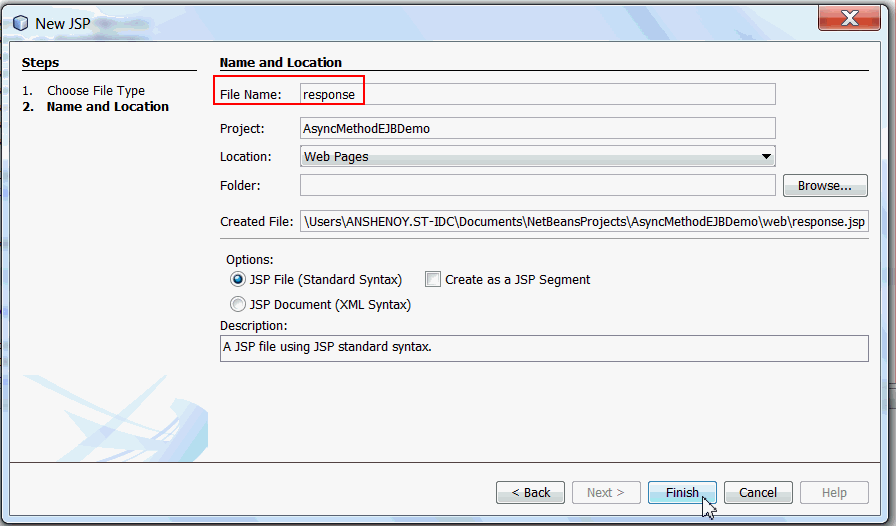
To create response.jsp, perform the following steps in NetBeans IDE. This jsp page is forwarded from the servlet, and displays the messages printed.
Right-click AsyncMethodEJBDemo project and select New->Other.
In the New File window, select a category of Web and a file type of JSP.
Click Next.

Specify the name as response and click Finish.
Make the following changes to response.jsp.
a. Modify the title of the page to Creating Asynchronous Methods in EJB 3.1.
b. Modify the body section, add the below line of code.
<%
out.println(request.getAttribute("message")); %>

Modify index.jsp
To modify index.jsp, perform the following steps in
NetBeans IDE.
Open the existing index.jsp file from the Web Pages portion of the AsyncMethodEJBDemo project.
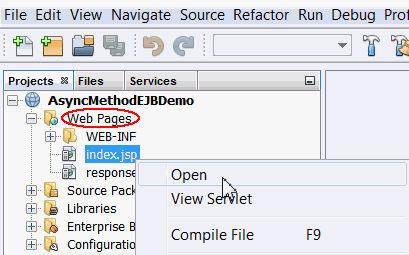
Make the following changes to index.jsp.
a. Modify the title of the page to Creating Asynchronous Methods in EJB 3.1.
b. Modify the heading of the page to Click Run to execute this example
Add a form to the body of the index.jsp page which contains a submit button named Run.
<form
action="./CalcInvokeServlet" >
<input value="Run" type="submit"/>
</form>

Deploy the Web Application
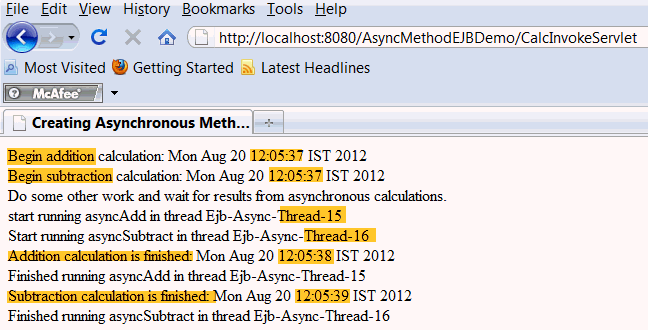
- Examine the starting and completion time of execution of asynchronous methods.
asyncAddandasyncSubtractmethods are being executed in different threads.
To deploy and run the application, perform the following steps in NetBeans IDE.
Right-click AsyncMethodEJBDemo project in the projects window and select Build.
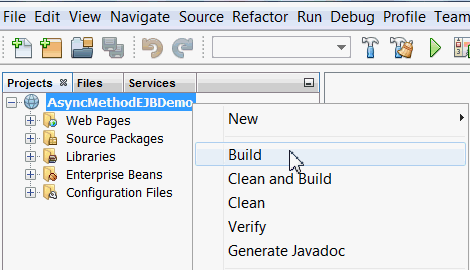
In the Output console, you see a message that AsyncMethodEJBDemo.war has been created.
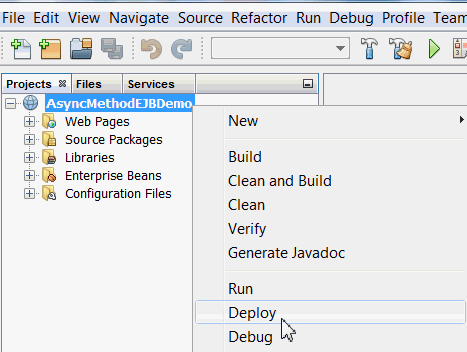
In the Projects window, right-click AsyncMethodEJBDemo
and select Deploy.
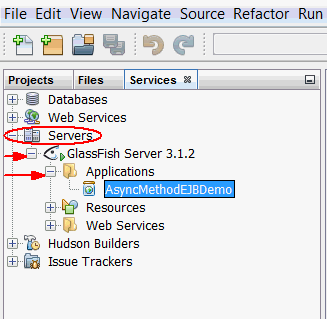
a. In the Services tab, expand the Servers node.
b. Expand the GlassFish Server node.
c. In the GlassFish Server node, expand the Applications node, you see AsyncMethodEJBDemo deployed.
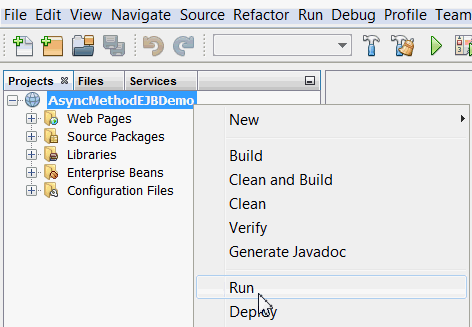
The output will be similar to, as shown below.
Observe the output.
Summary
- Create asynchronous methods in a stateless session bean.
- Access the asynchronous methods in a Servlet.
In this tutorial, you have learned how to:
- JSR 318: Enterprise JavaBeans 3.1
- Java
EE 6 Tutorial
- Enterprise JavaBeans Technology
- Creating an Enterprise Application with EJB 3.1
- Future
Interface
- Lead Curriculum Developer: Anjana Shenoy
Resources
Credits
To help navigate this Oracle by Example, note the following:
- Hiding Header Buttons:
- Click the Title to hide the buttons in the header. To show the buttons again, simply click the Title again.
- Topic List Button:
- A list of all the topics. Click one of the topics to navigate to that section.
- Expand/Collapse All Topics:
- To show/hide all the detail for all the sections. By default, all topics are collapsed
- Show/Hide All Images:
- To show/hide all the screenshots. By default, all images are displayed.
- Print:
- To print the content. The content currently displayed or hidden will be printed.
To navigate to a particular section in this tutorial, select the topic from the list.