Testing EJB 3.1 Applications in GlassFish Embedded EJB Container
Overview
Purpose
This tutorial covers creating an EJB 3.1 application that
demonstrates how to create and run JUnit tests in GlassFish
embedded EJB container within a Java SE environment.
Time to Complete
Approximately 45 minutes.
Introduction
EJB 3.1 introduced the EJB 3.1 Embeddable API for executing EJB
components within a Java SE environment. The embedded container
allows use of the EJB programming model in desktop
applications. The EJB 3.1 Embeddable API is designed for unit
testing of EJB modules. This includes the support for running an
embedded EJB container within a Java SE environment, so that the
EJB can run without an Application Server.
The embedded container allows client code and its corresponding
enterprise beans to run within the same JVM and class loader.
This provides better support for testing and offline
processing (e.g. batch).The client uses a spec-defined
bootstrapping API to start the container and identify the set of
enterprise bean components for execution. The embeddable EJB
container provides a managed environment with support for the
same basic services that exist within a Java EE runtime:
injection, access to a component environment, container-managed
transactions, etc. In general, enterprise bean components are
unaware of the kind of managed environment in which they are
running. This allows maximum reusability of enterprise
components across a wide range of testing and deployment
scenarios without significant rework.
In this tutorial, you will create a Java SE application
with a stateless EJB session bean. Next you will create a JUnit
test class to test the session bean and run the test in
the GlassFish embedded EJB container.
- Download and install Java JDK 7 from this link.
- Download and install NetBeans 7.2 with Java EE which
includes GlassFish 3.1.2 (Java EE download bundle) from this link.
During installation, be sure to check the box to install
GlassFish and JUnit.
- Have the software installed as listed under Hardware and Software Requirements section.
- Ensure NetBeans is running.
The Hardware and Software Requirements
The following is a list of hardware and software requirements:
Prerequisites
Before starting this tutorial, you should:
Creating a Java SE Application
To create a Java SE Application, perform the following
steps in the NetBeans IDE.
Create a new Java SE Application.
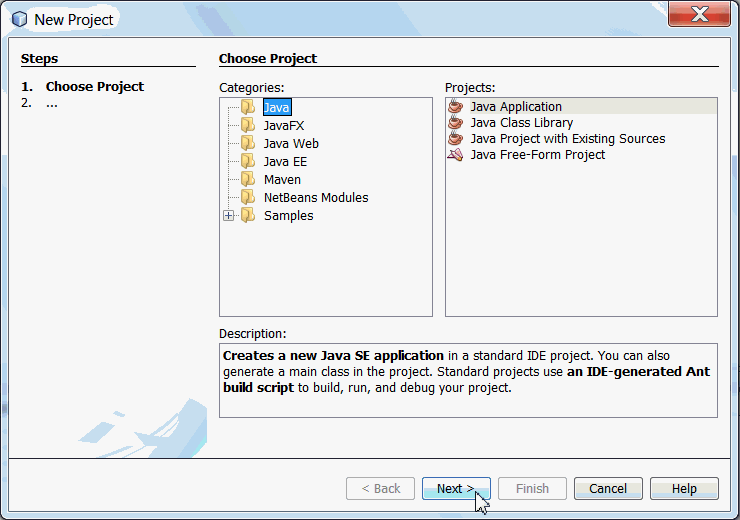
Select File->New Project from the NetBeans menu.
Select the Java category and a project type of Java Application.
Click Next.
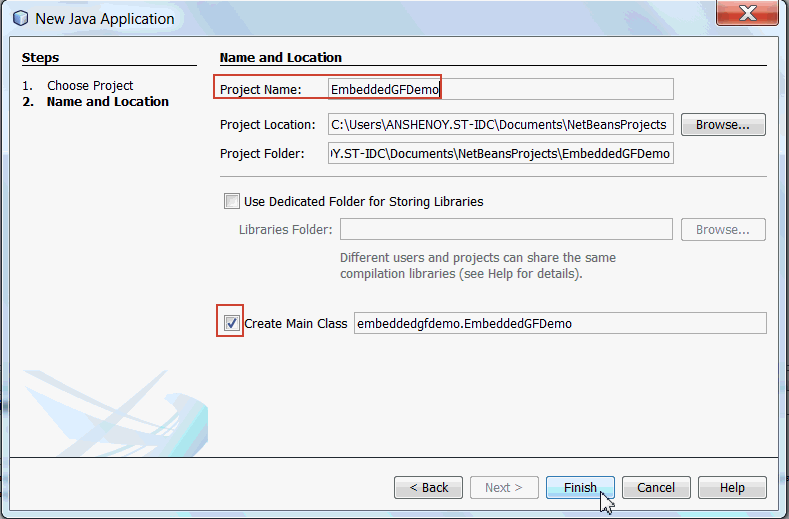
Enter project name as EmbeddedGFDemo.
Uncheck Create Main Class option.
Note: This option is checked by default.
Click Finish.
You should now have a Java SE Application
project.
Setting the Project Properties
You need to add the GlassFish embedded EJB container
glassfish-embedded-static-shell.jar and javax.ejb.jar
to the classpath of the EmbeddedGFDemo project.
Adding the GlassFish embedded EJB Container
Add the GlassFish embedded EJB container to the classpath of the EmbeddedGFDemo project by completing the following steps
a. Right-click EmbeddedGFDemo
project and select Properties.
b. In the Project Properties - EmbeddedGFDemo
dialog box, select Libraries under the
Categories column.
c. Click Add Jar/Folder.

d. Browse to $GLASSFISH_HOME/lib/embedded folder.
$GLASSFISH_HOME points to the
GlassFish installation directory.
e. Select glassfish-embedded-static-shell.jar.
f. Click Open.
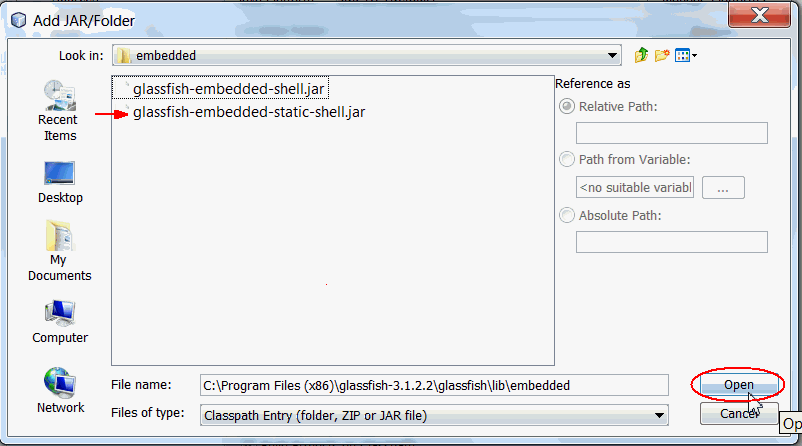
g.Click OK.
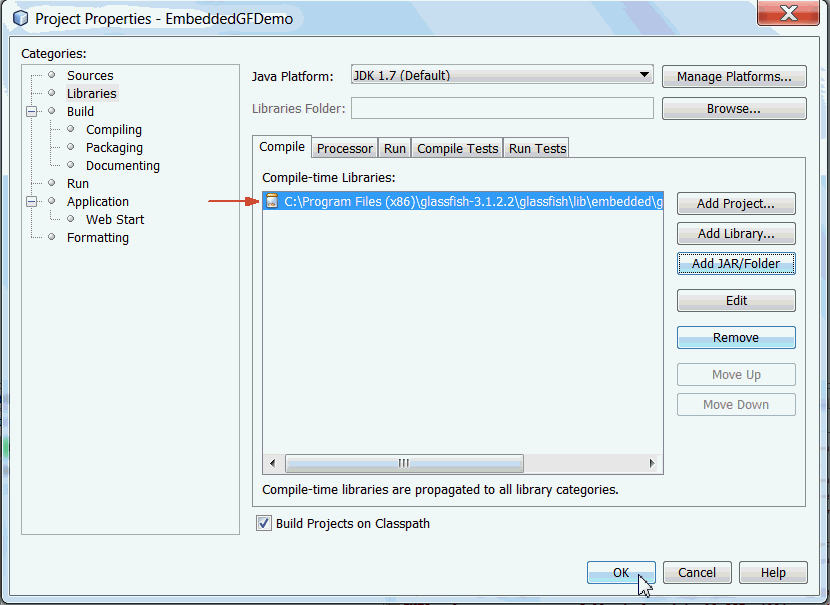
EmbeddedGFDemo
in the projects window. Expand the Libraries node
and you see the GlassFish embeddable EJB container.
Adding javax.ejb.jar
Add the javax.ejb.jar to the classpath
of the EmbeddedGFDemo project by completing the
following steps:
a. Right-click EmbeddedGFDemo
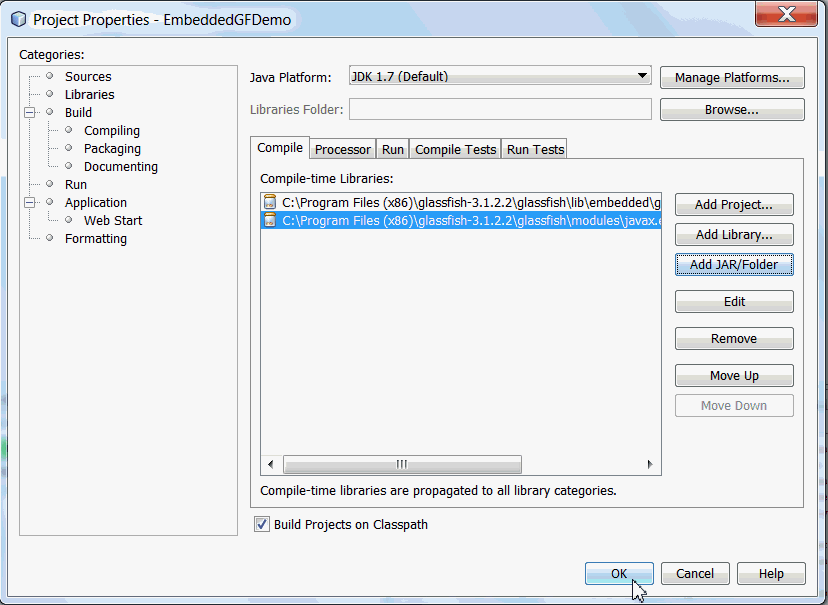
project and select Properties.
b. In the Project Properties - EmbeddedGFDemo
dialog box, select Libraries under the
Categories column.
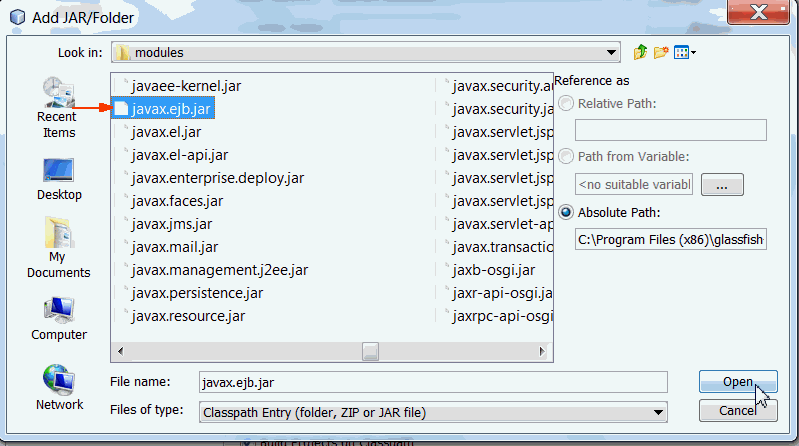
c. Click Add Jar/Folder.
d. Browse to $GLASSFISH_HOME/modules/javax.ejb.jar
e. Select javax.ejb.jar.
f. Click Open.
g. Click OK.
EmbeddedGFDemo
in the projects window. Expand the Libraries node
and you see javax.ejb.jar.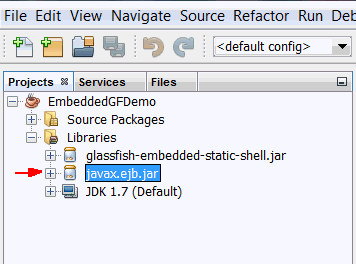
Creating a Session Bean
Create a session bean by performing the following steps.
In the Projects pane, right-click the
EmeddedGFDemo project and select New->Java
Class.

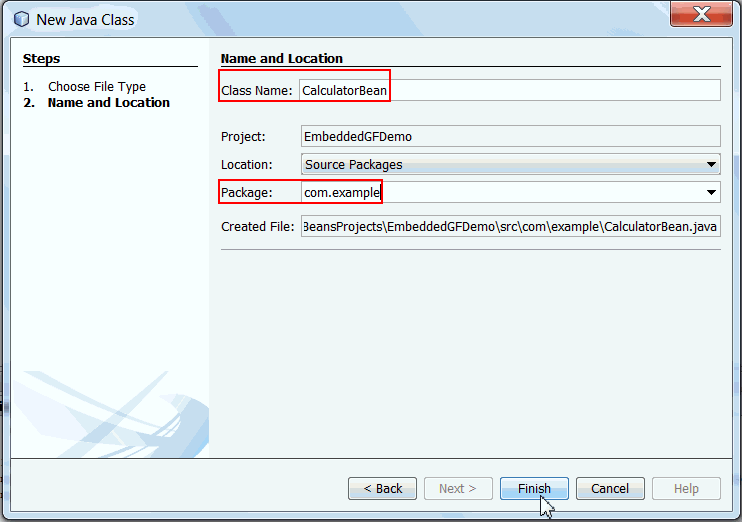
Specify the session bean information as follows:
Class Name: CalculatorBean
Package Name: com.example
Click Finish.
Double-click CalculatorBean.java in the Source Packages node to open in the code editor.
a. Import the following package.
import javax.ejb.Stateless;
b. Add an
@Stateless annotation to the
class.
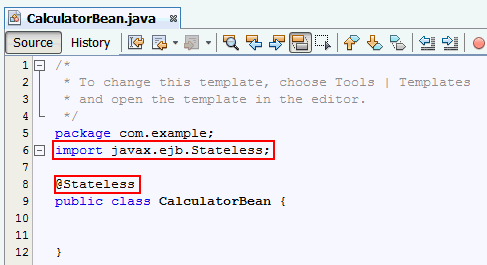
c. Implement two business methods
add and subtract
in CalculatorBean.
                      public int add(int a, int b) {

                              return a + b;

                          }


                          public int subtract(int a, int b) {

                              return a - b;

                          }

Testing in the embedded EJB Container
- The tests are passed. You can also expand the test
results and observe that Add and Subtract tests are
executed successfully.

- Observe the status of the embedded container
indicating successful start before execution
of the JUnit tests and shutdown after the
execution of the tests.
To test the business methods of the session bean, you will use the new embeddable EJB Container API. You first create a JUnit test class, CalculatorBeanTest. You will start the emedded EJB Container in that class. Next, you will look up the CalculatorBean using JNDI.
Creating a JUnit Test
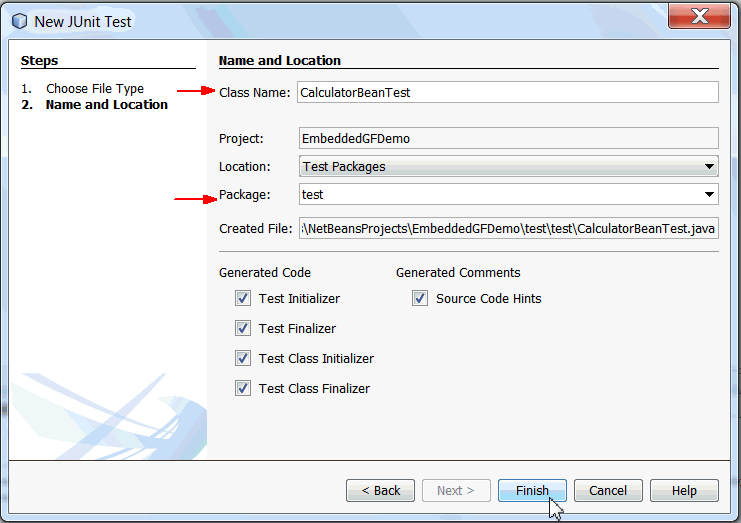
Create the JUnit test class by performing the following steps.
Right-click on the
EmbeddedGFDemo
project and select New->JUnit
Test.

Specify the JUnit test information as follows:
Class Name: CalculatorBeanTest
Package Name: test
Click Finish.
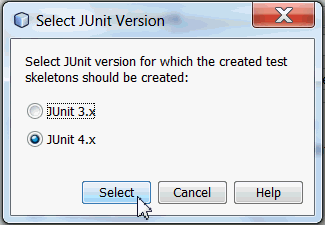
Verify JUnit 4.x is selected in the Select JUnit Version dialog box.
Click Select.
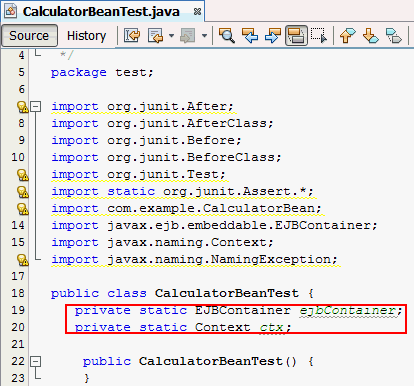
When you click Select, NetBeans generates
the CalculatorBeanTest.java file and
opens the class in the editor.
CalculatorBeanTest.java
generated test class under the Test Packages node.

Modifying the JUnit Test
Perform the following steps to modify
CalculatorTestBean.java.
Import the following packages.
import com.example.CalculatorBean;

                            import javax.ejb.embeddable.EJBContainer;

                            import javax.naming.Context;

                            import javax.naming.NamingException;
Declare two variables of the type EJB
container and Context in the
class CalculatorBeanTest.
private static
EJBContainer ejbContainer;
private static Context ctx;
To Modify the setUpClass() method, add the
below lines of code.
ejbContainer = EJBContainer.createEJBContainer();
System.out.println("Starting the container");
ctx
= ejbContainer.getContext();
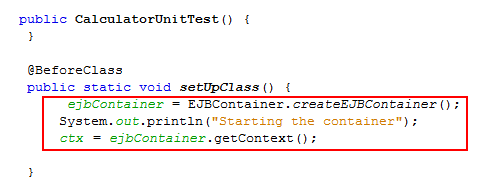
setUpClass
method creates the embedded EJB container. The setUpClass
method is annotated with @BeforeClass,
and that is used to indicate a method that will be run
first, before the test method.In this example, the container instance will be created before the test methods, and the container will exist until it is shut down.
createEJBContainer()is
used to create an embedded
EJB container instance, and it is part of the EJB
3.1 Embeddable API.To modify the tearDownClass() method, add the below lines of code:
                            ejbContainer.close();


                            System.out.println("Closing the container");
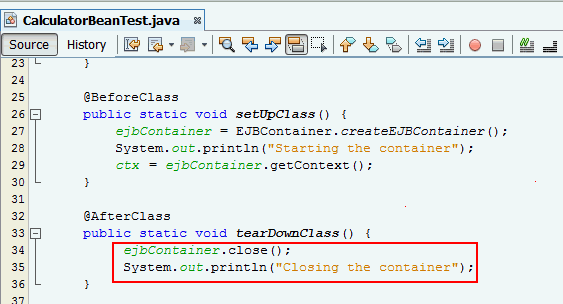
The tearDownClass()method
shuts down the embedded EJB container and releases
all the acquired resources. The @AfterClass annotation indicates that
this method will be executed after the test method in
the test class. Create a test method, Add .
    @Test

                                public void Add() throws
                            NamingException

                                {

                                 CalculatorBean
                            calculatorBean =
                            (CalculatorBean)ctx.lookup("java:global/classes/CalculatorBean");

                                 int num1=8;

                                 int num2=7;

                                 int expResult = 15;

                                 int result =
                            calculatorBean.add(num1,num2);

                                 assertEquals(expResult,
                            result);


                                }

test method
                            performs a unit test of
the add method of CalculatorBean,Create a test method, Sub.
     @Test

                                public void Sub() throws
                            NamingException

                                {

                                 CalculatorBean
                            calculatorBean =
                            (CalculatorBean)ctx.lookup("java:global/classes/CalculatorBean");

                                 int num1=8;

                                 int num2=7;

                                int expResult = 1;

                                int result =
                            calculatorBean.subtract(num1,num2);

                                assertEquals(expResult, result);


                                }
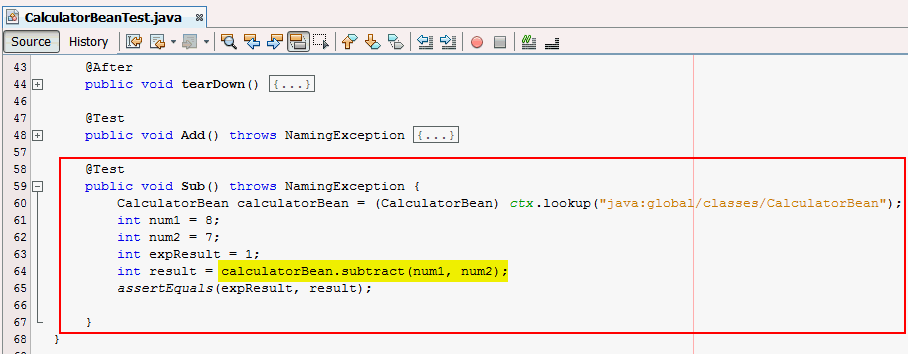
subtract method of CalculatorBean.
Executing the JUnit Test
To execute the JUnit Test, perform the following steps in NetBeans IDE.
In the Projects pane, select EmbeddedGFDemo
project,
Expand Test Packages node.
Right-click CalculatorBeanTest.java
and select Run.
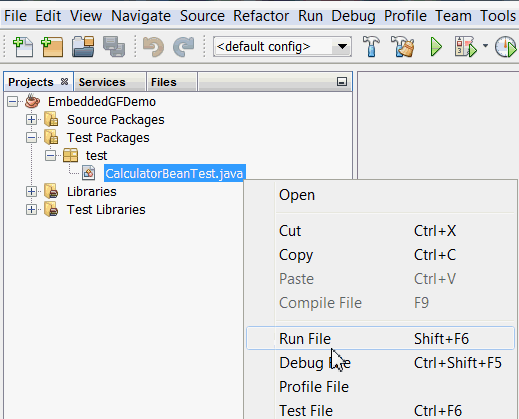
You see the following output in the Output window.

Observe the output-
Summary
- Create JUnit tests for EJB 3.1 applications in Java SE
environment.
- Execute the JUnit tests in GlassFish embedded server .
In this tutorial, you have learned how to:
- JSR 318: Enterprise JavaBeans 3.1
- Java
EE 6 Tutorial
- Enterprise JavaBeans Technology
- Using
the Embedded EJB container to Test Enterprise Applications
- Lead Curriculum Developer: Anjana Shenoy
 Overview