How-To Document
After completing this How-To, you should be able to understand, How to use the SQL Worksheet to enter SQL and SQL*Plus commands.
1. Introduction
Oracle SQL Developer provides a SQL Worksheet that you can use to query data, by writing simple or complex SQL statements. In this How-To, we look at the most basic of these, select all the data in a table, and restricting this query by reducing the columns or rows you retrieve.
2. Software Requirements
- Oracle Database 9.2.0.1 or later
- Access to the Sample User Account HR
3. Browse Your Data
3.1. Write a Select Statement
Once you have a database connection, you are ready to browse the schema, query and modify data.
1. Once you have created a database connection, you need to ensure you have the SQL Worksheet open. If the worksheet is not open, use the context menu to open it.
2. Once connected, you should see the SQL Worksheet window.

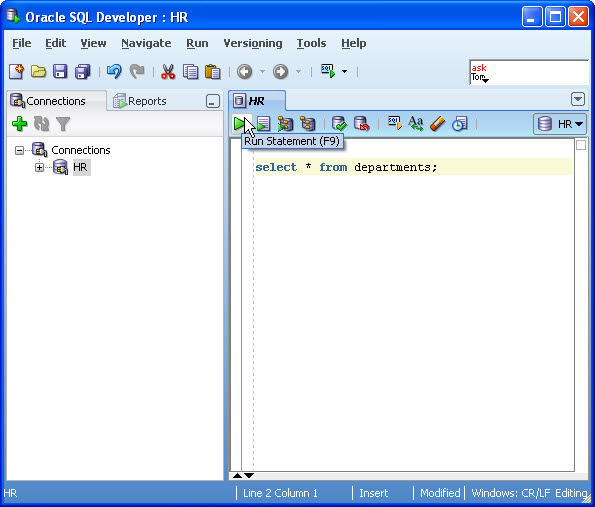
3. Now you are ready to start. Query all the data in the DEPARTMENTS table. Enter
select * from departments;
Click Execute Statement or F9.

Notice the number of rows retrieved is displayed below the Results tab.
3.2. Retrieve Columns
Instead of selecting all the columns from a table, you can itemize them, selecting only the data you require.
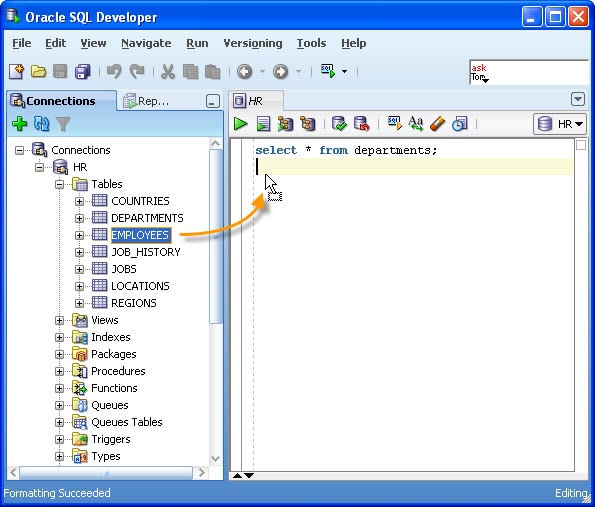
1. Instead of typing in each column name, you can just drag the table name from the Connection Navigator. Expand the Tables node and drag the EMPLOYEES table onto the worksheet.

For more complex queries or statements, use the Format function (Ctrl+F7) to make it easier to read the SQL. This can be found in the context menu.
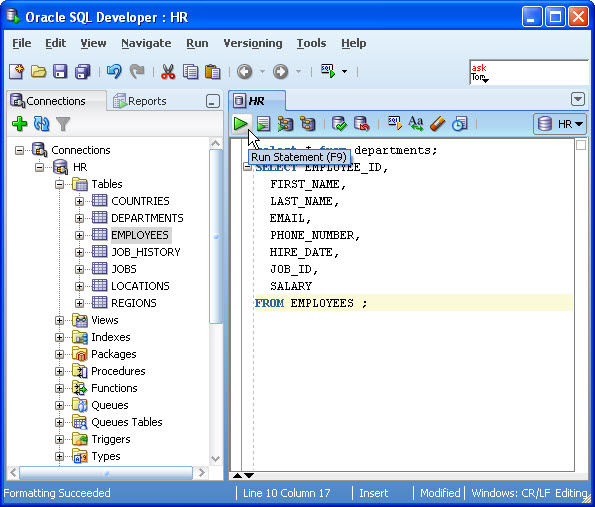
2. Now delete the last 3 columns from the statement. An example is shown below.

Remove the ',' after the column SALARY and click F9 to retrieve the records.
3.3. Retrieve Rows
Often you want to restrict the number of records returned. You add a Where Clause to do this. These can be complex and involved. We will start with the most basic.
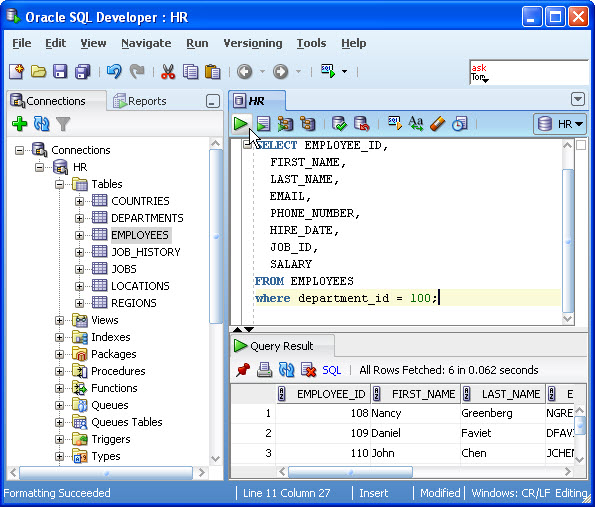
1. Using the same Select statement you have above, remove the ' ; ' and add
where department_id = 100;

Click F9. The Results tab shows fewer records returned.
4. Use SQL*Plus commands
The SQL Worksheet allows you to use a selection of SQL*Plus commands. SQL*Plus commands have to be interpreted by the SQL Worksheet before being passed to the database. Some commands are not supported and are hence ignored and are not sent to the Oracle database. For a list of unsupported SQL*Plus commands, see SQL Developer on OTN.
1. To use the Describe command to describe a schema object, type:
describe employees
Instead of clicking on F9, select Run Script or F5.

Notice the numbers of rows retrieved are displayed under the Script Output tab.
2. Let's put this to some use. In order to determine what objects this schema owns and what they are, you can look at the the user_objects dictionary table.
Instead of using 'SELECT * from USER_OBJECTS' you need to find more specific detail, enter:
DESCRIBE USER_OBJECTS
Click F5.

3. Now that you have seen the columns that define the table, you can write your select statement. Enter:
select object_name, object_type
from user_objects;
Click F9.

The results displayed are the objects your HR schema owns.