Technical Article
Updating Java ME Applications
By Vikram Goyal, Published December 2011
Learn how easy it is to update the text, images, and source code for Java ME applications.
Download |
|---|
|
|
Introduction
Updating a Java Platform, Micro Edition (Java ME) application involves updating static data, such as text and images, as well as updating code components of the application. In this article, I develop a sample application that illustrates how to update an application.
The article starts with the basics—updating simple text strings—and then moves to updating images. Finally, the article shows the easiest way to update the core application files, which Java ME makes quite easy. However, this ease can come at a price in terms of extra network traffic.
Note: The complete source code for the application described in this article can be downloaded here.
The Application Flow
Figure 1 shows an example application in action.
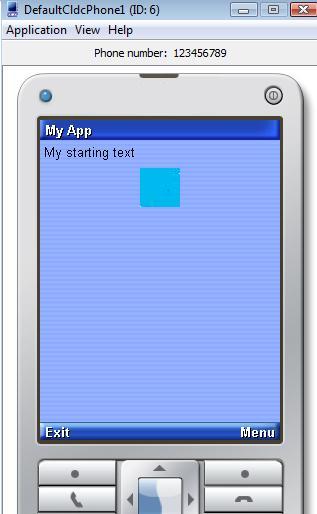
Figure 1. Example Application
The application has two elements: a basic text string and an image. Selecting Menu shows the three actions that can be performed, as shown in Figure 2.
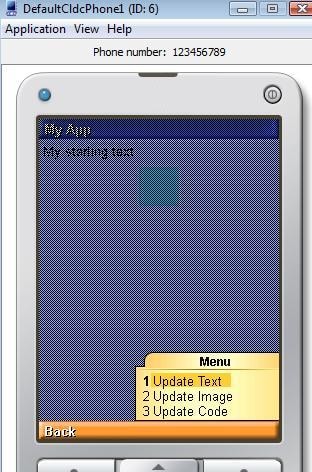
Figure 2. Possible Actions
The Update Text menu item will check with a background server to see whether an update is available for the text portion of the application. Update Image will check to see whether the image needs to be updated. Finally, Update Code will update the whole application—the text, the image, and the underlying code.
Let’s get started!
Coding the Layout
The application is a simple MIDlet that has three basic commands and two visual components. We set up the basic display elements and hook up the commands in the constructor, as shown in Listing 1.
  public MyGreatApp() {


    // set up the basic MIDlet with the display and the elements
    display = Display.getDisplay(this);

    form = new Form("My App");

    // we start with a blue square and a simple string of text
    text = new StringItem("", "My starting text");
    try {
      image =
        new ImageItem(
              "",
              Image.createImage("/blue_square.jpg"),
              Item.LAYOUT_CENTER,
              "");
    } catch (IOException ex) {
      handleError(ex);
    }

    exitCommand = new Command("Exit", Command.EXIT, 2);

    updateTextCommand = new Command("Update Text", Command.ITEM, 1);
    updateImageCommand = new Command("Update Image", Command.ITEM, 1);
    updateCodeCommand = new Command("Update Code", Command.ITEM, 1);

    // add the commands etc
    form.append(text);
    form.append(image);

    form.addCommand(exitCommand);
    form.addCommand(updateTextCommand);
    form.addCommand(updateImageCommand);
    form.addCommand(updateCodeCommand);

    form.setCommandListener(this);

  }
Listing 1. Setting Up the Display Elements
There is nothing remarkable about this code. It creates a Form and then adds the two visual elements, a StringItem and an ImageItem, to the Form. These are the elements that we are going to upgrade.
Then various commands are added: Exit and three update commands (UpdateText, UpdateImage, and UpdateCode). Notice that the Exit command is set at a separate level from the update commands, so the update commands are grouped together when you select Menu.
Finally, the current MIDlet is set as the command listener for all the commands so it can handle the callbacks. Let’s look at what we need to do to update the text, the image, and the code.
Coding the Command Handlers
The most important point to remember while coding the command handlers for this MIDlet is that all command handling should be done in a separate thread so it doesn’t block the main thread of operation while doing potentially expensive network calls.
Listing 2 shows the code for handling the UpdateText command:
    if(c == updateTextCommand) {

      new Thread() {
        public void run() {
          ContentConnection cc = null;
          DataInputStream dis = null;
          try {
            cc =
              (ContentConnection)Connector.open(
                "http://localhost:8080/updatedText.txt");
            int size = (int)cc.getLength();
            dis = cc.openDataInputStream();
            byte[] data = new byte[size];
            dis.read(data);
            String newText = new String(data);

            // found some text, and it is updated - so update the screen
            if(newText != null && !newText.equals(text)) {
              text.setText(newText);
            }
          } catch(IOException ioex) {
            handleError(ioex);
          }
        }
      }.start();
    }
Listing 2. Code for Handling the UpdateText Command
When the command handler for this code starts, it creates a new thread and contacts the server (the server holds the text, image, and code files).
At this point, we are interested only in checking for text-based updates, so we use the ContentConnection class (instead of the usual HttpConnection class). With the help of this class, we check for the presence of an updatedText.txt file on the server. If such a file is found, we read it, using a DataInputStream, into a byte array and convert it into a string. At any stage, if an error occurs, the error handler takes over.
If the file is found, its contents are read, and the contents are not the same as the existing text, we modify the text in StringItem. Voila! We have updated our text! Figure 3 shows the MIDlet after we have run the UpdateText command.
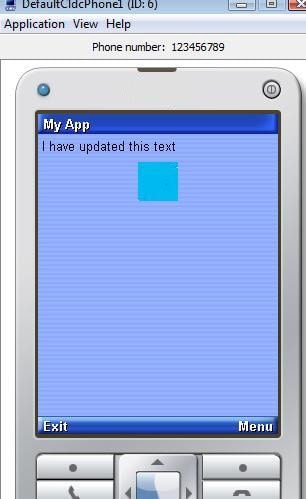
Figure 3. MIDlet After Running the UpdateText Command
The next step is to see how we can update the image. Updating the image is not very different from updating the text. Listing 3 shows how it is done.
    if(c == updateImageCommand) {

      new Thread() {
        public void run() {
          HttpConnection cc = null;
          DataInputStream dis = null;
          try {
            cc =
              (HttpConnection)Connector.open(
                "http://localhost:8080/red_square.jpg");
            int size = (int)cc.getLength();
            dis = cc.openDataInputStream();
            byte[] data = new byte[size];
            dis.read(data);

            // found an image - update it
            if(size > 0)
              image.setImage(Image.createImage(data, 0, data.length));
          } catch(IOException ioex) {
            handleError(ioex);
          }
        }
      }.start();
    }
Listing 3. Code for Updating the Image
As you can see, instead of using the ContentConnection, we use the HttpConnection class to update the image. If we find an image and its size is greater than 0, we download it into a byte buffer using a DataInputStream instance. Using the Image.createImage() method, we create this image in memory and then update the ImageItem to use this new image.
It is expected that an update process on the server would keep the text file or the image file only if updates were available. This would be an offline process and part of the update routines. We could modify our code to notify the user that there are no updates available, instead of letting the error handler handle it.
Finally, we come to one of the easiest parts of the update process. Updating the core code itself (or rather, updating the whole MIDlet and its associated files). Why is this the easiest part? Because by using an in-built function, we can request that the MIDlet update itself. This is useful when you have made several modifications to the code and associated logic and, therefore, non-static data needs to be updated. The downside is that the update process can be network-expensive.
To update the code, use the following code snippet:
    if(c == updateCodeCommand) {

      try {
        this.platformRequest("http://localhost:8080/UpdateArticle.jad");
      } catch (ConnectionNotFoundException ex) {
        handleError(ex);
      }
    }
We use the method platformRequest(String) to update the code itself. This method is provided by the MIDlet class, and it is used to request that the device on which it is running handle the provided URL. Note that this is not strictly for updating the application/MIDlet itself, but for the generic transfer of handling the URL by the associated device. For example, if this method is called with the URL of an image, the handling device would need to call up an image viewer to view the image provided by the URL.
By providing a URL that ends in .jad (in our case, http://localhost:8080/UpdateArticle.jad) and has the same file name as the currently installed application, the device understands that a request is being made to update the application itself. If the .jad file (and the associated .jar file) is found, and it is determined to be valid, the device will start the download/install/update cycle automatically, without any further intervention from the code itself, as shown in Figure 4.
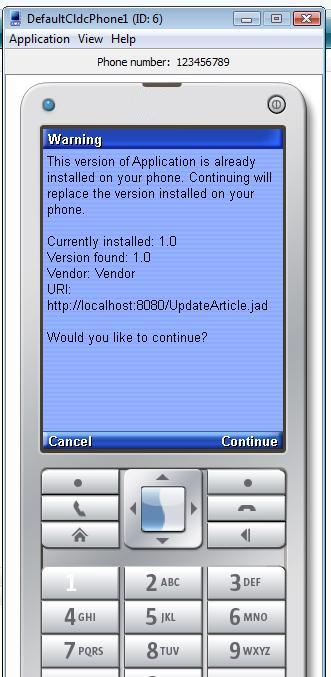
Figure 4. Updating the Application
Of course, user intervention is required to acknowledge the update process and to answer any pre-update questions, as shown in Figure 5.
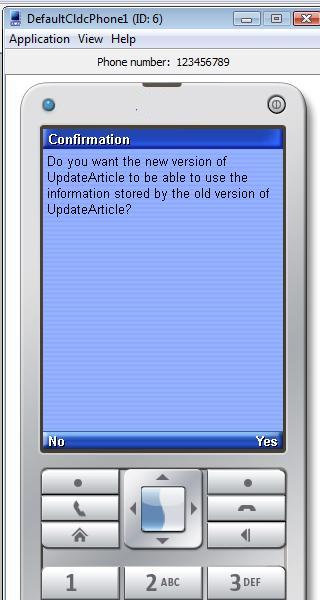
Figure 5. The User Must Authorize the Update
Once the user authorizes the update, the device downloads and updates the code. This process happens without any more intervention from the user or the original MIDlet. Once the update has finished, the old MIDlet is removed from the device and the new one is installed. After the install, the device will confirm whether the user wants to start the new MIDlet.
All in all, the platformRequest(String) method of the MIDlet class makes it easy for the application developer to provide an in-built update mechanism for applications.
Conclusion
If you don’t need to update the entire source code for your application, use the connection classes provided within the javax.io package, such as ContentConnection and HttpConnection, to update static data, such as text and images.
On the other hand, if you need to provide a mechanism for updating the entire source code, make sure you follow a valid update process on the server, and use platformRequest(String) with a URL that ends in jad to provide the updates. The device’s interface will then make sure the updates are applied by removing the old MIDlet and installing the new updated version.
See Also
About the Author
Vikram Goyal is the author of Pro Java ME MMAPI: Mobile Media API for Java Micro Edition, published by Apress. This book explains how to add multimedia capabilities to Java technology-enabled phones. Vikram is also the author of the Jakarta Commons Online Bookshelf, and he helps manage a free craft projects Web site.