Wireless Application Programming: MIDP Programming and Packaging Basics
by Qusay H. Mahmoud
Release 1.0
October 2000

Everyone is talking about the Wireless Internet, and that means we will all soon be able to surf the 'net with our palm pilots, cell phones, and other mobile devices. Currently, there is a lot of interest in creating applications for this market, and currently there are a few ways to do it. The Wireless Application Protocol (WAP) is one way, and another is to use Sun Microsystems's Java 2 Micro Edition (J2ME) Mobile Information Device Profile (MIDP).
This article is part of a series on wireless applications programming using the MID Profile APIs. It introduces you to the basics of MIDP programming and explains how to package MIDP applications (also called MIDlets). Please note that this article does not describe how to set up your MIDP environment. For setup information for the J2ME Wireless Toolkit software, see Quick Guide to the J2ME Wireless Tookit. If you prefer using the MIDP and CLDC seperate downloads with system configurations, MIDP Setup Explained. For an overview of MIDP, Introduction to Wireless Programming with the MID Profile. For a tutorial on WAP, see WAP for Java Developers.
Introduction
Most Internet technologies are designed for desktop and large computers running on reliable networks with relatively high bandwidth. Hand-held wireless devices, on the other hand, have a more constrained computing environment. They tend to have less memory, less powerful CPUs, different input devices, and smaller displays. Further, wireless networks have less bandwidth and more latency (delay) compared to wired computer networks.
The Wireless Application Protocol (or WAP), which is a specification developed by the WAP Forum, takes advantage of the several data-handling approaches already in use. Developing wireless applications using WAP technologies is similar to developing web pages with a markup language because it is browser based. Another approach to developing wireless applications is to use the Mobile Information Device Profile (MIDP).
With either WAP or MIDP, the Java programming language plays an important role. In WAP, Java Servlets and Java Server Pages (JSPs) can be used to generate Wireless Markup Language (WML) pages dynamically, and in MIDP, applications (also called MIDlets) are written in the Java programing language. The rest of this article focuses on using the Java programing language to write MIDlets.
Look and Feel
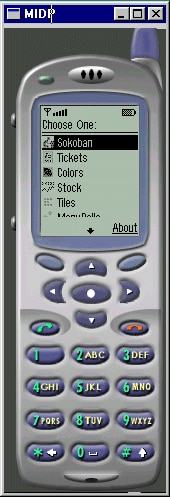
Figure 1: MIDP Demo
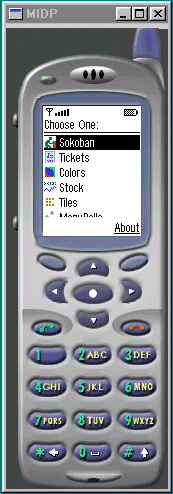
Figure 2: In Color
To get started with MIDP programming, install the MIDP reference implementation as described in MIDP Setup Explained. Once you have your environment set up, you might want to test it.
MIDP comes with several demo programs. To try the demos, run the midp executable on the run.jad descriptor file located in the src\example directory of your installation as follows:
c:> midp -descriptor run.jad
If everything goes well, you see something similar to Figure 1 at left.
Because some mobile phones have color displays, MIDP supports several color ranges, so you can run applications in color. To run applications in color, set the SCREEN_DEPTH environment variable to 8. On Windows machines, you can do this with the set command as follows:
c:> set SCREEN_DEPTH=8
On Unix, setting the screen depth depends on the shell you are using so you might want to consult your documentation.
Once you have set the screen depth to 8, you can run the demo application in color using the same command shown above and repeated here:
c:> midp -descriptor run.jad
You should now see the demo application in color as shown in Figure 2 at right.
The MIDP Development Life Cycle
MIDP applications (or MIDlets) can be easily developed by following the few steps outlined here:.
- Once you have an idea for an application, write it using the MIDP APIs.
- Compile and preverify the application.
- Test the application.
- Package the application.
- Test the packaged application.
Developing MIDlets is not only easy, but it is also fun and interesting. MIDlet programming is easier than J2SE programming because the MIDP API is simpler. You only need to learn about a few classes before you can start writing your own MIDlets.
Now, let's look at the genesis of a simple MIDlet by developing one. The MIDlet we will develop displays some text and multiple commands.
Step 1. Writing the Application
Our MIDlet, when launched, displays a simple text message and a few commands. The source code for this MIDlet is shown in Listing 1.
Listing 1: FirstMIDlet.java
import javax.microedition.midlet.*;
import javax.microedition.lcdui.*;

// A first MIDlet with simple text and a few commands.
public class FirstMIDlet extends MIDlet
                         implements CommandListener {

  //The exit, info, and buy commands
  private Command exitCommand;
  private Command infoCommand;
  private Command buyCommand;

  //The display for this MIDlet
  private Display display;

  public FirstMIDlet() {
    display = Display.getDisplay(this);
    exitCommand = new Command("Exit", Command.SCREEN, 1);
    infoCommand = new Command("Info",Command.SCREEN, 2);
    buyCommand = new Command("Buy", Command.SCREEN, 2);
  }

  // Start the MIDlet by creating the TextBox and
  // associating the exit command and listener.
  public void startApp() {
    TextBox t = new TextBox("FirstMIDlet",
                    "Welcome to MIDP Programming", 256, 0);
    t.addCommand(exitCommand);
    t.addCommand(infoCommand);
    t.addCommand(buyCommand);
    t.setCommandListener(this);
    display.setCurrent(t);
  }

  // Pause is a no-op because there are no background
  // activities or record stores to be closed.
  public void pauseApp() { }

  // Destroy must cleanup everything not handled
  // by the garbage collector.
  // In this case there is nothing to cleanup.
  public void destroyApp(boolean unconditional) { }

  // Respond to commands. Here we are only implementing
  // the exit command. In the exit command, cleanup and
  // notify that the MIDlet has been destroyed.
  public void commandAction(Command c, Displayable s) {
    if (c == exitCommand) {
      destroyApp(false);
      notifyDestroyed();
    }
  }
}
Note the following from Listing 1:
- We import the
midletandlcduipackages. Themidletpackage defines the MIDP, and thelcduipackage provides user interface APIs for implementing user interfaces for MIDP applications. - Each MIDlet must extend the
MIDletclass, similar to applets, which allows for the orderly starting, stopping, and cleanup of the MIDlet. - A MIDlet must not have a
public static void main()method.
In FirstMIDlet, the Command class is used to create commands. This class encapsulates the semantic information of an action. The command itself contains only information about a command, but not the actual action that happens when a command is activated. The action is defined in a CommandListener associated with the screen. Let's look at one of the command statements from Listing 1:
infoCommand = new Command("Info", Command.SCREEN, 2);
As you can see, a command contains three pieces of information: a label, a type, and a priority. The label (which is a string) is used for the visual representation of the command. The type of the command specifies its intent. And the priority value describes the importance of this command relative to other commands on the screen. A priority value of 1 indicates the most important command, and higher priority values indicate commands of lesser importance.
When the application is executed, the device chooses the placement of a command based on the type of the command, and places similar commands based on their priorities. In the above example, there are the following three commands:
exitCommand = new Command("Exit", Command.SCREEN, 1);
infoCommand = new Command("Info",Command.SCREEN, 2);
buyCommand = new Command("Buy", Command.SCREEN, 2);
In this example, the application manager maps the exit command to the screen, and, as shown in Figures 3.2 and 3.3, creates a menu command to hold the info and, buy commands

Figure 3.1: First Launched
Figure 3.1 shows how the screen looks when the application is first launched.

Figure 3.2: Exit & Menu Commands
Clicking the selection button takes you to Figure 3.2.

Figure 3.3: Info & Buy Commands
And clicking the soft button under Menu takes you to Figure 3.3. In later steps you will learn how to test and deploy the application.
Step 2: Compile and preverify
Compiling an MIDP class is performed, using the javac command, the same way you would compile any other Java class. On my Windows-based setting, I compile the FirstMIDlet as follows:
c:> javac -d .\ -bootclasspath c:\pathTo\MIDP\classes FirstMIDlet.java
This command produces a FirstMIDlet.class in the same directory (using the -d .\ option).
After compiling your program, you must process it with the preverify command. This command preprocesses the program for use by the K virtual machine (KVM) without changing the name of a class. The preverify command takes a class or a directory of classes and preprocesses them. You can specify an output directory for classes; otherwise, a default directory named output is created and all new classes are written to it. For the example above, I used the following command line to preverify my program (everything is typed on one line):
c:>preverify -classpath c:\pathTo\MIDP\classes;
c:>pathTO\FirstMIDlet.class FirstMIDlet.class
The above command creates the output subdirectory in the current directory where the command is executed.
Note: If you try to run an application without preverifying it, you get this error message: ALERT: Error verifying the class NameOfClass".
Step 3: Testing the application
Testing the application can be done easily with the midp executable. To test FirstMIDlet, I used the following command, where FirstMIDlet is the class preprocessed by the preverify utility:
c:> midp FirstMIDlet
Running the application in this way automatically launches the application and gives the output shown in Figure 3.2 above. This is fine if your application consists of one MIDlet. However, if your application consists of multiple MIDlets and you want to give the user a choice as to which one to run, you package the application.
How to package the application is discussed in the next step. An example of having multiple MIDlets is shown in Enhancing the Application: Listing 5 below.
Step 4: Packaging the application
If an application consists of multiple classes, a JAR file is used to group all the classes together so that the application is easy to distribute and deploy. In my case, I created the JAR file as follows:
c:> jar cf First.jar FirstMIDlet.class
The next step in packaging is creating a manifest file (or application descriptor), which provides information about the contents of the JAR file. Manifest attributes that start with MIDlet- are passed to the MIDlet when requested. The application descriptor is used by the application management software to manage the MIDlet. It is also used by the MIDlet itself to configure specific attributes. The file extension of the application descriptor must be jad, which stands for Java Application Descriptor.
There is a predefined set of attributes to be used in every application descriptor. For example, the descriptor file for the FirstMIDlet is shown here:
MIDlet-Name: MyFirst
MIDlet-Version: 1.0.0
MIDlet-Vendor: Sun Microsystems, Inc.
MIDlet-Description: My First MIDlet
MIDlet-Info-URL:
MIDlet-Jar-URL: first.jar
MIDlet-Jar-Size:    1063
MicroEdition-Profile: MIDP-1.0
MicroEdition-Configuration: CLDC-1.0
MIDlet-1: MyFirst,, FirstMIDlet
The attributes are pretty much self-explanatory. However, the last attribute should be discussed a little. The MIDlet-1 attribute has three parameters: name, icon, and class. In this example, only the name ( MyFirst) and class ( FirstMIDlet) parameters are specified; the icon is left blank. You will see how to use icons in the section Adding Icons below.
The name appears in the device display so the MIDlet can be selected, the icon (if one is supplied) appears next to the name, and the class is the executable called to launch the MIDlet. The attribute name MIDlet-1 indicates this is the first, and in this case only, midlet. Other MIDlets, if any, referenced by this descriptor would be added as MIDLet-2, MIDlet-3, and so on.
Step 5: Testing the packaged application
Once the application is packaged, we can test it to see if everything works. To test the packaged application, use the -descriptor option of the midp executable as follows, which invokes the emulator and launches FirstMIDlet:
c:> midp -descriptor first.jad
If you are satisfied with the MIDlet, you can now deploy it to a web server by uploading the JAR and JAD files to the web server. Once deployed to a web server, your MIDlet is downloadable; however, you must add the following new MIME type to your mime-types configuration file and restart the web server before you can run the MIDlet:
text/vnd.sun.j2me.app-descriptor jad
Use the following command to download and launch the MIDlet:
c:> midp -transient http://hostname/path/first.jad
Enhancing Wireless Applications
In this section a ticker and icons are added to the HelloMIDlet that comes with the MIDP installation. A ticker is an advertisement that runs across the top of the screen. The source code for HelloMIDlet is shown in Listing 3:
Listing 3: HelloMIDlet.java
import javax.microedition.midlet.*;
import javax.microedition.lcdui.*;

public class HelloMIDlet extends MIDlet
                implements CommandListener {
  // The exit command
  private Command exitCommand;
  // The display for this MIDlet
  private Display display;
  // create a ticker
  private Ticker hi = new Ticker("J2ME is cool");

  public HelloMIDlet() {
    display = Display.getDisplay(this);
    exitCommand = new Command("Exit", Command.SCREEN, 2);
  }

  public void startApp() {
    TextBox t = new TextBox("Hello MIDlet",
                        "Wireless Internet", 256, 0);

    t.addCommand(exitCommand);
    t.setCommandListener(this);
    t.setTicker(hi); // set the ticker
    display.setCurrent(t);
  }
  public void pauseApp() { }
  public void destroyApp(boolean unconditional) { }
  public void commandAction(Command c, Displayable s) {
    if (c == exitCommand) {
      destroyApp(false);
      notifyDestroyed();
    }
  }
}
As you can see, the Ticker class is used to create the ticker, and the setTicker method sets the ticker. This nifty feature is very easy to usedon't you think? I ran the application as described above and the output is shown in Figure 4. The ticker, J2ME is cool appears at the top of Figure 4, and if you run the application, you will see the ticker as a running message across the top of the screen.

Figure 4: Adding a Ticker
Now, we have two MIDlets: FirstMIDlet and HelloMIDlet. A sophisticated wireless application is composed of multiple related MIDlets that collectively make a useful application. Suppose that our application consists of the two MIDlets that we have so far. We can display them as an application simply by creating an application descriptor that describes the MIDlets as shown in Listing 5:
MIDlet-Name: FirstApplication
MIDlet-Version: 1.0
MIDlet-Vendor: Sun Microsystems, Inc.
MIDlet-Description: Sample First Application
MIDlet-Info-URL:
MicroEdition-Profile: MIDP-1.0
MicroEdition-Configuration: CLDC-1.0
MIDlet-1: First,, FirstMIDlet
MIDlet-2: Hello,, HelloMIDlet
I simply added both MIDlets to the application descriptor with these last two lines:
MIDlet-1: First,, FirstMIDlet
MIDlet-2: Hello,, HelloMIDlet

Figure 5: Two MIDlets
Now when I run the application, I get what is shown in Figure 5.
c:> midp -descriptor app.jad
Users can now navigate through the items on the display (MIDlets) and select the one to run.
Adding Icons
We can make the application look more professional simply by adding icons to the items shown on the display. This is easily done by modifying the last two lines of the application descriptor in Listing 5 to read:
MIDlet-1: First, /Tiles.png, FirstMIDlet
MIDlet-2: Hello, /Stock.png, HelloMIDlet

Figure 6: Icons
I have added icons, in .png format, to the descriptor file. As shown in Figure 6, when I run the application the icons appear to the left of the items. Figure 6 shows running the application in color.
Note: Portable Network Graphics (PNG) is a file format for the portable well-compressed storage of raster images. It provides a patent-free replacement for GIF. ALL MIDP implementations are required to support images stored in PNG format, and MIDP devices are also required to read PNG images.
Conclusion
Programming MIDlets is fun. This article discusses the genesis and development life cycle of MIDlets. Example MIDlets with multiple commands and a running ticker were developed. The process of packaging, creating application descriptor files, and adding icons to real applications was presented through examples.
Future articles will cover more advanced topics and MIDP programming examples showing how to make network connections, working with databases, and others. Stay tuned!
About the Author: Qusay H. Mahmoud provides Java consulting and training services. He has published dozens of articles on Java, and is the author of Distributed Programming with Java (Manning Publications, 1999) and Learning Wireless Java (O'Reilly & Associates, 2002).