How to Publish Packages to the Image Packaging System
Hands-On Labs Of the System Admin and Developer Community of OTN
This lab will introduce you to the Image Packaging System (IPS) concepts, the process of managing system software, and the process of publishing your own software packages in IPS format.
Prerequisites
- The student has installed Oracle Solaris 11 in Oracle VM VirtualBox.
- See Lab 1
This hands-on lab assumes you have some basic knowledge or programming experience of the following technologies.
- Basic knowledge of the Solaris Operating Environment
- Basic knowledge of C programing and scripting languages
- Supported OS: Oracle Solaris 11
- Memory requirement: 1GB recommended
- Additional disk space requirement: 150 Mbytes (if using VirtualBox, 8GB disk space is required on the host)
Additional software needed for the lab:
- The GNU C compiler. To install it, you'll need to have the root password handy, and run "
sudo pkg install gcc-3"
Lab exercises
Exercise 1: Introduction to IPS
Expected duration: 20 minutes
Introduction
Oracle Solaris 11 takes a new approach to package management, that greatly simplifies the process of managing patches and updates to reduce the risk of operating system maintenance. With Solaris 11 we introduce Image Packaging System (IPS) that replaces the old SVR4 packages used in earlier Oracle Solaris releases. IPS greatly simplifies software life cycle management, IPS was designed to cope with the complete life cycle of software, addressing software packaging, deployment and installation, updates, system upgrades, and removal of software packages. IPS is also tightly integrated with ZFS, and uses ZFS features (such as as snapshots and clones) to minimize risk and downtime associated with maintenance.

IPS Terminology
Fist we need to understand the terminology and concepts used in IPS.
IPS manages software in units of packages. An IPS package is a collection of directories, files, links, drivers, dependencies, groups, users, and license information in a defined format. This collection represents the installable objects of a package. Packages have attributes such as package name and description.
You can use commands to view information about a package, or you can view the manifest of a package.
Oracle Solaris 11 supports both, IPS packages and SVR4 packages.
While most administrators can install software from the package repositories, it is also possible to install software from an on-disk IPS package format, .p5p. This is equivalent to .rpm, SVR4 packages, or .nbm files.
From a developer's view, an IPS package is made up of a series of actions; actions are described in the manifest of a package. Actions are used for defining the files and directories of the package, setting package attributes, declaring dependencies on other packages, creating users and groups, and installing device drivers. Actions represent the installable objects on a system. Every action consists primarily of its name and a key attribute. Together, these refer to a unique object as it follows a version history.
Each IPS package is represented by a Fault Management Resource Identifier (FMRI). The pkg(1) command uses valid FMRI package information to perform its command actions. The FMRI includes descriptive information about the package, such as the publisher of the package, package name, version information, and date.
For example, the FMRI, pkg://solaris/system/library@0.5.11,5.11-0.175.0.0.0.2.1:20111019T082311Z, consists of the following sequence of information
- Scheme – pkg
- Publisher – solaris
- Category - system
- Package Name – library
- Version String – Consists of four components :
- Component Version – 5.11
- Build Version – 5.11
- Branch Version – 175.0.0
- Timestamp in ISO-8601 basic format – 20111019T082311Z
- A publisher is a person, groups of persons, or a corporation that publishes a package.
- A repository or depo server is a location where packages are downloaded from. e.g: http://pkg.oracle.com/solaris/release
- A repository can contain packages from many publishers. Conversely many repositories can contain packages from a single publisher.
- A default or preferred publisher is similar to a default catalog. Any package chosen for installation is first searched for in the preferred publisher's catalog. A package with the same name may be available for download from different repositories.
IPS images and Boot Environments
An image is a location on your system where packages and their associated files, directories, links, and dependencies can be installed.
An image can be one of three types:
- Full images -- are capable of providing a complete system.
- Zones images -- are linked to a full image (the parent image) to ensure that the software is consistent with what is installed in the global zone
- User images -- contain only relocatable packages. Example of a user image would be an installation of Glassfish 3, which uses IPS on multiple platforms.
After you have completed the installation of Oracle Solaris 11 on your system, an image is automatically made available to you. You can install packages without explicitly creating an image. However, creating images is necessary in order to provide a logical separation for different software applications, and especially required if you are working with zones.
The following figure shows the concept of an image.

Engineered with close integration with ZFS and boot management on Solaris, pkg(1) is using ZFS snapshots to facilitate rollback functionality if the package installation either fails or otherwise results in an undesired environment. IPS performs an analysis on the software being updated, and if deemed necessary (during 'pkg update' sequence) automatically creates a new boot environment (BE) where the updated package versions will be installed. The new BE will be activated on reboot, the old BE will be available as a rollback alternative in case the upgrade resulted in a non-working system or broke functionality. (A beadm command is available to list out and control behavior of boot environments on Solaris 11)
For more information about BEs, see the Managing Boot Environments With Oracle Solaris 11 guide.
Software can have components that are optional and components that are mutually exclusive. Examples of optional components include locales and documentation. Examples of mutually exclusive components include SPARC or x86 and debug or non-debug binaries. In IPS, optional components are called facets and mutually exclusive components are called variants. Both variants and facets appear as tags on IPS actions.
Variants and facets affect whether a particular action is selected or deselected for installation.
The following list shows some examples of facet and variant tags and their possible values.
| Name | Values |
|---|---|
| facet.locale.* | true, false |
| facet.doc.man | true, false |
| facet.doc | true, false |
| facet.devel.* | true, false |
| variant.arch | sparc, i386, zos |
| variant.debug.* | true, false |
By default an action that's not tagged with facet or variant will be included.
An action that is tagged with a variant that is not selected is excluded.
An action that is tagged with one or more facets is excluded if none of the facets are selected.
- Variant tags are evaluated with a logical "AND". If any of the variant tags do not match, the action is not installed.
- Facet tags are evaluated with a logical "OR". If any of the facet tags match, the action is not excluded.
A single action can have multiple facet and variant tags. An example of a component with multiple facet and variant tags is an architecture-specific header file that is used by developers.
Variants and facets are set at the image level. An image with a variant set to a particular property can only have actions that match that variant installed on it. For example, you cannot install an x86 package into a SPARC image.
IPS Commands
- pkg(1)
- Use the pkg(1) command to create an image, to install packages to your image, and to manage packages on your image.
- pkgdepend(1)
- pkgdepend(1) is used to generate and resolve dependencies for packages. A package may depend upon files from other packages.
pkgdepend(1) is typically used in two passes :- file dependency generation
- file-to-package resolution.
- pkgdepend(1) is used to generate and resolve dependencies for packages. A package may depend upon files from other packages.
- pkgmogrify(1)
- Use pkgmogrify(1) to transform the raw manifest file that had been generated with pkgdepend(1)
- pkgsend(1)
- Use the pkgsend(1) command to publish packages from your image to an existing repository.
- pkgrecv(1)
- Use the pkgrecv(1) command to download the contents of a package from a server. The user can use pkgrecv(1) to automatically republish the retrieved packages to a local repository. Alternatively the user can modify the contents by adding additional package attributes and republish the package with the pkgsend(1) command.
- pkgrepo(1M)
- Use the pkgrepo(1M) command to create and manage local repository's storage and properties.
- pkg.depotd(1M)
- Use the pkg.depotd(1M) daemon to run your own network repository or set up mirror repositories.
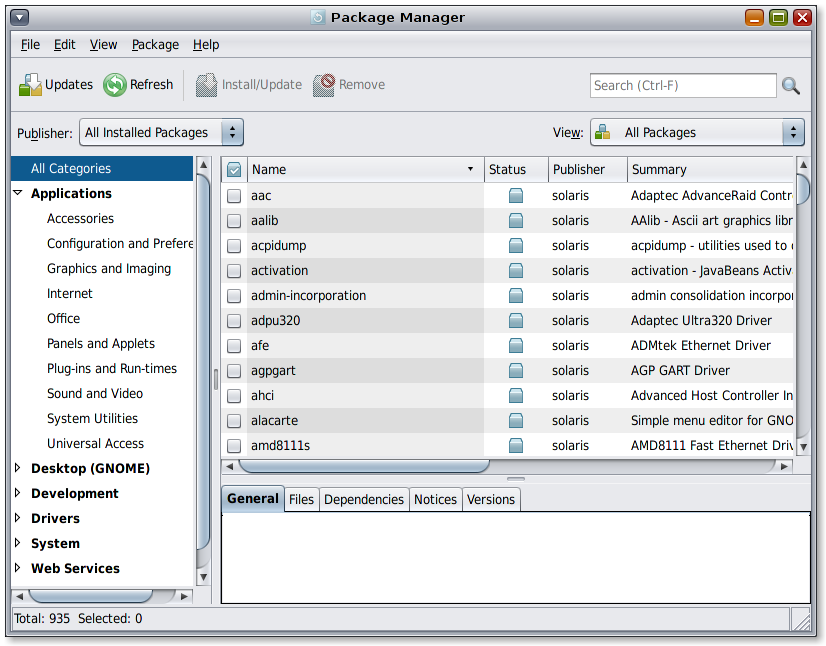
IPS GUI tools
On the client-side, IPS has a graphical front-end called "Package Manager", The "Package Manager" allows you to search, install, update and remove packages; manage repositories; manage boot environments.
With IPS you also have an Update Manager. The Update Manager is a desktop application that enables users to update all installed packages in an image, the Update Manager notifies the user when updates to the installed packages are available.

Exercise 2: Working with IPS Commands
To get used to working with IPS, lets begin to familiarize ourselves with the IPS commands
Manage our authorities/repositories
List our current Package Authorities
oracle@solaris:~$ pkg publisher
PUBLISHER            TYPE     STATUS   URI
solaris (preferred)  origin   online   http://pkg.oracle.com/solaris/release/
Adding an Additional Package publisher
oracle@solaris:~$ sudo pkg set-publisher -g  http://pkg.sunfreeware.com:9001 sunfreeware.com Password:
oracle@solaris:~$ pkg publisher
PUBLISHER            TYPE     STATUS   URI
solaris (preferred)  origin   online   http://pkg.oracle.com/solaris/release/ sunfreeware.com
                     origin   online   http://pkg.sunfreeware.com:9001/
And lets remove it, as we don't need it right now.
oracle@solaris:~$ sudo pkg unset-publisher sunfreeware.com
Password:
oracle@solaris:~$ pkg publisher
PUBLISHER            TYPE     STATUS   URI
solaris (preferred)  origin   online   http://pkg.oracle.com/solaris/release/
Search for a Package in the Installed Image. The following example searches and locates the bash command gperf and lets us know what package it came from.
oracle@solaris:~/Work/srm-1.2.10$ pkg search gperf
INDEX           ACTION VALUE                     PACKAGE
basename        file   usr/bin gperf             pkg:/developer/gperf@3.0.3-0.175.0.0.0.2.537
pkg.description set    GNU gperf is a perfect hash function generator. For a given list of strings,
                       it produces a hash function and hash table, in form of C or C++ code,
                        for looking up a value depending on the
                       input string.
                                                 pkg:/developer/gperf@3.0.3-0.175.0.0.0.2.537
pkg.fmri        set    solaris/developer/gperf   pkg:/developer/gperf@3.0.3-0.175.0.0.0.2.537
pkg.summary     set    GNU gperf                 pkg:/developer/gperf@3.0.3-0.175.0.0.0.2.537
basename        dir    usr/share/doc/gperf       pkg:/developer/gperf@3.0.3-0.175.0.0.0.2.537
Search For a Package in a Remote Repository. To search for the bash package in the remote (-r) repository associated with the current image.
oracle@solaris:~/Work/srm-1.2.10$ pkg search -r bash
INDEX      ACTION VALUE              PACKAGE
basename   file   usr/bin/bash       pkg:/shell/bash@4.1.9-0.175.0.0.0.2.537
pkg.fmri   set    solaris/shell/bash pkg:/shell/bash@4.1.9-0.175.0.0.0.2.537
basename   dir    etc/bash           pkg:/shell/bash@4.1.9-0.175.0.0.0.2.537
basename   dir    usr/share/bash     pkg:/shell/bash@4.1.9-0.175.0.0.0.2.537
This example installs gperf. The output displays the status of the download, number of packages that were installed, number of files that were installed and the size (in megabytes) of the download.
oracle@solaris:~/Work/srm-1.2.10$ sudo pkg install gperf
           Packages to install:  1
       Create boot environment: No
Create backup boot environment: No
            Services to change:  1

DOWNLOAD                    PKGS  FILES    XFER (MB)
Completed                   1/1   8/8      0.1/0.1

PHASE                       ACTIONS
Install Phase               27/27

PHASE                       ITEMS
Package State Update Phase  1/1
Image State Update Phase    2/2

oracle@solaris:~/Work/srm-1.2.10$ pkg list gperf
NAME (PUBLISHER)            VERSION                    IFO
developer/gperf             3.0.3-0.175.0.0.0.2.537    i--
This example uninstalls the gperf package.
oracle@solaris:~/Work/srm-1.2.10$ sudo pkg uninstall gperf
Packages to remove:     1
Create boot environment:    No
PHASE                         ACTIONS
Removal Phase                 21/21

PHASE                         ITEMS
Package State Update Phase    1/1
Package Cache Update Phase    1/1
Image State Update Phase      2/2

PHASE                         ITEMS
Reading Existing Index        8/8
Indexing Packages             1/1
oracle@solaris:~/Work/srm-1.2.10$ pkg list gperf
pkg list: no packages matching 'gperf' installed
Summary
You should now have a basic understanding of the IPS package management system
Exercise 3: Creating Your Own Local IPS Repository
Expected duration: 20 minutes
Introduction:
We will look at two methods to enable a local repository. First we will look at how you can create a file-based repository that can be accessed directly from the IPS client commands. Second, after that, we will instantiate it as a network service via a pkg server to the repository, allowing it to be accessed over the net. Both of theses two methods are OK to use for development and testing. However if you want to run a repository server on your system permanently it's recommended that (a) you have sufficient disk space to host the files on your local disk, and (b) use SMF to manage the repository server, the default SMF FMRI for the repository server service is svc:/application/pkg/server.
This can be done in two ways, the easiest way is just to modify the properties of the default instance of the repository service to reflect your configuration, that is what we will do in the second part of this lab. The other alternative is to create a second instance of the svc:/application/pkg/server service, this is useful in case you need to run multiple IPS depo servers on the same system, say that you want to have a local copy of the Solaris repository, you can find the instructions on how to make a copy here, and a development/test repository for your own code. I've added instructions on how to do this as an extra exercise if you have time to spare.
Example 3-1 How to create a filesystem-based repository
(Optionally) Create a ZFS filesystem to hold the repository data.
$ sudo zfs create <filesystem>
Create a skeleton repository and set a publisher for our repository:
$ sudo pkgrepo create <path to repository>
$ sudo pkgrepo set -s <path to repository> publisher/prefix=example.com
Verify that repository was created OK and that the publisher has be set:
$ pkgrepo info -s <path to repository>
Add our new repository to the system image:
$ pkg set-publisher -p file:<path to repository>
Verify that our repository work OK:
$ pkg publisher
Creating a filesystem-based IPS repository
It would look something like this:
oracle@solaris:~$ pkgrepo create ~/myrepo
oracle@solaris:~$ pkgrepo info -s ~/myrepo
PUBLISHER PACKAGES STATUS           UPDATED
oracle@solaris:~$ pkgrepo set -s ~/myrepo publisher/prefix=example.com
oracle@solaris:~$ pkgrepo info -s ~/myrepo
PUBLISHER   PACKAGES STATUS           UPDATED
example.com 0        online           2011-05-19T11:31:28.549665Z
Example 3-2 How to Create Your Own IPS Repository Using SMF
This the preferred way of setting up a more permanent IPS repository server on your local system. The most common way is to modify the default instance of the application/pkg/server service, we can do that using the svccfg(1M) command. But first we need somewhere to put the repository, so for that we can create a zfs filesystem. By using a zfs filesystem rather than just a directory, we get more options on how to manage the storage as the repository grows when we put more packages in it.
Create a ZFS filesystem to hold the repository data.
$ sudo zfs create <filesystem>
Use pkgrepo(1) command to create a skeleton repository, and set the publisher.
$ pkgrepo create <path to repository>
$ pkgrepo set -s <path repository> publisher/prefix=example.com
Set the value of the port.
$ sudo svccfg -s application/pkg/server setprop pkg/port=port_value
Set the value for the location of the repository data.
$ sudo svccfg -s application/pkg/server setprop pkg/inst_root=$repository_directory
Refresh the repository service.
$ sudo svcadm refresh application/pkg/server
Start the repository service.
$ sudo svcadm enable application/pkg/server
Open your browser and type http://localhost:port_value to confirm that the repository has been created, or optionally verify connectivity by running:
$ wget http://localhost:<port_value>
Creating a IPS Repository Using SMF
First we need to create a ZFS file system where we can locate the repository, for this example I'm using /export/ips:
oracle@solaris:~$ sudo zfs create rpool/export/ips
oracle@solaris:~$ sudo zfs create rpool/export/ips/example
eoracle@solaris:~$ zfs list
NAME                       USED  AVAIL  REFER  MOUNTPOINT
rpool                     8.42G  7.20G  92.5K  /rpool
rpool/ROOT                6.14G  7.20G    31K  legacy
rpool/ROOT/solaris        6.14G  7.20G  6.00G  /
rpool/dump                1023M  7.20G  1023M  -
rpool/export               225M  7.20G    36K  /export
rpool/export/home          225M  7.20G    32K  /export/home
rpool/export/home/oracle   225M  7.20G   225M  /export/home/oracle
rpool/export/ips            31K  7.20G    31K  /export/ips
rpool/export/ips/example    31K  7.20G    31K  /export/ips/example  <--- Our new zfs file system
rpool/swap                1.06G  8.10G   172M  -
The next thing we need to do is to create our repository and set the publisher using pkgrepo(1):
oracle@solaris:~$ sudo pkgrepo create /export/ips/example
oracle@solaris:~$ pkgrepo info -s /export/ips/example
PUBLISHER PACKAGES STATUS           UPDATED
oracle@solaris:~$ sudo pkgrepo set -s /export/ips/example publisher/prefix=example.com
oracle@solaris:~$ pkgrepo info -s /export/ips/example
PUBLISHER   PACKAGES STATUS           UPDATED
example.com 0        online           2011-05-19T16:55:14.278173Z
That looks OK, now we need to change the default port and location to 10001 and /export/ips/local on the default instance of the application/pkg/server service in SMF. To do that we use svccfg(1M) and svcadm(1M)
oracle@solaris:~$ svcs application/pkg/server
STATE          STIME    FMRI
disabled       11:05:09 svc:/application/pkg/server:default
oracle@solaris:~$ sudo svccfg -s application/pkg/server setprop pkg/port=10001 <---- Set the port to 10001
oracle@solaris:~$ sudo svccfg -s application/pkg/server setprop pkg/inst_root=/export/ips/example <---- rep. location
oracle@solaris:~$ sudo svcadm refresh application/pkg/server
oracle@solaris:~$ sudo svcadm enable application/pkg/server
oracle@solaris:~$ svcs application/pkg/server
STATE          STIME    FMRI
online         10:51:10 svc:/application/pkg/server:default
OK lets try to see if it works by pointing our browser to http://localhost:10001

That looks good, let's keep this repository so we can use it in exercise 4 below. But before that lets just have a look at how you stop your IPS repository service using SMF commands. To change the state of a service we use svcadm(1M), just as we did when we started our service. To verify state of our service we use svcs(1M):
oracle@solaris:~$ svcs application/pkg/server
STATE          STIME    FMRI
online         13:03:52 svc:/application/pkg/server:defaul
oracle@solaris:~$ sudo svcadm disable application/pkg/server
oracle@solaris:~$ svcs application/pkg/server
STATE          STIME    FMRI
disabled       13:04:20 svc:/application/pkg/server:default
oracle@solaris:~$ sudo svcadm enable application/pkg/server
oracle@solaris:~$ svcs application/pkg/server
STATE          STIME    FMRI
online         13:04:34 svc:/application/pkg/server:defaul
More info on SMF can be found here Managing Services (Overview).
Example 3-3 How to Create a Second Instance of the IPS Repository Server with SMF (For extra credit, if you have spare time.)
From time to time we might need to run multiple IPS servers on our system, say that you have your development and testing IPS repository running in one server but you also need to have a local copy of the Solaris repository. And as both of these are permanent, it's preferable that we use Solaris SMF to manage the pkg.depotd processes as services. We can do that by adding a new instance to the pkg/server service. To do that we need to do the following steps:
1. Create a ZFS filesystem to hold the repository data.
$ sudo zfs create <filesystem>
2. Use pkgrepo(1) command to create a first skeleton repository, and set the publisher. We've previously done this so you can skip this step if you have followed the previous example.
$ sudo pkgrepo create repository <path to repository>
$ sudo pkgrepo set -s <path repository> publisher/prefix=<publisher name>
3. Add a new instance of the pkg/server service
$ sudo svccfg -s pkg/server add <instance_name>
$ sudo scvcfg -s pkg/server:<instance_name> addpg pkg application
$ sudo svccfg -s pkg/server:<instance_name> addpg general framework
$ sudo svccfg -s pkg/server:<instance_name> setprop general/complete=astring:\"\"
$ sudo svccfg -s pkg/server:<instance_name> setprop general/enabled=boolean: true
4. Set the value of the port and path to repository data.
$ sudo svccfg -s pkg/server:<instance_name> setprop pkg/port=<port_value>
$ sudo svccfg -s pkg/server:<instance_name> setprop pkg/inst_root=<repository_directory>
5. Refresh the repository service instance.
$ sudo svcadm refresh application/pkg/server:<instance_name>
6. Start the repository instance.
$ sudo svcadm enable application/pkg/server:<instance_name>
7. Verify that our new service instance runs OK
$ svcs -x application/pkg/server:<instance_name>
8. Open your browser and type http://localhost:<port_value> to confirm that the repository has been created.
Creating Your IPS Repository Using SMF
oracle@solaris:~$ sudo zfs create rpool/export/ips/devtest
oracle@solaris:~$ sudo pkgrepo create /export/ips/devtest
oracle@solaris:~$ sudo pkgrepo set -s /export/ips/devtest publisher/prefix=devtest.example.com
oracle@solaris:~$ sudo svccfg -s pkg/server add devtest
oracle@solaris:~$ sudo svccfg -s pkg/server:devtest addpg pkg application
oracle@solaris:~$ sudo svccfg -s pkg/server:devtest addpg general framework
oracle@solaris:~$ sudo svccfg -s pkg/server:devtest setprop general/complete=astring:\"\"
oracle@solaris:~$ sudo svccfg -s pkg/server:devtest setprop general/enabled=boolean: true
oracle@solaris:~$ sudo svccfg -s pkg/server:devtest setprop pkg/port=10002
oracle@solaris:~$ sudo svccfg -s pkg/server:devtest setprop pkg/inst_root=/export/ips/devtest
oracle@solaris:~$ sudo svcadm refresh pkg/server:devtest
oracle@solaris:~$ sudo  svcadm enable pkg/server:devtest
oracle@solaris:~$ svcs pkg/server
STATE          STIME    FMRI
online         23:24:11 svc:/application/pkg/server:default

online          0:14:46 svc:/application/pkg/server:devtest
As you can see in the end we now have two IPS repositories up and running on our system, the default server at port 10001 and our devtest server at port 10002
Summary
Now you know how to set up an IPS repository, as a simple filesystem based repository, an un-manged network repository, modify the default instance of the pkg/server SMF service and finally if you had some spare time over, add a second instance to our pkg/server SMF service
Exercise 4: Package and Submit a Simple Application to an IPS Repository
Expected duration: 20 minutes
Background, a closer look at an IPS manifest
Lets have a look at the manifest for wget
We can use pkg contents -m <pkg_name> to get
oracle@solaris:~$ pkg contents -m wget > wget_manifest
oracle@solaris:~$ cat wget_manifest
set name=pkg.fmri value=pkg://solaris/web/wget@1.12,5.11-0.175.0.0.0.2.537:20111019T122502Z set name=variant.arch
    value=i386 value=sparc
set name=info.upstream-url value=http://www.gnu.org/software/wget/ set name=pkg.description
                           value="GNU wget - a utility to retrieve files from the World Wide Web"
set name=info.classification value=org.opensolaris.category.2008:Applications/Internet
set name=info.source-url value=http://ftp.gnu.org/gnu/wget/wget-1.12.tar.bz2 set name=pkg.summary value="wget - GNU wget"

set name=org.opensolaris.consolidation value=userland
set name=org.opensolaris.arc-caseid value=PSARC/2000/488
license 97a51b7c9fd624f1d16cda23f472e1fbe24d0efc chash=626a60459b65a1cac3a1ce0303c40f3e69403b4c license=GPLv3
        pkg.csize=12330 pkg.size=35702
depend fmri=pkg:/library/security/openssl@1.0.0.5-0.175.0.0.0.0.525 type=require
depend fmri=pkg:/system/library@0.5.11-0.175.0.0.0.0.0 type=require
depend fmri=pkg:/library/libidn@1.19-0.175.0.0.0.0.525 type=require
dir group=sys mode=0755 owner=root path=etc
dir group=sys mode=0755 owner=root path=usr
dir group=bin mode=0755 owner=root path=usr/bin
dir group=bin mode=0755 owner=root path=usr/sfw
dir group=bin mode=0755 owner=root path=usr/sfw/bin
dir group=sys mode=0755 owner=root path=usr/share

.

file 6be18eb59d8f6906ee4ee18104f3318ae817ee80 chash=17183aaa04fcae20401cec26df325bf66b5d135d elfarch=sparc
     elfbits=32 elfhash=df980eca224f1e3627dee713590403b359b3084a group=bin mode=0555 owner=root
     path=usr/bin/wget pkg.csize=211661 pkg.size=506548 variant.arch=sparc

.
.

file 68bc81098633a627d03da5c92ac7e048556460df chash=19c439fc21948815d089487a775b0f72323ca227 elfarch=i386
     elfbits=32 elfhash=116c3f5c151fabe88e1274a817ad7557ea6bbbb5 group=bin mode=0555 owner=root
     path=usr/bin/wget pkg.csize=191555 pkg.size=528028 variant.arch=i386
file 291bbb69aa064bb0affa458acb0a1007a178ec13 chash=222ef630db851d7ce5dceae8941dc1c349399ecc
     facet.doc.info=true group=bin mode=0444 owner=root path=usr/share/info/wget.info pkg.csize=62581
     pkg.size=199596 restart_fmri=svc:/application/texinfo-update:default variant.arch=i386
.
At the top we can see the name of the package or the FMRI, which includes, the publisher, category, name and version. We can take this manifest as a starting point for our own package. We could set a number of properties for our package which is followed by a number of directory actions, where we set the correct permissions on directories that we will touch. This is then followed by the main payload of the packages, all of the files that will be delivered with the package.
As you can see we have two variants available for the wget package, a sparc and a i386, so if you want to deliver both a SPARC and a x86 version of your application you do this in the same package, just add a second "variant". You can also see that wget delivers a 32-bit binary for both SPARC and x86 platforms.
Simple example using srm secure rm:
Tasks
- Starting a local IPS server (see exercise 3.2 for details)
- Setup your build environment
- Generate your manifest
- Publish your package
- Examine your package
- Install our package from the repository
Starting a Repository Server:
See exercise 3.2 for details on how to set up and start a local repository server.
Setup your build environment
In our case we need to get a GNU base toolchain installed, we can easily do that by installing the developer/gnu package, it includes all the needed tools for a GNU developer toolchain. It's an empty package that just defines dependencies on all the needed GNU developer tools. Because IPS automatically resolves dependencies, we simply need to install this package and all the other packages it depends on shall be installed automatically. This is actually a very useful feature of IPS, and can be used to create different "bundles" of your software package.
Establish a workspace, build and do a proto install:
Download the source code from sourceforge. We use srm 1.2.10 in following example, due to a bug in the new signal handling code in more recent version, 1.2.11, and it will not compile cleanly on Solaris.
Create a workspace and a prototype area where you can create an "install" prototype. Something like this:
oracle@solaris:~$ cd ~/Work
oracle@solaris:~/Work$ tar -zxf ../Download/srm-1.2.10.tar.gz
oracle@solaris:~/Work$ cd srm-1.2.10
oracle@solaris:~/Work/srm-1.2.10$ mkdir proto_inst
oracle@solaris:~/Work/srm-1.2.10$ ./configure exec_prefix=`pwd`/proto_inst/usr prefix=`pwd`/proto_inst/usr
checking for a BSD-compatible install... /usr/bin/ginstall -c
checking whether build environment is sane... yes
checking for a thread-safe mkdir -p... /usr/gnu/bin/mkdir -p
checking for gawk... gawk
checking whether make sets $(MAKE)... yes
checking for gcc... gcc
.
.
config.status: executing depfiles commands
oracle@solaris:~/Work/srm-1.2.10$ make
make  all-recursive
make[1]: Entering directory `/home/oracle/Work/srm-1.2.10'
Making all in lib
make[2]: Entering directory `/home/oracle/Work/srm-1.2.10/lib'
gcc -DHAVE_CONFIG_H -I. -I..     -O2 -DNDEBUG -MT snprintf.o -MD -MP -MF .deps/snprintf.Tpo -c -o snprintf.o snprintf.c
.
.
make[1]: Leaving directory `/home/oracle/Work/srm-1.2.10'
oracle@solaris:~/Work/srm-1.2.10$ make install
.
.
Making install in src
make[1]: Entering directory `/home/oracle/Work/srm-1.2.10/src'
make[2]: Entering directory `/home/oracle/Work/srm-1.2.10/src'
test -z "/home/oracle/Work/srm-1.2.10/proto_inst/usr/bin" || /usr/gnu/bin/mkdir -p "/home/oracle/Work/srm-1.2.10/proto_inst/usr/bin"
  /usr/bin/ginstall -c srm '/home/oracle/Work/srm-1.2.10/proto_inst/usr/bin'
.
.
make[1]: Leaving directory `/home/oracle/Work/srm-1.2.10'
oracle@solaris:~/Work/srm-1.2.10$ ls -R proto_inst/
proto_inst/:
usr
proto_inst/usr:
bin  share
proto_inst/usr/bin:
srm
proto_inst/usr/share:
man
proto_inst/usr/share/man:
man1
proto_inst/usr/share/man/man1:
srm.1
oracle@solaris:~/Work/srm-1.2.10$ ./proto_inst/usr/bin/srm --version
srm (srm) 1.2.10
OK, so now we have a working srm in our proto_inst area, the next step is now to create our manifest, and coming up next is how to do that:
Creating a manifest:
The first thing we do is use 'pkgsend generate' to create an initial crude manifest....
oracle@solaris:~/Work/srm-1.2.10$ pkgsend generate proto_inst > srm_1_2_1_manifest
oracle@solaris:~/Work/srm-1.2.10$ cat srm_1_2_1_manifest
dir group=bin mode=0755 owner=root path=usr timestamp=20110705T162628Z
dir group=bin mode=0755 owner=root path=usr/share timestamp=20110705T162628Z
dir group=bin mode=0755 owner=root path=usr/bin timestamp=20110705T162628Z
dir group=bin mode=0755 owner=root path=usr/share/man timestamp=20110705T162628Z
dir group=bin mode=0755 owner=root path=usr/share/man/man1 timestamp=20110705T162628Z
file usr/share/man/man1/srm.1 group=bin mode=0644 owner=root path=usr/share/man/man1/srm.1 pkg.size=2488
file usr/bin/srm group=bin mode=0755 owner=root path=usr/bin/srm pkg.size=24560
Lets add some meta data to our manifest. Using a text editor, add the following 5 lines to our manifest
set name=pkg.fmri value=srm@1.2.10,5.11
set name=pkg.description value="Secure rm 1.2.10"
set name=description value="Secure rm"
set name=summary value="Secure rm"
set name=info.classification value="org.opensolaris.category.2008:Applications/System Utilities"
And we need to find any dependencies we might have, we can use 'pkgdepend generate' to do that:
oracle@solaris:~/Work/srm-1.2.10$ pkgdepend generate -d ./proto_inst srm_1_2_1_manifest > srm_1_2_1_depend
oracle@solaris:~/Work/srm-1.2.10$ cat srm_1_2_1_depend
depend fmri=__TBD pkg.debug.depend.file=libc.so.1 pkg.debug.depend.path=lib pkg.debug.depend.path=usr/ccs/lib
pkg.debug.depend.path=usr/lib pkg.debug.depend.path=usr/sfw/lib pkg.debug.depend.reason=usr/bin/srm
pkg.debug.depend.type=elf type=require
OK, so now we know what our dependencies are, now lets resolve them to packages.
oracle@solaris:~/Work/srm-1.2.10$ pkgdepend resolve srm_1_2_1_depend
oracle@solaris:~/Work/srm-1.2.10$ ls *.res
srm_1_2_1_depend.res
oracle@solaris:~/Work/srm-1.2.10$ more srm_1_2_1_depend.res
depend fmri=pkg:/system/library@0.5.11-0.151.0.1 type=require
As you can see here we only depend on one package, so let's add that to our manifest file and format it.
oracle@solaris:~/Work/srm-1.2.10$ cat srm_1_2_1_depend.res >> srm_1_2_1_manifest
oracle@solaris:~/Work/srm-1.2.10$ pkgfmt srm_1_2_1_manifest
oracle@solaris:~/Work/srm-1.2.10$ more srm_1_2_1_manifest
set name=pkg.fmri value=srm@1.2.10,5.11set name=pkg.description value="Secure rm 1.2.10"
set name=description value="Secure rm"
set name=info.classification \
    value="org.opensolaris.category.2008:Applications/System Utilities"
set name=summary value="Secure rm"
dir path=usr group=bin mode=0755 owner=root timestamp=20110705T162628Z
dir path=usr/bin group=bin mode=0755 owner=root timestamp=20110705T162628Z
dir path=usr/share group=bin mode=0755 owner=root timestamp=20110705T162628Z
dir path=usr/share/man group=bin mode=0755 owner=root \
    timestamp=20110705T162628Z
dir path=usr/share/man/man1 group=bin mode=0755 owner=root \
    timestamp=20110705T162628Z
file usr/bin/srm path=usr/bin/srm group=bin mode=0755 owner=root \
    pkg.size=24560
file usr/share/man/man1/srm.1 path=usr/share/man/man1/srm.1 group=bin \
    mode=0644 owner=root pkg.size=2488
depend fmri=pkg:/system/library@0.5.11-0.151.0.1 type=require
OK, now we have a nice looking manifest file that we can use to publish our package.
Make the following edits in the manifest:
1) Adjust permissions for "dir path=usr/share" to be "group=sys".
2) Adjust permissions for "dir path=usr" to be "group=sys".
If you do not do the above 2 steps, installation of this package will break because during installation of this package, IPS will validate the listed permissions and will determine that the listing in this manifest prompts a rejection from those package supplied by Solaris 11.
3) Finally, rename the manifest file to give it a ".p5m" extension
Publishing a Package:
We need to tell SMF that our repository should be read/write and not (as the default) readonly
oracle@solaris:~/Work/srm-1.2.10$ sudo svccfg -s pkg/server setprop pkg/readonly=false
oracle@solaris:~/Work/srm-1.2.10$ sudo svcadm refresh pkg/server:default

oracle@solaris:~/Work/srm-1.2.10$ sudo svcadm restart pkg/server:default
oracle@solaris:~/Work/srm-1.2.10$ svcprop -p pkg/readonly pkg/server:default
false

oracle@solaris:~/Work/srm-1.2.10$
To publish our package we use 'pkgsend publish':
oracle@solaris:~/Work/srm-1.2.10$ sudo pkgsend publish -d ./proto_inst -s /export/ips/example \
srm_1_2_1_manifest.p5m
pkg://example.com/srm@1.2.10,5.11:20111117T63324Z
PUBLISHED
We publish it directly into the file system where the repo resides. Now that its published, restart the service to validate the presence of this package:
oracle@solaris:~/Work/srm-1.2.10$ sudo svcadm disable pkg/server:default
oracle@solaris:~/Work/srm-1.2.10$ sudo svcadm enable pkg/server:default

oracle@solaris:~/Work/srm-1.2.10$ pkgrepo info -s http://localhost:10001 PUBLISHER   PACKAGES STATUS           UPDATED
example.com 1        online           2011-11-17T17:43:48.638470Z
OK, now we have our srm package published in our local repository, lets try and see if we can install it.
Installing the Package:
The first thing we need to do is to add our local repository to our image, after that we can try to install srm from our local repository.
oracle@solaris:~$ pkg publisher
PUBLISHER                             TYPE     STATUS   URI
solaris                  (preferred)  origin   online   http://pkg.oracle.com/solaris/release/ example.com
                                      origin   online   file:/export/home/oracle/myrepo/
oracle@solaris:~$ sudo pkg unset-publisher example.com
oracle@solaris:~$ sudo pkg set-publisher -p http://localhost:10001 pkg set-publisher:
  Added publisher(s): example.com
oracle@solaris:~$ pkg publisher
PUBLISHER                             TYPE     STATUS   URI
solaris                  (preferred)  origin   online   http://pkg.oracle.com/solaris/release/  example.com
                                      origin   online   http://localhost:10001/
oracle@solaris:~$ pkg info -r srm
          Name: utilities/srm
       Summary: Secure rm
   Description: Secure rm 1.2.10
      Category: Applications/System Utilities
         State: Not installed
     Publisher: example.com
       Version: 1.2.10
 Build Release: 5.11
        Branch: 0.1
Packaging Date: July  5, 2011 05:43:48 PM
          Size: 26.41 kB
          FMRI: pkg://example.com/utilities/srm@1.2.10,5.11-0.1:20110705T174348Z
oracle@solaris:~$ sudo pkg install srm
               Packages to install:     1
           Create boot environment:    No
DOWNLOAD                                  PKGS       FILES    XFER (MB)
Completed                                  1/1         2/2      0.0/0.0

PHASE                                        ACTIONS
Install Phase                                  13/13

PHASE                                          ITEMS
Package State Update Phase                       1/1
Image State Update Phase                         2/2

PHASE                                          ITEMS
Reading Existing Index                           8/8
Indexing Packages                                1/1
oracle@solaris:~$ srm --version
srm (srm) 1.2.10
Summary
Now you should have a basic understanding of how to create your own IPS repository and how to publish a package to it.