Before You Begin
Purpose
This Oracle by Example (OBE) demonstrates how to create:
-
A connection between Integration Cloud Service (ICS) and Oracle Sales Cloud (OSC)
-
A connection between ICS and JD Edwards EnterpriseOne
-
An integration between the connections
What Do You Need?
To perform the steps in this OBE, you must have:
-
An ICS account
-
An OSC account
-
A JD Edwards EnterpriseOne environment
Time to Complete
60 minutes
Background
ICS is a complete and secure integration solution that enables you to connect your applications in the cloud. It simplifies connectivity between your applications, and can connect both your applications that live in the cloud and your applications that still live on-premises.
ICS enables you to integrate Software as a Service (SaaS) with SaaS, on-premise, or custom applications and enables automated end to end business flows.
The integration enables the on-premise applications to coexist with SaaS applications.The JD Edwards EnterpriseOne adapter can be leveraged with ICS to create the integration. JD Edwards EnterpriseOne acts as an inbound target to integrate with other SaaS applications, with ICS as the integrating agent. The inbound integration is triggered by the source application.
OSC customers may want to integrate their applications with JD Edwards EnterpriseOne as a target application on-premise or the cloud. One common use case for such an integration is automating the “opportunity to quote to order”. With this integration, when representatives create a sales opportunity, they can also generate a quote by using the JD Edwards EnterpriseOne system in the backend. The Customer Relationship Management (CRM) order can also be entered in the JD Edwards system from the Oracle Sales CRM Cloud.
Adapters
Adapters provide connectivity to the applications and enable automatic discovery of application assets, including customizations. The connectivity is established during the design time configuration, activation, and runtime execution. When you add an adapter to a trigger (source) or an invoke (target) in an integration, a wizard prompts you to configure how the data is processed for that connection, including the type of operation to perform, the business objects or fields to use, and so on. The properties you can configure vary by each type of adapter.
Agents
ICS provides an agent framework that enables you to create integrations and exchange messages between on-premise applications and ICS.
Note that agents are not used in the use case explained in this OBE.
See here for more details.
Creating the Connections
In the use case explained in this section, whenever a new customer account is created in the OSC, a new customer account is created automatically in JD Edwards EnterpriseOne as well. The integration for this use case is created using the CustomerManager Business Services (BSSV) interface.
In this use case, the BSSV server is the point of integration from the JD Edwards EnterpriseOne end, and the OSC adapter is leveraged in the ICS. OSC Event Handling Framework (EHF) is the source for triggering the ICS integration with JD Edwards EnterpriseOne. The EHF is used to generate an Account Created event on the object and to notify the subscribers.
ICS registers itself with OSC and is notified when the event is triggered along with the payload. ICS will invoke the CustomerManager BSSV in JD Edwards EnterpriseOne to create the account in JD Edwards EnterpriseOne.
Creating the Connection between ICS and OSC
-
Sign in to the ICS console by providing a valid user ID and password.

ICS Login window -
Click Create Connections.

Create Connections -
Click New Connection.

New Connection -
In the Create Connection - Select Adapter window, scroll the list to find the Oracle Sales Cloud adapter, and then click Select. You can also use the Search field on the top to search for the required adapter.

Create Connection - Select Adapter window -
In the New Connection - Information window, enter a name in the Connection Name field.
-
The Identifier field is automatically populated with the Connection Name in capital letters. You can edit the identifier name. From the Connection Role drop-down list, select Trigger. You can also provide a description in the Description field.
-
Click Create.
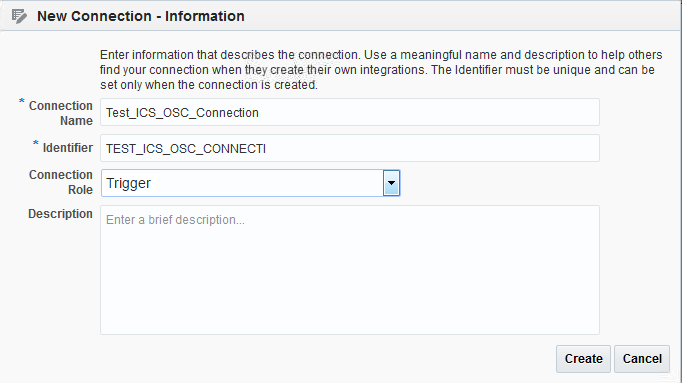
New Connection - Information window -
Provide a valid email ID in the Email Address field.

Email Address -
In the Connection Properties section, click Configure Connectivity.

Configure Connectivity -
Enter the URL details for the OSC Services Catalog WSDL URL. For example, enter https://<hostname>:<port>/webservices/ServiceCatalogService?wsdl.

Connection Properties window -
Enter the URL details for the Interface Catalog URL. For example, enter https://<hostname>:<port>/soa-infra, and then click OK.

Connection Properties window -
To configure the security credentials, click Configure Security in the Security section.

Configure Security -
Enter values in the Username, Password, and Confirm Password fields. Click OK.
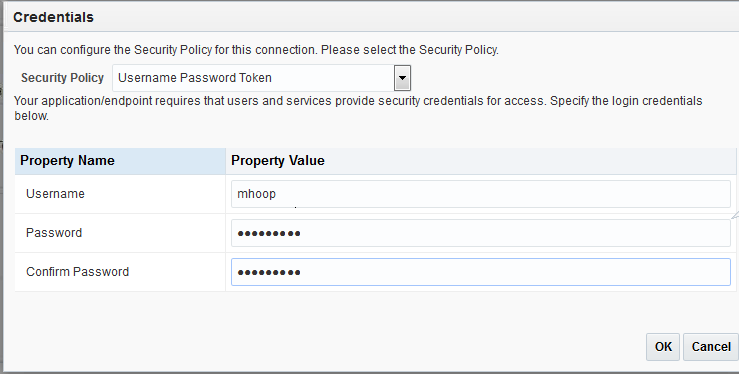
Credentials window -
To validate the connection, click Test. Verify that the percentage value is displayed as 100% to ensure that the connection was successful.

Test icon -
Click Save, and then click Exit Connection.

Save and Exit Connection
You will see the message that the connection was created successfully. The connection details page is displayed automatically and it tracks your progress as well.
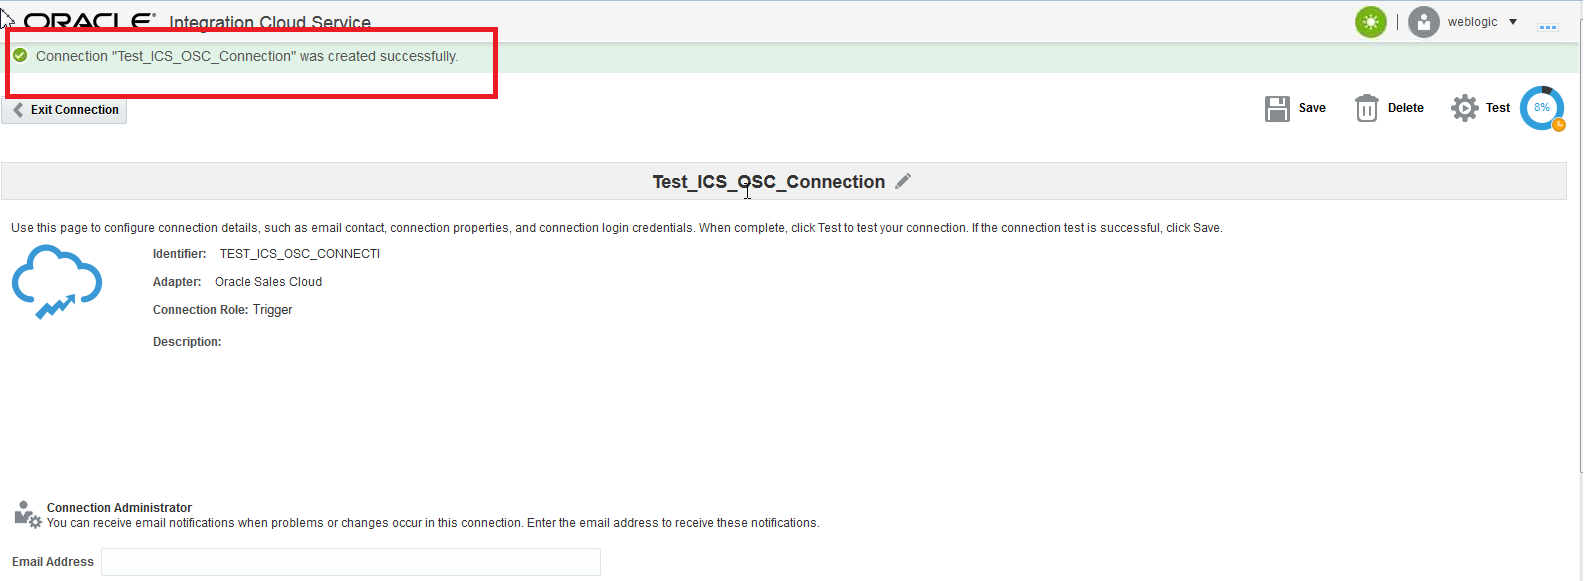
Creating the Connection between ICS and JD Edwards EnterpriseOne
-
Sign in to the ICS console by providing a valid user ID and password.
-
Click Create Connections.
-
Click New Connection.
-
In the Create Connection - Select Adapter window, scroll the list to find the JD Edwards EnterpriseOne adapter, and then click Select. You can also use the Search field on the top to search for the required adapter.

Create Connection - Select Adapter window -
In the New Connection - Information window, enter a name in the Connection Name field.
-
The Identifier field is automatically populated with the connection name in capital letters. You can edit the identifier name. From the Connection Role drop-down list, select Invoke. You can also provide a description in the Description field.
-
Click Create.
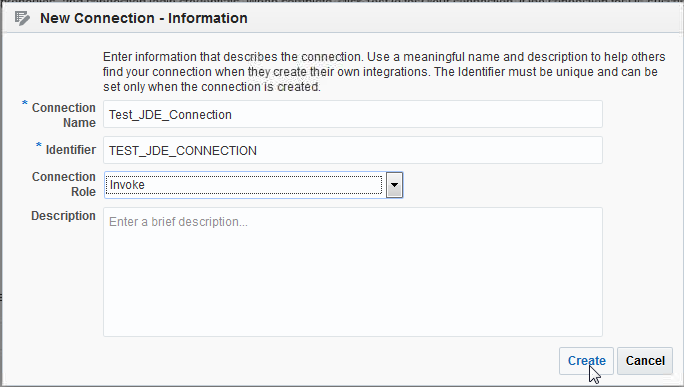
New Connection - Information window You will see a window prompt with the message that the connection was created successfully. The connection details page is displayed automatically and it tracks your progress as well.
-
Provide a valid email ID in the Email Address field.

Email Address -
In the Connection Properties section, click Configure Connectivity.

Connection Properties window -
Enter the URL details for the EnterpriseOne Services Catalog WSIL URL. For example, enter https://<bssv server name>:<port>/<environment>/wsil.jsp, and then click OK.

Connection Properties window -
To configure the security credentials, click Configure Security.

Configure Security -
Enter the User Name, Password, Confirm Password, Environment, and Role, and then click OK.
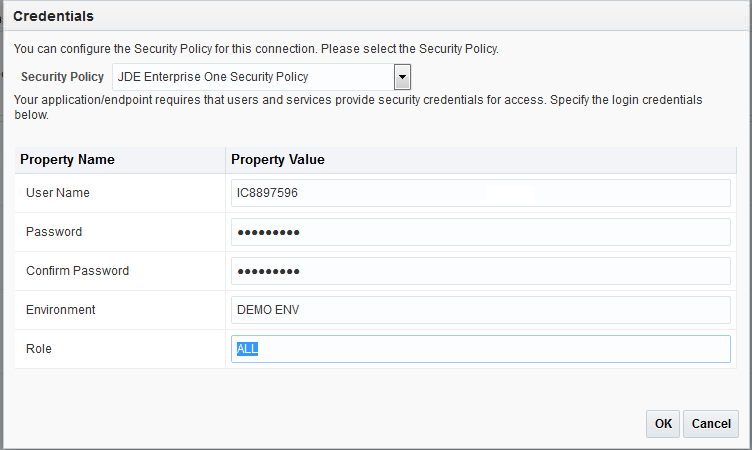
Credentials window -
To validate the connection, click Test. Verify that the percentage value is displayed as 100% to ensure that the connection was successful.
Note that, if you get an SLL exception/error when you click Test, copy the SSL certificate and upload it using the Administration tab.
-
Click Save, and then click Exit Connection.

Save and Exit Connection
Creating the Integration between the Connections
After you create the connection between ICS and OSC and the connection between ICS and JD Edwards EnterpriseOne, these connections must be integrated and validated.
To integrate the connections:
-
From the ICS Designer tab, select Integrations and click New Integration.

New Integration -
In the Create Integration - Select a Style/Pattern window, select a Style/Pattern. For example, select Basic Map Data.

Create Integration - Select a Style/Pattern window -
In the Create New Integration window, enter the Integration name, Identifier, and Version fields, and click Create. The ICS console displays the integration as created successfully.

Create New Integration window -
In the left side of the window, you can see Drag and Drop a Trigger; in the right side, you can see Drag and Drop an Invoke. Search for the ICS to OSC trigger connection in the Connections field.
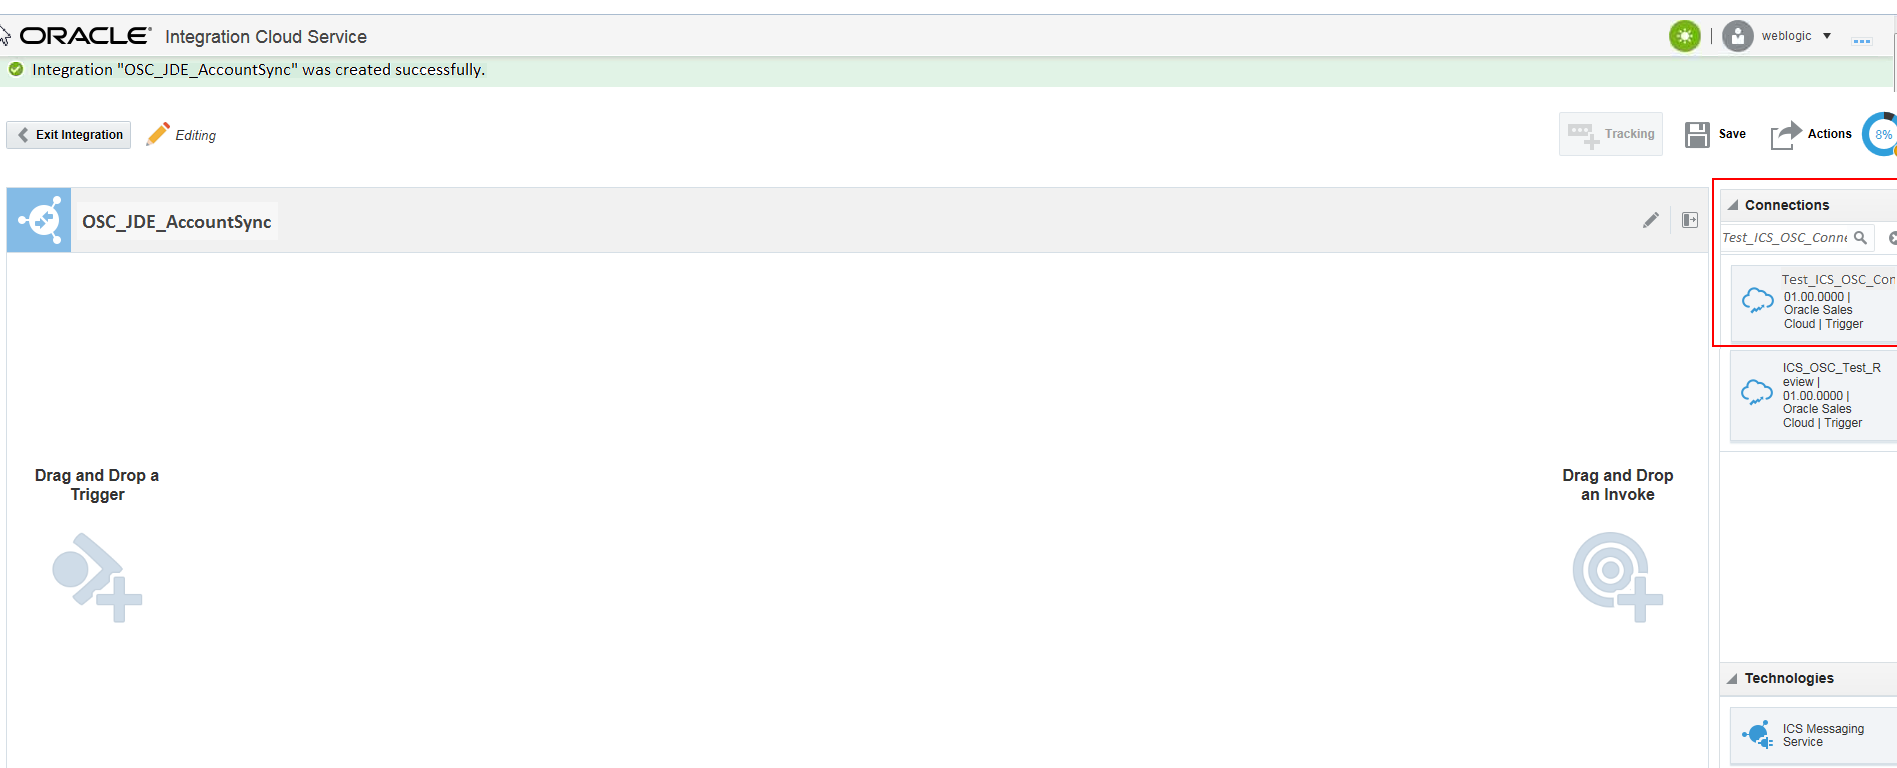
Drag and Drop a Trigger and Drag and Drop an Invoke -
Drag and drop the ICS to OSC trigger connection onto Drag and Drop a Trigger. The Configure Oracle Sales Cloud Endpoint is displayed.
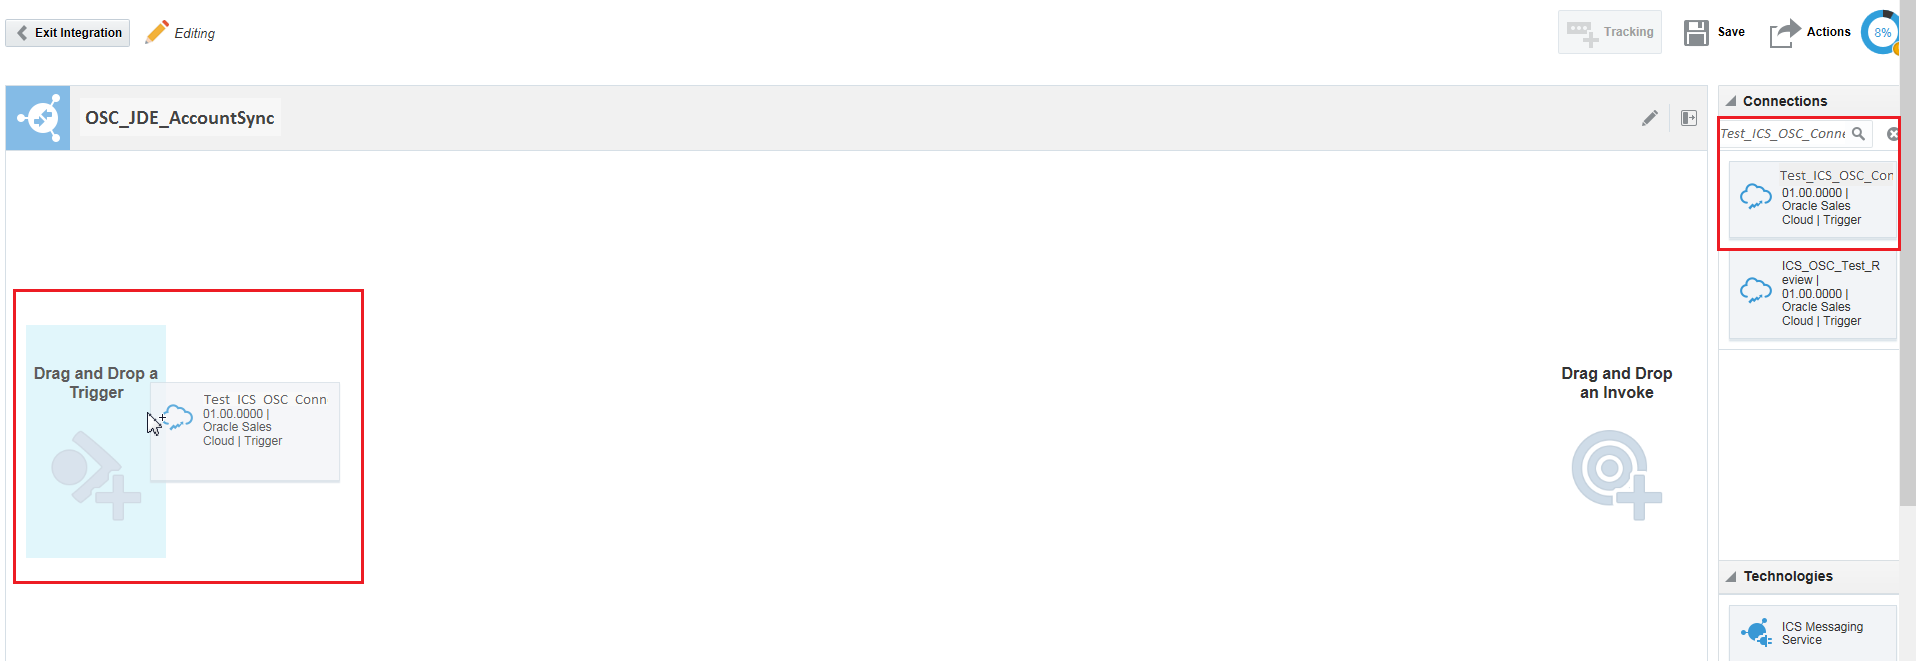
Drag and Drop a Trigger connection -
In the Basic Info tab, enter values in the “What do you want to call your end point?” and “What does this end point do?” fields.
Click Next.
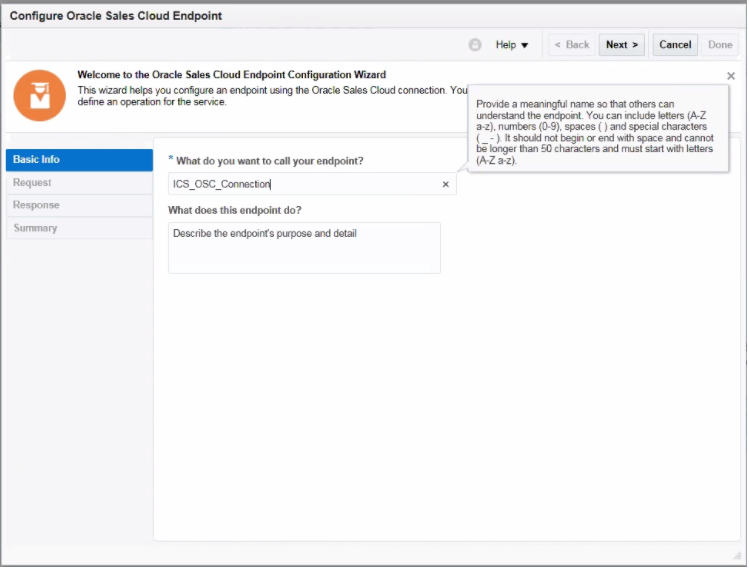
Basic Info tab -
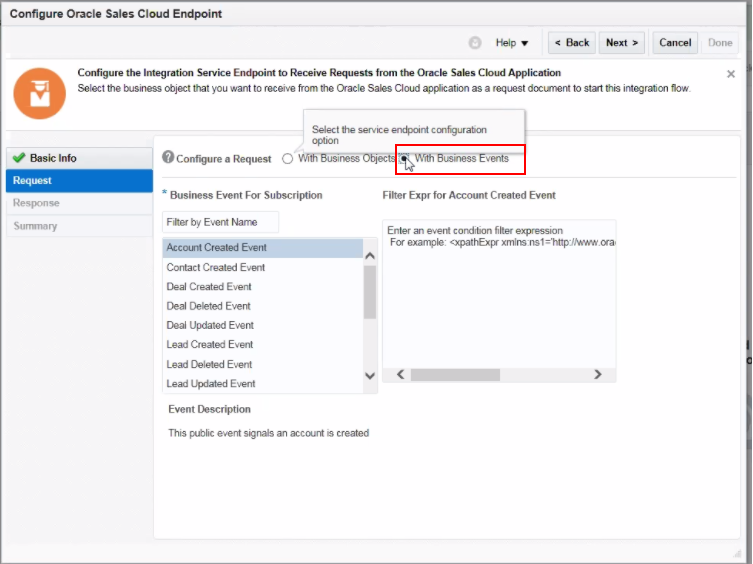
In the Request tab, select With Business Events, and then select Account Created Event in the Filter by Event Name field.
Click Next.
Request tab -
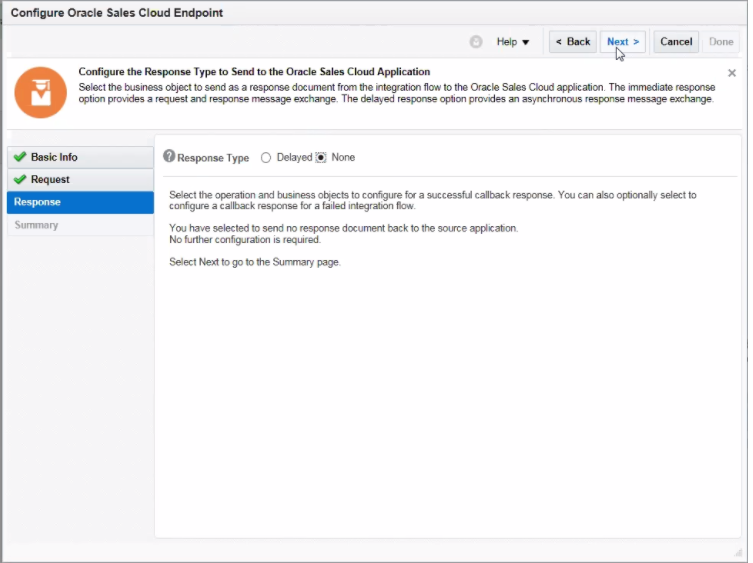
In the Response tab, select None.
Click Next.
Response tab -
The summary tab contains the name of the subscribed event. Click Done.

Integration details window -
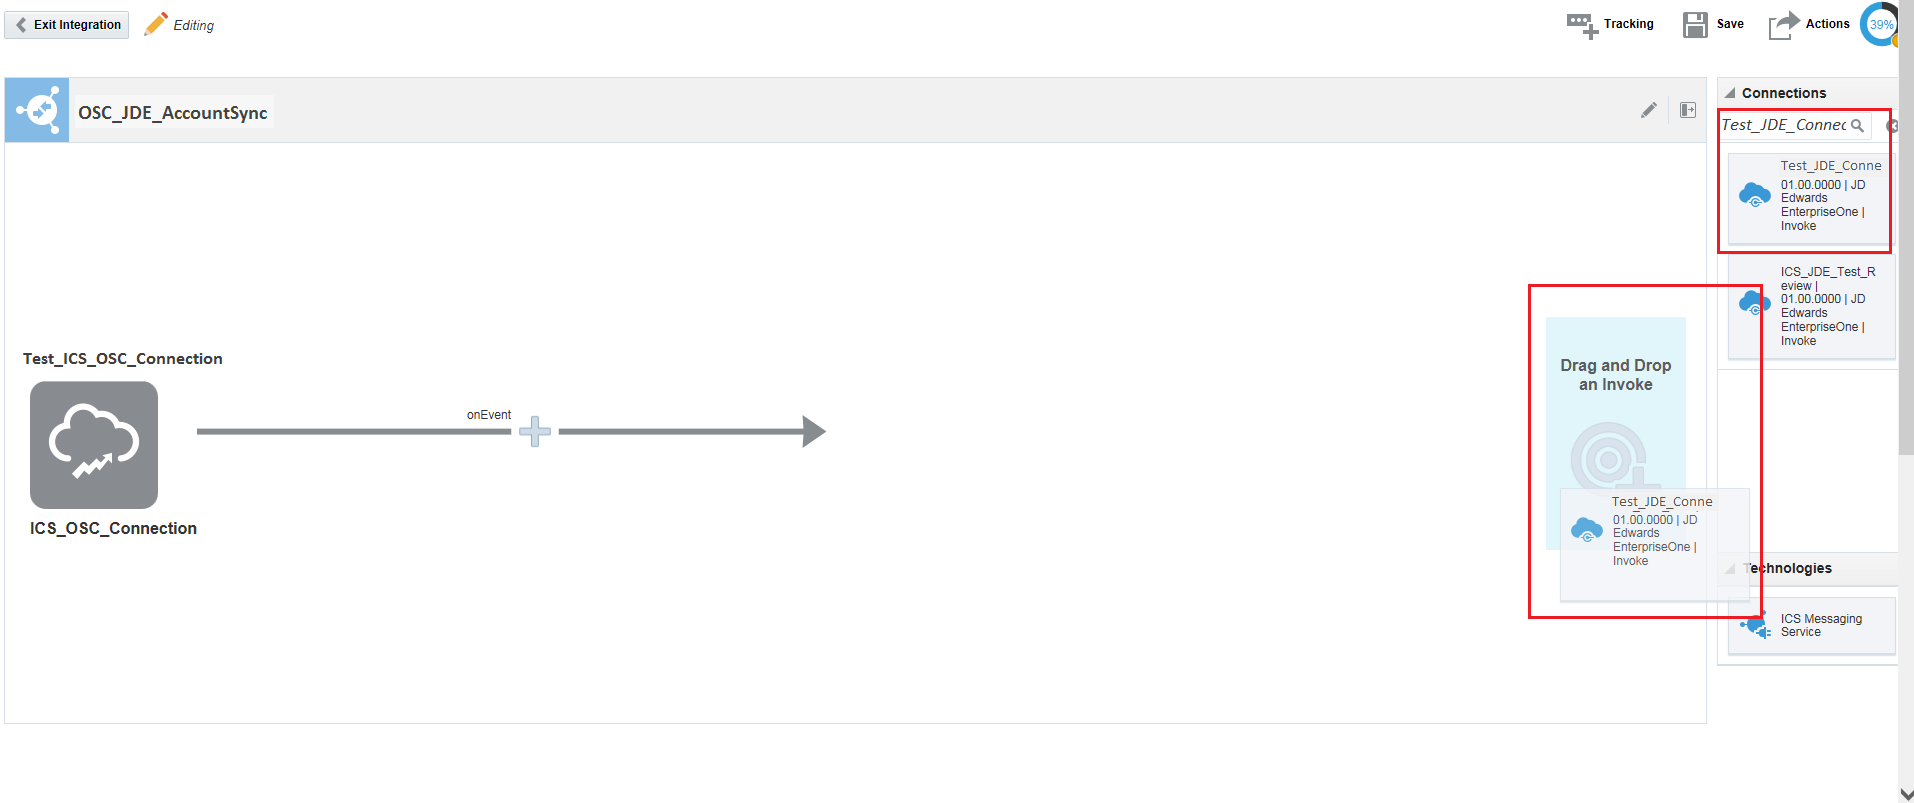
Search for the ICS to JD Edwards EntepriseOne invoke connection in the Connections field. Drag and drop the ICS to JD Edwards EnterpriseOne invoke connection onto Drag and Drop an Invoke. The Configure JD Edwards EnterpriseOne Endpoint is displayed.
Drag and Drop an Invoke connection -
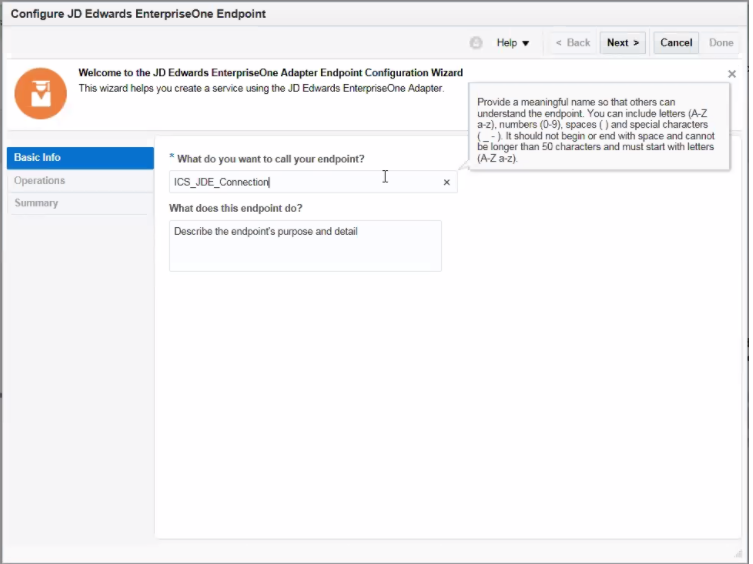
In the Basic Info tab, enter values in the “What do you want to call your end point?” and “What does this end point do?” fields.
Click Next.
Basic Info tab -
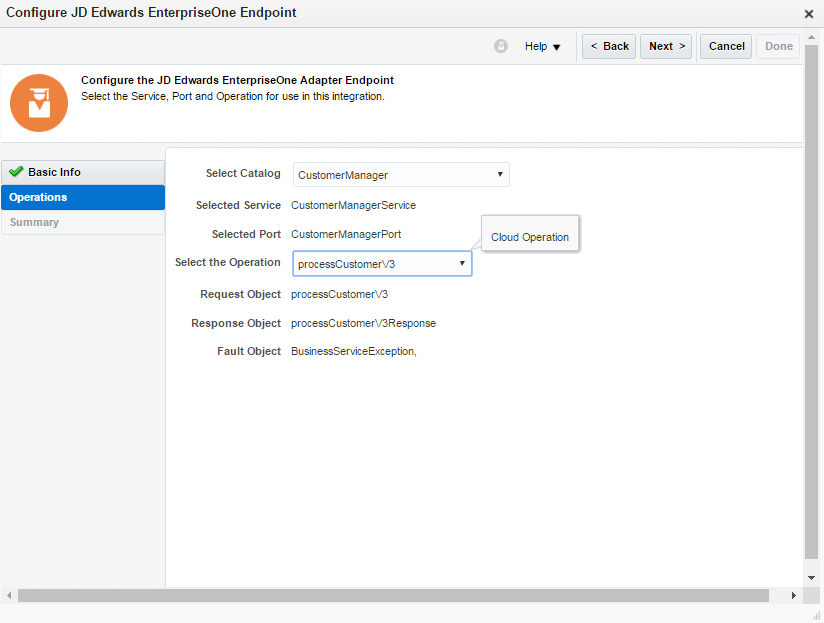
In the Operations tab, select CustomerManager BSSV for Select Catalog, and processCustomerv3 for Select the Operation fields, and click Next.
Operations tab -
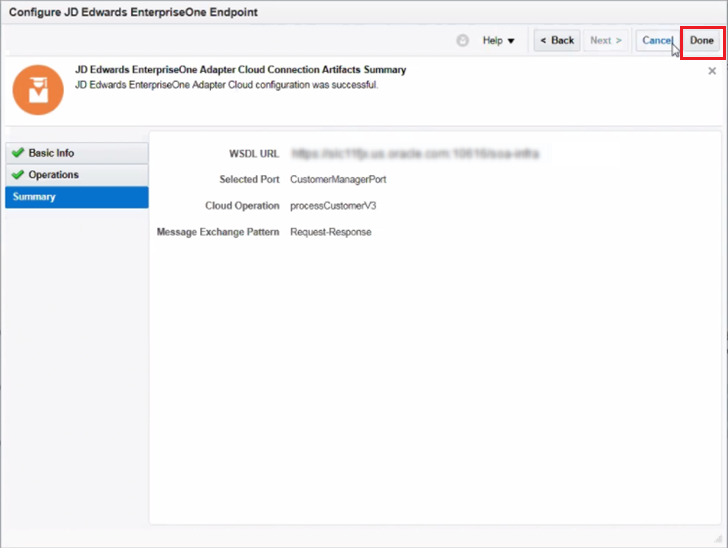
In the summary tab, click Done.
Summary tab -
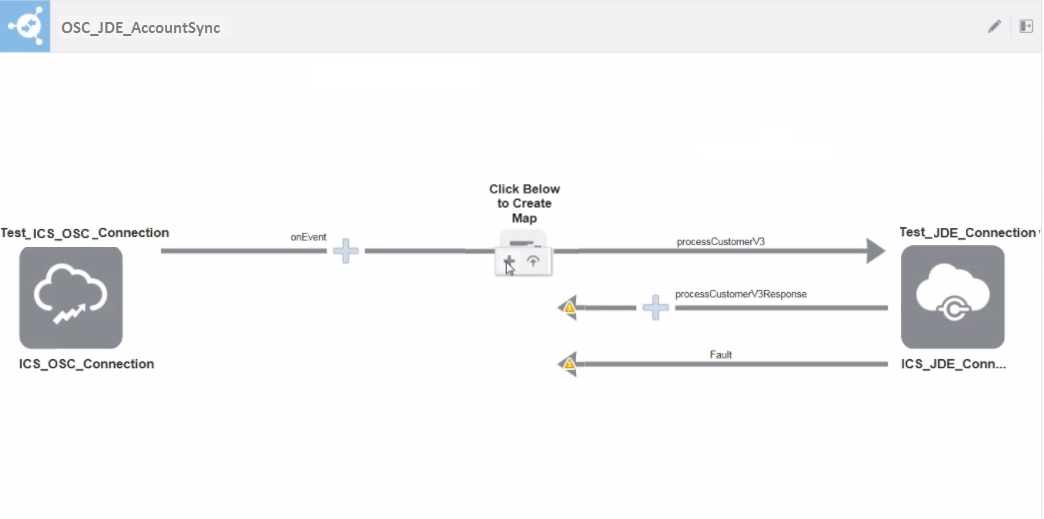
To map the source payload to the target payload, click the Map icon followed by the “+” icon to create a mapping.
Integration details window -
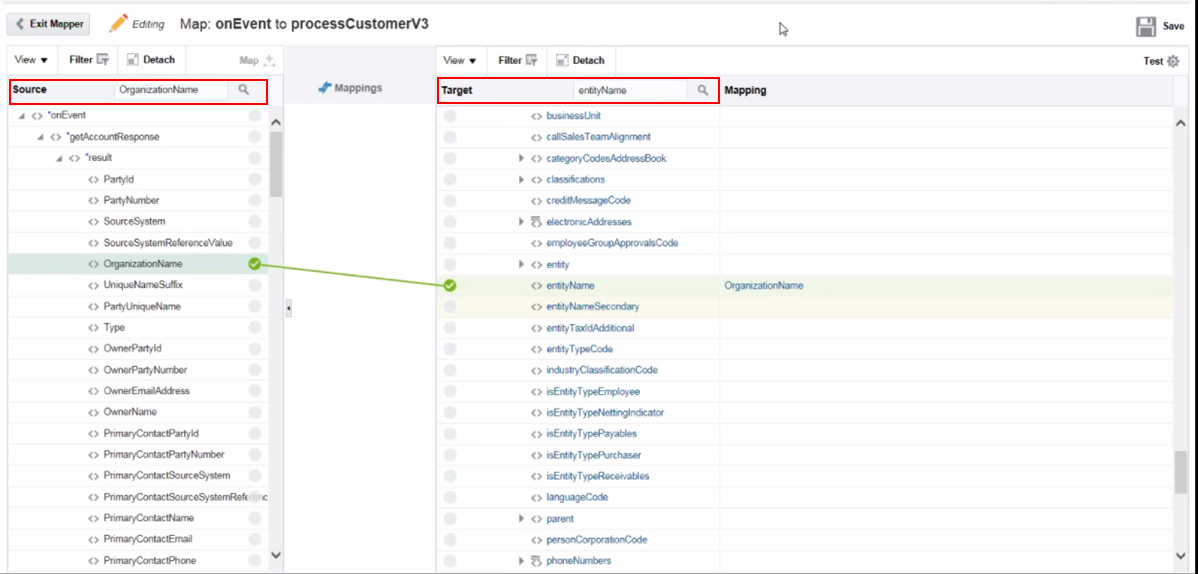
In the mapping wizard, drag and drop the source to the target in order to create a mapping.
For example, to map OrganizationName to entityName, search for OrganizationName in the Source field, and then search for entityName in the Target field. Drag OrganizationName from the Source field and drop it on entityName in the Target field to create a mapping.
Mapping example -
Similarly, specify the mappings as mentioned in the following table:
OSC Field (Source field) EnterpriseOne related element (Target field) OrganizationName <entityName>?</entityName> Country <countryCode>?</countryCode> Address Line1 <addressLine1>?</addressLine1> Address Line2 <addressLine2>?</addressLine2> Address Line3 <addressLine3>?</addressLine3> City Town <city>?</city> Pin Code <postalCode>?</postalCode> State <stateCode>?</stateCode> -
To view all the mappings, click Filter in the Source or Target, and select Mapped in the Is it Mapped? field. Click Apply.

Mapping wizard -
You can click the check mark next to the source or the target to view the mappings. For example, if you click on the check mark next to "State" in the Source field, the system displays the mapping to the "stateCode" in the Target field.
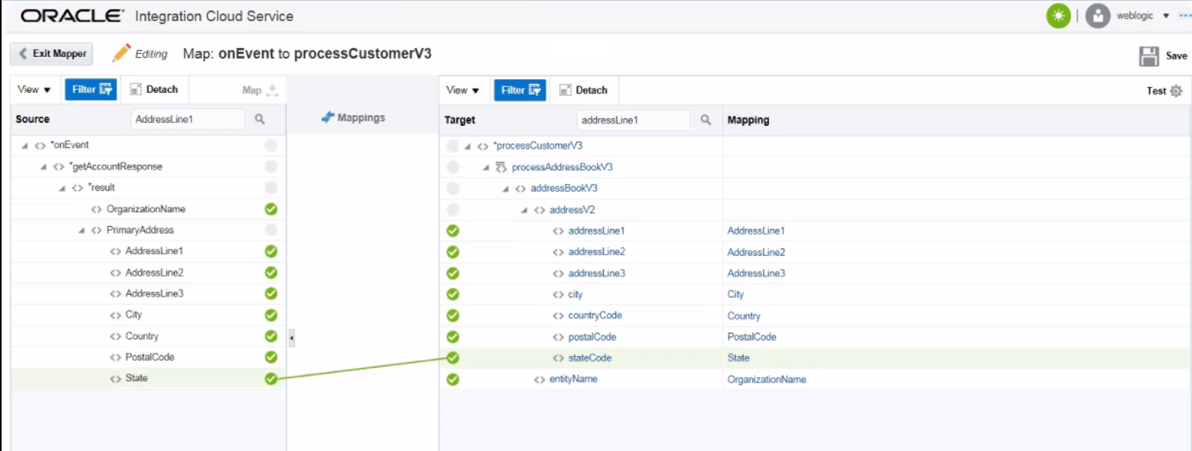
Mapping wizard -
Click Save, and then click Exit Mapper. The integration is displayed as 77% complete.
-
Click Tracking to add tracking fields in order to identify the various instances of integration.
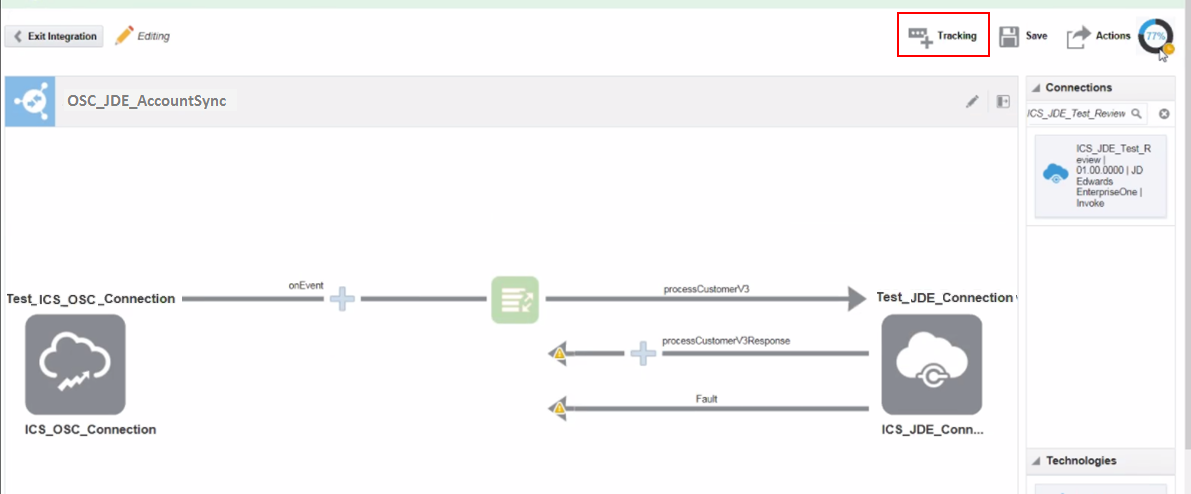
Tracking button -
In the Business Identifiers For Tracking, add OrganizationName as a tracking field. Drag and drop the OrganizationName from the Source field and drop it on the Tracking Field, and then click Done.

Business Identifiers for Tracking window You can optionally choose an action for the response and fault. For this example, this step is skipped.
-
Click Save. The integration is now 100% complete. The ICS console displays the integration as created successfully. Click Exit Integration.

Integration details window -
The newly created integration is displayed in the list of integrations. Click Activate to activate this integration.

Newly created integration -
In the confirmation dialog box, click Yes. An active integration is shown in the following example.
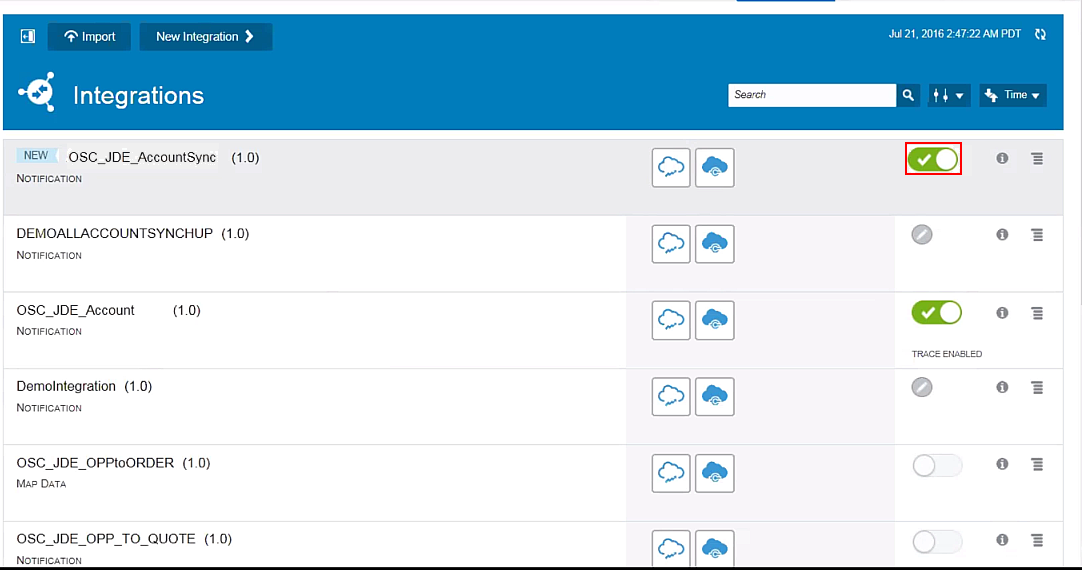
Integrations window When the integration is active, a subscription for it is created in the OSC. You can review this subscription as well as all the other subscriptions by invoking the following URL from your browser:
<CRM_DOMAIN_URL>/soa-infra/PublicEvent/subscriptions
-
After the integration is active, an endpoint URL will be provided by the ICS. This endpoint can be invoked to use the integration. You can click the "i" icon to access the endpoint URL.

Endpoint URL
Testing the Integration
-
Log in to the OSC to create a new account.

OSC Login window -
Click Sales, and then click Accounts.
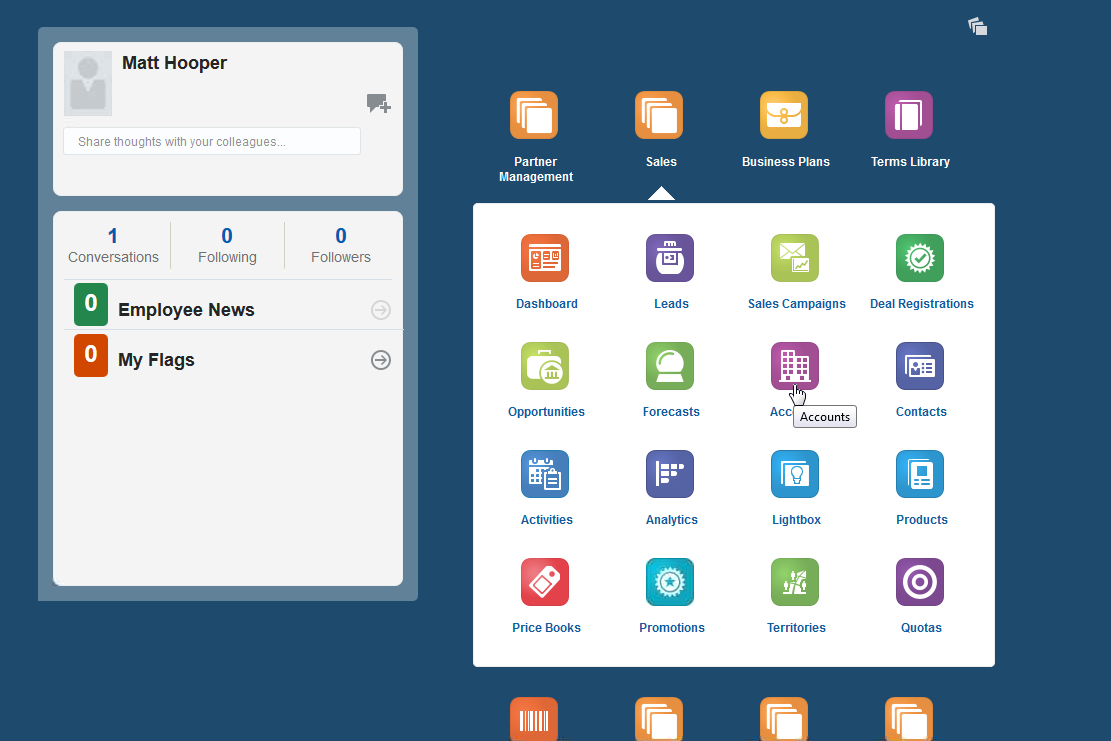
Accounts icon -
Click Create Account.
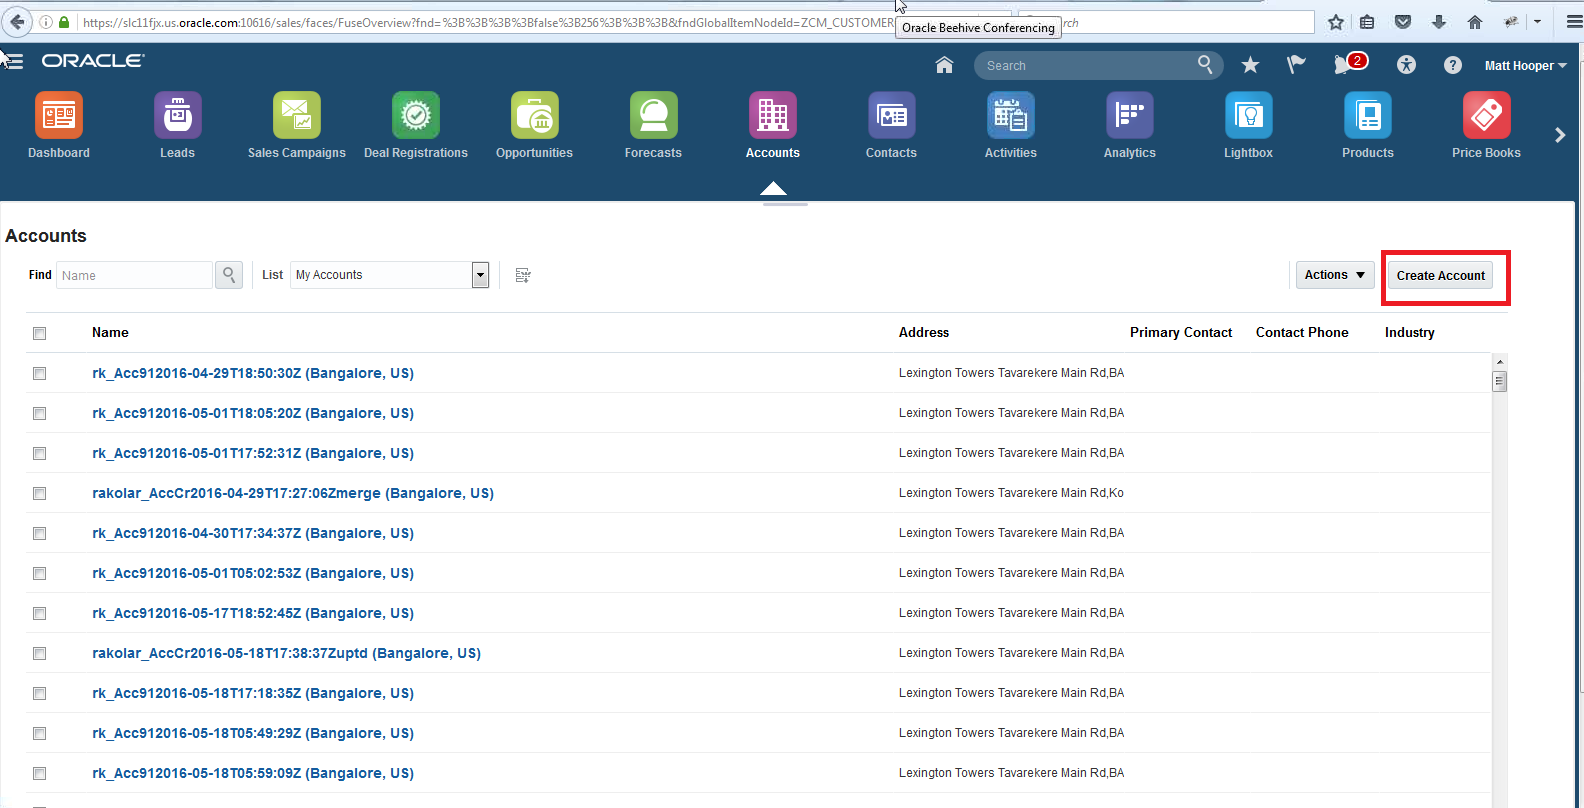
Create Account -
Enter values for the fields in the Create Account window, and then click Save and Close. In the Accounts page, you can search and view the newly created account.

Create Account window -
Log in to the ICS, and then click Monitoring.
You can see the message counts, errors, and process time in the Monitoring Dashboard. Click the MESSAGES box.

Monitoring window You can see the newly created account in the ICS.
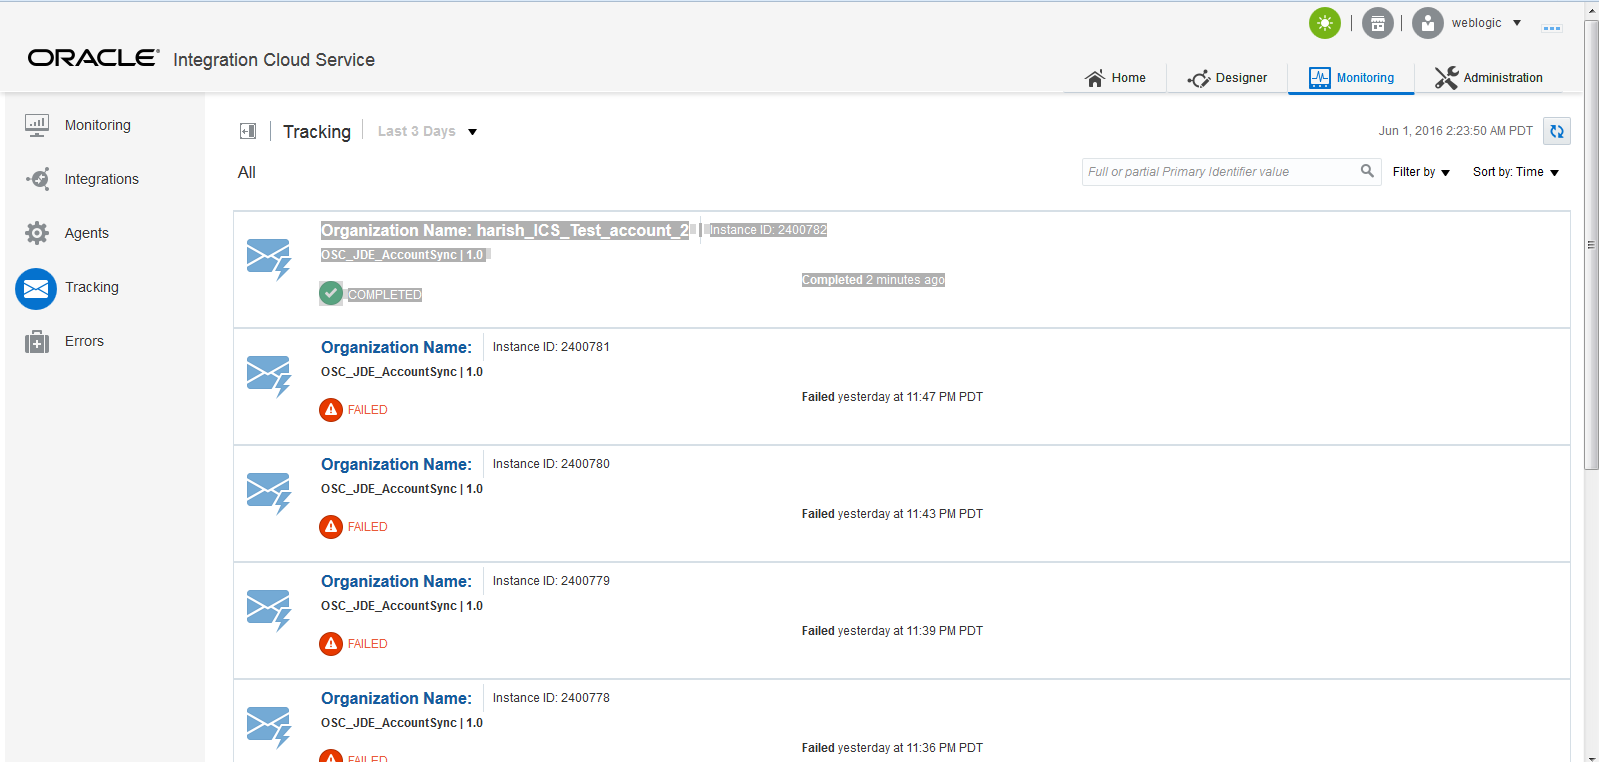
Newly created account in ICS -
To verify that this account is created in JD Edwards EnterpriseOne, log in to the JD Edwards EnterpriseOne environment. Enter P03013 in the Fast Path field and press Enter. Enter the account name you created in the Alpha Name field and click Search. The new account is displayed.
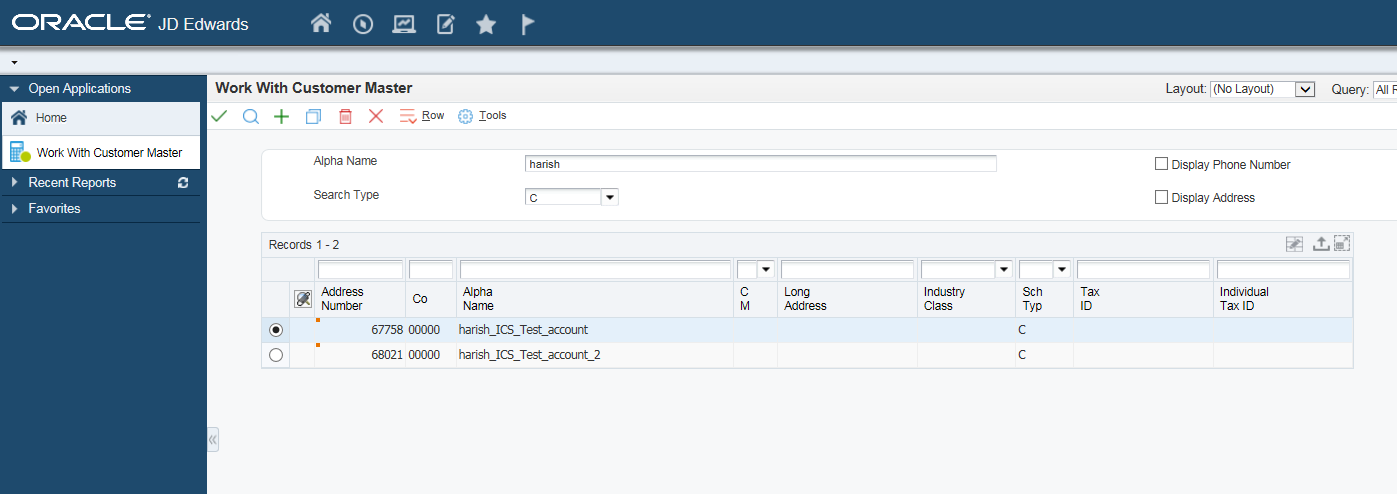
Newly created account in JD Edwards EnterpriseOne
Summary
In this exercise, you performed the following tasks:
-
Created the connection between ICS and OSC.
-
Created the connection between ICS and JD Edwards EnterpriseOne.
-
Created an integration between the ICS-OSC and JD Edwards EnterpriseOne-ICS connections and specified the mappings.
-
Accessed the endpoint URL to use the integration.