Using DBA Tools to Create and Administer DBaaS Databases
Overview
Purpose
This tutorial covers databases creation and management of databases in the Oracle Cloud Database Service using tools like DBCA, SQL Developer and SQL*Plus.Time to Complete
Approximately 30 minutes.
Introduction
In this tutorial, you learn how to use DBA tools to administer databases in the Oracle Cloud Database Service.
You will see how to launch DBCA, SQL Developer, EM Database Express and SQL*Plus.
Prerequisites
Before starting this tutorial, you should have performed the Creating a Database Cloud Service (DBaaS) Instance and Connecting to a Database Cloud Service (DBaaS) Instance Through an SSH Tunnel tutorials.Creating a New DBaaS Database
To create a database into your Oracle Database Cloud Service, verify that you have enough storage allocated in the Oracle Database Cloud Service.
-
You have created a PuTTY definition for connecting through an SSH tunnel to your Database Cloud Service (DBaaS) instance. Now open this definition to connect to the VM.

Then click Open.
-
Because this is not the first time you are connecting to the VM, the SSH utility does not prompt you to confirm the public key. If it were the first time, the SSH utility would have prompted you to confirm the public key. You would have confirmed by clicking Yes.

- The username can be either oracle or opc. The opened connection uses the default user oracle. Another connection can be created to connect under opc to perform sudo commands as root. The DBaaS instance name is NFDBA.
-
You can now launch DBCA either in silent mode or in graphical mode. The first example shows how to run DBCA in silent mode.
- Create a response file that will contain the parameters used by DBCA executed in silent mode.

- Launch DBCA in silent mode. DBCA uses the response file created previously.

-
Add a pluggable database to the newly created CDB.

Enter password for pdb_admin_CDB2 user is prompted. Enter the password for the PDB admin user.

PDB_CDB2 is now created.
Using SQL Developer to Administer DBaaS Databases
- Launch SQL Developer from your client.

- You want to clone a PDB in the CDB2.
- Create a new connection to your Database Cloud
Service (DBaaS) CDB2 database. Retrieve the service name from
the tnsnames.ora file.

- In SQL Developer, click + in
the Connections navigator to create a new connection to the
DBaaS database.
In the New / Select Database Connection, enter:
- A name for the new Connection Name, cdb2_root_SYS
- The Username to log in the CDB when the connection will be opened
- The Password of the SYS user
- Set the role to SYSDBA
- The host name (IP Address of the VM)
- The port of the listener on the VM
- The service name to access the CDB root

The connection to DBaaS CDB2 database is created. You can click Test to check that the connection is usable.
- Open the connection to DBaaS CDB2 database by
clicking the + in DBA navigator. Select the
cdb2_root_SYS connection and click OK.

- Expand the cdb2_root_SYS connection, and then the
Container Database. The list of the PDBs is displayed. Clone
the PDB_CDB2 to another PDB in CDB2.

- Right-click the PDB name, click Clone Pluggable
Database. Enter a name for the new PDB.

- To define the data files location of the new PDB,
click the SQL tab to update the
FILE_NAME_CONVERT clause to CREATE_FILE_DEST and click Apply.

Click OK when the operation is successfully completed. The new PDB name appears in the PDB list of the CDB.

- You want to display the DBaaS Database Backups for the ORCL
database. Expand the ORCL_root_SYS connection in the DBA
navigator and click the Backup sets.
- You want to display the data files associated to PDB_CDB2.
- Create a connection to the PDB2_CDB2 pluggable database in CDB2, then open the connection. Check the list of data files.
- Open the PDB2_CDB2 pluggable database. In the
cdb2_root_SYS connection, right-click the PDB2_CDB2. Click Modify
State.

Click Apply.

- Back to the pdb2_root_SYS connection, click Datafiles.
All data files are located in the directory defined in the
CREATE_FILE_DEST parameter of the CREATE PLUGGABLE DATABASE
statement.

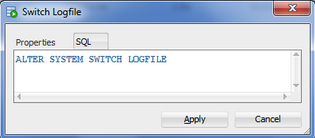
- Click Redo Log Groups. Click Actions.
Observe that SQL Developer does not allow you to perform the
ALTER SYSTEM and ALTER DATABASE commands on redo log files and
groups because you are connected to a PDB. The ALTER SYSTEM
SWITCH LOGFILE, ALTER SYSTEM CHECKPOINT, ALTER DATABASE ADD
LOGFILE GROUP commands require a connection to the root.


- Retry the same operation in a cdb2_root_SYS connection.
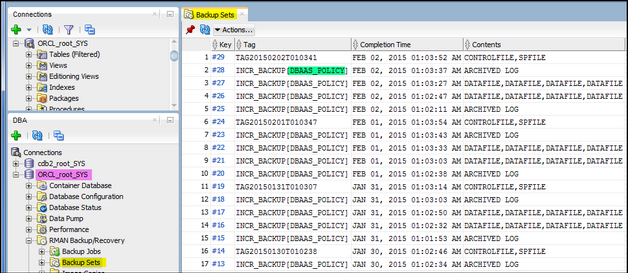
Note: If the backup option selected during the configuration of the creation of the DBaaS instance is NONE, there will be no backup.
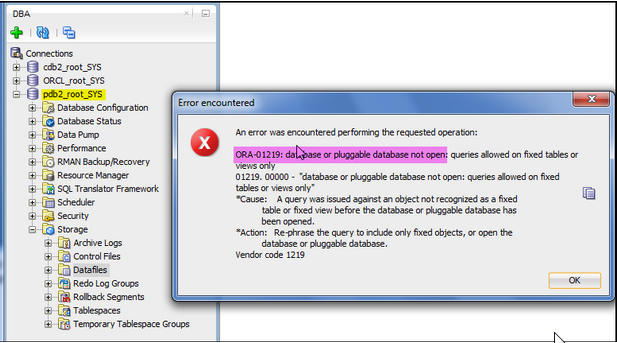
The PDB is not opened.
Using EM Database Express to Administer DBaaS Databases
- You first have to sign in to your Oracle Database Cloud
Service.

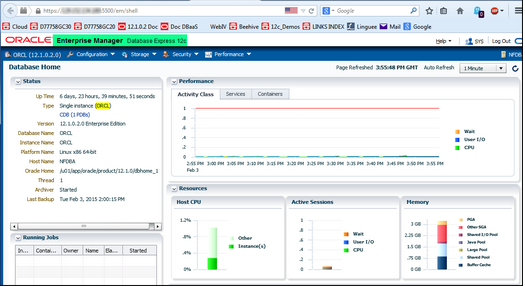
- Click the icon with four small horizontal lines on the
right-hand side of the page. Select Open EM Console. EM Database
Express home page shows up for the database created at the
Standard service level.
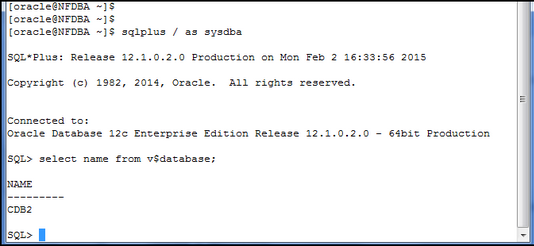
Using SQL*Plus to Administer DBaaS Databases
- Set the environment to ORACLE_SID and ORACLE_HOME. By
default, the ORACLE_SID is set to the database instance
automatically created when you created the DBaaS instance.
- Use SQL*Plus as you usually do on a Linux or Unix server.

Summary
-
You can administer the DBaaS databases with the same tools as you
would do with the Oracle Databases.
- Create new DBaaS databases, CDB and PDBs with DBCA
- Administer DBaaS databases with SQL Developer
- Administer DBaaS databases with EM Database Express
- Administer DBaaS databases with SQL*Plus
- For more detailed information about connecting to Oracle Database instances in the Oracle Database Cloud Service (DBaaS), see the documentation.
- To learn more about Oracle Database Cloud Service, visit the Database Cloud Service.
- For training on the Oracle Cloud platform-as-a-service (PaaS) Services, visit the Oracle Learning Library
- Look at these videos on working with the Oracle Database Cloud Service:
- Lead Curriculum Developer: Dominique Jeunot
- Other Contributors: James Spiller
In this tutorial, you learned to:
Resources
Credits
Put credits hereTo navigate this Oracle by Example tutorial, note the following:
- Topic List:
- Click a topic to navigate to that section.
- Expand All Topics:
- Click the button to show or hide the details for the sections. By default, all topics are collapsed.
- Hide All Images:
- Click the button to show or hide the screenshots. By default, all images are displayed.
- Print:
- Click the button to print the content. The content that is currently displayed or hidden is printed.
To navigate to a particular section in this tutorial, select the topic from the list.