Before You Begin
Purpose
In this tutorial, you will learn how to create a project and work with Git repositories using Oracle Developer Cloud Service and NetBeans IDE.
Time to Complete
Approximately 30 minutes
Background
This tutorial shows you how to do the following:
- Create a project using Oracle Developer Cloud Service
- Use the Team Server plugin for NetBeans IDE to clone the Git repository for the Oracle Developer Cloud Service project
- Create a local project using NetBeans IDE and make changes to this project
- Push the NetBeans IDE project to the Git repository for the Oracle Developer Cloud Service project
- Verify that the project files have been correctly pushed to the Oracle Developer Cloud Service project
Context
After completing this tutorial, you may want to move on to Managing Issues Using Oracle Developer Cloud Service.
What Do You Need?
-
A login to an Oracle Developer Cloud Service instance
-
One of the following supported browsers:
- Internet Explorer 11 or 12
- Firefox 31 or later
- Chrome 37 (also for Android)
- Safari 7 or 8
- Safari Mobile 5 (iOS)
-
Some familiarity with NetBeans IDE
-
An installation of Oracle WebLogic Server 11g
-
An installation of the Java EE bundle of NetBeans IDE, with Oracle WebLogic Server added to it
-
Some experience developing applications in Java
-
Some familiarity with the Git source control system
-
Some familiarity with Oracle Java Cloud Service
Creating a Project Using Oracle Developer Cloud Service
-
Launch your Oracle Developer Cloud Service, following the instructions in "Accessing Oracle Developer Cloud Service Using the Web Interface" in Using Oracle Developer Cloud Service.
-
Provide your user name, password, and identity domain, and click Sign In.
-
On the Welcome page, click New Project.

Description of this image -
On the first page of the New Project dialog, enter a name for the project, such as My Web Application. In the Description field, enter a description, such as "Web application". Select Private as the Security setting, then click Next.

Description of this image -
On the Template page, select Initial Repository, and then click Next. Your environment may provide templates in addition to the Empty Project and Initial Repository selections.

Description of this image -
From the Wiki Markup drop-down menu, select TEXTILE. In the Initial Repository area, select the Empty Repository radio button, then click Finish.

Description of this image -
Wait for provisioning to complete.

Description of this image After provisioning completes, the project is fully provisioned. You are on the project's Home page, which displays the URLs of the Git and Maven repositories.

Description of this image
Cloning the Project's Git Repository Using NetBeans IDE
Your next task is to clone the project's Git repository. This involves several steps:
- Installing the Team Server Plugin in your NetBeans IDE instance
- Adding the team server for your Oracle Cloud Developer Service instance to your NetBeans IDE instance
- Finally, cloning the repository
Adding the Team Server Plugin to your NetBeans IDE Instance
If you have not already done so, add the Team Server plugin to your NetBeans IDE instance.
-
In NetBeans IDE, select Tools > Plugins.

Description of this image -
Click the Available Plugins tab and enter
cloudin the Search field.
Description of this image -
From the list that appears, select the Oracle Developer Cloud Service check box, and then click Install.

Description of this image -
On the first screen of the installation dialog, click Next. On the next screen, select the check box to accept all the license agreements and click Install.

Description of this image -
Click Finish when the installation is complete. (If you see a Verify Certificate dialog box about the Mylin plugin, click Continue.) Finally, click Close to close the Plugins window.
Adding the Team Server for Your Oracle Cloud Developer Service Instance to Your NetBeans IDE Instance
-
In NetBeans IDE, select Team > Team Server > Add Team Server.

Description of this image -
Specify a name (for example, "My Team Server") in the Name field, specify the URL of your Oracle Developer Cloud Service instance in the URL field, and then click Add.

Description of this image A Team tab opens, if it is not already present.

Description of this image -
Click Click here to select project, and then click Login.

Description of this image -
Enter your username and password, and then click Login.

Description of this image The team server appears in the Team tab.
-
(Optional) After you log in, NetBeans IDE synchronizes all issues, builds, and Git repositories of each project, and this may slow down NetBeans IDE performance. To synchronize the selected project only, click the Gear icon and select Auto Synchronize Services > Selected Project.
Cloning the Git Repository
-
Select the My Web Application project you just created in Oracle Developer Cloud Service.

Description of this image -
Expand the Sources node of the project to see the Git repository node.

Description of this image -
Click get... to clone the source files from the Oracle Developer Cloud Services repository.
-
In the Get Sources from Oracle Developer Cloud Services dialog, click Get From Team Server. (There may be a brief delay before the Developer Repository appears in the dialog.)

Description of this image -
The first screen of the Clone Repository wizard, Remote Repository, goes by very fast with default settings. On the Remote Branches screen, click Next. (There are no remote branches at this point. At the first commit, NetBeans IDE will create a default master branch.)

Description of this image -
On the Destination Directory screen, you can specify a nondefault location for the NetBeans project if you wish. Deselect the Scan for NetBeans Projects after Clone check box and click Finish.

Description of this image An empty project with the name of the cloned repository is created in your
NetBeansProjectsdirectory. It contains nothing but a.gitdirectory, so it is not really a NetBeans project yet.
Description of this image
Creating a Local Project Using NetBeans IDE
-
Select File > New Project to create a NetBeans IDE counterpart to your Oracle Developer Cloud Service project.

Description of this image -
On the Choose Project screen of the New Project wizard, select Java Web, then select Web Application, then click Next.

Description of this image -
In the Project Name field, enter
MyWebApp. Specify the Project Location under the name of the cloned repository in your NetBeansProjects directory, then click Next.
Description of this image -
Select Oracle WebLogic Server from the Server drop-down menu, or select Add... to add your Oracle WebLogic Server instance. When you're finished, click Finish.

Description of this image The project is displayed in the Projects tab, and the
index.jspfile opens.
Description of this image -
In the JSP file, change the line
Hello World!toHello Cloud!, then click the Save icon or select File > Save.
Description of this image
Pushing the NetBeans IDE Project to the Oracle Developer Cloud Service Git Repository
-
In NetBeans IDE, return to the Team tab and expand Sources, then click the name of the project, if it appears, to return to the Projects tab.

Description of this image If the project name does not appear, click Open local project....

Description of this image -
If you clicked Open local project..., in the Open Project dialog, select MyWebApp, then click Open Project.

Description of this image You are returned to the Projects tab.
-
In the Projects tab, right-click the project and select Git, then Commit.

Description of this image -
In the Commit dialog, enter a commit message such as
Initial commit of MyWebApp, and then click Commit to commit the project locally.
Description of this image -
Right-click the project and select Git, then Remote, then Push to Upstream.

Description of this image -
In the Create New Branch? dialog, click Yes.

Description of this image -
In the "Specify Git repository location" dialog, specify your username and password, select the Save Password check box, then click OK.

Description of this image -
In the Set Up Remote Tracking? dialog, click Yes.

Description of this image The project is now pushed to Oracle Developer Cloud Service. This action initializes the remote repository and creates the master branch.
-
Select Team > Repository > Repository Browser to view the repository.

Description of this image The Git Repository Browser window appears below the source code.
-
In the Git Repository Browser window, expand the nodes to see the branches and remotes.

Description of this image
Viewing the Modified Project in Oracle Developer Cloud Service
-
Return to your Oracle Developer Cloud Service browser window and click Home if you are not already on the Home page.
If your Git commit is not already visible, refresh the browser to view it in the activity feed.

Description of this image -
To view the files that were committed, click the commit link.
The Code page shows all the files that were added.

Description of this image -
Click Code to return to the Files view.

Description of this image -
Click MyWebApp, then click web to see the files in that directory.

Description of this image -
Click index.jsp to confirm that the line you changed in NetBeans IDE is visible.

Description of this image
You can now make further changes to the project source code in NetBeans IDE, repeating the process of committing the changes locally and pushing them to the remote repository in your Oracle Developer Cloud Service instance.
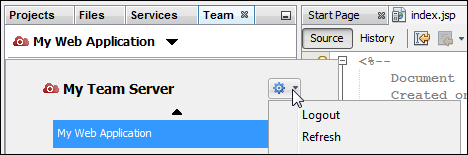
If you want to log out of the Team Server, click the Team tab, click My Web Application, click the wheel icon, then click Logout.
Want to Learn More?
- Managing Issues Using Oracle Developer Cloud Service OBE
- Oracle Developer Cloud Service in the Oracle Help Center
- Using Oracle Developer Cloud Service in the Oracle Help Center
Credits
- Lead Curriculum Developer: Kim Haase
- Other Contributors: Ken Ganfield