Overview
Purpose
Oracle Developer Cloud Service is a cloud-based hosting environment for software development projects. This tutorial covers the setup, initial project creation, and project workflow of Oracle Developer Cloud Service.
Time to Complete
Approximately 45 minutes
Background
This tutorial shows how to start using an Oracle Developer Cloud Service instance, set up software development projects, interact with the browser-based Oracle Developer Cloud Service interface, and practice performing a build.
Scenario
You are an application developer whose department will be developing Java web applications in the Oracle Cloud. Your manager has assigned you to set up an Oracle Developer Cloud Service environment, test the creation of projects and issues, and test the features for managing the environment.
You may have the role of developer or that of administrator. Most of the tasks in this tutorial can be performed by both developers and administrators. Some tasks at the end can be performed only by administrators.
What Do You Need?
-
A login on an Oracle Developer Cloud Service instance
-
One of the following supported browsers:
- Chrome 48 or later (also for Android)
- Firefox 38 or later
- Internet Explorer 11 or 12
- Safari 7 or 8 (Mac OS)
- Safari Mobile 5 (iOS)
-
Some familiarity with the Git source control system
-
Some familiarity with building applications in Hudson or a similar continuous integration tool (helpful to have, but not required)
About Oracle Developer Cloud Service
Oracle Developer Cloud Service is a cloud-based hosting environment for software development projects. Oracle Developer Cloud Service provides integrated issue tracking, Agile development, source code repository, software build, code review, wiki collaboration, and deployment services.
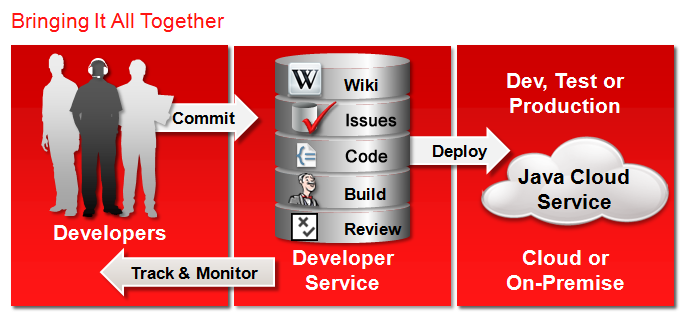
Oracle Developer Cloud Service is available as a web interface accessible from a web browser.
Key Features of Oracle Developer Cloud Service
When you create a project in Oracle Developer Cloud Service, you are immediately provisioned with source control management and Maven repositories, an issue tracking module, a Hudson continuous integration server, and a Wiki.
Source control management allows you to do the following:
- Create hosted Git repositories to manage project source files
- Use Maven repositories to manage libraries
- Integrate existing repositories in GitHub
Issue tracking allows you to do the following:
- Provision a cloud-based issue tracking system for each project
- Track development tasks, file defects, and suggest enhancements
- Associate code transactions with issues
Continuous integration allows you to do the following:
- Automate and integrate scalable build and testing environments
- Receive immediate feedback
- Deploy to Oracle Java Cloud Service and local environments
Wiki collaboration allows you to do the following:
- Have documentation services for each project
- Define and collaborate on project requirements
- Choose the wiki markup to fit your project
Integration with IDEs
In addition to its web interface, Oracle Developer Cloud Service provides integration with Integrated Development Environments (IDEs):
- Oracle Developer Cloud Service interface in Oracle Enterprise Pack for Eclipse (OEPE)
- Oracle Developer Cloud Service interface in NetBeans IDE
- Oracle Developer Cloud Service interface in Oracle JDeveloper
In this tutorial, we will focus on using the Oracle Developer Cloud Service web interface to set up a team development environment. Other tutorials in the Oracle Help Center show how to use Oracle Developer Cloud Service with IDEs.
Source Control Management
In Oracle Developer Cloud Service, the source code of your project is managed with Git-based source control management. You can use any Git client to work with your hosted Git repository, including Git integration with IDEs, such as Oracle Enterprise Pack for Eclipse (OEPE), NetBeans IDE, or Oracle JDeveloper. If you are not familiar with Git, see http://git-scm.com/docs and http://git-scm.com/book for documentation and tutorials.
Multiple Ways to Define Builds
Oracle Developer Cloud Service provides continuous build integration, and your project builds can use Maven, Apache Ant, Gradle, Node.js, and shell scripts.
Examining a Typical Oracle Developer Cloud Service Workflow
Before starting our work in this tutorial, let's
examine a typical workflow for using Oracle
Developer Cloud Service.
Here is a typical sequence of activities you might perform with Oracle Developer Cloud Service when you are in your production environment.
- Create a project (blank, or from a template).
- Add project team members.
- Configure Git source control management.
- Create issues.
- Set up Agile development.
- Perform code reviews.
- Check the project home page.
- Set up a wiki.
- Update and close issues.
- Perform builds.
- Administer the project.
- Deploy to a publicly available Oracle Java Cloud
Service, Oracle Java Cloud Service - Saas
Extension, or Oracle Application Cloud Service
server (not covered in this tutorial).
The activities you perform in this tutorial are different from those you will experience in your production environment, due to the limits of a self-study environment. In your production environment, you may be collaborating with multiple application developers in different services over time. In this tutorial you are performing a range of activities in a short time by yourself.
Launching Your Oracle Developer Cloud Service
-
Launch your Oracle Developer Cloud Service, following the instructions in "Accessing Oracle Developer Cloud Service Using the Web Interface" in Using Oracle Developer Cloud Service.
The first time you log in to Oracle Developer Cloud Service, you will see a welcome banner and a message similar to one of the following.
View Image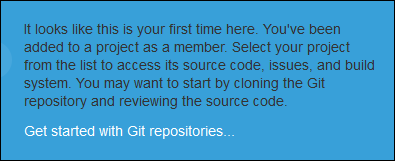
Description of this image View Image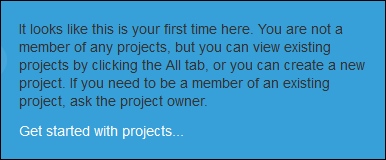
Description of this image -
You may see an empty environment with no projects. More likely, you will see a list of projects. To create a project, click New Project.
View Image
Description of this image The New Project wizard opens.
Creating Your First Developer Project
-
In the Project Details section of the New Project wizard, enter a name for the project (
My
                                  First Project
, for example) and a brief description. Select the security type. Private projects are accessible only to members. Select Shared to make the project code, wiki documents, issues, and builds available to anyone inside your organization's Identity Domain. Then click Next to open the Template section.View Image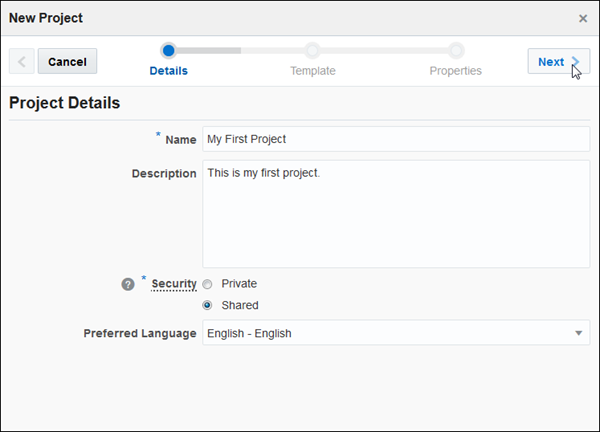
Description of this image -
You can create a project from scratch, or you can create it from a template. If you create it from a template, your project copies the artifacts of the template project: its Git repositories, build jobs, deployment configurations, and wiki pages.
For this tutorial, select Initial Repository, and then click Next to open the Project Properties section.
View Image
Description of this image -
By default, the Project Properties page allows you to select a wiki markup style (Textile, Confluence, or Markdown). All wikis of the project will use the specified markup style. For this tutorial, select TEXTILE.
Since you selected Initial Repository, you can specify its initial configuration. For this project, select the Initialize repository with README file option.
If you create the project from a template, you may be asked to specify other properties.
Finally, click Finish.
View Image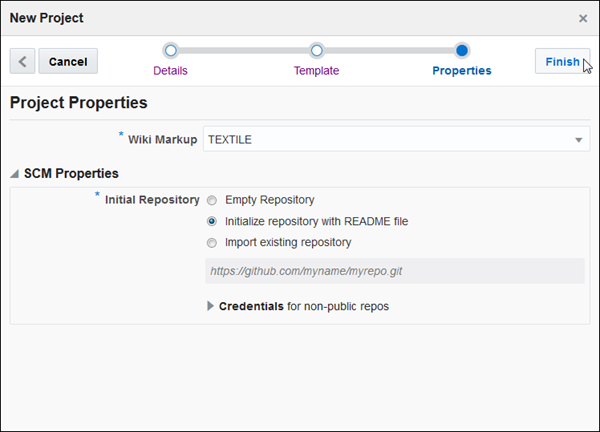
Description of this image A page is displayed showing the progress of project provisioning. If your Organization Administrator has configured your instance appropriately, you also see a Develop module being provisioned.
View Image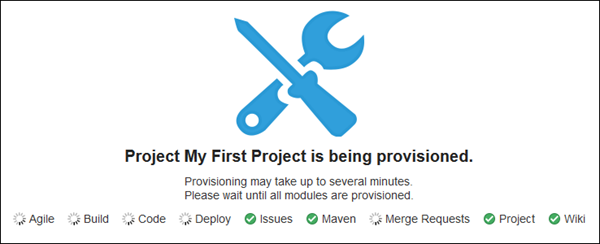
Description of this image Once project provisioning is completed, you are automatically taken to your new project’s Project page.
The following tabs are displayed: Project, Code, Maven Snippets, Merge Requests, Issues, Agile, Build, Deploy, Wiki, and Administration (which has sub-tabs). You will be exploring some of these tabs as you proceed through the tutorial. The Administration tab is visible only if you are an owner of the project.
View Image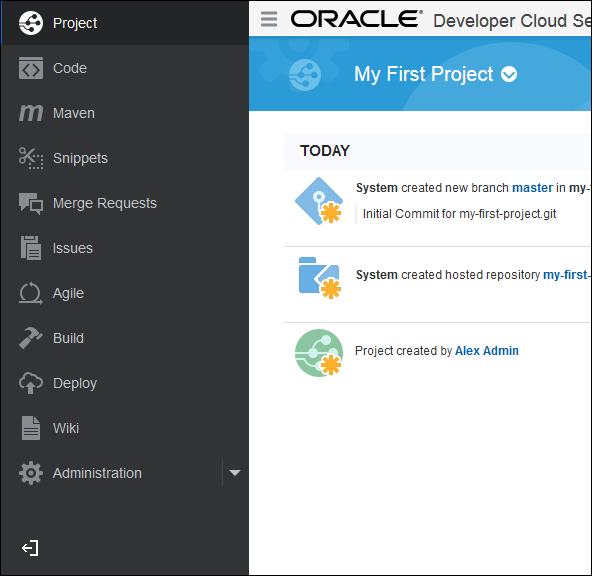
Description of this image You can click the
 icon to hide or show the tabs. You
can click the
  icon to hide the
labels.View Image
Description of this image The Project page also provides useful information about your project. Activities you perform in the project are displayed in the activity feed on the left, and URLs for the Maven repository and the Git repositories are displayed on the right by default. The right side also contains tabs that display graphs and statistics for the project and that allow you to add and remove team members. At the top right is a news feed, which you can remove if you don't want to see it.
View Image
Description of this image -
Click the Oracle Developer Cloud Service link at the top of the page to return to the Welcome page.
View Image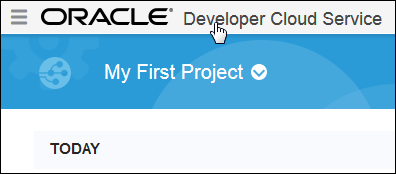
Description of this image -
Your project is displayed on the Welcome page, along with its description. You can click the star to the right to mark the project as a Favorite. If you click the Favorites tab, only projects marked as Favorites are displayed.
When the project list contains projects, you can filter by Owner as well as by Member, Favorites, and All.
Click the project to return to the Project page.
View Image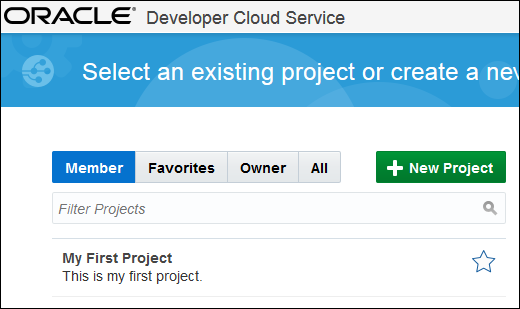
Description of this image The OBE tutorials Creating an Oracle Developer Cloud Service Project and Cloning an Oracle Developer Cloud Service Project Repository Using a CLI provide more information about creating projects and using Git repositories.
Adding Users to the Project
If your learning environment provides you access to other users in your Identity Domain, you can add users to your project.
-
When you start your project, one of the first steps is to add users to the project if you are permitted to do so. From the Project page, click the Team tab on the right side of the page to display the Team panel. Then click the New Member button.
View Image
Description of this image -
In the New Member dialog box, select the Member option (the default) in the Role area. Select a user from the Username drop-down list. You can type in the text field to narrow the selections. (Alternatively, you can select the Multiple Users check box to add more than one user at a time.) Then click the Add button.
View Image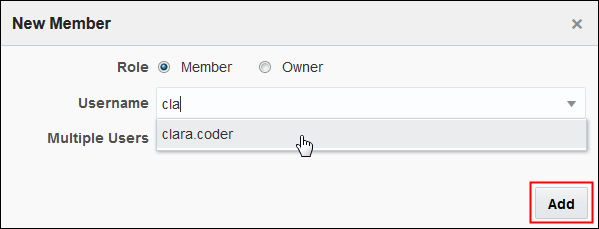
Description of this image After you add a user (in this case,
clara.coder), the Team area looks like this. You can continue to select and add members. To make a member a project owner, you can click the person icon with the star next to the member's name. To make a project owner a member, you can click the person icon without a star next to the project owner's name. To remove a member, you can click the X. The buttons next to your own name are grayed out because you are the only project owner. Every project must have at least one owner.View Image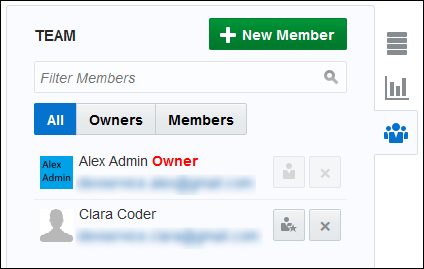
Description of this image
Using Source Control Management with a Hosted Git Repository
Oracle Developer Cloud Service provides a hosted Git repository for source control management. You can use any Git client on your local computer to work with your hosted Git repository, including Git integration with IDEs, such as Oracle Enterprise Pack for Eclipse (OEPE), Oracle JDeveloper, or NetBeans IDE. If you are not familiar with Git, see http://git-scm.com/docs and http://git-scm.com/book for documentation and tutorials.
You can use the hosted Git repository that was created when you created the project, or you can use an existing external project on GitHub. In this tutorial, you will use the hosted Git repository for your project.
On the right side of the Project page, click the Repositories tab to view the repositories that belong to your project. The tab provides information on how to connect from your local client Git tool to the hosted Git repository using either HTTP or SSH access.
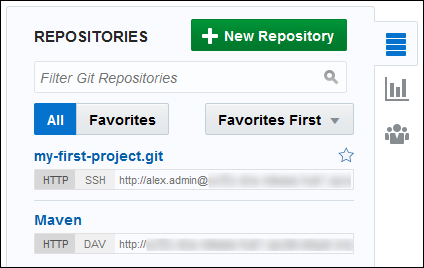
The default access mode is HTTP. If you wanted to use an SSH tunnel to access the Git repository hosted by Oracle Developer Cloud Service instead of using HTTP, you would need to generate an SSH key and associate it with your account. See "Generating an SSH Key" in the Using Oracle Developer Cloud Service book for details.
Creating Issues
Oracle Developer Cloud Service provides a cloud-based issue management system for team development. You can define issues and assign them to team members. For example, you can create issues to:
- Suggest enhancements
- Specify tasks
- File defects
- Define new functionality
- Associate code transactions with issues
-
Click the
 tab. An empty issue table is displayed. Recently
changed issues are displayed by default.View Image
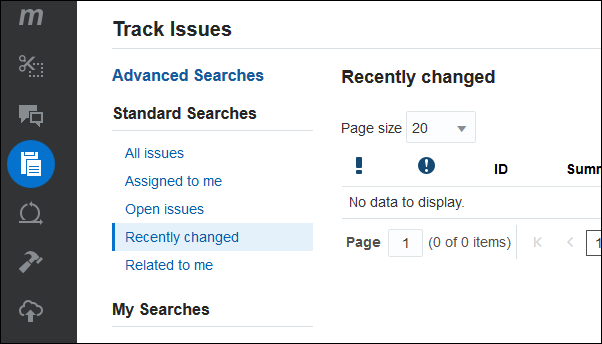
Description of this image At the top of the page, you can use the Search Issues field to perform a free-form issue search, or you can use the list on the left to select a standard search that returns a subset of the issues in your list.
You can click Advanced Searches to refine the search criteria. You can save either a free-form search or an advanced search under My Searches.
-
Click the New Issue button on the right.
View Image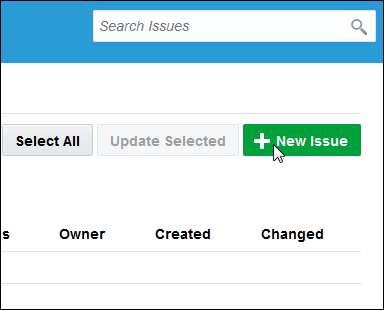
Description of this image The New Issue page opens.
View Image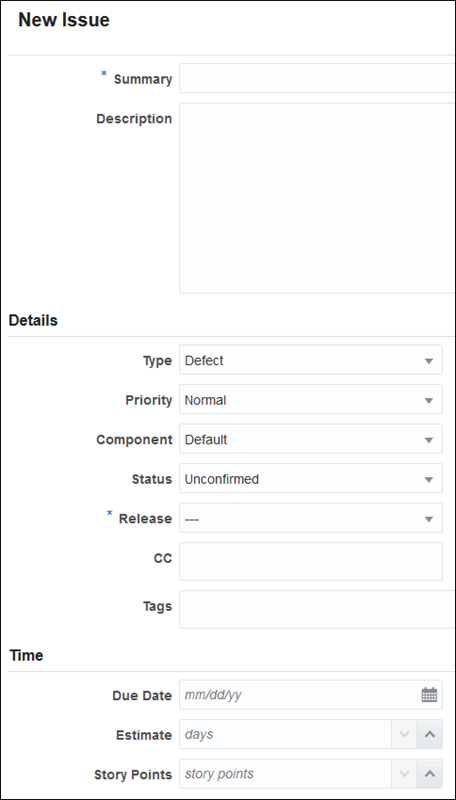
Description of this image -
Define your issue on the New Issue page. At the top of the page, you can see the fields for the summary (name of the issue), description, type, status, and other properties.
In the Summary field, enter a name, such as
My First Issue.In the Description field, enter a description, such as
This is my first task.In the Type field, the three choices are Task, Defect, and Feature. Select Task.
In the Estimated Days field, enter
1.View Image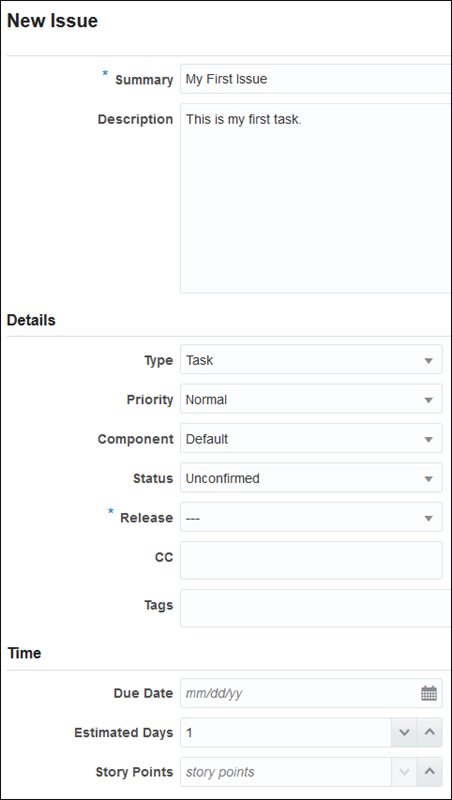
Description of this image Click Create Issue in the upper or lower right corner of the New Issue dialog box.
View Image
Description of this image After you click Create Issue, an "Issue was created successfully" message appears briefly at the top of the page. A page for the issue opens, with the title Task 1. On this page, you can edit the task or post a comment.
View Image
Description of this image -
On the right side of the Details area, use the Owner drop-down list to assign the issue to yourself.
View Image
Description of this image -
In the Comments tab at the bottom of the page, enter
Edit the README.md filein the New Comment text area.View Image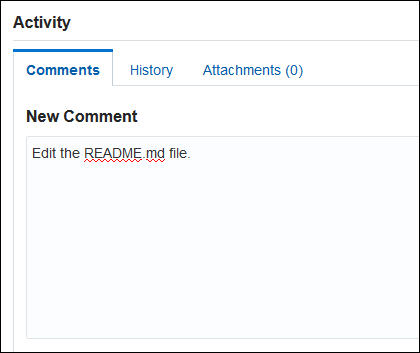
Description of this image -
Click Add at the bottom right, and then click Save to save your changes.
View Image
Description of this image Messages at the top of the page briefly report that the comment was added and that the issue was updated successfully.
-
Click the Issues tab to return to the main issues page. The issue you created is displayed in the table.
View Image
Description of this image
The OBE tutorial Managing Issues in Oracle Developer Cloud Service provides more information on issues.
Performing Agile Development
The Agile tab enables you to organize and schedule issues into sprints and then track their progress.
-
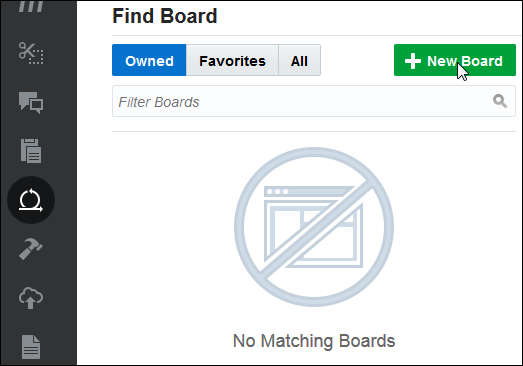
Click the
 tab. An empty Find Board page opens. Click the New
Board button.View Image
Description of this image -
In the New Board dialog box, enter a name, such as
My First Board, in the Name field. Accept the default All Issues selection in the Search drop-down list. Select Estimated Days in the Estimation drop-down list. Finally, click Create.View Image
Description of this image -
The Backlog page for My First Board opens, with a table that lists the current issue backlog. For this project, there is only one issue in the backlog. Before you can work with the backlog, you must create a sprint. Click New Sprint.
View Image
Description of this image -
In the New Sprint dialog box, enter
Sprint
                                  1
in the Name field and click OK.View Image
Description of this image The board page now contains a sprint, with instructions on how to move issues from the backlog to the sprint.
View Image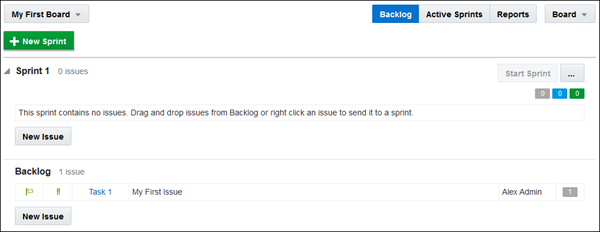
Description of this image -
Right-click the issue in the backlog and select Send to, and then select Sprint 1.
View Image
Description of this image -
The issue appears in the sprint issue list. The gray box in the last column of the issue row shows the estimated time for the sprint. The boxes above the issues on the right show the estimates for the open issues, the completed issues, and the total issues. Click Start Sprint to start the sprint.
View Image
Description of this image -
In the Start Sprint dialog box, accept the default Start Date and End Date and click Start. A sprint commonly lasts two weeks. More than one sprint can be active at a given time.
View Image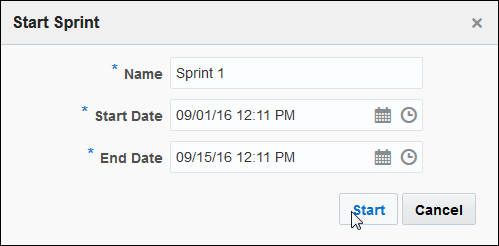
Description of this image The sprint dates now appear under the sprint name. On this page, you can click the New Issue button in the Backlog area to create a new issue in the backlog, or you can click New Issue under a sprint to create a new issue that belongs to the selected sprint. Buttons on the right allow you to view sprints in relation to the backlog, to view the active sprints, or to view reports.
-
Click Active Sprints to see the status of the issues in any active sprints.
View Image
Description of this image By default, the issues are organized into swimlanes based on their status and assignees, and you can sort them in several ways.
View Image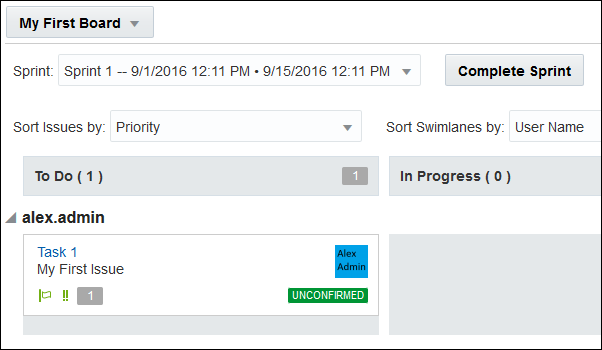
Description of this image
For more information on Agile development, see the OBE tutorial Using Agile Methodology in Oracle Developer Cloud Service.
Performing Code Reviews
If you are part of a development team, your work ordinarily involves iterative development, in which you repeat tasks like the following:
- You are assigned an issue to develop some code (maybe a bug fix, an enhancement, or some functionality based on a specification).
- On the local system, you clone your Git repository and create a branch.
- On the local system, you work on the code in your development environment, check the code into your local branch, and then push the branch up to the cloud repository.
- You create a code review for this issue, point to this new branch, and invite team members to look at the code.
- The invited team members review the code and provide feedback. You may make changes based on the feedback, and the team reviews the changes.
- When everyone is happy with the change, they vote to approve the change in the code review.
- After your change is approved, you merge your branch back to the master and pull the changes from the cloud master to your local master.
Steps 4 through 6 of this process involve a code review.
In this tutorial, instead of going back and forth between your local code and the cloud repository, you can create a branch when you create a code review, make changes on the branch, review the changes, and merge them, all in the Cloud.
Creating a Review
-
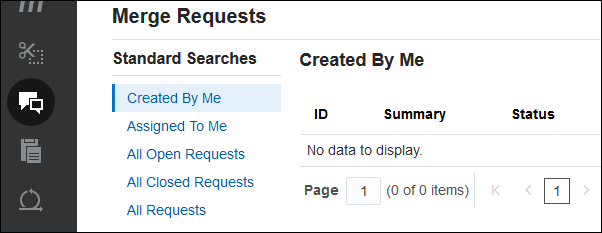
To create a review, click the
 tab, which displays
an empty table of merge requests.View Image
Description of this image -
Click the New Merge Request button on the top right. On the Branch page of the New Merge Request wizard, from the Repository drop-down list, select the project's Git repository,
my-first-project.git.From the Target Branch drop-down list, select master.
In the Review Branch field, enter
MyBranchto create a branch for the review. This field presents you with a list of branches if there are any, but you can also use it to create a branch if a branch of that name does not exist.Click Next.
View Image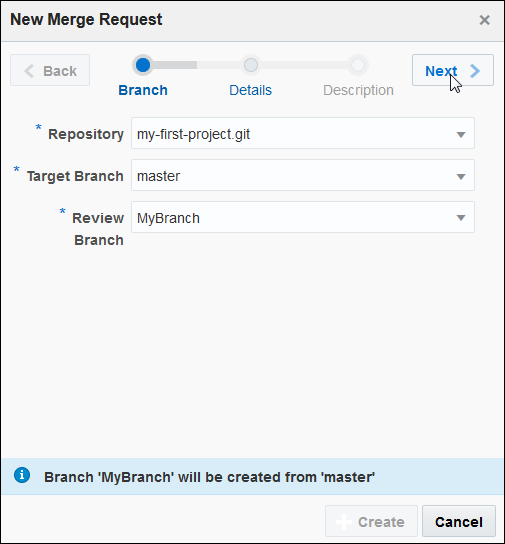
Description of this image -
On the Details page, in the Linked Issues field, enter
Tand select Task 1 when it is displayed. Leave the Linked Builds field empty.In the Summary field, enter a name, such as
First Code Review.In the Reviewers field, select your name. (Normally, you would assign the review to one or more members of your team.) Then click Next.
View Image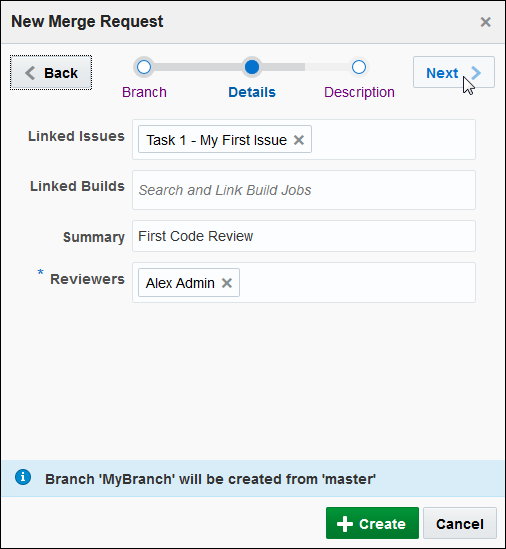
Description of this image -
On the Description page, in the Edit Description text area, add the text
Review
                                      change to README file.
Finally, click Create.
View Image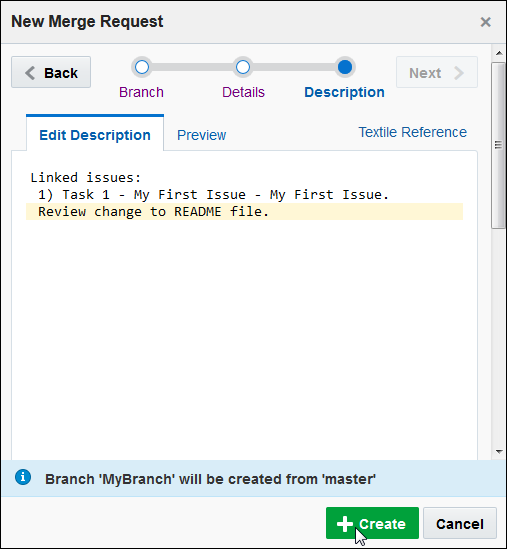
Description of this image The review opens. The description has a link to the task mentioned in it. Placing an issue type and ID in a description (Task 1, Defect 25, Feature 9, or just Issue 3) automatically creates a link to that issue in many areas of the user interface.
View Image
Description of this image
Modifying a Project File and Committing the Change
-
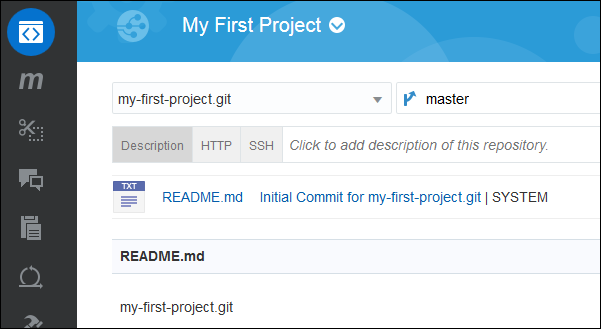
Click the
 tab to view the current
repository contents on the master.View Image
Description of this image -
Click the drop-down list on the right and select MyBranch to switch to the branch you created.
View Image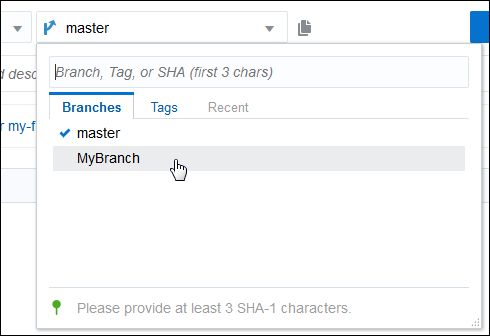
Description of this image -
Click the README.md link to view the file.
View Image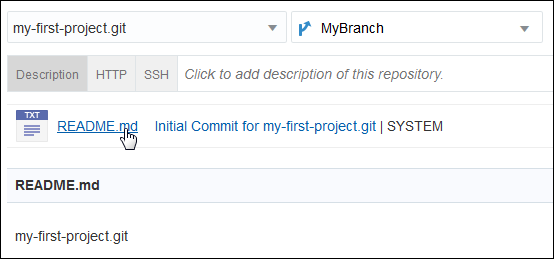
Description of this image The file is displayed. Its only content is the repository name.
View Image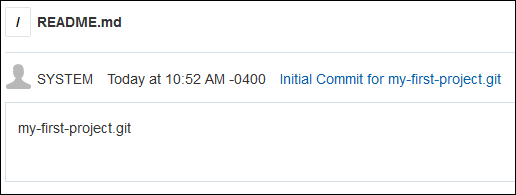
Description of this image -
Click the pencil icon on the right to open the file in an editor.
View Image
Description of this image -
In the editor, modify the file by entering some text, such as
I am editing the
                                      README file in the my-first-project.git
                                      repository.
Then enter a comment in the text area below that mentions the issue for which you are making the commit, such asUpdating the README file for Task 1.Finally, click Commit Changes.View Image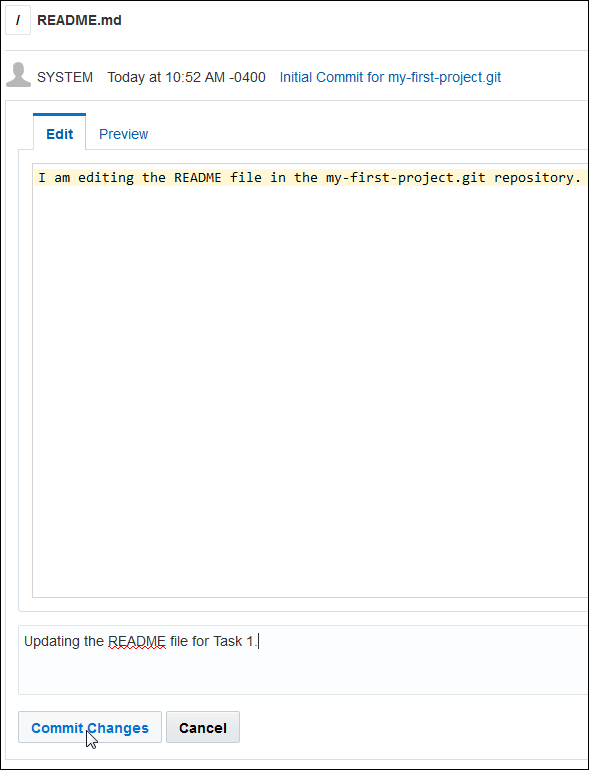
Description of this image The changed file and your comment are displayed in the Code tab.
View Image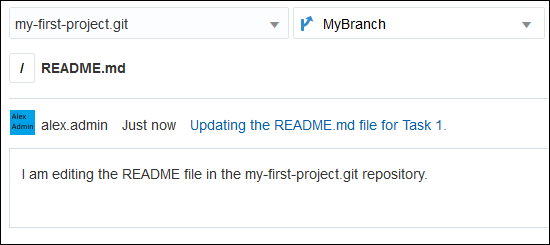
Description of this image
Merging Your Changes from the Branch to the Master
-
Click the
 tab to return to the Created By Me table,
where your merge request is displayed. Then
click the First Code Review
link.View Image
Description of this image You are returned to the review page, where your commit is displayed.
View Image
Description of this image If you needed to, you could click the Click to add a reviewer link to add more reviewers, who could then approve or reject the code changes and add comments.
View Image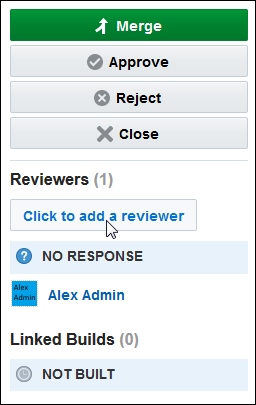
Description of this image -
Instead, click Merge to merge your change to the master.
View Image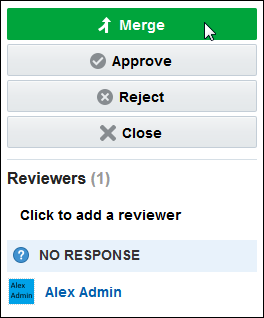
Description of this image -
In the dialog box, type a commit message. Select the "Squash Commits" and "Close linked issues" check boxes. Then click Merge.
View Image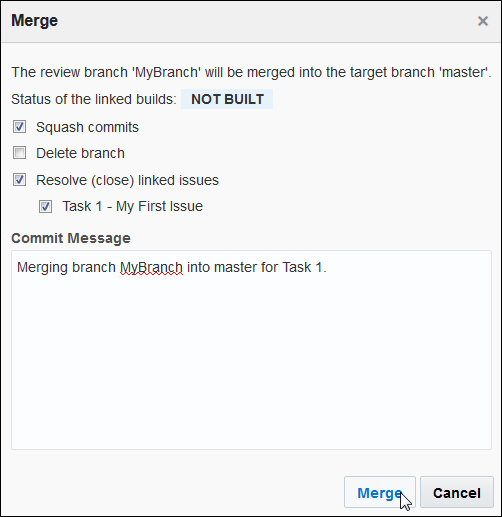
Description of this image The merge now appears with the status MERGED in the code review page.
View Image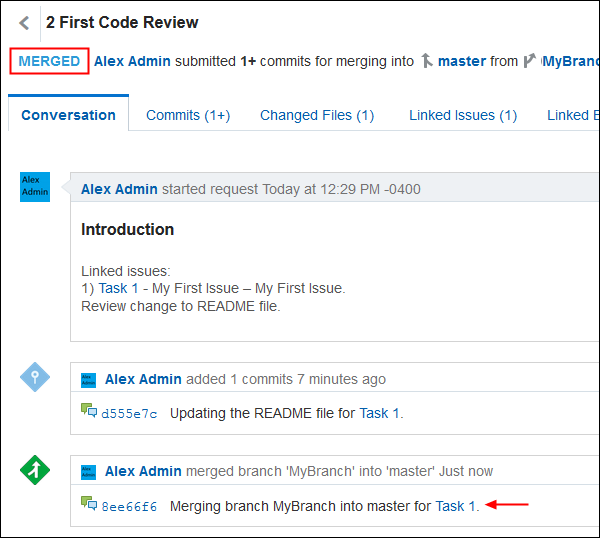
Description of this image -
Click the
 tab. The status is changed in the table.View Image
Description of this image
Verifying the Merge and Deleting the Branch
-
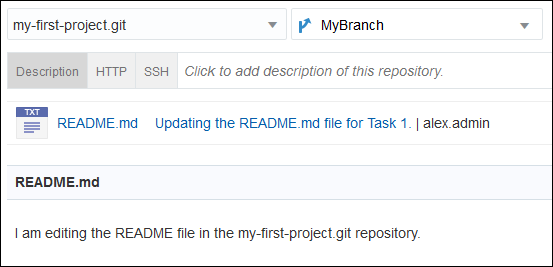
Click the
 tab and verify the change in
MyBranch.View Image
Description of this image -
Click the drop-down list on the right and select master to switch to the master.
View Image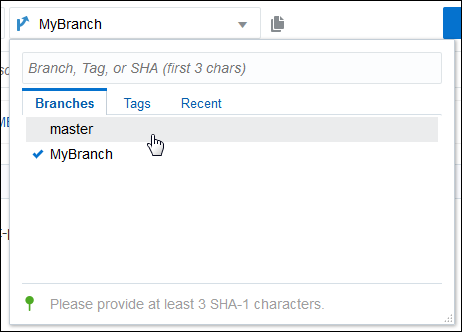
Description of this image -
Verify that the changes also appear in the master.
View Image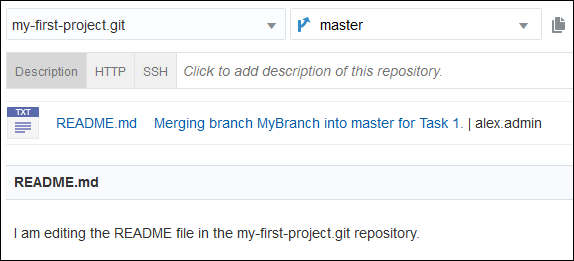
Description of this image -
It is now safe to delete the branch you created, now that your work is completed. Click the Merge Requests tab, then click the First Code Review link to return to the review page, and then click the Delete Branch button on the right side of the page.
View Image
Description of this image -
Click the X icon to delete the success message.
View Image
Description of this image
For more information on code reviews, see the OBE tutorial Performing Code Reviews in Oracle Developer Cloud Service.
Verifying that an Issue Is Resolved
-
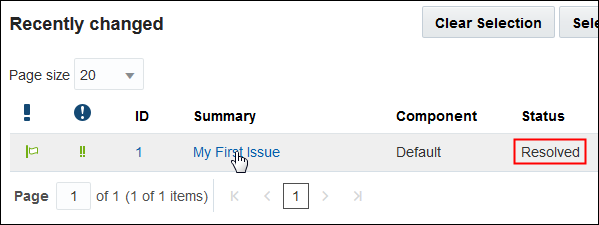
You selected the option to resolve the linked issue, Task 1, when you merged your code change.
Click the
 tab, and then click the task named My
First Issue, which now has the status
Resolved.View Image
Description of this image -
The task opens. In the Details area of the page, the Status is Resolved, and the Resolution is Fixed.
View Image
Description of this image -
Scroll down to the Activity area. The system has reported the merge.
View Image
Description of this image Above the Activity area, an Associations area also displays the commit. The Time area displays the estimate, and the Agile area displays the associated sprint.
View Image
Description of this image -
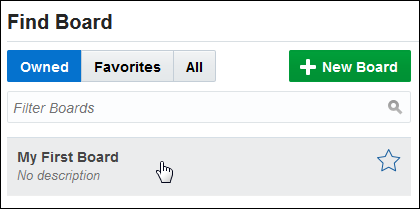
Click the
 tab. You are normally returned to the Agile
board you were working in, but if you are
returned to the Find Board page, click My
First Board.View Image
Description of this image In the Sprint 1 list, the issue name is crossed out to indicate that it is now resolved, and on the right the issue is displayed as completed.
View Image
Description of this image -
Click Active Sprints. The only issue in the sprint has been completed, so click Complete Sprint.
View Image
Description of this image -
In the Complete Sprint dialog box, select the check box and click the Complete Sprint button.
View Image
Description of this image You are taken to the Reports page for an overview of the sprint status.
View Image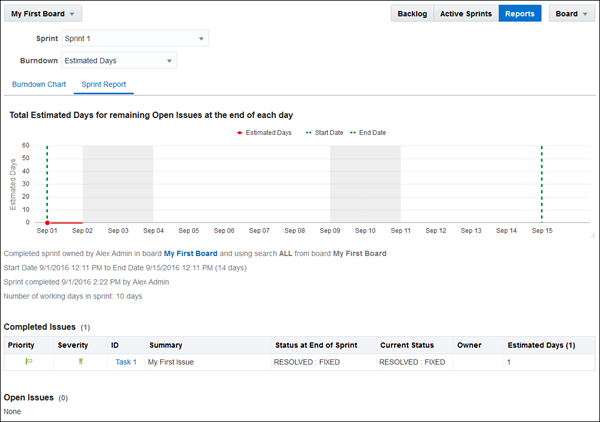
Description of this image
For more information, see the tutorials Managing Issues in Oracle Developer Cloud Service and Using Agile Methodology in Oracle Developer Cloud Service.
Checking the Project Page
Checking the Project page lets you get a quick status on the project.
Click the ![]() tab.
tab.
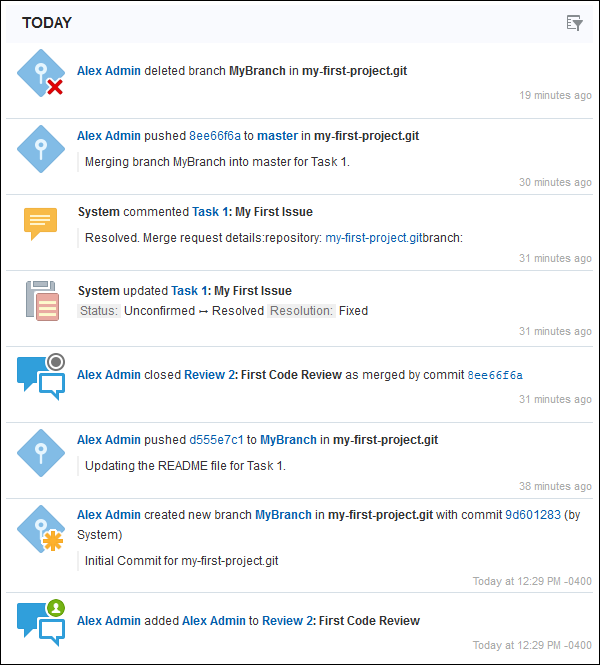
Examine the activity feed for your project. You can see that the actions you have performed now appear there.
Using a Wiki
Oracle Developer Cloud Service provides a Wiki module for document authoring and collaboration. The wiki module is created when you create a project. While creating the project, you are prompted to select a wiki markup style. Three types of wiki markup are supported:
- Confluence
For more information, see http://www.atlassian.com/software/confluence/.
- Markdown
For more information, see http://daringfireball.net/projects/markdown/.
- Textile
For more information, see http://textilewiki.com.
Use the Wiki tab to view, edit, or create wikis. Try creating a wiki page for your project.
-
Click the
 tab, which takes you to the Wiki Home page.View Image
Description of this image -
Click New Page on the right side of the page.
View Image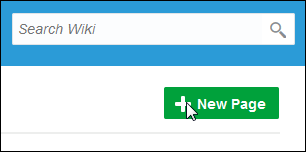
Description of this image -
In the Page Title field, enter
My First
                                  Project Wiki
or another title of your choice. In the Page Text area, enter some content that includes the textIssue 1orTask 1.View Image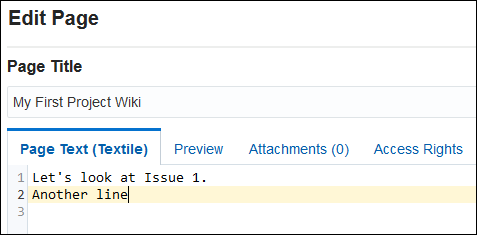
Description of this image -
Click Save on the right side of the page. The Textile Reference link provides help on your chosen markup language.
View Image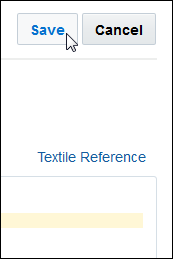
Description of this image -
You can see that the text "Issue 1" is a hyperlink. Placing the name of an issue in the text of your wiki page automatically creates a link to that issue. Click the Issue 1 link.
View Image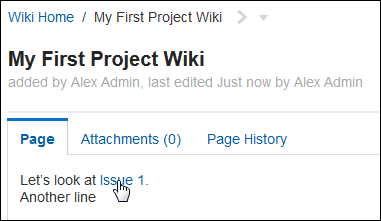
Description of this image You are on the main page for Task 1.
View Image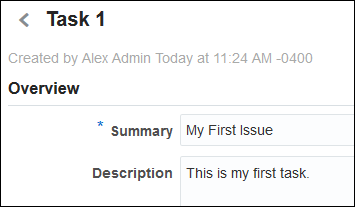
Description of this image -
Click the
 tab.
tab.The page you created is listed under Wiki Home. You can click the My First Project Wiki link to view or edit the page, to add attachments, or to see page revisions.
View Image
Description of this image
Performing a Build
When you create a project in Oracle Developer Cloud Service, you are immediately provisioned with a build server. With continuous build integration, you can automate and integrate scalable build and testing environments, receive immediate feedback, and deploy to a publicly available instance of Oracle Java Cloud Service, Oracle Java Cloud Service - SaaS Extension, Oracle Application Container Cloud Service, or to local environments. A typical workflow might involve the following steps:
- Create a build job.
- Specify the job configuration.
- Run a build. If there are errors, review the build log console.
- Modify the job configuration if necessary and rerun the build.
- After the build has completed successfully, review the console build log and the build artifacts.
Perform the following steps in your project:
-
Click the
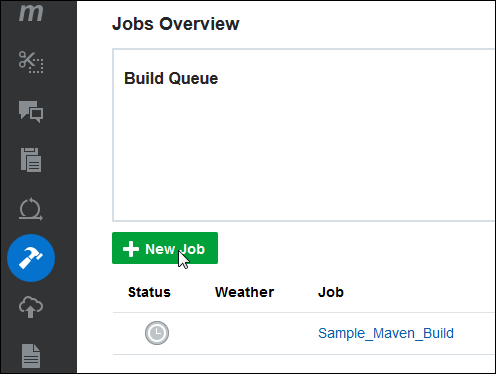
 tab. One build job, Sample_Maven_Build, was
provided when you created the project with the
Initial Repository template. Click New
Job.View Image
Description of this image -
In the New Job dialog box, provide a job name such as
My First Job, select the Create a free-style job option, and click Save.View Image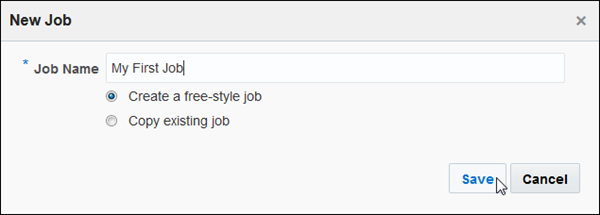
Description of this image -
The configuration page for the job opens, allowing you to specify job configuration options. For this job, select JDK 8 from the JDK drop-down list.
View Image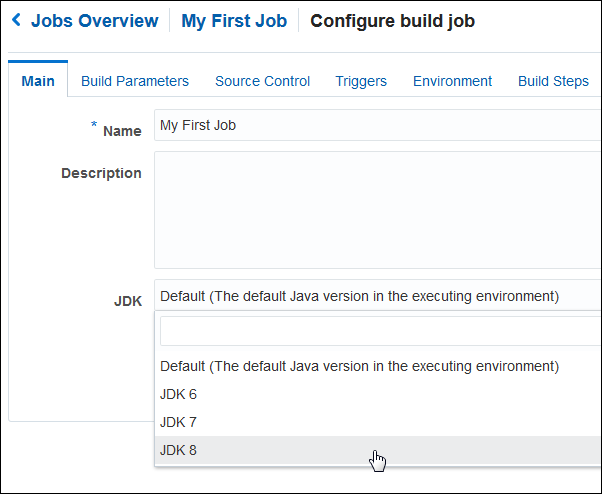
Description of this image -
Click the Build Steps tab, then click Add Build Step and select Execute shell from the drop-down list.
View Image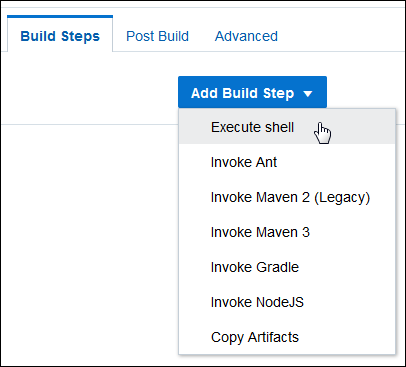
Description of this image -
In the Command editor pane, enter the following.
java -version; echo Hello World! > hello.outView Image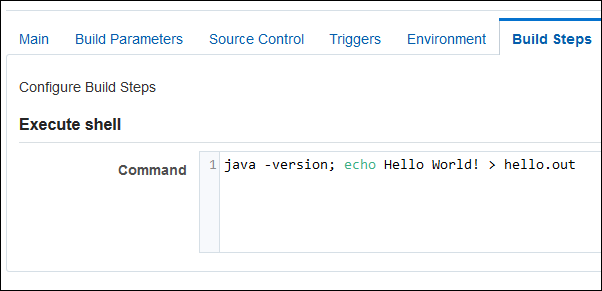
Description of this image -
Click Post Build, and then select the Archive the artifacts check box. In the Files to archive field, enter
hello.out. Select the Discard all but the last successful/stable artifact to save disk space check box, and then select NONE from the Compression Type drop-down list.View Image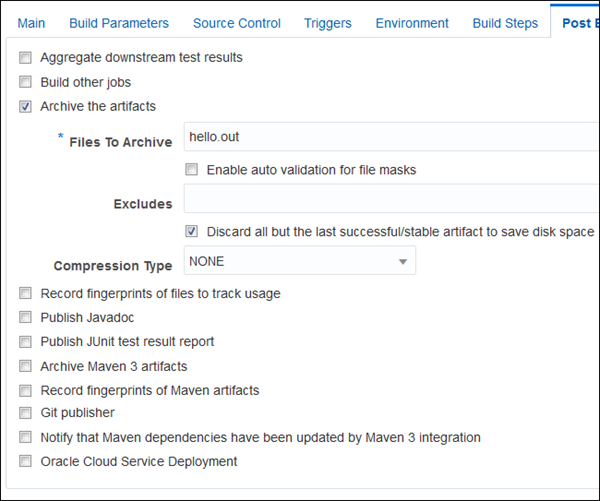
Description of this image -
Click Save in the top right corner.
View Image
Description of this image -
A job page opens. Click Build Now in the top right corner.
View Image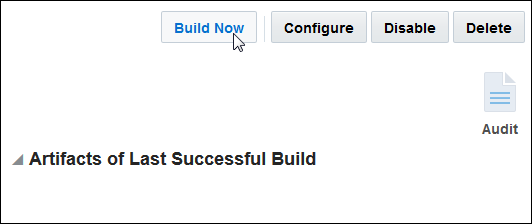
Description of this image A "Queueing ..." message is displayed briefly, and then a "New Build Queued" message is displayed next to Build History. There will be a delay before the build starts.
View Image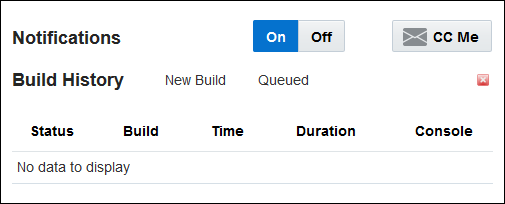
Description of this image When the build starts, a progress bar is displayed until the build is completed. The completed build is then displayed in the table.
View Image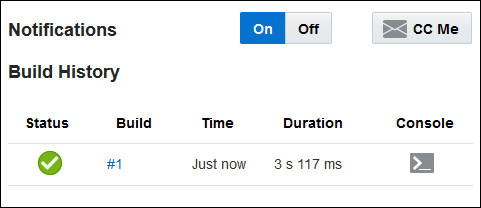
Description of this image -
The
hello.outartifact is displayed under Artifacts of Last Successful Build. Click the Console icon to view the console.View Image
Description of this image -
You can see the execution of the
javaandechocommands. Click My First Job to return to the build page.View Image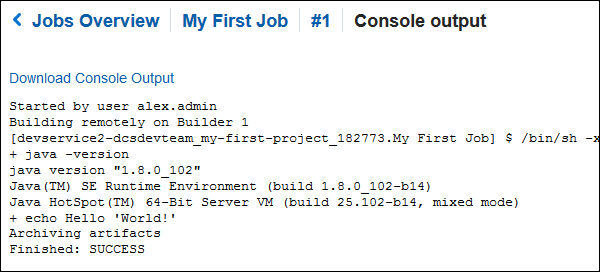
Description of this image If you return to the My First Job page and click the hello.out link, your operating system prompts you to save the file or to open it using a program of your choice. The contents of the file are as follows.
Hello World! -
Click the
 tab or the Jobs Overview link
to return to the Jobs Overview page and view the
job status.View Image
Description of this image -
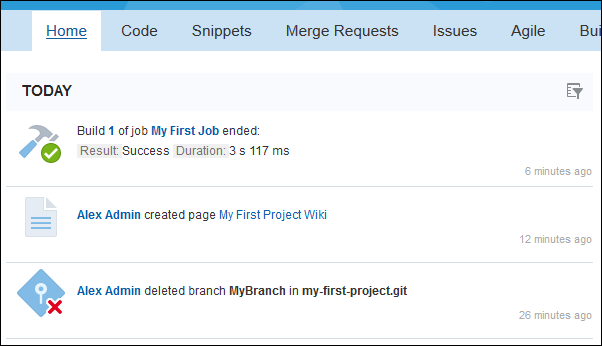
Click the
 tab to view your recent actions, including the
build and the creation of the wiki page, in the
activity feed.View Image
Description of this image
Using Other Tabs
The Oracle Developer Cloud Service user interface includes some additional tabs that this tutorial does not cover in depth.
The Snippets tab allows you to create segments of text, Java code, JavaScript code, and other file types, which you can copy and insert elsewhere. For example, you could create a snippet that contains a complex Git command, which you could copy and paste into your Git client command line.
The Deploy tab allows you to deploy to an instance of Java Cloud Service, Java Cloud Service - SaaS Extension, or Oracle Application Container Cloud Service. For information on deployment, see the section "Deploying an Application in Oracle Developer Cloud Service" in Using Oracle Developer Cloud Service and the OBE tutorial Deploying an Application from Oracle Developer Cloud Service to Oracle Java Cloud Service.
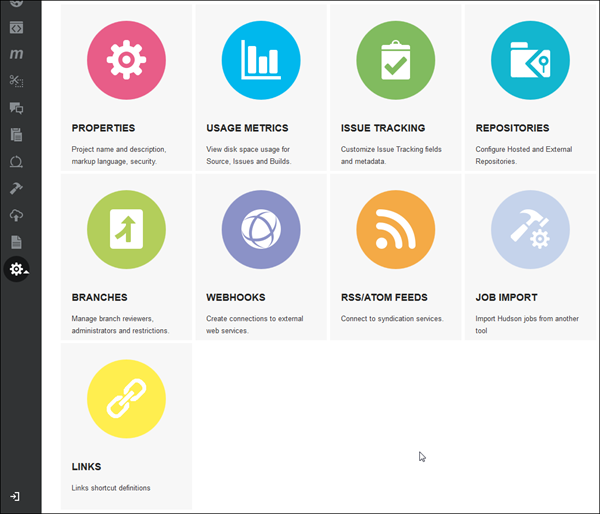
Click the ![]() tab to administer project properties, issues,
repositories, branches, webhooks, and RSS/ATOM
feeds, to view disk usage metrics for your project,
to import build jobs, and to define rules for
enhancing text with links.
tab to administer project properties, issues,
repositories, branches, webhooks, and RSS/ATOM
feeds, to view disk usage metrics for your project,
to import build jobs, and to define rules for
enhancing text with links.
Deleting a Project
If you wish, you can now delete the project you created for this tutorial.
-
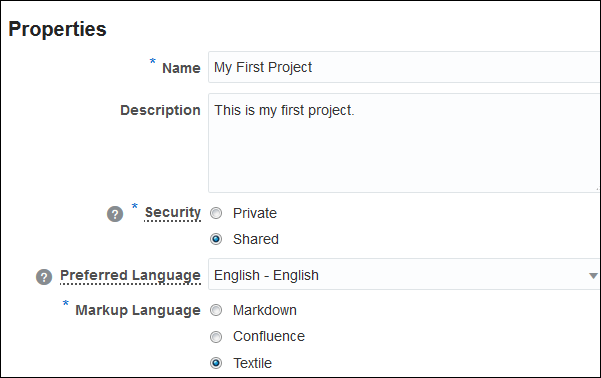
Click the
 tab, and then click the Properties
tile or submenu. The Properties page opens.View Image
Description of this image -
Click the Delete Project button at the top right of the page.
View Image
Description of this image -
In the Delete Project dialog box, select the check box and click Delete, or click Cancel if you want to keep the project.
View Image
Description of this image
Want to Learn More?
- Creating an Oracle Developer Cloud Service Project OBE
- Cloning an Oracle Developer Cloud Service Project Repository Using a CLI OBE
- Managing Issues in Oracle Developer Cloud Service OBE
- Using Agile Methodology in Oracle Developer Cloud Service OBE
- Performing Code Reviews in Oracle Developer Cloud Service OBE
- Deploying an Application from Oracle Developer Cloud Service to Oracle Java Cloud Service OBE
- Oracle Developer Cloud Service in the Oracle Help Center
- Using Oracle Developer Cloud Service in the Oracle Help Center
- Oracle Developer Cloud Service product page