Before You Begin
Purpose
In this tutorial, you'll learn to manage issues using Oracle Developer Cloud Service and NetBeans IDE.
Time to Complete
Approximately 30 minutes
Background
The Issues component of Oracle Developer Cloud Service allows you to work on your project using an issue tracker. You can create issues using various attributes, which an administrator can customize. You can also use the Agile tab to organize issues.
Issues commonly involve making changes to code, either by adding new features to a product or by fixing bugs found in the product. Typically, the team member assigned to an issue will create a repository branch, make code changes on the branch, have team members review the changes, and then merge the approved changes back to the master. At this point, the issue owner can mark the issue as completed.
Scenario
In the environment you are using for this tutorial, you may be the only team member. For this reason, you'll play the roles of both administrator and team member.
You'll complete the following actions:
- Create a new issue
- Edit issue properties
- Administer an issue
- Manage an issue using NetBeans IDE
- Complete an issue
Working with repository branches and performing code reviews are covered in other OBE tutorials.
Context
It would be helpful if you first completed the OBE tutorial Using NetBeans IDE to Create an Oracle Developer Cloud Service Project. This tutorial uses the project created in that tutorial, but you can use any project to which you have access.
The Oracle JDeveloper Team Server works very similarly to the NetBeans IDE Team Server. You can complete the NetBeans IDE tasks using Oracle JDeveloper.
What Do You Need?
-
A login to an Oracle Developer Cloud Service instance
-
One of the following supported browsers:
- Chrome 48 or later (also for Android)
- Firefox 38 or later
- Internet Explorer 11 or 12
- Safari 7 or 8 (Mac OS)
- Safari Mobile 5 (iOS)
-
An installation of NetBeans IDE 8.0 or higher with the Oracle Developer Cloud Service plugin. See "Using NetBeans IDE with Oracle Developer Cloud Service" in Using Oracle Developer Cloud Service.
-
Some experience developing applications in Java
-
Some familiarity with the Git source control system
-
Some familiarity with NetBeans IDE
Creating a New Issue
-
If you are not already logged in, launch your Oracle Developer Cloud Service, following the instructions in "Accessing Oracle Developer Cloud Service Using the Web Interface" in Using Oracle Developer Cloud Service.
-
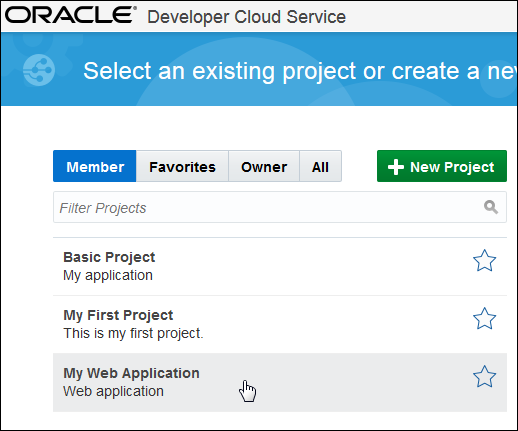
From the Welcome page, click an application you own. If you recently completed the OBE tutorial Using NetBeans IDE to Create an Oracle Developer Cloud Service Project, click the project My Web Application.
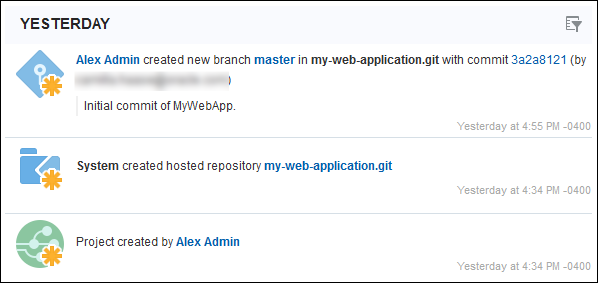
Description of this image The Project page opens. The activity feed looks something like the following.
Description of this image -
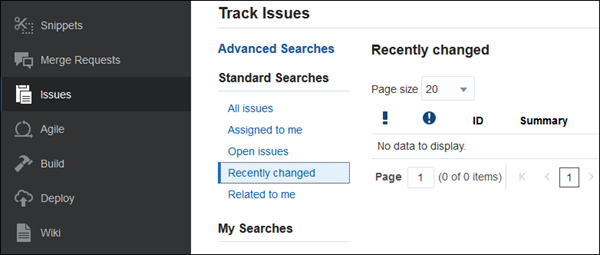
Click Issues to go to the Track Issues page. By default, recently changed issues are displayed. For a new project, there are no issues at all.
Description of this image -
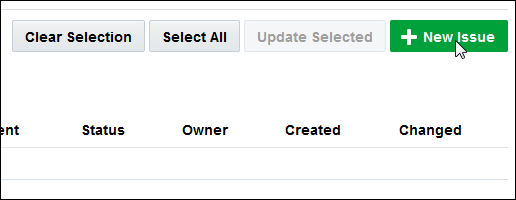
On the right side of the Issues page, click New Issue.
Description of this image -
In the Summary field, enter a name, such as
My
                                    first issue
. In the Description field, enterEdit index page. Select Task from the Type menu.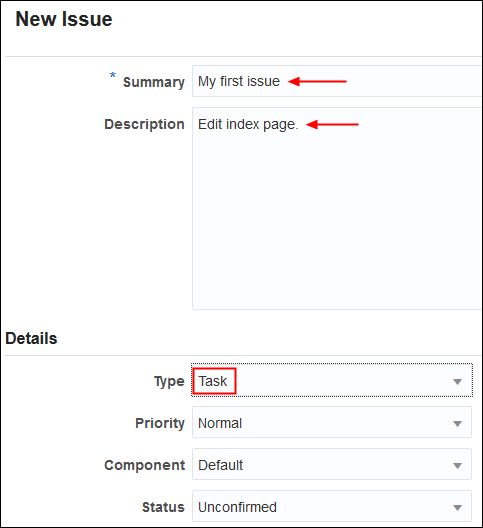
Description of this image -
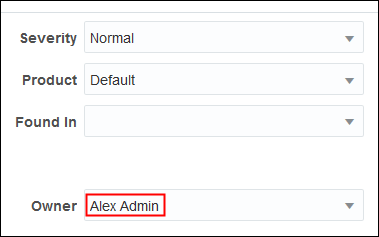
On the right side of the Details area, assign the issue to yourself by selecting your user name from the Owner drop-down list.
Description of this image -
Click Create Issue at the top or bottom of the page. An "Issue was created successfully" message appears briefly at the top of the screen.

Description of this image The issue is now displayed in a page specific to that issue, with the title Task 1.
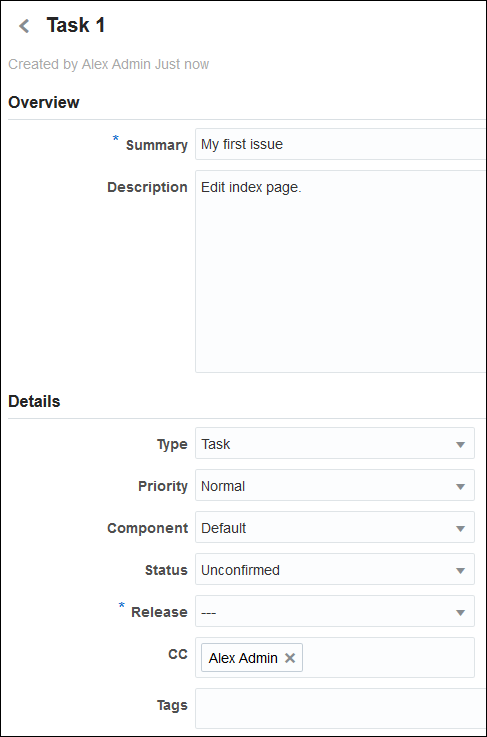
Description of this image Buttons at the top right and bottom right allow you to save the current issue, create a new issue at the same level, or create a new issue subordinate to the current one. You can now edit issue properties.

Description of this image
Editing Issue Properties
-
Under Details, click the Status field and select New from the drop-down list.
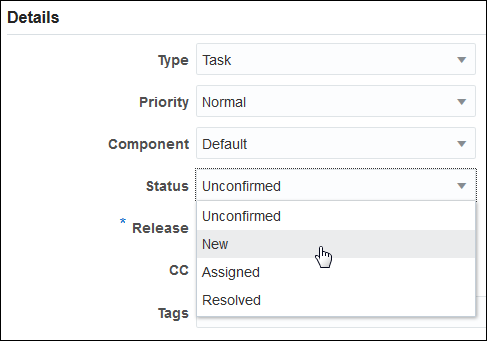
Description of this image You can make additional changes to the issue, such as adding a comment, supplying product or component information, specifying a parent issue or sub-issue, specifying the amount of time to be spent on the issue, associating the issue with a sprint, or uploading an attachment.
-
When you finish editing the issue, click Save at the top or bottom of the page. An "Issue successfully updated" message appears briefly at the top of the page.

Description of this image -
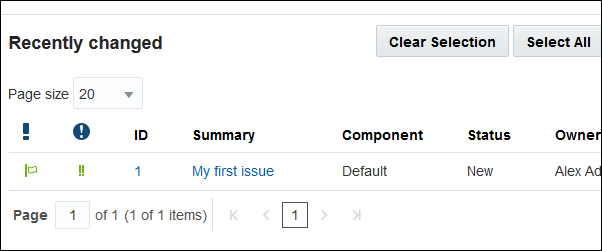
Click the Issues tab or the Back to List icon to return to the Issues page.

Description of this image The issue is now displayed in the table.
Description of this image
Administering an Issue
As the project owner, you can also edit issue fields and customize them for your organization. You can do any of the following:
- Create new products or edit existing ones
- Add custom tags to the three default ones (Plan, Release, and Epic)
- Create custom name/value fields of many types.
-
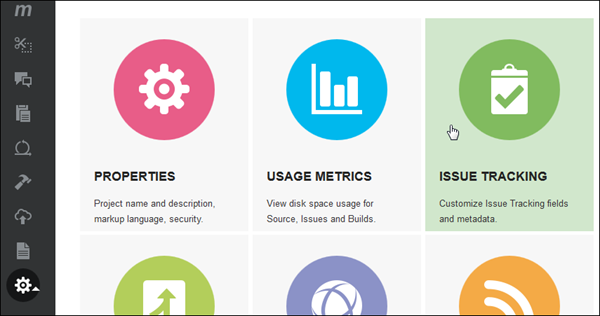
Click the Administration tab, then click Issue Tracking.
Description of this image -
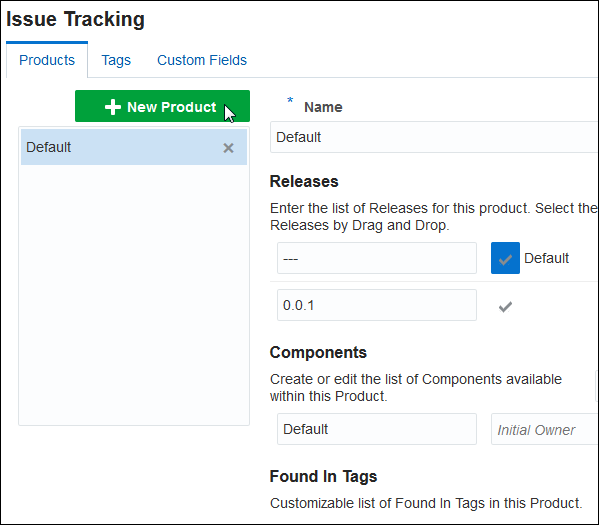
The Issue Tracking page is displayed, with the Products tab displayed by default. Click New Product to add a new product.
Description of this image -
On the Create Product page, enter a name (for example,
MyProduct).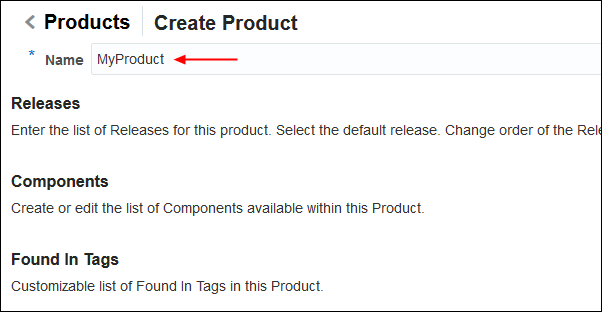
Description of this image -
In the Releases area, click New Release.

Description of this image -
Enter
0.1in the field, then click New Release again, enter0.2in the new field, and press Return. The 0.1 release is the default, but you can click the check box next to a release to change the default.
Description of this image You can remove a release by selecting the X on the right side, but there must always be at least one release.
-
In the Components area, click New Component.

Description of this image -
Enter
MySubProductin the Component Name field, and select your name from the Initial Owner drop-down list. The new component is shown as the default.
Description of this image -
Click Done at the top right to return to the issue administration page.

Description of this image Your new product, MyProduct, is selected, and you can view the changes you made.
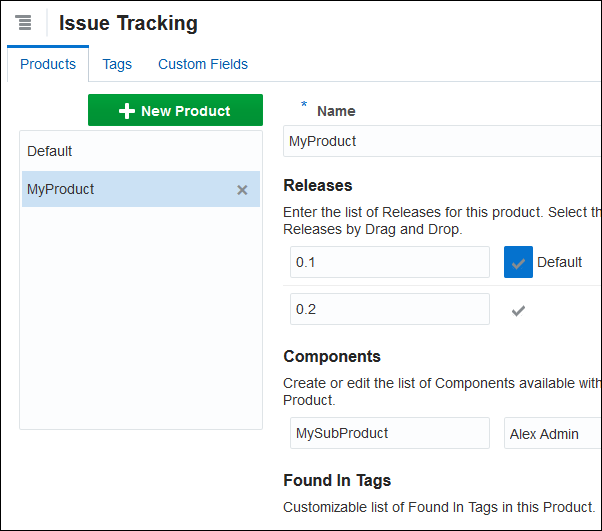
Description of this image
You can also customize tags for your products and specify custom fields that will be displayed among the issue properties you can edit.
Managing an Issue Using NetBeans IDE
These steps assume that you previously established a connection from NetBeans IDE to your Oracle Developer Cloud Service instance by following the instructions in the OBE tutorial Using NetBeans IDE to Create an Oracle Developer Cloud Service Project.
The Oracle JDeveloper Team Server works very similarly to the NetBeans IDE Team Server. You can complete these tasks using Oracle JDeveloper instead of NetBeans IDE.
-
Start NetBeans IDE and click the Team tab. (If the Team tab is not visible, select Team from the Window menu.)

Description of this image You may already be logged in to your team server. If you are not, click Click here to select project and click Login.
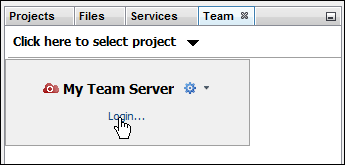
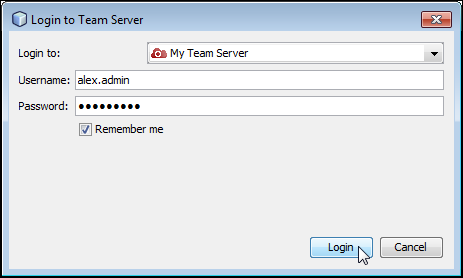
Description of this image In the dialog box, enter your user name and password and click Login.
Description of this image -
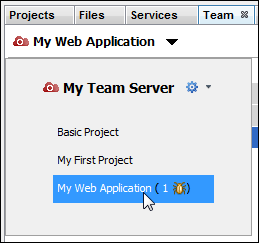
Scroll down to your My Web Application project. You may notice that a number and a small bug icon are displayed next to the project name. If they aren't visible, select Refresh from the gear menu. If it is not already open, click the project to open it in the Team tab.
Description of this image -
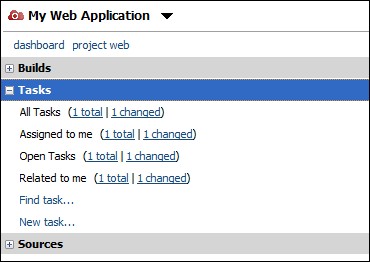
Expand the Tasks node to see the issue lists.
Description of this image -
Click one of the links next to Assigned to me.
The Tasks tab opens in the IDE, with My Web Application open. Expand Assigned to me and mouse over My first issue to see information about the issue.

Description of this image -
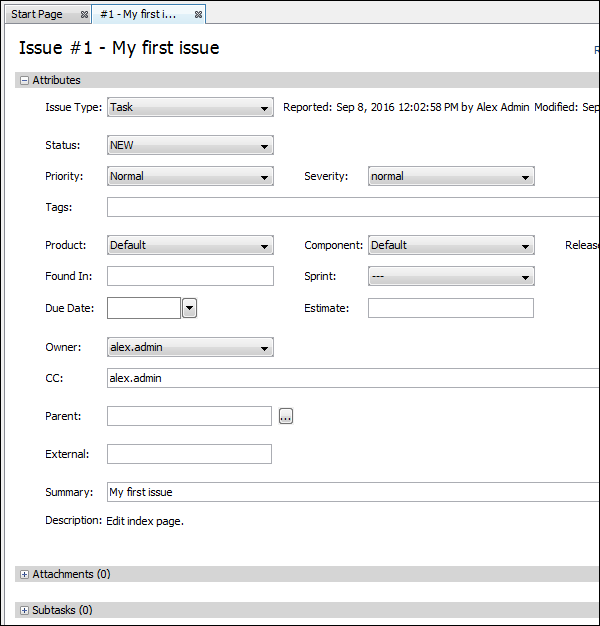
Double-click My First Issue. The issue opens in the IDE, where you can view and modify its properties just as you can in the browser. For example, you can change the issue type, add an attachment, change the assignee, or add people to the CC list.
Description of this image -
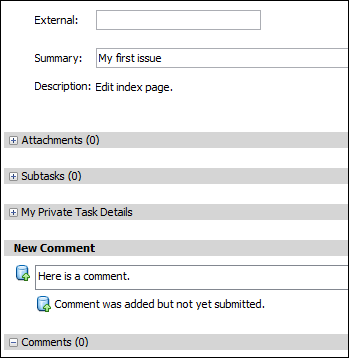
Scroll down to the New Comment field at the bottom and enter a comment. The message "Comment was added but not yet submitted" is displayed below the comment.
Description of this image -
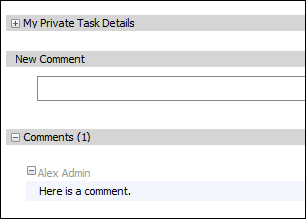
Click the Submit link in the top right corner of the pane to synchronize the IDE issue with the Cloud version.

Description of this image The comment appears in the Comments area now.
Description of this image -
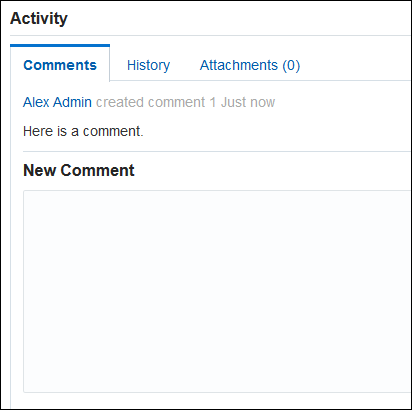
Go to the web browser, click Issues, then click My first issue, and scroll down to see the added comment.
Description of this image
When you work with Git, you'll usually make code changes in a branch, obtain approval using a code review, and then merge the changes to the main code line, called the master. Those tasks are covered in the OBE tutorial Performing Code Reviews Using Oracle Developer Cloud Service. This tutorial will instead check the changes in to the master.
Completing an Issue
In NetBeans IDE, you can work on your assigned issue, commit files associated with the issue, and update the issue to mark it as completed.
-
In NetBeans IDE, click the Projects tab and then double-click
index.xhtmlor, if the file is already open, click the index.xhtml tab.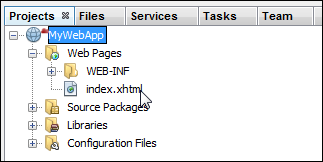
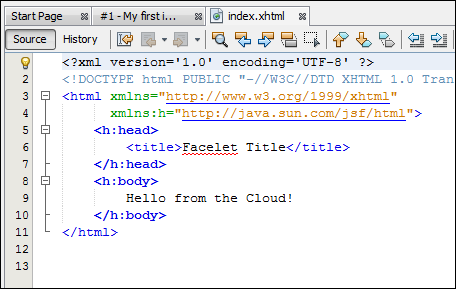
Description of this image The file opens in a code editor pane.
Description of this image -
Change the text to say
Modified Hello
                                    from the Cloud!
, then save the file.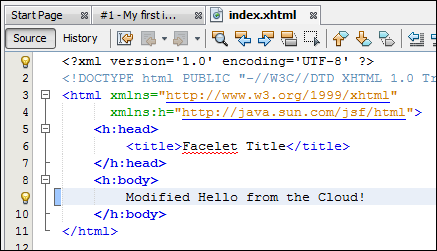
Description of this image -
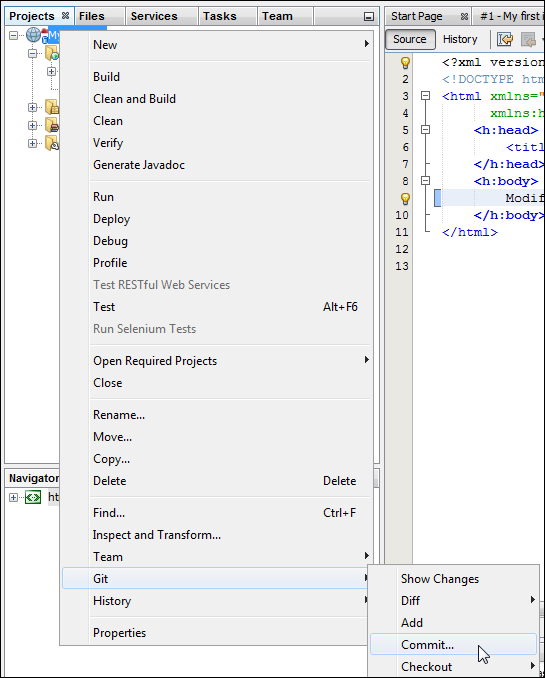
In the Projects tab, right-click the project, select Git, and then select Commit.
Description of this image -
In the Commit Message field, enter
Modified
                                    file for Task 1
, and then expand the Update Task node.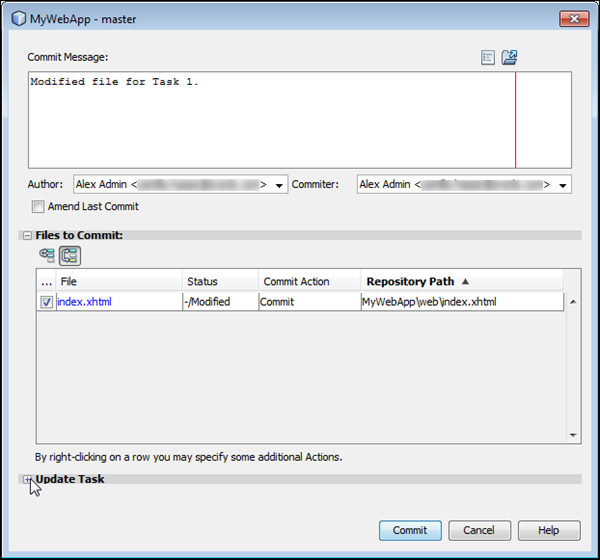
Description of this image -
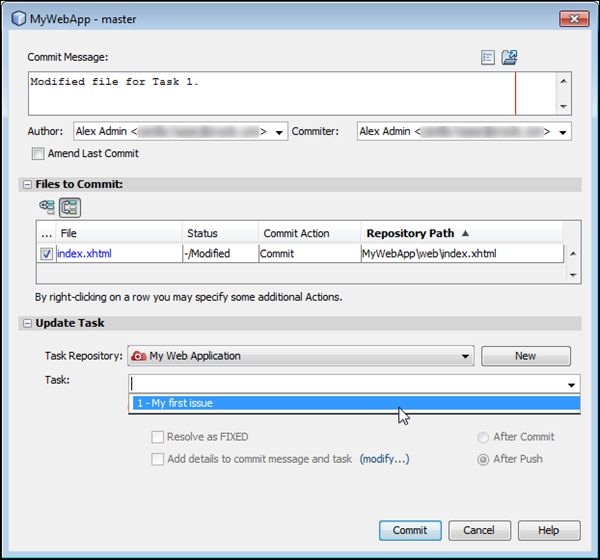
Select My first issue from the Task drop-down list. You might need to type some text in the Task field to see the drop-down list.
Description of this image -
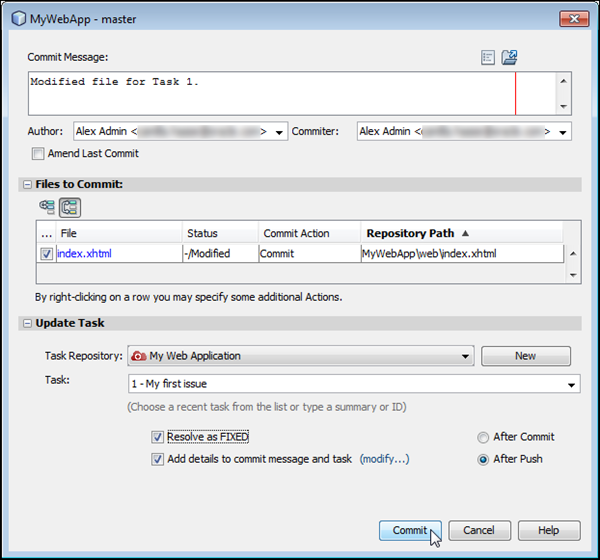
Select the Resolve as FIXED check box, the Add details to commit message and task check box, and the After Push option, then click Commit.
Description of this image -
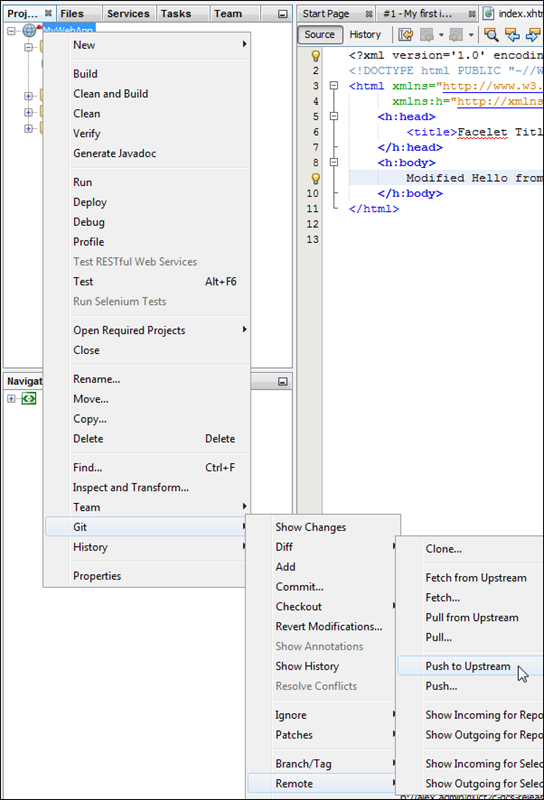
Right-click the project and select Git, then select Remote, and then select Push to upstream.
Description of this image -
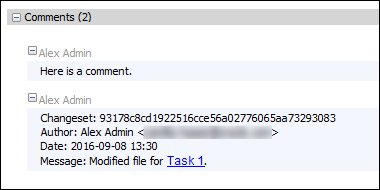
Click the tab for the task. The Status is now RESOLVED, and the Resolution is FIXED.

Description of this image Details about the commit appear in the Comments area.
Description of this image -
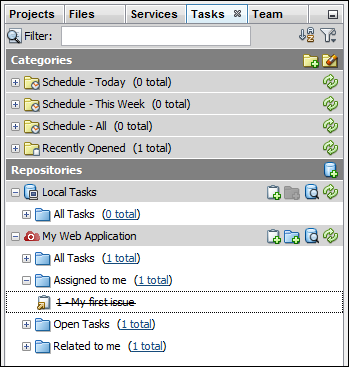
Click the Tasks tab. The issue is crossed out to indicate that it has been completed.
Description of this image -
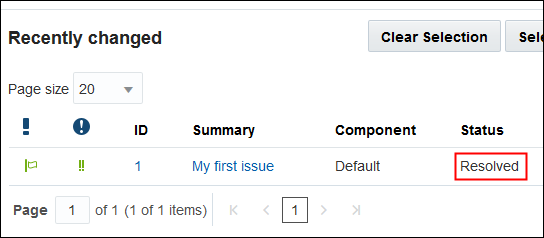
In the browser, click the Issues tab. In the table, the Status column shows the issue as Resolved.
Description of this image -
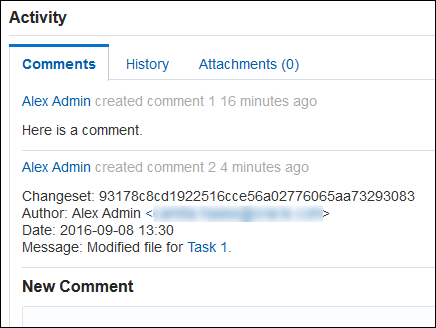
Click the issue link. On the issue page, scroll down to the Comments area to view the commit details.
Description of this image -
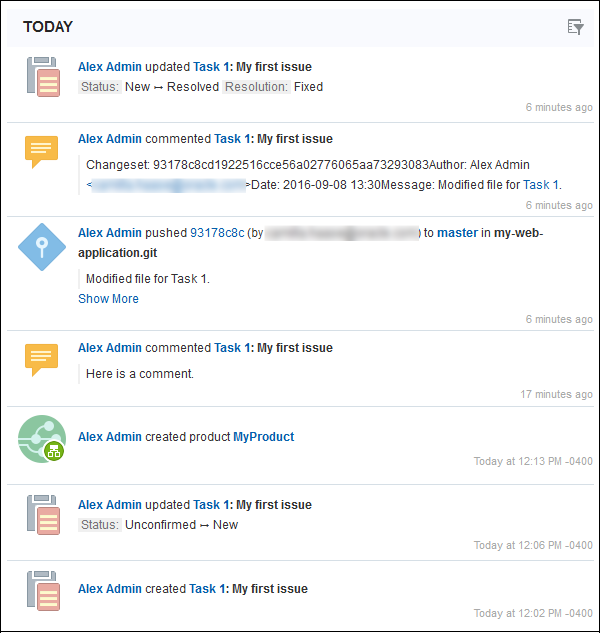
Click the Project tab and, if necessary, refresh the browser. The actions you performed are displayed in the activity feed.
Description of this image
If you wish, log out of the Team Server and exit NetBeans IDE, and sign out of your Oracle Developer Cloud Service instance.
Want to Learn More?
- Using NetBeans IDE to Create an Oracle Developer Cloud Service Project OBE
- Using Agile Methodology in Oracle Developer Cloud Service OBE
- Performing Code Reviews Using Oracle Developer Cloud Service OBE
- Oracle Developer Cloud Service in the Oracle Help Center
- Using Oracle Developer Cloud Service in the Oracle Help Center
- Oracle Developer Cloud Service product page