 Before You Begin
This tutorial shows you how to create a service instance in Oracle Database Cloud Service for Oracle Integration Cloud. This tutorial takes approximately 45 minutes to complete.
Background
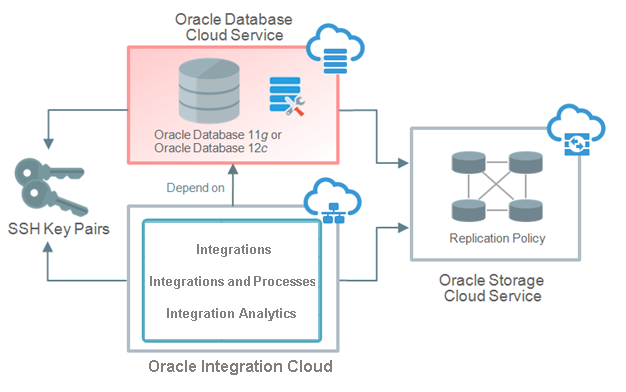
Oracle Database Cloud Service provides a platform to create full Oracle database instances in a virtual machine (VM). It's the same familiar Oracle Database, now in Oracle Cloud.
Oracle Integration Cloud uses Oracle Database Cloud Service to host component schemas and policies. Creating an Oracle Database Cloud Service instance is one of the prerequisites for provisioning Oracle Integration Cloud.
What Do You Need?
- An hourly commit subscription to Oracle Cloud.
- Your Oracle Cloud service user name, password, and identity domain (available in the New Account Information email that you received from Oracle Cloud when your user account was set up).
- An SSH key pair on your local machine. This tutorial shows how to generate an SSH key pair.
- A storage container for the database backup. This tutorial shows how to create a storage container.
 Start
the Create Service Wizard
You create a database instance by using the Create Service wizard for Oracle Database Cloud Service.
- Open your web browser and go to the URL given to you either
in an email or by your administrator. The Sign In page opens.
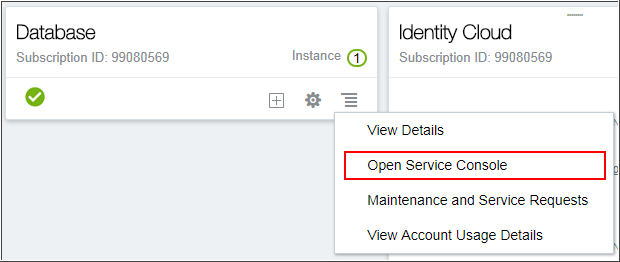
- In the Database section, click the menu icon, and then click
Open Service Console.
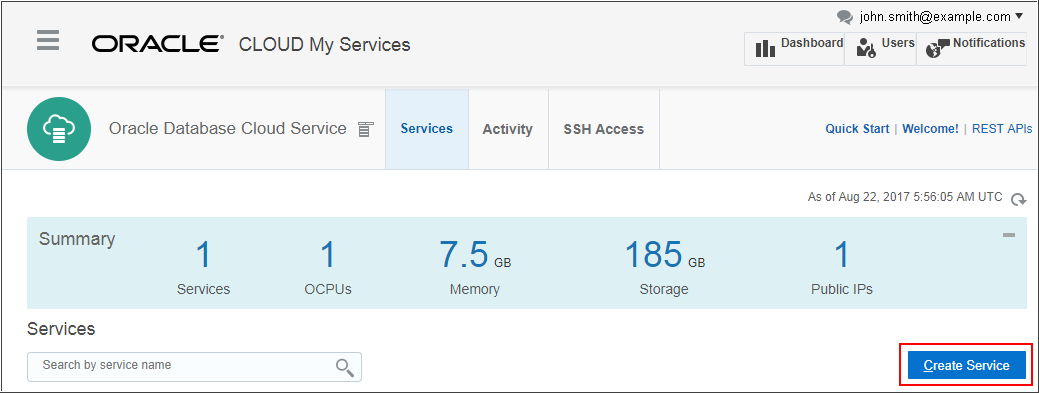
Description of the illustration db-sec1-s05.png - On the Oracle Database Cloud Service page,
click Create Service.
Description of the illustration db-sec1-s06.png
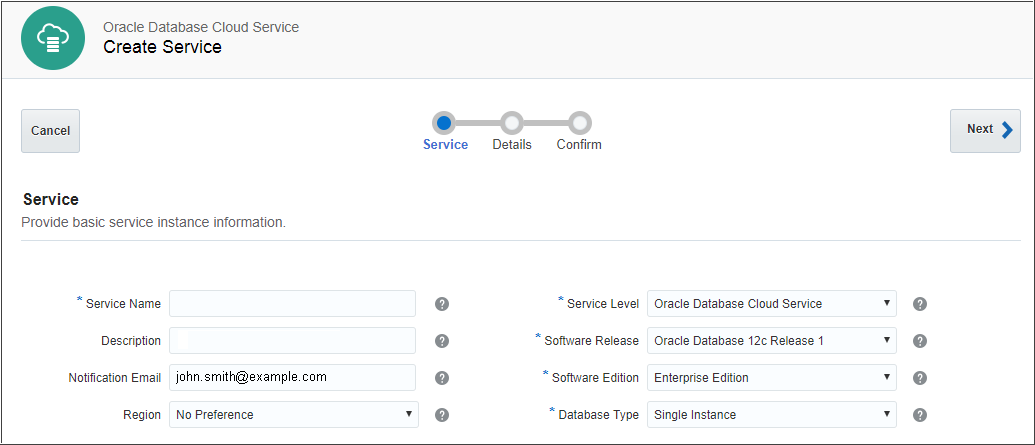
The Create Database Cloud Service Instance wizard displays the
Service page.
 Create
an Oracle Database Cloud Service Instance
- On the Service page, specify the following
details:
- Service Name: Enter a unique name for the database instance.
- Description: Enter a description of the database instance.
- Notification Email: Specify the email ID to which provisioning status updates will be sent.
- Region: Select a region.
- Service Level: Select Oracle Database Cloud Service.
- Software Release: Select Oracle Database 12c Release 1.
- Software Edition: Select Enterprise Edition.
- Database Type: Select Single Instance.
Description of the illustration db-sec2-s01.png - Click Next. The Service Details page appears where you'll now specify the database, backup, and recovery details.
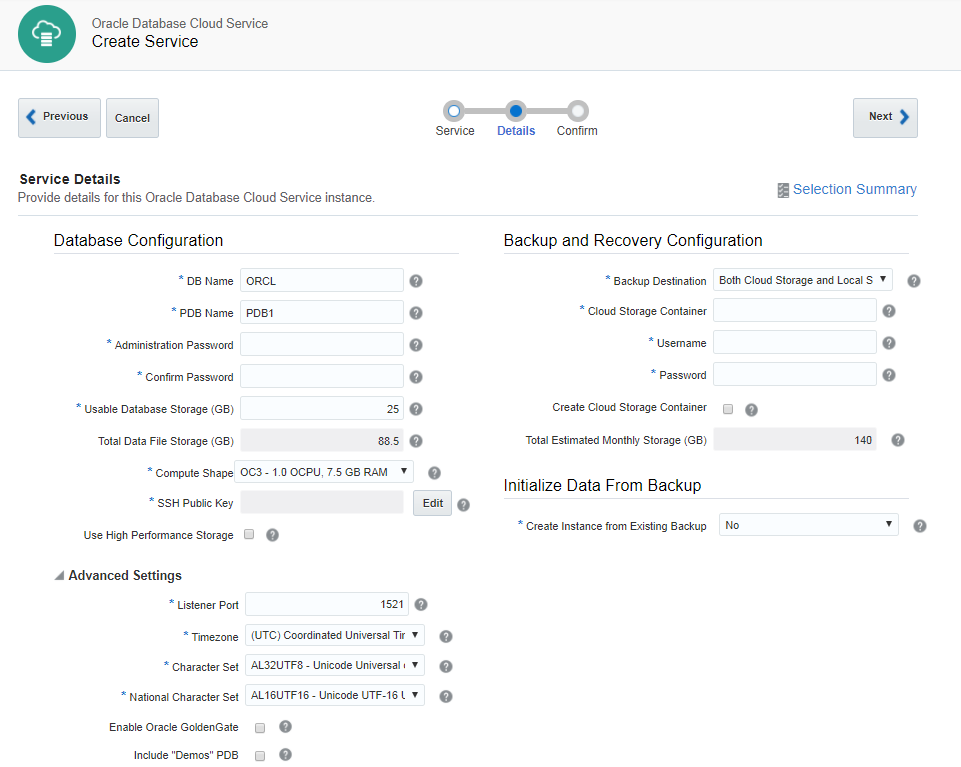
- In the Database Configuration section,
specify the following details:
- DB
Name: Make a note of the database name.
- PDB Name: Make a note of the pluggable database name.
- Administrator
Password: Enter
a password for the database administrator, and
type it again in the Confirm Password
field to confirm.
- Usable Database Storage (GB): Enter the
amount of storage in GB for actual database data. For this
tutorial, enter 15.
Note: The number in the Total Data File Storage (GB) field is automatically updated according to the storage number that you entered. - Compute Shape: Select a compute shape
from the list. For this tutorial, use the default value.
Note: The compute shape specifies the number of Oracle Compute Units and amount of memory (RAM) for the virtual machine hosting the new service instance. - SSH Public Key: Specify the SSH public
key you created as a prerequisite for this tutorial. Click
the Edit button, and in the SSH Public
Key for VM Access dialog choose your SSH public key file.
- For the remaining fields and the fields in the Advanced Settings section, use the default values.
- DB
Name: Make a note of the database name.
- In the Backup and Recovery Configuration
section, specify the following:
- Backup Destination: Select Both
Cloud Storage and Local Storage.
- Cloud Storage Container: Specify the
name of the container in this format: Storage-Identity_Domain/container,
where Identity_Domain is the name of your identity
domain and container is the name of the container
that you created as a prerequiste for database backups.
For example, if your identity domain name is paas117
and the container name is dbBackup,
enter the container name Storage-paas117/dbBackup.
You can use an existing container and provide its details, or you can have the wizard create a new container for you. If you wish to create a new container with the specified details rather than use an existing one, remember to select the Create Cloud Storage Container check box. - Username: Enter the same user name that you used to log in to the Oracle Cloud My Services page.
- Password: Enter the same password that you used to log in to the Oracle Cloud My Services page.
- Backup Destination: Select Both
Cloud Storage and Local Storage.
- For
all other fields, retain the default value. Click Next.
The Confirmation page appears. - Review your database definition choices and click Create.
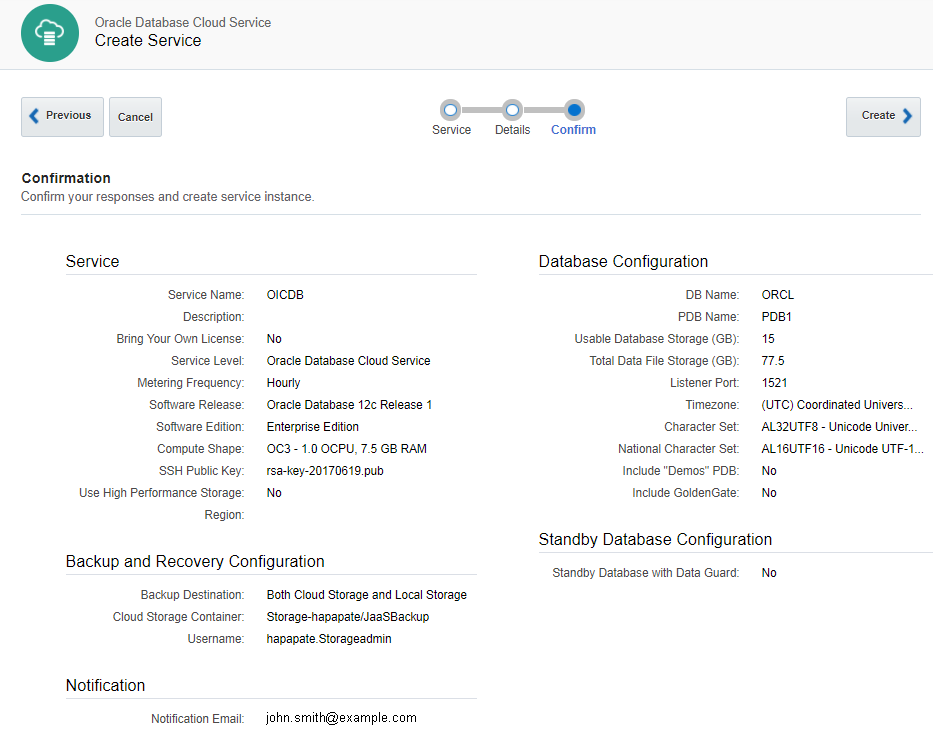 Description of the
illustration db-sec2-s05.png
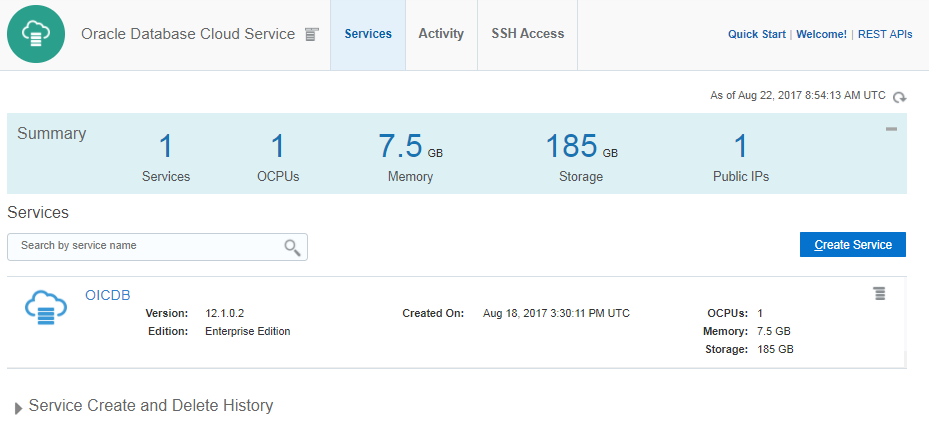
 - Return to the Oracle Database Cloud Service console to see your new database instance listed. It will show the status 'In Progress' until the instance creation is complete. Instance creation can take 20 minutes or more.
 Want
to Learn More?
- Using Oracle Database Cloud Service in Oracle Help Center
- Creating SSH Keys for Use with Oracle Cloud Services in Oracle Learning Library
- Creating Storage Containers for Backups in Oracle Learning Library
 Create an Oracle Database Cloud Service Instance for Oracle
Integration Classic