Database Copy using Oracle SQL Developer 3.1
Overview
- Oracle Database 11g with sample schema installed as the source database.
- Oracle SQL Developer 3.1.
- Install Oracle SQL Developer 3.1 from OTN. Follow the readme instructions here.
- Install Oracle Database 11g with the Sample schema.
Note: The Database Copy feature can also work on a 10g instance. - Unlock the HR user. Login
to SQL Developer as the SYS user
and execute the following command:
alter user hr identified by hr account unlock;
Purpose
This tutorial shows how to use the Database Copy feature using
Oracle SQL Developer 3.1
Time to Complete
Approximately 15 minutes
Introduction
Oracle SQL Developer is a free graphical tool that enhances
productivity and simplifies database development tasks. Using
SQL Developer, you can browse database objects, run SQL
statements, edit and debug PL/SQL statements and run reports,
whether provided or created.
Developed in Java, SQL Developer runs on Windows, Linux and the
Mac OS X. This is a great advantage to the increasing number of
developers using alternative platforms. Multiple platform
support also means that you can install SQL Developer on the
Database Server and connect remotely from their desktops, thus
avoiding client server network traffic.
The Database Copy feature in SQL Developer 3.1 is a new feature
that is used to copy objects and data from one database or
schema to another. In this example, 'HR'
database schema objects are copied to another database schema
named 'HR_COPY'.
Hardware and Software Requirements
The following is a list of software requirements:
Prerequisites
Before starting this tutorial, you should:
Creating a Database Connection to the Source and Destination Database Schema
The first step to managing database objects using Oracle SQL
Developer 3.1 is to create a database connection.
Perform the following steps to create database connections for
the source and destination database schema:
Note: If you have already created a source and destination
database connection, then you may move to Using the Database
Copy Feature topic.
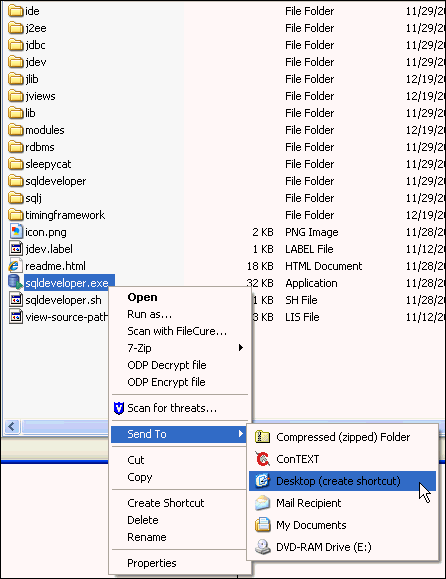
If you have installed the shortcut to SQL Developer icon on your desktop, click the icon to start your SQL Developer and move to Step 4. If you do not have the icon located on your desktop, perform the following steps to create a shortcut to launch SQL Developer 3.1 from your desktop.
Open the directory where SQL Developer 3.1 is located, right-click sqldeveloper.exe (on Windows) or sqldeveloper.sh (on Linux) and select Send to > Desktop (create shortcut).
On the desktop, you will find an icon named Shortcut to
sqldeveloper.exe. Double-click the icon to start
Oracle SQL Developer 3.1.
Note: To rename it, select the icon and then press F2 and
enter a new name.

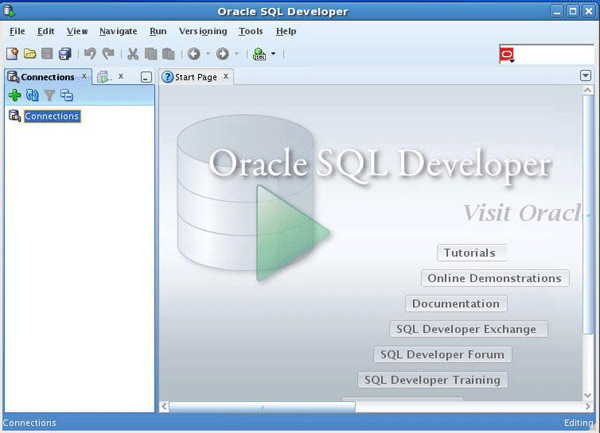
Oracle SQL Developer starts up.
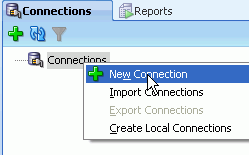
In the Connections navigator, right-click Connections and select New Connection.
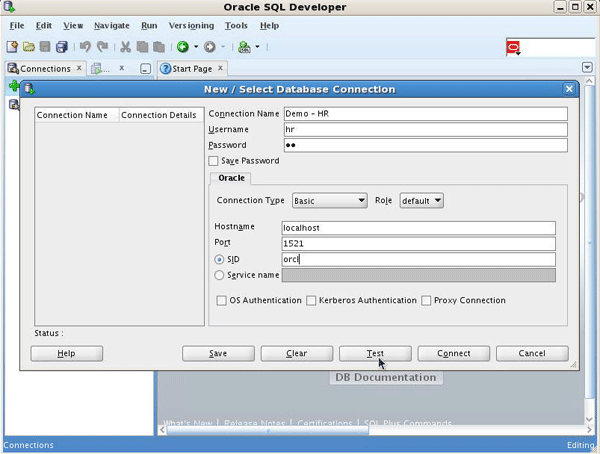
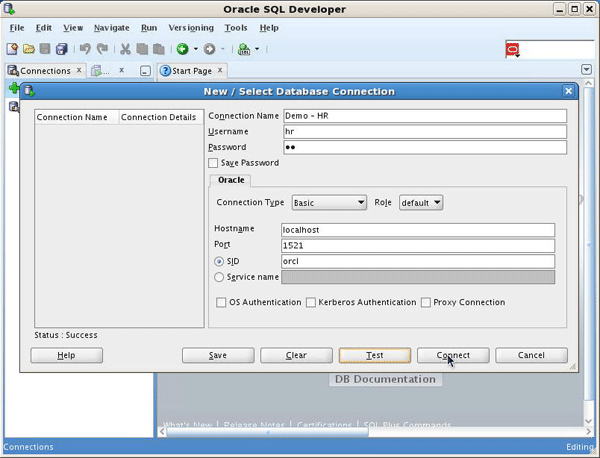
The New / Select Database Connection dialog opens. Enter the connection details as follows and click Test. This connection is to specify the source database schema from which the database objects will be copied to the destination schema. In this example, the 'hr' schema objects will be copied.
Connection Name: Demo - HRUser Name: hr
Password: <password for hr>
Hostname: localhost
SID: <SID of your database>
Check for the status of the connection on the left-bottom side (above the Help button). It should read Success. Click Save then click Connect.
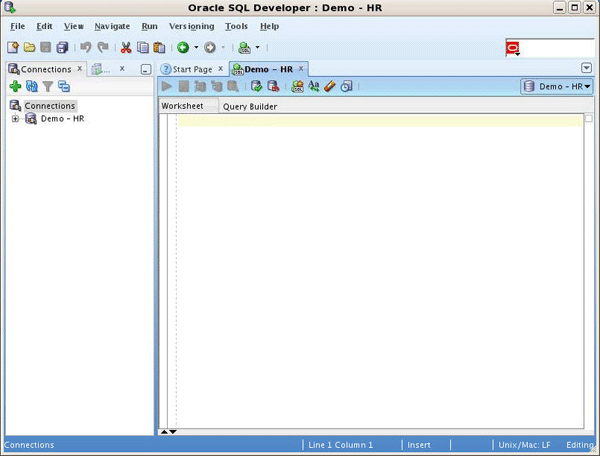
The connection was saved and you see the newly created connection in the Connections list.
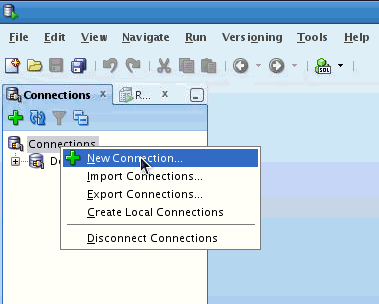
To create a new schema, you should first connect as sys and grant the necessary privileges to the user. In the Connections navigator, right-click Connections and select New Connection.
Enter the connection details as given below and click Test.
Connection Name: sys
User Name: sys
Password: <password for sys>
Role: SYSDBA
Hostname: localhost
SID: <SID of your database>
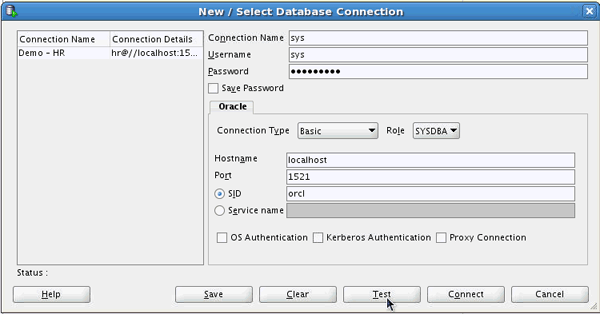
Check for the status of the connection on the left-bottom side (above the Help button). It should read Success. Click Save then click Connect.
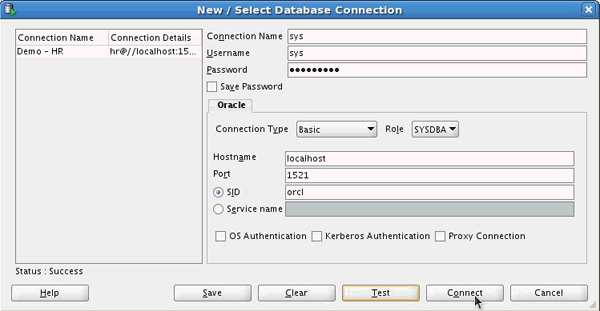
To create a new schema, type the following command in the sys worksheet
and click  (RunScript)
create user
hr_copy identified by hr;
grant connect,
resource, create session, unlimited tablespace to
hr_copy;
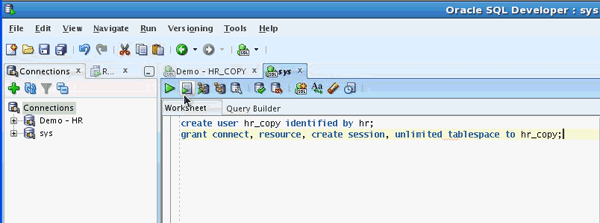
The script output shows that the user was successfully created and the grant succeeded.
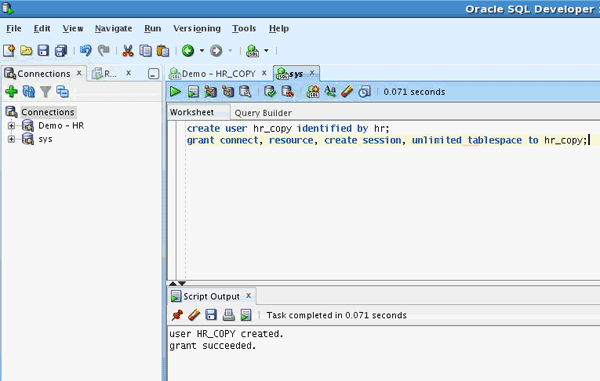
To copy the 'hr' schema to the newly created schema 'hr_copy', you need to create a new database connection. Right - click Connections and select New Connection.
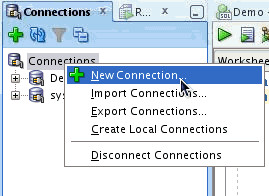
Enter the connection details for the destination database schema as given below and click Test.
Connection Name: Demo - HR_COPY
User Name: hr_copy
Password: hr
Hostname: localhost
SID: <SID of your database>
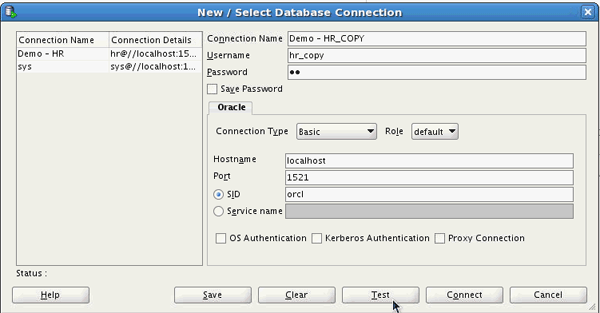
Check for the status of the connection on the left-bottom side (above the Help button). It should read Success. Click Save then click Connect.
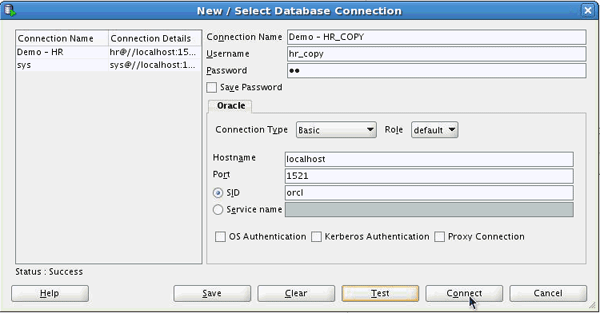
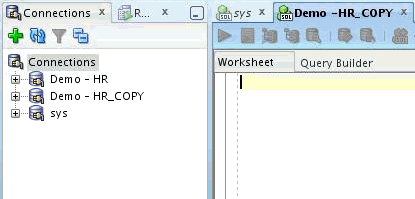
The connection was saved and you see the newly created connection in the Connections list.
Using the Database Copy Feature
The Database Copy feature opens a Database Copy Wizard Window which consists of five steps.
Click Tools and select Database Copy.
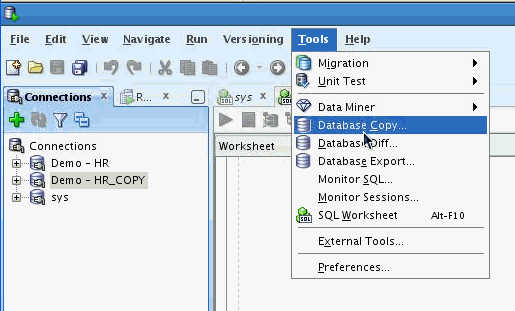
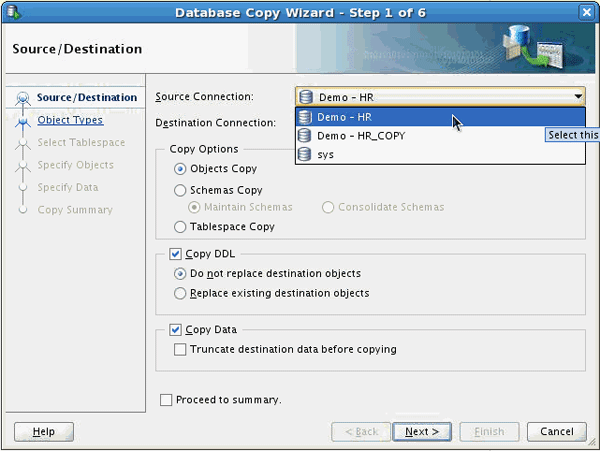
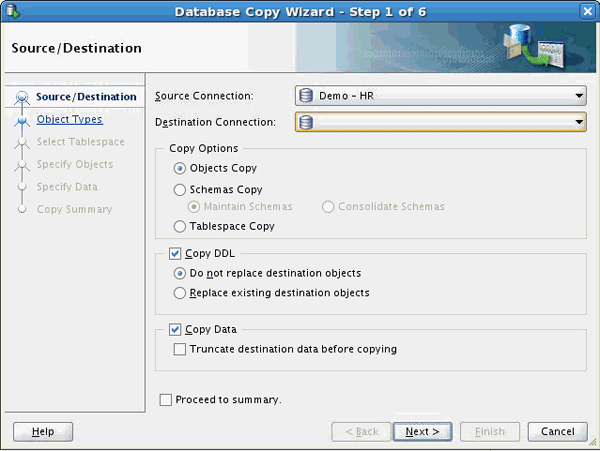
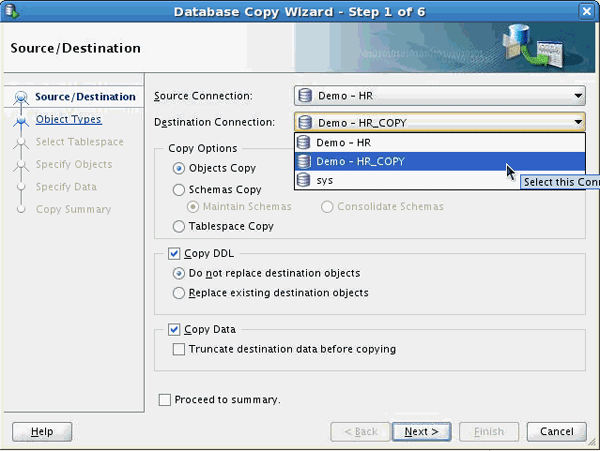
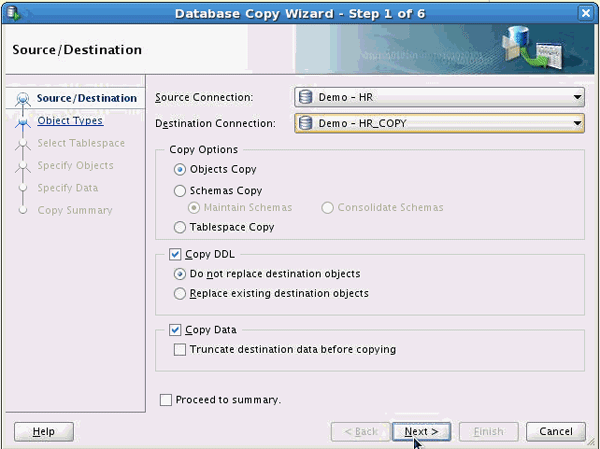
Step 1- Source / Destination: This step is used to set the source connection and the destination connection. In the Database Copy Wizard window, select the Source Connection as Demo - HR and the Destination Connection as Demo - HR_COPY and click Next.
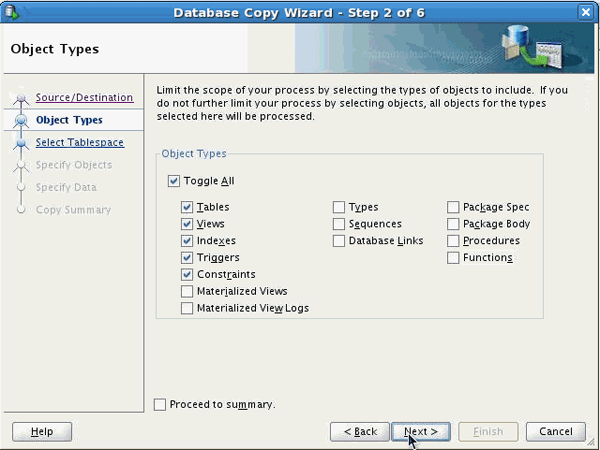
Step 2 - Object Types: In this step, you can select the object types that you want to copy to your destination schema. In the Database Wizard Window, select the Object types that need to be copied to the destination schema. Uncheck the object types that you do not want to include. Click Next.
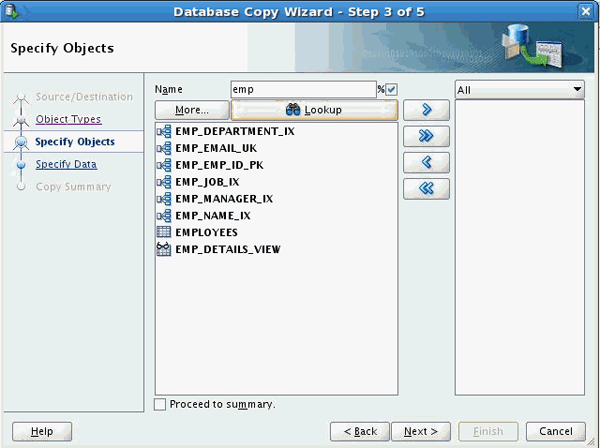
Step 3 - Specify Objects: In this step, you specify the database objects that you want to copy to the destination schema. In the Database Wizard Window, specify the Objects that need to be included. Enter Name as emp and check the % box so it will return all objects that begin with "emp". Click Lookup.
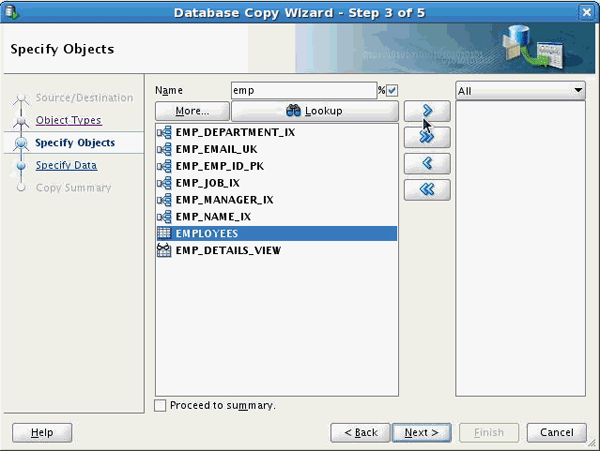
Select the EMPLOYEES table and click the right arrow key to specify that the EMPLOYEES table needs to be copied to the destination schema.
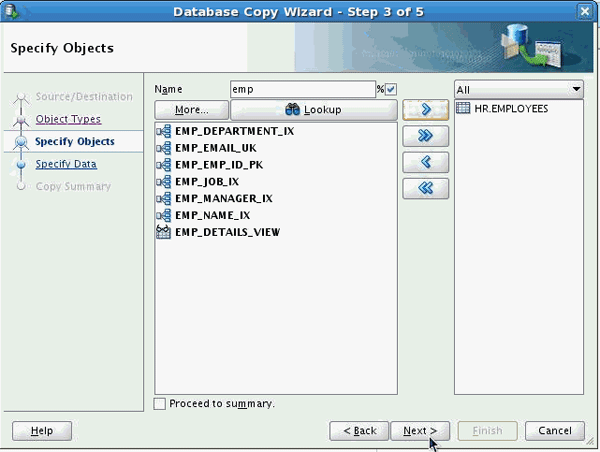
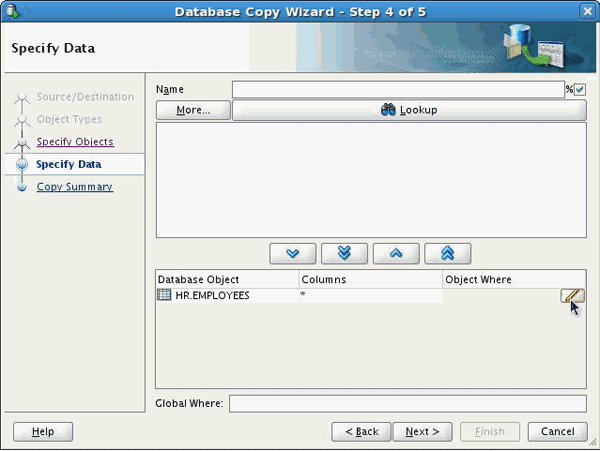
Step 4 - Specify Data: This step is used to specify
filtered data that needs to be copied from the specified
objects. To copy only those rows from the EMPLOYEES
table where the value of the salary column is less
than 10000, select HR.EMPLOYEES Database Object and
click  in the Object Where tab to
apply the where condition to the EMPLOYEES
table.
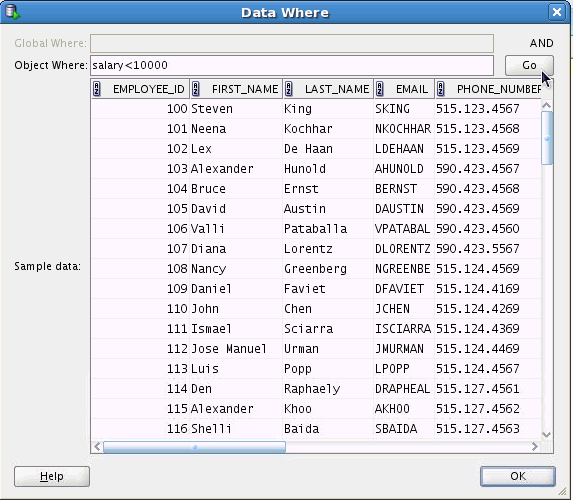
In the Data Where window, type salary
< 10000 for the Object Where condition.
Click  (Go).This will filter the data of
employees whose salary is less than 10000.
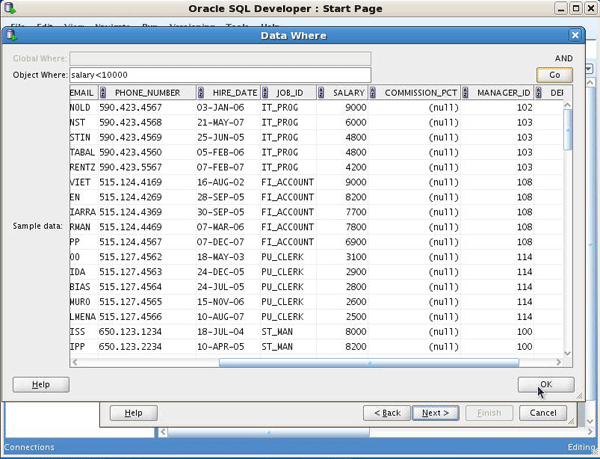
Click OK after viewing the data.
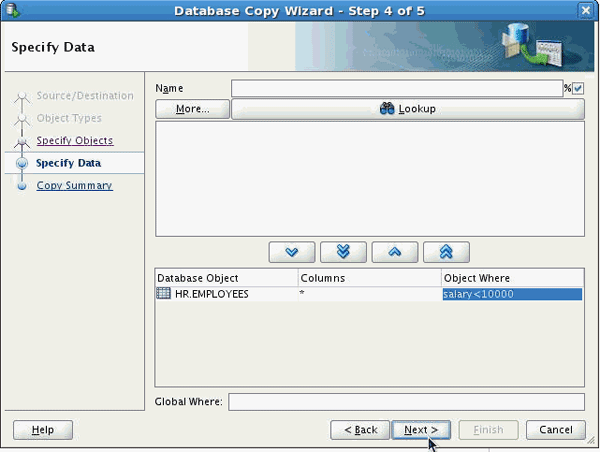
Click Next
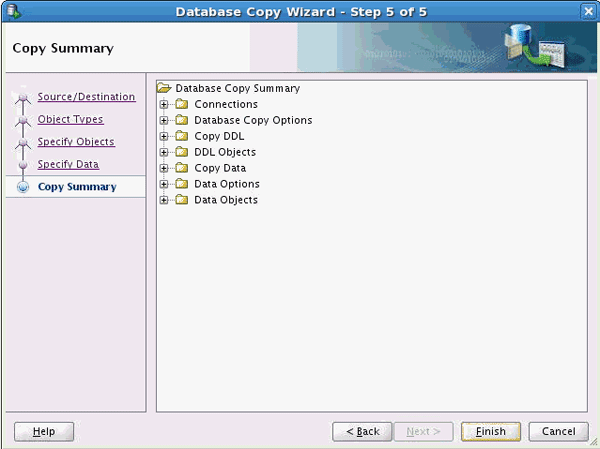
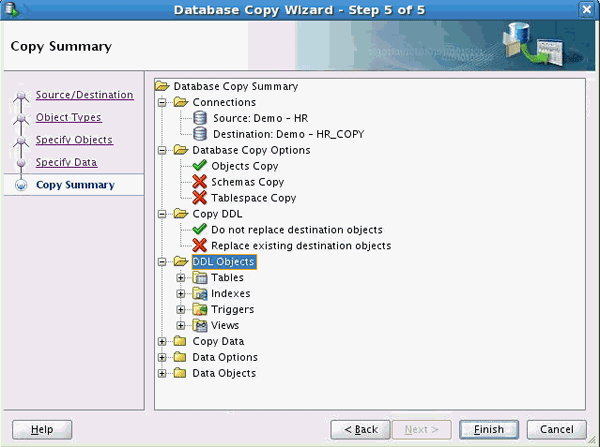
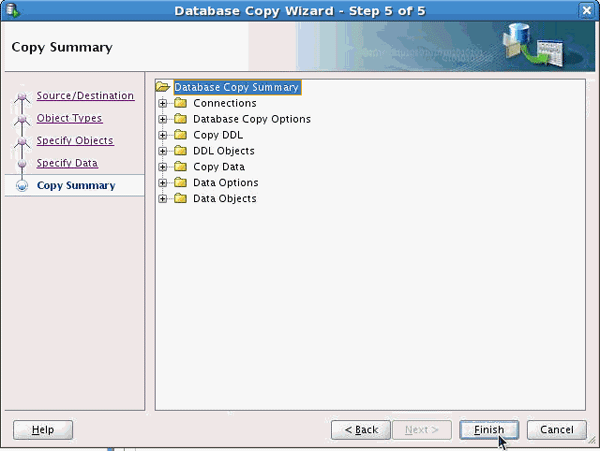
Step 5 - Copy Summary: In this step, make sure that all the desired objects have been copied. Expand the Connections tab to make sure the connections of the source and the destination are correct. Similarly expand other nodes to check if all the options have been set correctly and then click Finish.
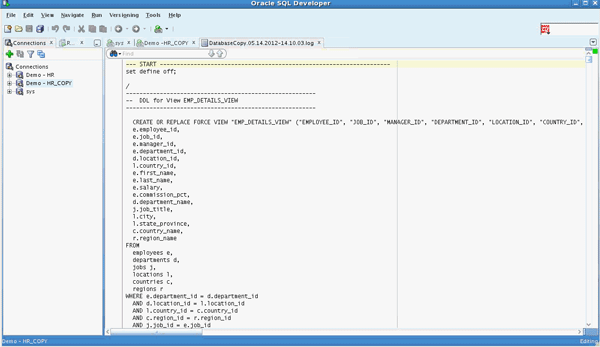
A Database Copy log containing the Database Summary is generated.
Viewing the Copied Data in the Destination Database Schema
You may view the objects in the destination schema that were
copied.
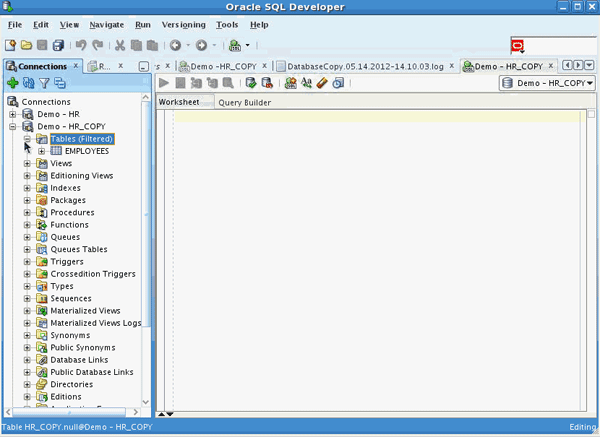
In the Connections node, expand the destination connection, in this case: Demo - HR_COPY.
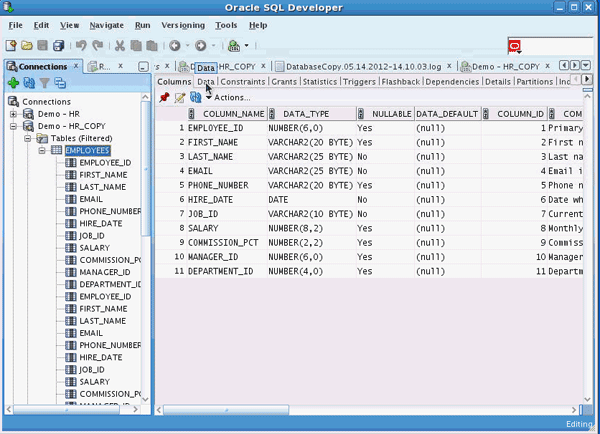
Expand Tables and select EMPLOYEES. Click Data.
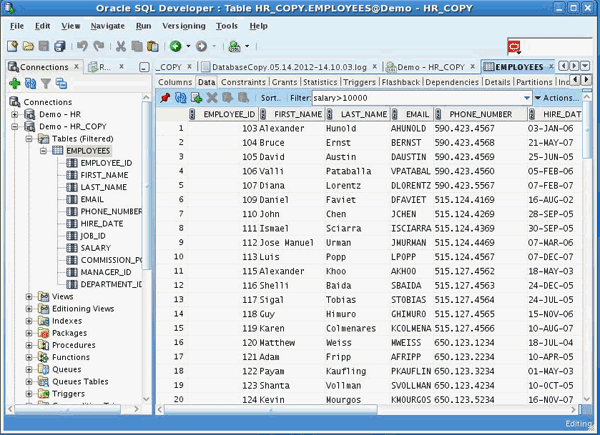
To make sure that only the employees whose salary is less than 10000 has been copied, in the Filter tab, type salary > 10000 and press Enter.
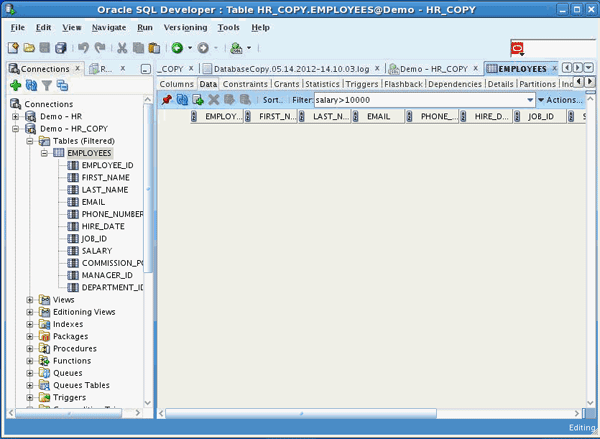
There are no employees whose salary is greater than 10000
which means that the data contains only employees whose
salary is less than 10000.
Summary
- Create a Database Connection for the Source and Destination Schema
- Use the Database Copy feature to copy data from one database schema to another
- View the copied data in the Destination Schema
- To learn more about SQL Developer 3.1, refer to additional OBEs in the OLL Web site
- Lead Curriculum Developer: Anupama Mandya
- Other Contributors: Jeff Smith, Ashley Chen
In this tutorial, you have learned how to:
Resources
Credits
To help navigate this Oracle by Example, note the following:
- Hiding Header Buttons:
- Click the Title to hide the buttons in the header. To show the buttons again, simply click the Title again.
- Topic List Button:
- A list of all the topics. Click one of the topics to navigate to that section.
- Expand/Collapse All Topics:
- To show/hide all the detail for all the sections. By default, all topics are collapsed
- Show/Hide All Images:
- To show/hide all the screenshots. By default, all images are displayed.
- Print:
- To print the content. The content currently displayed or hidden will be printed.
To navigate to a particular section in this tutorial, select the topic from the list.