Oracle SQL Developer 3.1 Data Pump Feature
Overview
- Create connections to SYSTEM, HR and IMPORT_HR schema
- Connect to DBA Navigator to initiate the Data Pump Export Wizard
- Use the Data Pump Export Wizard to export the HR schema to a dump file
- Review the status of the Export Job
- Launch the Data Pump Import Wizard to import the exported HR schema into an empty schema
- Install Oracle SQL Developer 3.1 from OTN.
- Install Oracle Database 11gR2.
- Unlock the SYSTEM user. Login to Sqlplus and execute the
following commands:
connect / as sysdba;
alter user system identified by <enter_a_pw> account unlock;
Purpose
This tutorial covers the Data Pump feature introduced in
SQL Developer Release 3.1
The Data Pump feature uses the Export and Import utilities to
export and import dump file sets in an operating system.
Time to Complete
Approximately 30 Minutes.
Introduction
Oracle Data Pump is a feature of the Oracle Database that enables very fast bulk data and metadata movement between Oracle databases. Oracle Data Pump provides new high-speed, parallel Export and Import utilities to export/import databases, schemas, tables and namespaces.
Scenario
In this tutorial, you use Oracle SQL Developer Release 3.1 to
perform the following:
Prerequisites
Before starting this tutorial, you should:
Note: Change the value of <enter_a_pw> to a secure password of your choice.
Create connections to SYSTEM, HR and IMPORT_HR schema
SQL Developer 3.1 uses Data Pump Export Utility to unload data and metadata into a set of system files called a dump file set.
Perform the following steps to export HR into an empty schema
using the SQL Developer Export Wizard.
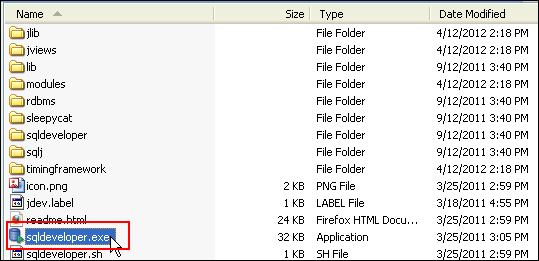
Double click the SQL Developer icon on your desktop. If you do not have the icon located on your desktop, find the executable file (either named "sqldeveloper.exe" on Windows or "sqldeveloper.sh" on Linux), and run it.
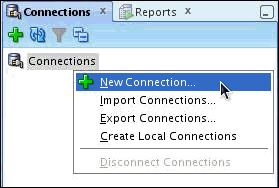
In the Connections navigator, right-click Connections and select New Connection...
The New / Select Database Connection
dialog window opens. Create a Database Connection with the
following details:
Connection Name: SYSTEM
Username: system
Password: <password_for_system>
Hostname: <your_machine>
SID: <your_SID>
Note: SYSTEM user has the necessary DBA privileges to execute the data pump feature.

You will use the SYSTEM connection to create a new schema called IMPORT_HR.This new schema will initially be empty. Later, HR schema will be exported into this schema.
Navigate to the SYSTEM SQL Worksheet and enter the following SQL statement.
Grant connect, resource to IMPORT_HR identified by oracle;

Click  to execute the script.
Create the IMPORT_HR and HR database connections with the following details:
Connection Name: IMPORT_HR
Username: import_hr
Password: oracle
Hostname: <your_machine>
SID: <your_SID>

Connection Name: HR
Username: hr
Password: <password_for_hr>
Hostname: <your_machine>
SID: <your_SID>

The new connections are listed in the Connections window.

Expand HR > Tables to display all the tables under HR schema. All the HR objects will be exported to the new IMPORT_HR schema using the Data Pump Export Wizard.
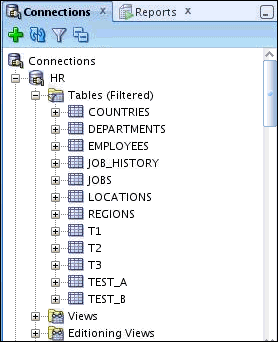
Also, Expand IMPORT_HR > Tables to make sure that the new schema is empty.

Connect to DBA Navigator to initiate the Data Pump Export Wizard
In this topic, you will use the SYSTEM connection in the DBA Navigator to initiate the Data Pump Export Wizard.
To access the DBA Navigator, select View > DBA .

 in the DBA window to select a connection.
Select SYSTEM Connection.
Note: You should add only those connections for
which the associated database user has DBA privileges.

Use the Data Pump Export Wizard to export the HR schema
SQL Developer 3.1 uses Data Pump Export Utility to unload data
and metadata into a set of system files called a dump file set.
In this topic, you will use the Data Pump Export Wizard to
export the HR Schema to a dump file.
Expand SYSTEM > Data Pump. This is where you can view your Export and Import Jobs.


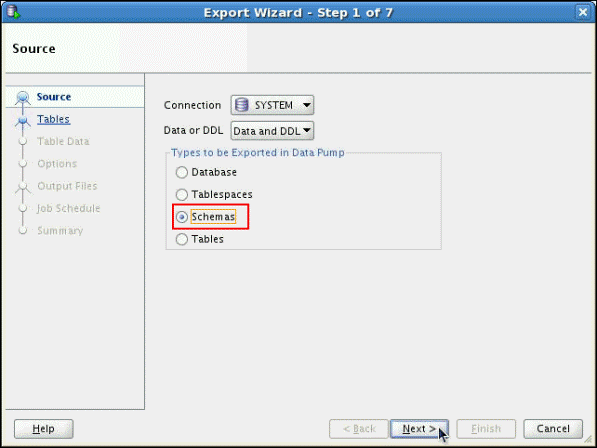
Accept the default settings for Connection and Data or DDL in Export Wizard - Step 1 of 7. Select Schemas for Types to be Exported in Data Pump. Click Next.
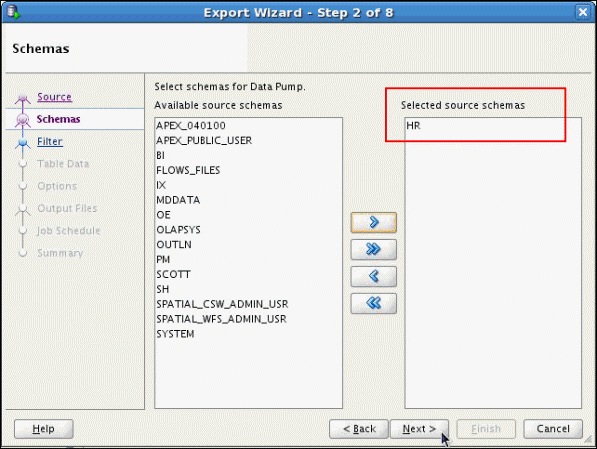
The Export Wizard - Step 2 of 8 opens up. It allows you to
select 1 or multiple schemas. Select HR
and click  . The HR schema is added to the list of Selected source
schemas. Click Next.
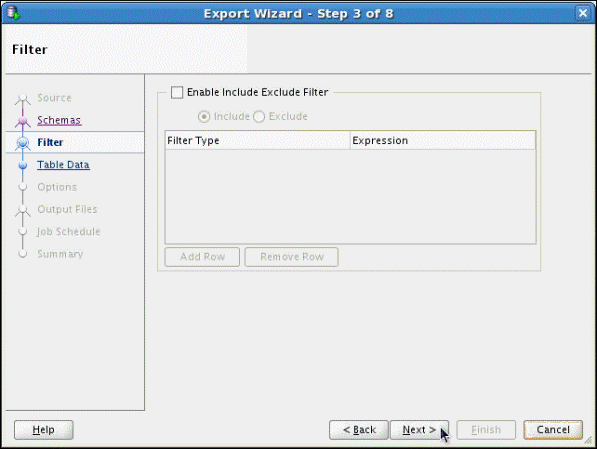
Export Wizard - Step 3 of 8 allows you to enable the include exclude filter by selecting Enable Include Exclude Filter check box. Accept the default settings and click Next.
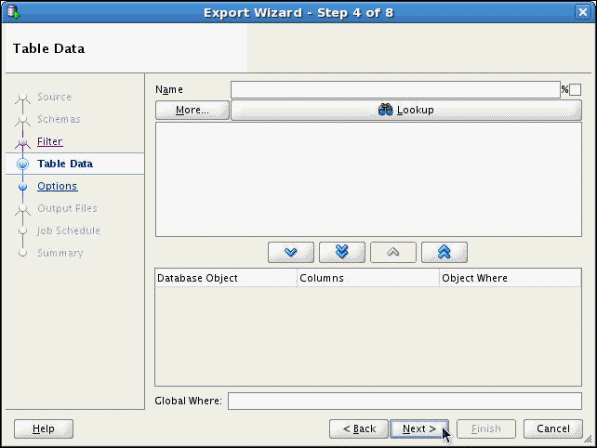
Step 4 of Export Wizard allows the user to create filters on the Table Data by entering a WHERE clause. Accept the default settings and click Next.
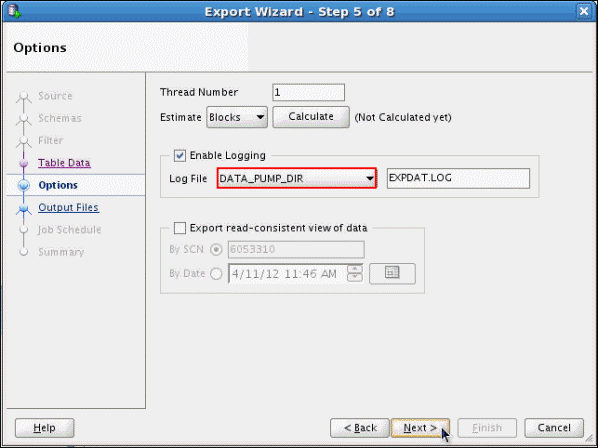
Accept the default log file name and click Next.
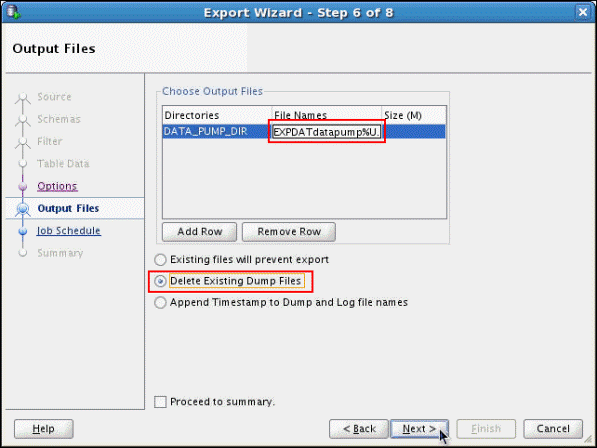
Export Wizard - Step 6 of 8 displays a list of Output
files. Click on the File name and rename the dump file as EXPDATdatapump%U.DMP.This
dump file will also be saved in the DATA_PUMP_DIR directory.
Any existing Dump files will prevent the export. Therefore,
select Delete Existing Dump Files radio
button and click Next.
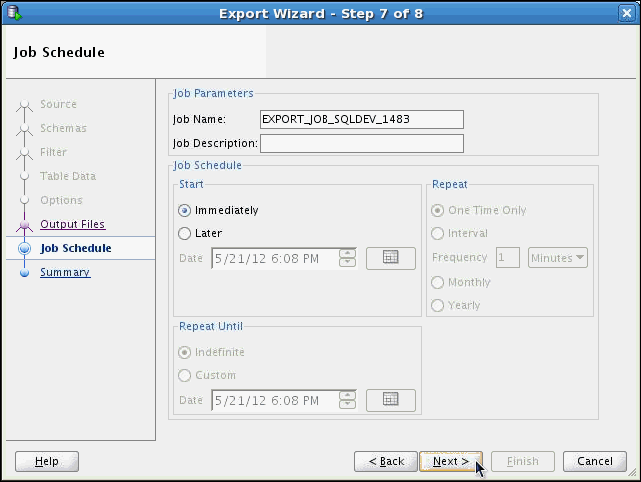
Export Wizard - Step 7 of 8 allows you to specify information about the job such as Job Name and Job Description.
You can schedule the job to run immediately or at a later
time. You can also select to have the job run repeatedly and
at what frequency.
Accept the default settings to run the job immediately
.Click Next.
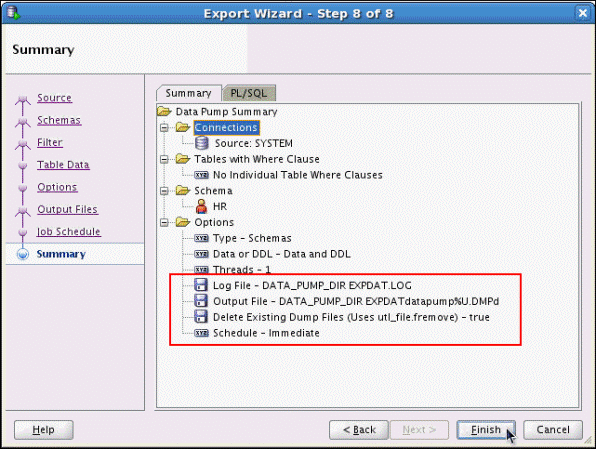
The final step (Step 8 of 8) displays the Summary tree which shows all the options selected in the previous steps.
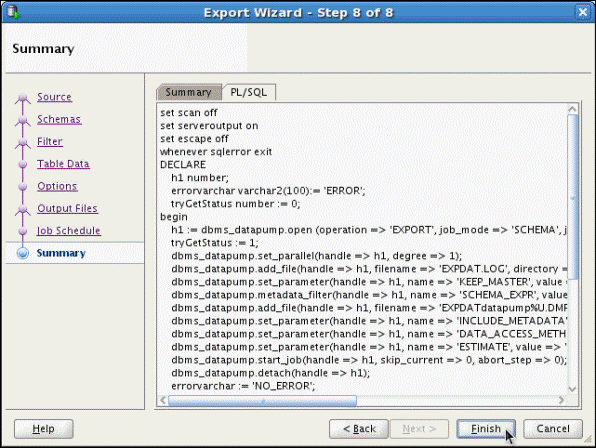
Click on the PL/SQL tab to view the
corresponding SQL statements for the selected options.
After reviewing the SQL Statements, click Finish.
Review the status of the Export Job
In this topic, you will review the status of the Export Job.
Expand the Export Jobs folder under the
DBA tab to see the currently running Export Job. Click on
the job name. A new window opens, displaying the
export job details.

Click the Refresh button in Export Jobs
window.

Once the job disappears, the job has completed.

Note: Export details can be found in the Export Log located in the DATA_PUMP_DIR directory.
Launch the Data Pump Import Wizard to import the exported
HR schema into an empty schema
Select Schemas for the Type of import
In the area below, change the file name to EXPDATdatapump%U.DMP
Click Next. The input file will be scanned to display all the available schemas.
The name of the Import log file
The name of the Input File we specified to import
The job schedule
SQL Developer 3.1 uses the Data Pump Import Utility to import a
dump file set on the same system or move it to another system
and load it there.
In this topic, you will step through the Data Pump Import Wizard to import the HR schema into the new IMPORT_HR schema.
To launch the Datapump Import Wizard, right click Data Pump in the DBA window and select Data Pump Import Wizard...

Perform the following operations in Import Wizard - Step 1
of 6:
Note: The input file EXPDATdatapump%U.DMP is the export file created in the previous section.

In the Import Wizard - Step 2 of 6 ,select HR and click Next.

Step 3 of the Import Wizard allows you to map the Source
and Destination schemas. Click on Add Row.
The source schema HR will be automatically displayed.
Type in the destination schema as IMPORT_HR.The
HR schema will be imported to this empty schema.Click Next.

In the Import Wizard - Step 4 of 6, you can enable logging
where an import log will automatically be generated.
Note: The Enable Logging is selected by
default.
This log file will be saved in the DATA_PUMP_DIR
directory. Click Next.

Step 5 of the Import Wizard allows you to schedule your job to run immediately or at a later time. Accept the default settings to allow the job to run immediately.
Click Next.

The Summary tree in the Import Wizard - Step 6 of 6
displays all the selected options such as:
Click FINISH.

Once your import operation completes, navigate to the IMPORT_HR schema to view all the objects that are successfully imported.

Expand Tables. Select a table and check if the data has also been successfully imported. In this case, the table COUNTRIES is selected.

Note: You can navigate to DATA_PUMP_DIR
directory to check the Import log file for any errors.
Summary
- Access the DBA Navigator to initiate the Data Pump Export/Import Wizards
- Export the HR schema using the Data Pump Export Wizard
- Review the status of the Export Job
- Import the HR schema into an empty schema using the Data Pump Import Wizard
- SQL Data Pump demo series on OLL
which includes:
- Lead Curriculum Developer: Supriya Ananth
- Other Contributors: Nancy Greenberg , Ashley Chen , Jeff
Smith , Swarnapriya Shridhar
In this tutorial, you have learned how to:
Resources
Credits
To help navigate this Oracle by Example, note the following:
- Hiding Header Buttons:
- Click the Title to hide the buttons in the header. To show the buttons again, simply click the Title again.
- Topic List Button:
- A list of all the topics. Click one of the topics to navigate to that section.
- Expand/Collapse All Topics:
- To show/hide all the detail for all the sections. By default, all topics are collapsed
- Show/Hide All Images:
- To show/hide all the screenshots. By default, all images are displayed.
- Print:
- To print the content. The content currently displayed or hidden will be printed.
To navigate to a particular section in this tutorial, select the topic from the list.