Working with the SQL Developer Data Modeler Reporting Repository
Purpose
This tutorial shows you how to review your Oracle SQL Developer Data Modeler designs by running a selection of reports in Oracle SQL Developer.
Time to Complete
Approximately 25 minutes
Overview
Oracle SQL Developer Data Modeler supports logical and physical data modeling for Oracle, and Microsoft SQL Server and IBM DB2. This addition to the Oracle SQL Developer family of tools provides forward and reverse engineering of database structures for all who work with graphical data models. There are various diagramming options, you can create Domains and use a set of Design Rules to help ensure your models comply with a set of standards. Oracle SQL Developer Data Modeler also provides a read-only reporting repository for reviewing the design. Save all designs to the repository and then use Oracle SQL Developer to run the reports provided.
In this tutorial you need to create a repository owner, for storing the report schema. The first time you save your design to the repository, Oracle SQL Developer Data Modeler creates the repository, if it does not already exist. Subsequent models are saved to the same repository and are kept distinct by means of a Global Unique Identifier (GUID).
Creating a Reporting Schema User
In this section, you create a user in Oracle SQL Developer that you will import your model (relational design and logical data model) into. Perform the following steps:
|
. |
Open Oracle SQL Developer by expanding the sqldeveloper folder of your installation and double click sqldeveloper.exe.
|
|---|---|
|
. |
You need to create a connection. Right-click Connections and select New Connection.
|
|
. |
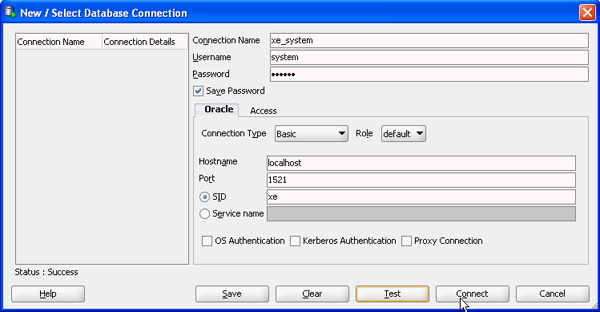
Enter the following and click Test. Connection Name: <your_sid>_system Select Save Password check box Hostname: <your_hostname>
|
|
. |
The connection was successful. Click Connect.
|
|
. |
Expand <your_sid>_system.
|
|
. |
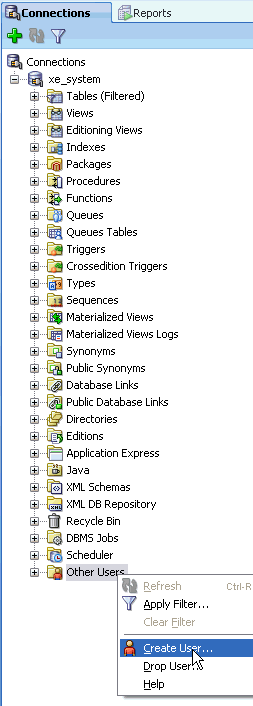
Right-click Other Users and select Create User.
|
|
. |
Enter the following and click the Roles tab. User name: dm1
|
|
. |
Select the Granted, Admin and Default check boxes for DBA and click Apply.
|
|
. |
The DM1 user and the grants statements were executed successfully. Click Close.
|
Opening the HR Schema Relational Model
In this section, you open the HR schema relational model. Perform the following steps:
|
. |
Open Oracle SQL Developer Data Modeler from the icon on your desktop. If you performed the previous tutorial, and did not exit Oracle SQL Developer Data Modeler, select File > Close to close the model you previously worked on.
|
|---|---|
|
. |
Select File >Open.
|
|
. |
Select the HR_Schema.dmd file from the sqldev directory and click Open.
|
| . |
The Relational Model will be loaded. Click OK.
|
|
. |
The relational model is opened successfully. In the next section, you reverse engineer to create the logical model.
|
Export Relational Design to Reporting Schema
In this section, you export your relational design to the reporting schema that you will later review in SQL Developer. Perform the following steps:
|
. |
Select File > Export > To Reporting Schema.
|
|---|---|
|
. |
You need to create a connection. Click the '+' plus icon.
|
|
. |
Enter the following values and click OK. Name: <your_sid>_dm1
|
|
. |
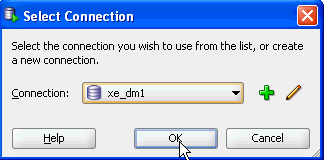
Select the connection you just created from the list and click OK.
|
|
. |
Your model is being export to the reporting schema. When it is complete, the progress window will disappear.
|
Reviewing the Report Results
In this section, you review the report results of the export. Perform the following steps:
|
. |
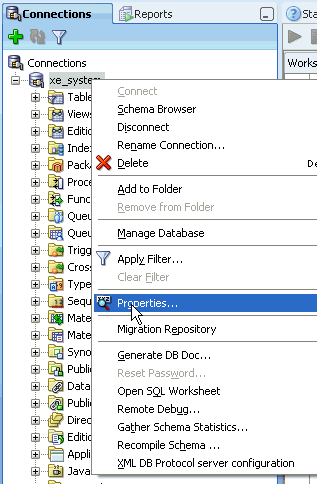
Switch to SQL Developer. You first need to create a connection for the DM1 user. Right-click the orcl_system user and select Properties.
|
|---|---|
|
. |
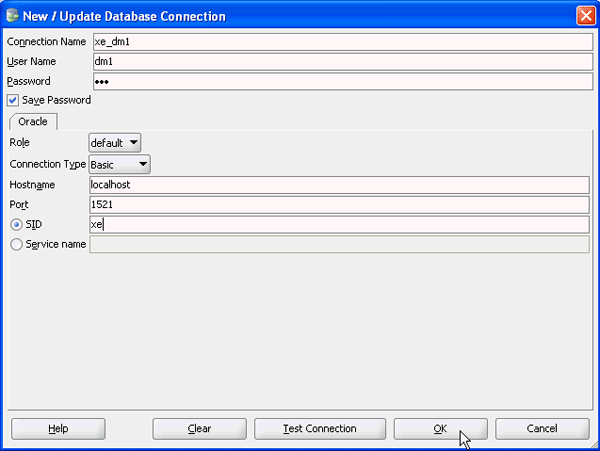
Enter the following and click Connect. Connection Name:<your_sid>_dm1
|
|
. |
Your connection was created. Click the Reports tab.
|
|
. |
Expand Data Modeler Reports.
|
|
. |
Expand Design Content > Relational Model. A list of the reports you can run appear. Select Relational Designs.
|
|
. |
Select <your_sid>_dm1 from the list of connections and click OK.
|
|
. |
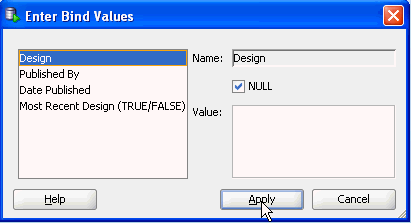
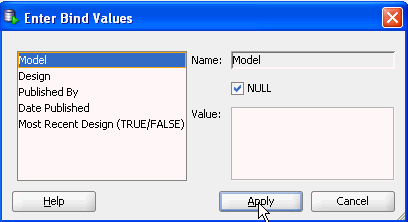
You can specify bind values to change the results displayed. In this case you want to take the defaults, click Apply.
|
|
. |
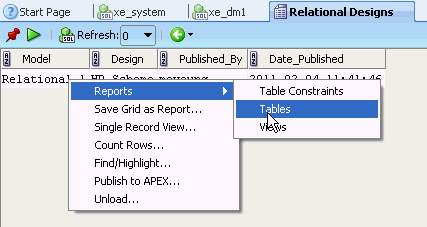
A list of the Models appears. Right-click Relational_1 in the Model column and select Reports > Tables.
|
|
. |
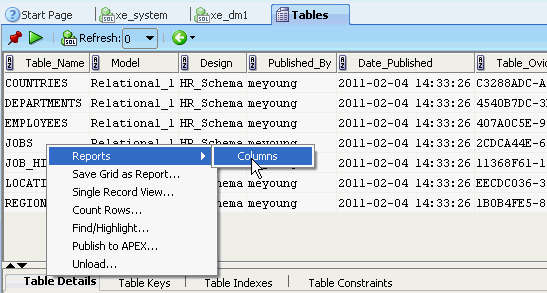
Review the list of tables. To see a list of the columns within a table, you can drill down to that report. Right-click the JOBS table and select Reports > Columns.
|
|
. |
Review the list of columns in the JOBS table. If you click on one of the columns, you see the detail below.
In the next section, you will make a change to the model and export it again to see the changes in the reports.
|
Making a Change to the Relational Design and Export Again
In this section, you delete a column and add a couple of columns without domains and export the model again. Perform the following steps:
| . |
Switch back to the Data Modeler tool and double-click the JOBS table.
|
|---|---|
| . |
Select Columns.
|
| . |
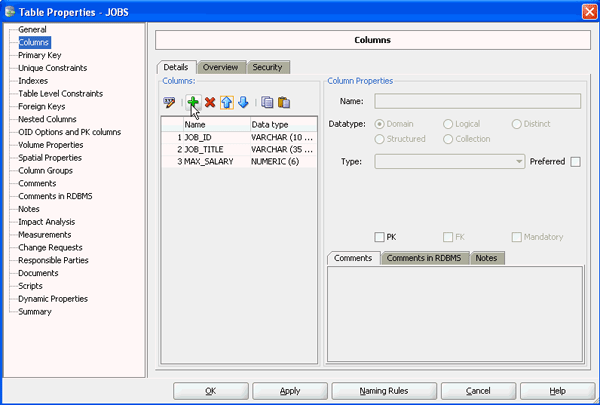
Select the MIN_SALARY column and click the Remove icon.
|
| . |
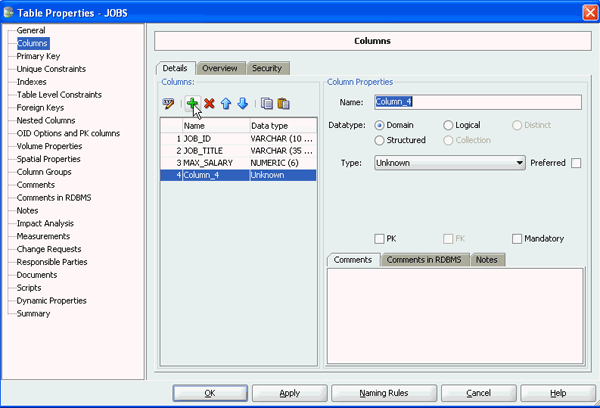
Click the Add Column icon.
|
| . |
Column_4 was created. Click the Add Column icon again.
|
| . |
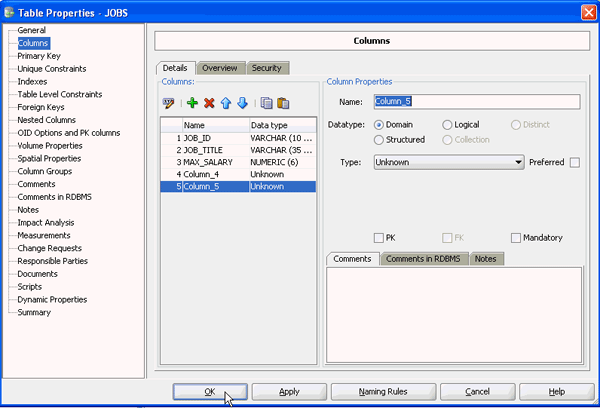
Column_5 was created. Click OK.
Note the changes that you made to the JOBS table.
|
| . |
In order for the changes to appear in the Data modeler reports in SQL Developer, you need to export again. Select File > Export > To Reporting Schema.
|
| . |
Select the orcl_dm1 connection and click OK.
|
| . |
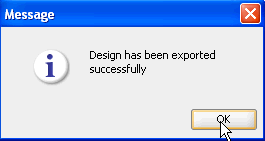
The model was exported successfully. Click OK.
|
Review the Report Changes
In this section, you review the Data Modeling reports again to see the changes you made. Perform the following steps:
| . |
Switch back to SQL Developer and right-click Relational Designs and select Open again.
|
|---|---|
| . |
Right-click the Relational_1 Model and select Reports > Tables.
|
| . |
The list of tables is displayed.
Select the JOBS table. Notice the number of Columns in the table details. Right-click the JOBS table and select Reports
> Columns.
|
| . |
Review the list of columns. Notice that MIN_SALARY no longer appears and the two columns you added appear.
|
| . |
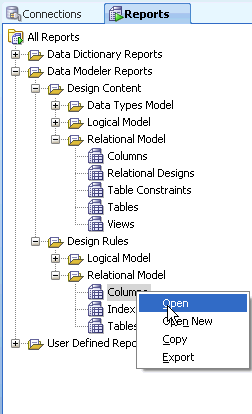
You can also review a Design Rules report. Under the Report tab in the left navigator, expand Design Rules > Relational Model. Right-click Columns and select Open.
If you have more than one connection, you may receive a dialog asking you which connection you want, select orcl_dm1.
|
| . |
If there is more than one model, you can specify the name. In this case, click Apply.
|
| . |
Select the Relational_1 model. Notice that you see the violations listed in the lower window. In this case, the new columns you created did not have datatypes assigned and that is why they appear.
In the next section, you reverse engineer the Relational Design to create a Logical Data Model and then export it again.
|
Reverse Engineer the Relational Design to a Logical Data Model
In this section, you reverse engineer your Relational Design to create a Logical Data Model. You will then export it so that you can review the results in SQL Developer data modeler reports. Perform the following steps:
| . |
Switch back to the Data Modeler tool and click the Engineer to Logical Modelicon.
|
|---|---|
| . |
You will take the defaults. Click Engineer.
|
| . |
In order for the Logical Data Model objects
to appear in the Data modeler reports in SQL Developer, you need
to export again. Select File > Export > To Reporting
Schema.
|
| . |
Select the <your_sid>_dm1 connection and click OK.
|
| . |
The model was exported successfully. Click OK.
|
Review the Logical Data Model Reports
In this section, you review the Logical Data Model Reports in SQL Developer. Perform the following steps:
| . |
Switch back to SQL Developer and expand Design Content > Logical Model and right-click Logical Designs and select Open.
|
|---|---|
| . |
You can change one of the bind values. Select Most Recent Design (True/False). Notice that the default is True. If you wanted to show all the designs, change the value to False and click Apply.
|
| . |
Notice that all three exports you
performed now display. The most recent is listed first. Right-click
the HR_Schema Design and select Reports
> Entities.
|
| . |
The list of entities appears. Right-click the JOBS table and select Reports > Attributes.
|
| . |
The list of attributes is displayed.
|
| . |
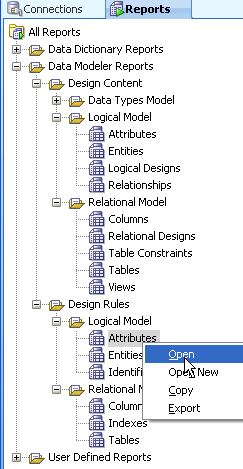
You can also review the Design Rules report for the Logical Model. Under Design Rules, expand Logical Model. right-click Attributes and select Open.
|
| . |
Click Apply.
|
| . |
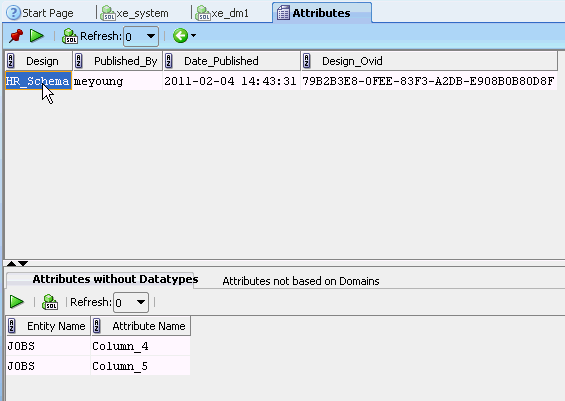
Select the HR_Schema Design from the list. Notice that the two attributes are listed for Attributes without Datatypes.
|
Summary
In this tutorial, you have learned how to:
- Export a relational design to a reporting schema
- Review the data modeler report results
- Make a change to the relational design, export the schema again and review the report results
- Reverse engineer the relational design, export the schema again and review the report results
![]()

|
About
Oracle |Oracle and Sun | |


