Re-engineering Your Database Using Oracle SQL Developer Data Modeler 3.0
Purpose
In this tutorial, you will update a database with the changes made to its relational model using Oracle SQL Developer Data Modeler 3.0 and Oracle SQL Developer.
Time to Complete
Approximately 20 minutes.
Overview
Oracle SQL Developer Data Modeler is a tool that enables you to diagrammatically display your database objects, make changes, and update the schema based on the changes quickly and easily. It is a standalone, independent product available for download and evaluation from OTN.
You can import from and export to a variety of sources and targets. You also have a variety of formatting options and can validate the models through a predefined set of Design Rules. Using this tool, you can connect to any Oracle supported database.
In this tutorial, you import two tables (EMPLOYEES and DEPARTMENTS) from the HR schema into SQL Developer Data Modeler. You add a new table (PROJECTS) and join it to the DEPARTMENTS table. You also create a new column (MOBILE_NUMBER) in the EMPLOYEES table. You then generate the code for the changes you made and run the code in SQL Developer to update the database.
Prerequisites
Before starting this tutorial, you should:
|
. |
Install Oracle Database 11g with Sample Schema. |
|---|---|
|
. |
Unlock the HR user.
Login to SQL*Plus as the SYS
user and execute the following command: |
|
. |
Unzip the Oracle SQL Developer Data Modeler and Oracle SQL Developer software to your system. |
Importing Tables from HR Schema
In this topic, you will create a connection to the HR schema. Using this connection, you import the EMPLOYEES and DEPARTMENTS tables into SQL Developer Data Modeler.
|
. |
Open Oracle SQL Developer Data Modeler.
|
|---|---|
|
. |
To import tables from the data dictionary, select File > Import > Data Dictionary.
|
|
. |
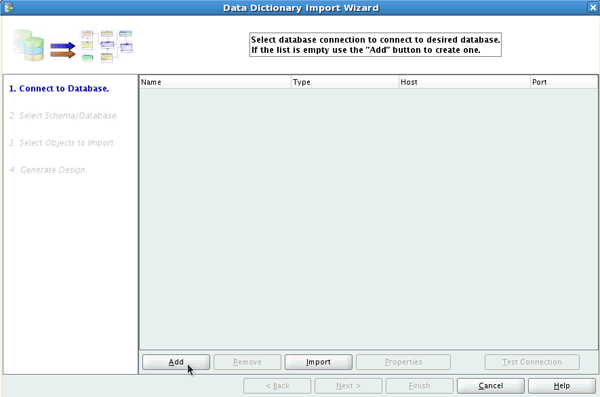
The Data Dictionary Import Wizard opens. To create a connection to the database, click Add.
|
|
. |
A New / Update Database Connection dialog opens. Enter the connection details as follows and click Test Connection. Connection Name: hr_orcl
|
|
. |
You get a 'Connection established successfully' message. Click OK.
|
|
. |
Click OK in the New/ Update Database Connection dialog to create the connection.
|
|
. |
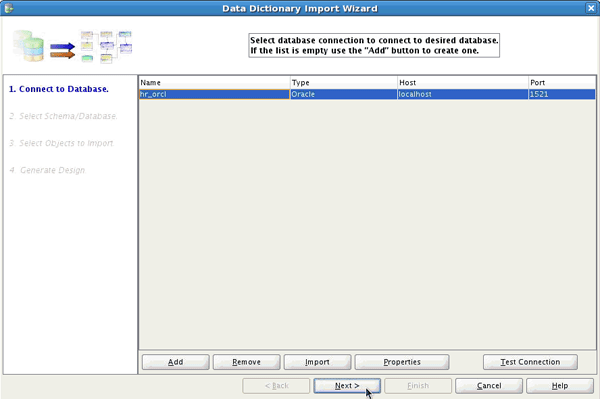
In the Data Dictionary Import Wizard, select the hr_orcl connection you just created and click Next.
|
|
. |
You want to import only the HR schema. Select the HR schema and click Next.
|
|
. |
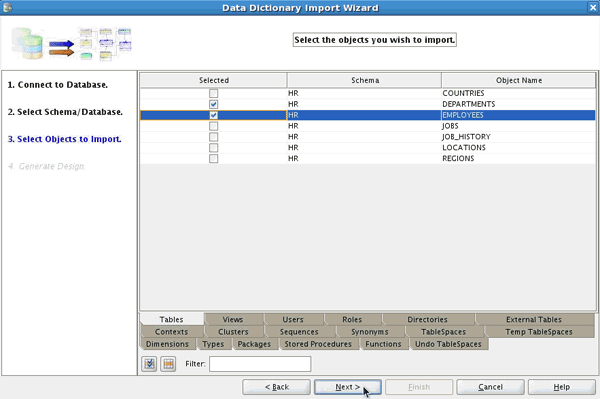
Select the DEPARTMENTS and EMPLOYEES tables and click Next.
|
|
. |
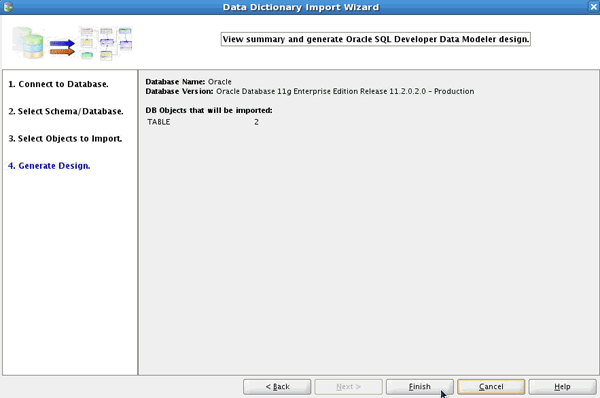
Review the objects to be imported and click Finish to generate the design.
|
|
. |
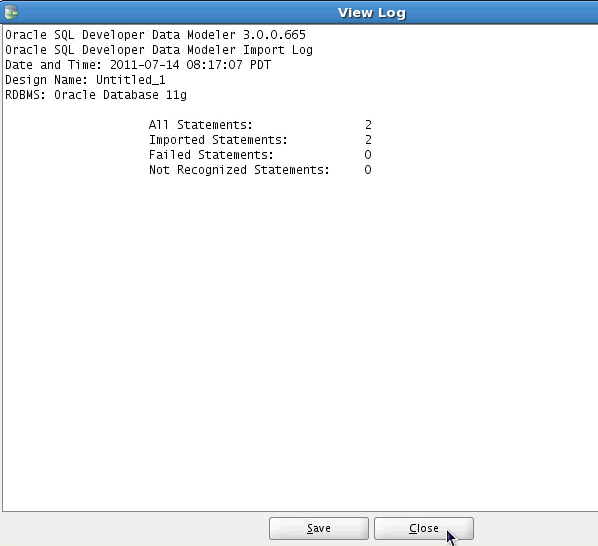
Review the log file created and click Close.
|
|
. |
The EMPLOYEES and DEPARTMENTS tables are successfully imported into SQL Developer Data Modeler.
|
Creating a New Table
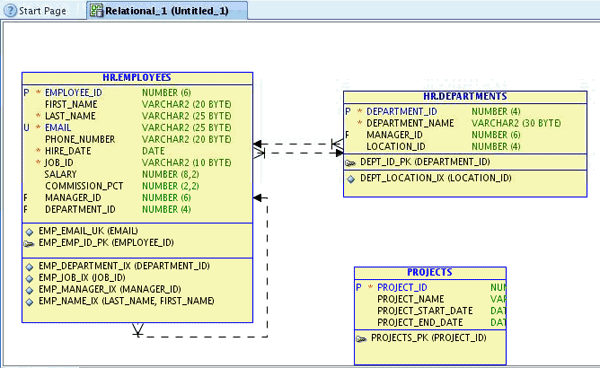
In this topic, you create a PROJECTS table. The PROJECTS table has four columns: PROJECT_ID, PROJECT_NAME, PROJECT_START_DATE, and PROJECT_END_DATE.
|
. |
Click the New Table icon (
|
|---|---|
|
. |
Move the cursor to the white space of the diagram and click.
|
|
. |
A Table Properties - TABLE_<n> dialog opens. Enter PROJECTS for Name and click Columns on the left-navigator.
|
|
. |
To add a column, click the Create Column icon (
|
|
. |
Enter PROJECT_ID for Name. Select Logical for Datatype and NUMERIC for Type.
|
|
. |
Enter 6 for Precision. You want the PROJECT_ID column to be the Primary Key. Select the PK checkbox and click the Create Column icon to add another row.
|
|
. |
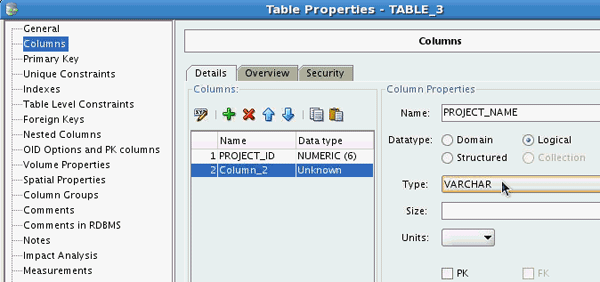
Enter PROJECT_NAME for Name. Select Logical for Datatype and VARCHAR for Type.
|
|
. |
Enter 25 for Size and select CHAR for Units. Click the Create Column icon to add another column.
|
|
. |
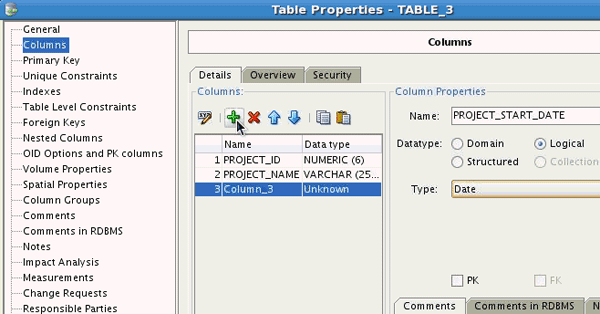
Enter PROJECT_START_DATE for Name. Select Logical for Datatype and Date for Type. Click the Create Column icon to add another column.
|
|
. |
Enter PROJECT_END_DATE for Name. Select Logical for Datatype and Date for Type. Click OK to create the table.
|
|
. |
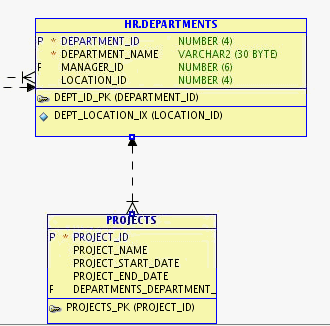
The table is created successfully.
|
Joining the New Table to Existing Table
In this topic, you create a foreign key relation between the PROJECTS table and the DEPARTMENTS tables.
|
. |
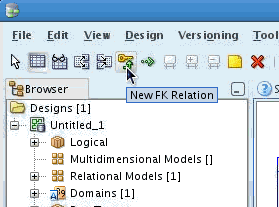
Click the New FK Relation icon (
|
|---|---|
|
. |
To create a foreign key in the PROJECTS table, select the DEPARTMENTS table and then the PROJECTS table.
|
|
. |
A ForeignKey Properties dialog opens. Select Associated Columns from the left-navigator.
|
|
. |
Confirm that DEPARTMENTS_DEPARTMENT_ID is selected for Child Column and click OK.
|
|
. |
Select the Arrow
|
|
. |
To make the FK optional, right-click on the line joining the two tables and select Properties.
|
|
. |
Deselect the Mandatory checkbox. and click OK.
|
|
. |
Click Yes.
|
|
. |
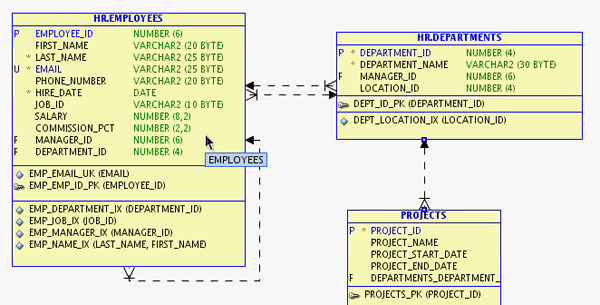
The FK is successfully created.
|
Modifying an Existing Table
In this topic, you add a MOBILE_NUMBER column to the EMPLOYEES table.
|
. |
In the diagram, double-click the EMPLOYEES table.
|
|---|---|
|
. |
Select Columns from the left-navigator.
|
|
. |
To create a new column, click the Create Column icon.
|
|
. |
Enter MOBILE_NUMBER for Name. Select Logical for Datatype and VARCHAR for Type.
|
|
. |
Enter 25 for Size and Select CHAR for Units. Click OK to create the column.
|
|
. |
The MOBILE_NUMBER column is successfully created in the EMPLOYEES table.
|
Creating DDL to Update the Database
In this topic, you compare the modified model and the existing database and create the DDL to update the database.
|
. |
Select File > Import > Data Dictionary.
|
|---|---|
|
. |
Select the previously created hr_orcl connection and click Next.
|
|
. |
Select HR schema. The data model that you modified is your point of truth. So you must select Swap Target Model. Click Next.
|
|
. |
Select the EMPLOYEES and DEPARTMENTS table and click Next.
|
|
. |
Click Finish.
|
|
. |
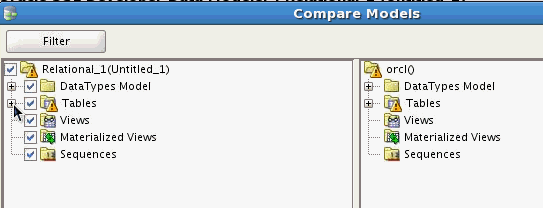
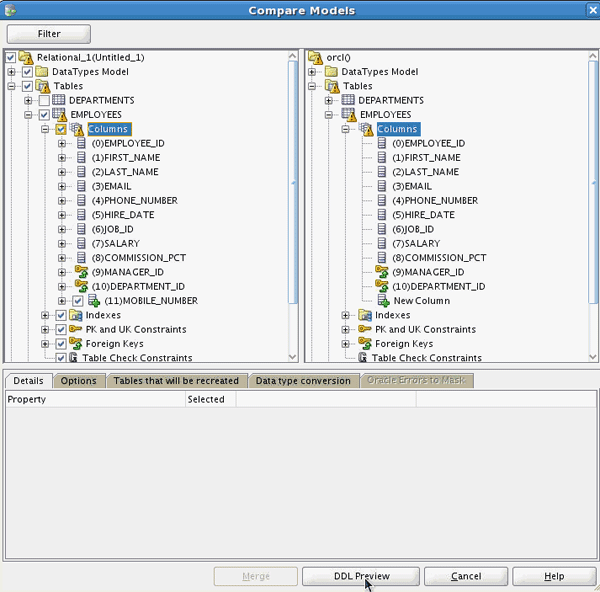
The Compare Models dialog opens. Nodes where changes have been made
are marked with a triangle symbol (
|
|
. |
Confirm that the PROJECTS table is created and the checkbox next to the node is selected. Expand the EMPLOYEES node to see the new column created.
|
|
. |
Expand Columns.
|
|
. |
Confirm that the MOBILE_NUMBER column is added and the checkbox next to it is selected.
|
|
. |
To generate the DDL for the updates you have made, click DDL Preview.
|
|
. |
The code generated is displayed. Review the CREATE and ALTER statements and click Save to save the code to a file. Note the location where you save the file as you will open it shortly.
|
|
. |
Click Close.
|
|
. |
Click Cancel to exit the Compare Models window..
|
Executing DDL to Update the Database Using SQL Developer
In this topic, you will execute the DDL generated in the previous steps using Oracle SQL Developer.
|
. |
Open Oracle SQL Developer.
|
|---|---|
|
. |
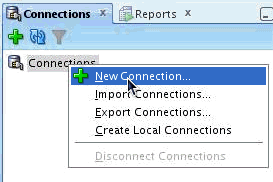
To execute the script file, you must have a connection to the HR schema. To create the connection, right-click Connections in the Connections navigator and select New Connection.
|
|
. |
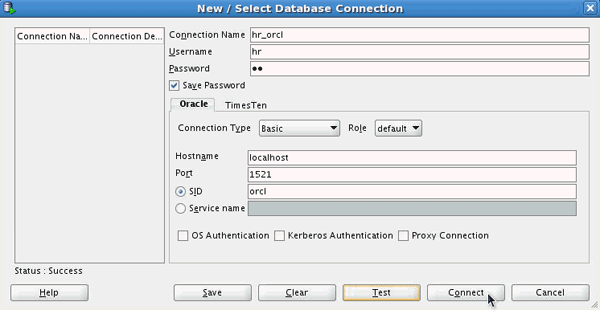
The New / Select Database Connection dialog opens. Enter the connection details as follows and click Test. Connection Name: hr_orcl
|
|
. |
If the Status is Success, click Connect.
|
|
. |
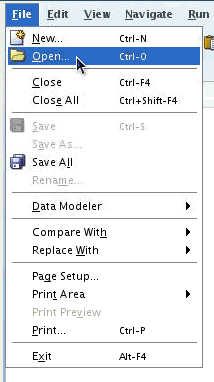
To open the script file, select File > Open.
|
|
. |
Browse to the location where you saved the file and and select it. Click Open.
|
|
. |
The file opens in a new SQL Worksheet. Select the hr_orcl connection for the Worksheet.
|
|
. |
Click the Run Script icon (
|
|
. |
Confirm that the script ran successfully.
|
Verifying the Updates to the Database
In this topic, you will verify the changes to the database after running the DDL script.
|
. |
Expand the hr_orcl connection. All the HR schema objects are listed. Expand the Tables node. Click PROJECTS to view its description.
|
|---|---|
. |
Expand the EMPLOYEES node. The MOBILE_NUMBER column is created.
|
Summary
You have successfully imported tables into Oracle SQL Developer Data Modeler. You modified the model by adding a new table and joining it to an existing table. You added a new column to an existing table. You then compared the modified model to the database tables and generated the code to update the database. You executed the code in Oracle SQL Developer and updated the database. You verified the database to confirm that the database was updated successfully.
In this tutorial, you have learned how to:
- Import tables from data dictionary
- Create new table and join to an existing table
- Create new column in an existing table
- Generate code to update database
- Execute script file in SQL Developer
- Verify updates to database in SQL Developer
Resources
- Oracle SQL Developer Data Modeler homepage on OTN.
- Oracle SQL Developer homepage on OTN.
- Oracle Data Modeling and Relational Database Design course.
- Oracle Learning Library
- Oracle University
![]()
 |
Copyright © 2011, Oracle and/or its affiliates. All rights reserved |






 )
from the Oracle SQL Developer Data Modeler toolbar.


 ).
).




 )
from the toolbar.




 ).
In this case, the tables node is marked. Expand the Tables node
to see the new table.







 ).
).


