Java EE 7: Applying JSF 2.2 Faces Flows in a Web Application
Overview
- Java Platform, Standard Edition 7 (Java SE 7; Java SE 7u11 recommended)
- NetBeans 7.3.1 IDE for Java Platform, Enterprise Edition 7 (Java EE 7)
- GlassFish 4
- Have some experience writing and deploying JSF web applications.
- Have some experience with CDI beans.
- Have installed NetBeans 7.3.1, Java EE 7, and GlassFish 4.
- Have started NetBeans.
- Have unzipped the
FaceFlowExampleApp.zipfile. - Have opened the
FaceFlowExampleAppproject in NetBeans.
Purpose
This tutorial covers the steps required to apply the Java
Server Faces 2.2 (JSF 2.2) Faces Flow feature in a customer
registration procedure for a web application.
Time to Complete
Approximately 45 minutes
Introduction
JSF technology is a user interface (UI) framework for developing Java web applications. It is based on components, events, and Model-View-Controller (MVC) architecture. Faces Flow provides an encapsulation of related views and pages. Each flow has a well-defined entry and exit point for which the developer assigned an application-specific meaning.
It takes the best part of other flow-based technologies, such as ADF Task Flow, Spring Web Flow, and Apace MyFaces CODI, and standardizes them in JSF 2.2.
Scenario
In this tutorial, you modify a sample web application, which has a customer registration use case. A customer enters information on several pages.
In this web application, the navigation between pages for entering customer information, customer address, contact information, and a summary page makes a flow. All pages and objects that deal with the customer registration process can be composed as modules. An application thus become a collection of flows instead of just views.

Contexts and Dependency Injection (CDI) defines the
conversation scope to be used in such a scenario. Faces Flows
are a good replacement for conversation scope in this scenario
because they reduce code complexity and make configuration
simpler.
Hardware and Software Requirements
The following is a list of hardware and software requirements:
Prerequisites
Before starting this tutorial, you should:
Examining the FaceFlowExampleApp Project
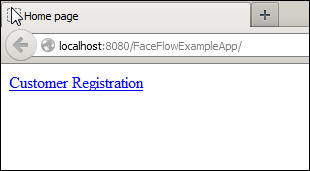
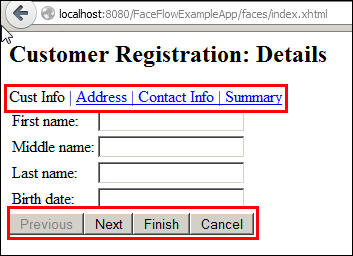
- On the home page, click the Customer Registration link to open the Customer Registration: Details page. This page is the first among the series of pages that are part of the customer registration process.
- Click the links or the buttons to navigate to each page.
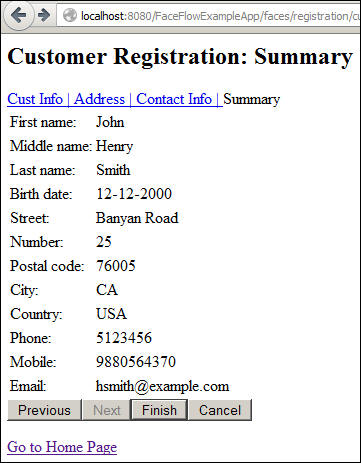
- Enter the details on each page and click the Summary link or Finish button. The Summary page displays the customer details in a single view.
Complete the following steps to run and examine the FaceFlowExampleApp
project.
On the Projects tab in NetBeans, right-click the FaceFlowExampleApp project and select Run.
The home page opens in a web browser window.
Perform the following steps:
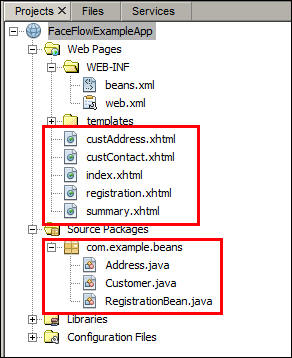
On the Projects tab in NetBeans, expand the FaceFlowExampleApp project and review the project directory structure.
Examine the xhtml pages in the Web Pages folder and the CDI beans in the com.example.beans package.
Notice that @SessionScoped is used in the
beans. This is not required because the customer information
is needed only in the flow of the customer registration
process.
Defining the Registration Flow
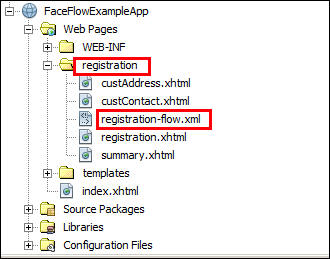
- Create a zero length XML file in the registration directory to add an empty flow definition file.
- Enter registration-flow.xml for the name of the XML file.
- Remove all text in the registration-flow.xml to make it absolutely empty.
- Ensure that the first file of the flow is named as
registration.xhtml.
Complete the following steps to define a flow in FaceFlowExampleApp
project.
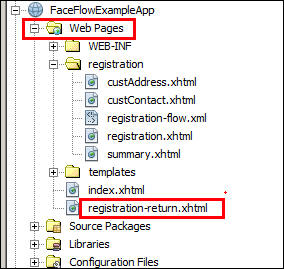
Managing the Views of the Flow
On the Projects tab in NetBeans, create a registration
folder in the Web Pages node.
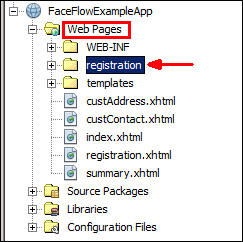
The name of the folder is the same as the name of the
flow.
Move the four facelets, custAddress.xhtml,
custContact.xhtml,
registration.xhtml,
and summary.xhtml,
from the Web Pages
folder to the
registration folder.
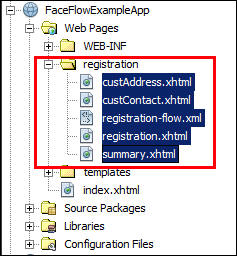
Any facelet views placed in the registration
directory are considered to be a part of that flow.
Declaring a Flow
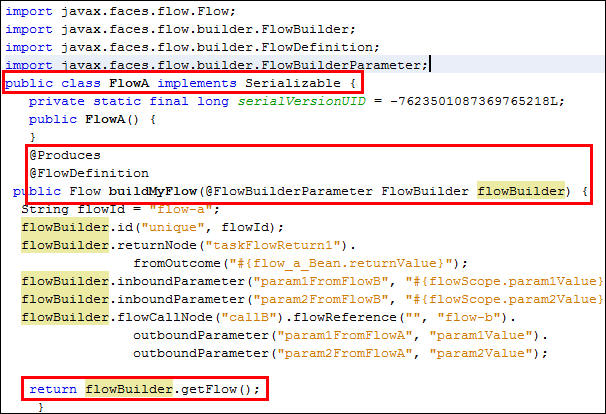
A flow can be declared two ways: using XML syntax or using a builder API. In the case of an empty flow definition, the start node is a facelet view whose name is equivalent to the flow name.
Declare a flow in XML syntax:
Examine a sample code that shows how to declare a flow definition,.
In this OBE scenario, an empty flow definition
file suffices. The code is provided only for your
information.
Returning from the Flow
To return from a flow you need a return node.
Create an XHTML page in the Web
Pages directory and name it registration-return.xhtml.
In the case of our empty flow definition, the end node
is the name of the flow, followed by the -return
string.
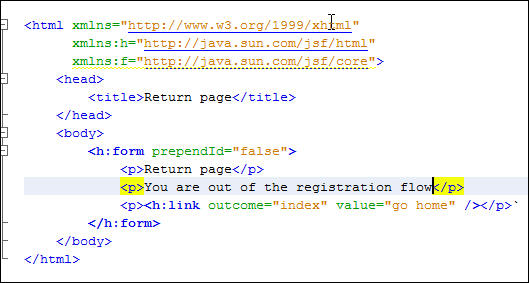
Modify the registration-return.xhtml
file to display a message that you are out of the registration flow.
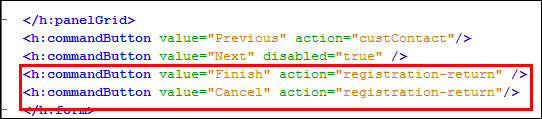
Modify the summary.xhtml file to enable navigation out of the registration flow.
For the Finish and Cancel buttons, modify the value of the action attributes to registration-return.
Faces Flows take full advantage of implicit navigation. With implicit navigation, there is no need to declare the navigation rules.
Modifying the Named Beans
- Replace the @SessionScoped
annotation with an
@FlowScoped
                        ("registration")
annotation in ReregistrationBean.java. - Import the appropriate class.
To apply the @FlowScoped annotation in the named
beans, complete the following steps.
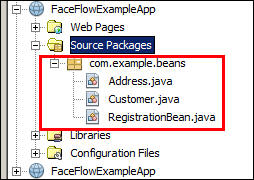
On the Projects tab, expand FaceFlowExampleApp > Source Packages > com.example.beans.
Open the three files, Address.java, Customer.java, and RegistrationBean.java, in the code editor window.
Perform the following steps:

Repeat step 3 for Customer.java and Address.java.
Running the FaceFlowExampleApp Application
- On the home page, click the Customer Registration link to start a new Faces Flow.
- Enter the customer details, address, and contact information on the relevant pages, and then click the Summary link.
- On the Summary page, click Finish. The registration-return page opens.
To run the application and test the Faces Flow feature, complete the following steps.
On the Projects tab in NetBeans, right-click the FaceFlowExampleApp project and select Run.
The home page opens in a web browser window.
Click the Customer Registration link to enter the Registration flow. The start node of the flow opens.
In accordance with the Faces Flow convention, the name of the start node is the same as the name of the flow. In this case, it is registration.xhtml.
Click the Cancel button to verify that you can return from the flow.
The registration-return page opens. The flow ends here.

Perform the following steps:
Summary
- Design and define a simple Faces Flow
- Define a start node and an end node for a flow
- Define an empty flow definition file
- Apply the
@FlowScopedannotation
- Oracle
blog about JSF 2.2 Face Flows
- JSR- 344, JSF 2.2 Specification
- The Java EE 7 Tutorial (The tutorial is an excellent source of information about the technologies included in Java EE 7.)
- To learn more about Java EE 7, visit other OBE tutorials in
the Oracle
Learning Library.
- Lead Curriculum Developer: Paromita Dutta
- Reviewer: Ed Burns
- Editor: Susan Moxley
- QA: Diganta Choudhury
In this tutorial, you learned how to:
Resources
The application in this tutorial uses JSF facelets and JSF 2.2 Faces Flow. To learn more about these technologies, see the following resources:
Credits
To help navigate this Oracle by Example, note the following:
- Hiding Header Buttons:
- Click the Title to hide the buttons in the header. To show the buttons again, simply click the Title again.
- Topic List Button:
- A list of all the topics. Click one of the topics to navigate to that section.
- Expand/Collapse All Topics:
- To show/hide all the detail for all the sections. By default, all topics are collapsed
- Show/Hide All Images:
- To show/hide all the screenshots. By default, all images are displayed.
- Print:
- To print the content. The content currently displayed or hidden will be printed.
To navigate to a particular section in this tutorial, select the topic from the list.