Using WebSocket for Real-Time Communication in Java Platform, Enterpise Edition 7
Overview
- Download and install the Java EE 7 software development kit (SDK) from http://www.oracle.com/technetwork/java/javaee/downloads/index.html
- Download and install the Java NetBeans 7.3.1 integrated development environment (IDE) from http://www.netbeans.org/downloads/index.html
- Download and install Oracle GlassFish Server 4.0 from http://www.oracle.com/technetwork/middleware/weblogic/downloads/index.html
- Knowledge of the Java programming language.
- Basic knowledge of Java EE 7.
- Basic knowledge of HTML 5, JavaScript, and Cascading Style Sheets (CSS).
Purpose
This tutorial shows you how to create an application that uses the WebSocket API for real-time communication between a client and a server.
Time to Complete
Approximately 1 hour
Introduction
Modern web applications require more interactivity than ever before fo client/server communications. HTTP, however, wasn't built to deliver the kind of interactivty needed today. "Push" or Comet techniques, such as long-polling, emerged as a way to allow a server to push data to a browser. Because these techniques usually rely on HTTP, they present some disadvantages to client/server communications, such as HTTP overhead. These disadvantages results in less efficient communication between the server and the web browser, especially for real-time applications.
WebSocket provides an alternative to this limitation by providing bi-directional, full-duplex, real-time, client/server communications. The server can send data to the client at any time. Because WebSocket runs over TCP, it also reduces the overhead of each message. WebSocket also provides greater scalability for message-intensive applications because only one connection per client is used (whereas HTTP creates one request per message). Finally, WebSocket is part of Java Plaform, Enterprise Edition 7 (Java EE 7), so you can use other technologies of the Java EE 7 stack.
Scenario
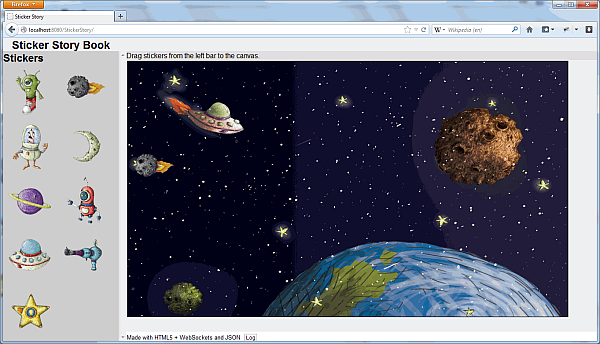
In this tutorial, you create a sticker story web application that children can use to create a story collaboratively by dragging images into a book or canvas. When an image sticker is dragged and dropped onto the canvas, the sticker is rendered in all other Web browsers that are connected to a server.
Software Requirements
The following software requirements are needed for this tutorial:
Prerequisites
Before starting this tutorial, you should have:
Introduction to WebSocket in Java EE 7
- Full duplex client-server communication.
- Integration with other Java EE technologies. You can inject objects and Enterprise JavaBeans (EJB) by using components such as Contexts and Dependency Injection (CDI).
- Low-level communication (works on the underlying TCP/IP connection).
- Low latency communication.
WebSocket is a standard web technology, which simplifies much of the complexity of bidirectional communication and connection management between clients and a server. It maintains a constant connection that can be used to read messages from and write messages to a server and the client at the same time. WebSocket was introduced as part of the HTML 5 initiative defining a JavaScript interface for browsers to use WebSocket to transfer and receive data.
Here are some of the benefits of WebSocket:
Creating a WebSocket Server Endpoint
- javax.websocket, which contains the Java EE 7 support for WebSocket.
- java.io, which is used for read and write operations.
- java.util, which is used to store the sticker objects that are added to the project and the list of connected users (or sessions) as collections. These collections are created as static variables to share them among all the WebSocket instances.
In this section, you create a Java EE 7 web application on which you’ll build the sticker story application.
Creating a Java EE 7 Project
Open the NetBeans IDE.
From the File menu, select New Project.

Select Java Web from Categories and Web Application from Projects and click Next.
Enter StickerStory as the project name and click Next.
Select GlassFish Server from the Server list.
Enter StickerStory as the context path and click Finish.

The StickerStory project has been created.
Right-click the StickerStory project and select Run to test your application.
A browser window opens and displays a TODO write content message. You successfully created a Java EE 7 web application by using NetBeans.
Creating the Sticker Class
In this section, you create the Sticker class, which contains the constructor, getters, and setters for the sticker object.
Select File > New File .
Select Java from Categories and Java Class from File Types and click Next.

Enter Sticker as the class name.

Enter org.sticker.websocket as the package and click Finish.
Add the following code to the Sticker.java file.
Sticker.java
package org.sticker.websocket;

public class Sticker {

    private int x;
    private int y;
    private String image;

    public Sticker() {
    }

    public int getX() {
        return x;
    }

    public void setX(int x) {
        this.x = x;
    }

    public int getY() {
        return y;
    }

    public void setY(int y) {
        this.y = y;
    }

    public String getImage() {
        return image;
    }

    public void setImage(String image) {
        this.image = image;
    }
}
Select File > Save to save the file
You successfully created the Sticker class.
Declaring, Defining, and Configuring the WebSocket Actions
Select File > New File.

Select Java from Categories and Java Class from File Types and click Next.

Enter StoryWebSocket as the class name.
Enter org.sticker.websocket as the package and click Finish.
Add the following highlighted code to import the required classes and declare the structures to store the stickers and sessions.
package org.sticker.websocket;


 import java.io.*;
 import java.util.*;
 import javax.websocket.EncodeException;
 import javax.websocket.OnClose;
 import javax.websocket.Session;
 import javax.websocket.server.ServerEndpoint;
 import javax.websocket.OnMessage;
 import javax.websocket.OnOpen;


public class StoryWebsocket {


 private static final List<Sticker> stickers = Collections.synchronizedList(new LinkedList<Sticker>());
 private static final Set<Session> sessions = Collections.synchronizedSet(new HashSet<Session>());


}
Note that the following packages are required:
Add the following highlighted code to declare and map the server endpoint path:
package org.sticker.websocket;

import java.io.*;
import java.util.*;
import javax.websocket.EncodeException;
import javax.websocket.OnClose;
import javax.websocket.Session;
import javax.websocket.server.ServerEndpoint;
import javax.websocket.OnMessage;
import javax.websocket.OnOpen;


 @ServerEndpoint(
    value = "/story/notifications",
    encoders = {StickerEncoder.class},
    decoders = {StickerDecoder.class})


public class StoryWebSocket {

    private static final List<Sticker> stickers = Collections.synchronizedList(new LinkedList<Sticker>());
    private static final Set<Session> sessions = Collections.synchronizedSet(new HashSet<Session>());

}
The @ServerEndpoint annotation allows you to declare a WebSocket, define its URL mapping, and define its encoders and decoders. In this case, the server endpoint is mapped to the /story/notifications URL, the StickerEncoder.class file as the server endpoint's encoder, and the StickerDecoder.class file as the server endpoint's decoder.
Note: Don't worry about NetBeans declaring an error on the encoders and decoders values of the server endpoint configuration. You'll create those objects in the next section.
To define the OnMessage action, add the following highlighted code:
package org.sticker.websocket;

import java.io.*;
import java.util.*;
import javax.websocket.EncodeException;
import javax.websocket.OnClose;
import javax.websocket.Session;
import javax.websocket.server.ServerEndpoint;
import javax.websocket.OnMessage;
import javax.websocket.OnOpen;

@ServerEndpoint(
   value = "/story/notifications",
   encoders = {StickerEncoder.class},
   decoders = {StickerDecoder.class})

public class StoryWebSocket {

private static final List<Sticker> stickers = Collections.synchronizedList(new LinkedList<Sticker>());
private static final Set<Session> sessions = Collections.synchronizedSet(new HashSet<Session>());


  @OnMessage
   public void onMessage(Session session, Sticker sticker) {
      stickers.add(sticker);
      for (Session openSession : sessions) {
         try {
            openSession.getBasicRemote().sendObject(sticker);
         } catch (IOException | EncodeException ex) {
            sessions.remove(openSession);
         }
      }
   }


}
The @OnMessage annotation is the core of the WebSocket implementation. This annotated method is invoked when the client sends a message to the server. In this case, when the client sends a Sticker object to the WebSocket server, the latter stores the Sticker object and pushes it to all connected peers.
To define the OnOpen and OnClose actions, add the following highlighted code:
package org.sticker.websocket;

import java.io.*;
import java.util.*;
import javax.websocket.EncodeException;
import javax.websocket.OnClose;
import javax.websocket.Session;
import javax.websocket.server.ServerEndpoint;
import javax.websocket.OnMessage;
import javax.websocket.OnOpen;

@ServerEndpoint(
   value = "/story/notifications",
   encoders = {StickerEncoder.class},
   decoders = {StickerDecoder.class})

public class StoryWebSocket {

   private static final List<Sticker> stickers = Collections.synchronizedList(new LinkedList<Sticker>());
   private static final Set<Session> sessions = Collections.synchronizedSet(new HashSet<Session>());

   @OnMessage
   public void onMessage(Session session, Sticker sticker) {
      stickers.add(sticker);
      for (Session openSession : sessions) {
         try {
            openSession.getBasicRemote().sendObject(sticker);
         } catch (IOException | EncodeException ex) {
            sessions.remove(openSession);
         }
      }
   }


   @OnOpen
   public void onOpen(Session session) throws IOException, EncodeException {
      sessions.add(session);
      for (Sticker sticker : stickers) {
         session.getBasicRemote().sendObject(sticker);
      }
    }

   @OnClose
   public void onClose(Session session) throws IOException, EncodeException {
      sessions.remove(session);
   }


}
The @OnOpen and @OnClose annotations define the lifecycle of the WebSocket. The OnOpen action is invoked when a new connection to the WebSocket server is created. Similarly, the OnClose action is invoked when a connection to the WebSocket server is closed. In this application, the OnOpen action pushes Sticker objects to a newly connected user.
Click File > Save to save the file.
You have successfully created and configured a WebSocket server endpoint.
Creating the JSON Encoder and Decoder
The sticker story application uses the Java API for JSON Processing (JSR 353), which is part of Java EE 7. This API allows a client and a WebSocket server to communicate using JSON objects. To accomplish this, the WebSocket server encodes the text sent to the client into objects and serializes them. Once received, the client decodes these objects and converts them back into text. In this section, you create a JSON encoder and decoder for the Sticker class that you created.
Creating the JSON Encoder
In this section, you create the StickerEncoder class that encodes a Sticker object and sends it to the WebSocket server by writing it to the stream.
Select File > New File.

Select Java from Categories and Java Class from File Types and click Next.
Enter StickerEncoder as the class name.
Enter org.sticker.websocket as the package and click Finish.

Add the following code to the StickerEncoder.java file:
StickerEncoder.java
package org.sticker.websocket;

import java.io.IOException;
import java.io.Writer;
import javax.json.JsonObject;
import javax.json.JsonWriter;
import javax.json.spi.JsonProvider;
import javax.websocket.EncodeException;
import javax.websocket.Encoder;
import javax.websocket.EndpointConfig;

public class StickerEncoder implements Encoder.TextStream<Sticker> {

  @Override
  public void encode(Sticker sticker, Writer writer) throws EncodeException, IOException {
    JsonProvider provider = JsonProvider.provider();
    JsonObject jsonSticker = provider.createObjectBuilder()
            .add("action", "add")
            .add("x", sticker.getX())
            .add("y", sticker.getY())
            .add("sticker", sticker.getImage())
            .build();
    try (JsonWriter jsonWriter = provider.createWriter(writer)) {
      jsonWriter.write(jsonSticker);
    }
  }

  @Override
  public void init(EndpointConfig ec) {
  }

  @Override
  public void destroy() {
  }
}
You have successfully created a WebSocket encoder.
Creating the JSON Decoder
In this section, you create the StickerDecoder class so that you can read data from the WebSocket stream by using the Decoder.TextStream interface. This interface allows you to read data from the socket by using a JsonReader object, constructed by using a Reader class, and to transform data the JSON object sent by the client back into text.
Select File > New File.
Select Java from Categories and Java Class from File Types and click Next.
Enter StickerDecoder as the class name.
Enter org.sticker.websocket as the package and click Finish.

Add the following code to the StickerDecoder.java file:
StickerDecoder.java
package org.sticker.websocket;

import java.io.IOException;
import java.io.Reader;
import javax.json.JsonObject;
import javax.json.JsonReader;
import javax.json.spi.JsonProvider;
import javax.websocket.DecodeException;
import javax.websocket.Decoder;
import javax.websocket.EndpointConfig;

public class StickerDecoder implements Decoder.TextStream<Sticker> {

 @Override
 public Sticker decode(Reader reader) throws DecodeException, IOException {
  JsonProvider provider = JsonProvider.provider();
  JsonReader jsonReader = provider.createReader(reader);
  JsonObject jsonSticker = jsonReader.readObject();
  Sticker sticker = new Sticker();
  sticker.setX(jsonSticker.getInt("x"));
  sticker.setY(jsonSticker.getInt("y"));
  sticker.setImage(jsonSticker.getString("sticker"));
  return sticker;

 }

    @Override
    public void init(EndpointConfig ec) {
    }

    @Override
    public void destroy() {
    }
}
Note: Do not create a JsonReader object. To create readers and writes, use the JsonProvider class.
You have successfully created a WebSocket decoder.
Creating the WebSocket Client Endpoint
In this section, you create the client that interacts with the WebSocket server.
Importing the Graphics Resources
In this section, you import the resources needed to render the user interface of the project.
Download the following file, which contains the images, stylesheets, and JavaScript files necessary for rendering, dragging, and dropping the stickers. To download the file, click here.
Extract the resources folder to your selected location (you will import it into NetBeans in the next step).
Drag and drop the resources location into the Web Pages folder in NetBeans.
The resources folder is now added to the project.
You successfully imported the resource files into the StickerStory project in NetBeans.
Configuring the Client Endpoint
In this section, you configure the WebSocket client endpoint controls. You create a new connection to the WebSocket server endpoint and then you specify a callback function that executes when a message is received.
Open the story-page.js file.
Create a WebSocket connection by adding the following highlighted code to the initialize function:
function initialize() {
   var canvas = document.getElementById("board");
   var ctx = canvas.getContext("2d");
   var img = document.getElementById("background_img");
   ctx.drawImage(img, 0, 0);

   socket = new WebSocket("ws://localhost:8080/StickerStory/story/notifications");


}
The WebSocket connection is created. Notice that this connection is the one that you mapped in Section 2.
Specify a callback function by adding the following highlighted code to the initialize function.
function initialize() {
   var canvas = document.getElementById("board");
   var ctx = canvas.getContext("2d");
   var img = document.getElementById("background_img");
   ctx.drawImage(img, 0, 0);
   socket = new WebSocket("ws://localhost:8080/StickerStory/story/notifications");

   socket.onmessage = onSocketMessage;


}
A callback function is now specified. When the client receives a message, the onSocketMessage function is executed.
Create the onSocketMessage function by adding the following code at the class level.
function onSocketMessage(event) {
   if (event.data) {
      var receivedSticker = JSON.parse(event.data);
      log("Received Object: " + JSON.stringify(receivedSticker));
      if (receivedSticker.action === "add") {
         var imageObj = new Image();
         imageObj.onload = function() {
            var canvas = document.getElementById("board");
            var context = canvas.getContext("2d");
            context.drawImage(imageObj, receivedSticker.x, receivedSticker.y);
         };
         imageObj.src = "resources/stickers/" + receivedSticker.sticker;
      }
   }
}
The onSocketMessage function is now defined.
To allow the client to send messages to the server, add the following highlighted line the drop function.
function drop(ev) {
   ev.preventDefault();
   var bounds = document.getElementById("board").getBoundingClientRect();
   var draggedText = ev.dataTransfer.getData("text");
   var draggedSticker = JSON.parse(draggedText);
   var stickerToSend = {
      action: "add",
      x: ev.clientX - draggedSticker.offsetX - bounds.left,
      y: ev.clientY - draggedSticker.offsetY - bounds.top,
      sticker: draggedSticker.sticker
   };

   socket.send(JSON.stringify(stickerToSend));


   log("Sending Object " + JSON.stringify(stickerToSend));
}
The socket.send() function sends a JSON string with the sticker's coordinates and type to the server.
Select File > Save to save the file.
The story-page.js file should contain the following code:
story-page.js
var socket = null;
function initialize() {
 var canvas = document.getElementById("board");
 var ctx = canvas.getContext("2d");
 var img = document.getElementById("background_img");
 ctx.drawImage(img, 0, 0);
 socket = new WebSocket("ws://localhost:8080/StickerStory/story/notifications");
 socket.onmessage = onSocketMessage;
}

function drag(ev) {
 var bounds = ev.target.getBoundingClientRect();
 var draggedSticker = {
  sticker: ev.target.getAttribute("data-sticker"),
  offsetX: ev.clientX - bounds.left,
  offsetY: ev.clientY - bounds.top
 };
 var draggedText = JSON.stringify(draggedSticker);
 ev.dataTransfer.setData("text", draggedText);
}

function drop(ev) {
 ev.preventDefault();
 var bounds = document.getElementById("board").getBoundingClientRect();
 var draggedText = ev.dataTransfer.getData("text");
 var draggedSticker = JSON.parse(draggedText);
 var stickerToSend = {
  action: "add",
  x: ev.clientX - draggedSticker.offsetX - bounds.left,
  y: ev.clientY - draggedSticker.offsetY - bounds.top,
  sticker: draggedSticker.sticker
 };
 socket.send(JSON.stringify(stickerToSend));
 log("Sending Object " + JSON.stringify(stickerToSend));
}

function allowDrop(ev) {
 ev.preventDefault();
}

function onSocketMessage(event) {
 if (event.data) {
  var receivedSticker = JSON.parse(event.data);
  log("Received Object: " + JSON.stringify(receivedSticker));
  if (receivedSticker.action === "add") {
   var imageObj = new Image();
   imageObj.onload = function() {
    var canvas = document.getElementById("board");
    var context = canvas.getContext("2d");
    context.drawImage(imageObj, receivedSticker.x, receivedSticker.y);
   };
   imageObj.src = "resources/stickers/" + receivedSticker.sticker;
  }
 }
}

function toggleLog() {
 var log = document.getElementById("logContainer");
 if (!log.getAttribute("style")) {
  log.setAttribute("style", "display:block;");
 } else {
  log.setAttribute("style", "");
 }
}

var logCount = 0;
function log(logstr) {
 var logElement = document.getElementById("log");
 logElement.innerHTML = "<b>[" + logCount + "]: </b>" + logstr + "<br>" + logElement.innerHTML;
 logCount++;
}

window.onload = initialize;
Rendering the StickerStory Application
In this section you create the index page that pulls the previously created elements together.
Open the index.html file.

Add the following code.
index.html
<?xml version='1.0' encoding='UTF-8' ?>
<!DOCTYPE html>
<html>
  <head>
    <title>Sticker Story</title>
    <link href="resources/styles.css" rel="stylesheet" type="text/css" >
    <script src="resources/story-page.js" type="text/javascript"></script>
  </head>
  <body>
    <header>
      <h1>Sticker Story Book</h1>
    </header>
    <nav>
      Drag stickers from the left bar to the canvas.
    </nav>
    <aside>
      <h2>Stickers</h2>
      <div id="stickerContainer">
        <img src="resources/stickers/alien.png"
             data-sticker="alien.png"
             style="float:left"
             draggable="true" ondragstart="drag(event);" >
        <img src="resources/stickers/asteroid.png"
             data-sticker="asteroid.png"
             style="float:left"
             draggable="true" ondragstart="drag(event);" >
        <img src="resources/stickers/astronaut.png"
             data-sticker="astronaut.png"
             style="float:left"
             draggable="true" ondragstart="drag(event);" >
        <img src="resources/stickers/moon.png"
             data-sticker="moon.png"
             style="float:left"
             draggable="true" ondragstart="drag(event);" >
        <img src="resources/stickers/planet.png"
             data-sticker="planet.png"
             style="float:left"
             draggable="true" ondragstart="drag(event);" >
        <img src="resources/stickers/robot.png"
             data-sticker="robot.png"
             style="float:left"
             draggable="true" ondragstart="drag(event);" >
        <img src="resources/stickers/ship.png"
             data-sticker="ship.png"
             style="float:left"
             draggable="true" ondragstart="drag(event);" >
        <img src="resources/stickers/spacegun.png"
             data-sticker="spacegun.png"
             style="float:left"
             draggable="true" ondragstart="drag(event);" >
        <img src="resources/stickers/star.png"
             data-sticker="star.png"
             style="float:left"
             draggable="true" ondragstart="drag(event);" >
      </div>
    </aside>
    <div id="content">
      <canvas id="board" width="1000" height="580" ondrop="drop(event);"
              ondragover="allowDrop(event);">
        Canvas Not Supported.
      </canvas>
      <img src="resources/canvas2.png" id="background_img"
           width="1000" height="580" style="display:none;"/>
    </div>
    <footer>
      <small>Made with HTML5 + WebSockets and JSON</small>
      <ol>
        <li onclick="toggleLog();">Log</li>
      </ol>
    </footer>
    <div id="logContainer">
      <h2>log</h2>
      <div id="log"></div>
    </div>
  </body>
</html>
Select File > Save to save the file.
Right-click the StickerStory project and click Run to build and deploy the project.
A Web browser opens and displays the StickerStory application.
Summary
- Create and configure a WebSocket server endpoint using the WebSocket API
- Create a JSON encoder and decoder to read and write data from a socket stream
- Create and configure a WebSocket client endpoint using HTML 5 and JavaScript
- Java EE 7 Tutorial
- The Java EE 7 Tutorial chapter on WebSocket
- The Java EE 7 Tutorial chapter on JSON
- The Aquarium Blog
- JSR 353: Java API for JSON Processing
- JSR 356: Java API for WebSocke
- WebSocket.org - A WebSocket Community
- JSON.org
- "Java EE7 - Embracing HTML5" article on Java Magazine
- To learn more about Java EE 7, refer to additional OBEs in the Oracle Learning Library.
- Lead Curriculum Developer: Miguel Salazar
- Other Contributors: Eduardo Moranchel, Edgar Martinez
In this tutorial you learned how to create an application that features real-time, full-duplex communication between a client and a server by using the WebSocket API.
You also learned how to:
Resources
For more information about the topics in this tutorial, see:
Credits
To help navigate this Oracle by Example, note the following:
- Hiding Header Buttons:
- Click the Title to hide the buttons in the header. To show the buttons again, simply click the Title again.
- Topic List Button:
- A list of all the topics. Click one of the topics to navigate to that section.
- Expand/Collapse All Topics:
- To show/hide all the detail for all the sections. By default, all topics are collapsed
- Show/Hide All Images:
- To show/hide all the screenshots. By default, all images are displayed.
- Print:
- To print the content. The content currently displayed or hidden will be printed.
To navigate to a particular section in this tutorial, select the topic from the list.