
Exploring Installation Options and User Roles In Oracle Solaris 11
by Alexandre Borges
Published August 2013
Part 1 of a two-part series that describes how I installed Oracle Solaris 11 and explored its new packaging system and the way it handles roles, networking, and services. This article focuses first on exploring Oracle Solaris 11 without the need to install it, and then actually installing it on your system.
Table of Contents
Introduction
If I needed to summarize the Oracle Solaris 11 operating system in a just one word it would be perfect. Seriously. I've been working with (and teaching about) Oracle Solaris since 2001 (Oracle Solaris 8, 9, 10, and 11), and it has undergone many changes. There are many others operating systems on the market that have very good features, but none of them provides performance, security, and usability like Oracle Solaris. In addition, Oracle Solaris is running in the most critical environments around of the world.
In this article, my approach will be to show you how you can explore Oracle Solaris 11 before (or instead of) installing it. Then, I help you install it, and I will describe the Oracle Solaris 11 desktop, how to use the root role, and how to get some basic information about the system.
In Part 2 of this series, I will explain several of the important features of Oracle Solaris 11, such as networking features, the Service Management Facility, and the Image Packaging System.
Along the way, I will also share a bit about my experience installing, configuring, and administering Oracle Solaris 11 and what kind of problems I faced when I tried to use it.
About Oracle Solaris 11
First, let me provide a short definition for some important Oracle Solaris 11 features:
- ZFS: One the best files systems in the world, which offers performance, usability, and security.
- Oracle Solaris Zones: A virtualization method that has been available since Oracle Solaris 10, which enables you to run different Oracle Solaris versions (Oracle Solaris 8, 9, 10, and 11) in a virtual environment without impacting the Oracle Solaris 11 host. Furthermore, it's possible to use a feature named Resource Manager to control the resources (processor, memory, and network) used by the zones.
- Image Packing System: A new method for managing packages in Oracle Solaris 11, which is more powerful and easier to use than previous commands such
pkginfo,pkgadd,pkgrm, and so on. - Dynamic Trace (DTrace): A revolutionary and advanced tool that provides a precise method for analyzing Oracle Solaris 11 performance and assists you in troubleshooting problems.
- Common Multiprotocol SCSI TARget (COMSTAR): A framework that aims to make the configuration of iSCSI, FC, and FCoE easy.
- Service Management Facility: A very powerful and useful framework for controlling and managing Oracle Solaris 11 services.
- Boot environment (BE): A feature that changes the way you update (and upgrade) Oracle Solaris 11. Using the BE framework, it is possible to upgrade Oracle Solaris in a failsafe way by taking advantage of ZFS snapshots and clones. Updates are performed on a clone of the file system, and you can quickly boot into the new BE once the upgrade is finished. If something goes wrong, you can switch back to the original environment without any consequences. Amazing!
- Role-based access control (RBAC): An old feature from Oracle Solaris 8 that is roughly similar to the
sudofeature from Linux and makes it possible to grant very specific privileges to a normal user—without the need to reveal therootpassword—so the user can perform some administrative tasks. Since Oracle Solaris 10 and with the addition of another feature (Least Privileges), RBAC provides a very strong way to limit user or process privileges, granting just the needed rights to execute a job or task, thus, reducing the attack surface exposed to hackers. - Automatic installation: An advanced way to install several Oracle Solaris 11 machines at the same time, which is similar to the old JumpStart technology.
- IP Multipathing (IPMP): A very useful feature that provides fault tolerance and load balancing between network interfaces.
Exploring Oracle Solaris 11
Oracle Solaris 11 runs on both SPARC servers from Oracle (for example, Oracle's SPARC T-Series servers and the SPARC M5-32 server) and on the x86_64 platform, so you can execute any commands from this article on Intel or AMD hardware (x86_64 platform).
For this article, I used VMware Workstation version 8, and I chose Oracle Solaris 10 as the virtual machine hardware type.
Note: If you are using Oracle VM VirtualBox, the instructions presented in this article are still valid.
My advice is that you reserve 4 GB of RAM and an enough disk space (about 100 GB) so any test can be done. From this requirement comes a good question: what are the minimums recommended by Oracle Solaris? There are no special minimum requirements beyond 1 GB RAM and 13 GB of disk.
To get Oracle Solaris 11, you'll need an Oracle account, which is free and can be created when you download Oracle Solaris.
To download Oracle Solaris, go to http://www.oracle.com/technetwork/server-storage/solaris11/downloads/index.html and download the file that is available under the "Oracle Solaris 11.1 Live Media for x86" section. (At this time of this writing, the file is 966 MB.) This file will allow you to test a live version of Oracle Solaris 11 before you decide whether to install it. Don't forget to accept the license agreement at top of page.
Furthermore, I suggest you read an excellent document: "Oracle Solaris 11—What's New." It highlights very important features and will be especially interesting if you've worked with previous versions of Oracle Solaris.
There are some important points you need to pay attention to when initializing Oracle Solaris 11, for example, the Oracle Solaris installer won't ask you for an IP address, a mask, or a gateway. Why? Because Oracle Solaris 11 is based on a feature named Reactive Network Configuration (RNC)—formerly known as Network Auto Magic (NWAM)—which does all the dirty work. All that's required is a DHCP service. After you provide that, RNC does everything else.
Note: In addition to the automatic installation done by Oracle Solaris 11.1 Live Media, there is another kind of installation that can be done using the Oracle Solaris 11 text installer. It does the same job that the Live Media does, but it shows you the different options for setting up a fixed IP address (other than DHCP), as well as a mask and a gateway. In addition, it installs a server-based set of packages (whereas Live Media installs a desktop-based set of packages), it allows you to configure the root account as a role or user (more about that later), and it demands less memory than the Live Media method.
Next, you should take the Oracle Solaris 11 DVD (or .iso file) and associate it with a virtual machine. To do this, select VM->Settings. Then, you should go to the CD/DVD section and click the Browse button and point to the .iso file. Don't forget to select Connect at power on and click OK.
After you turn on your virtual machine, the boot process happens and a screen similar to Figure 1 will be shown.
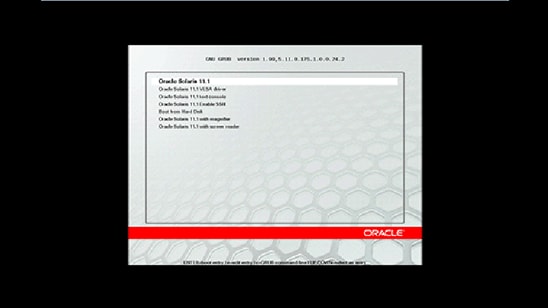
Figure 1 - Oracle Solaris 11 Install Options
Since the Oracle Solaris 11.1 option is already highlighted, you don't need to do anything. Just press Enter, and the Oracle Solaris installation wizard will present the next screen (Figure 2), where you can choose the keyboard and the language:
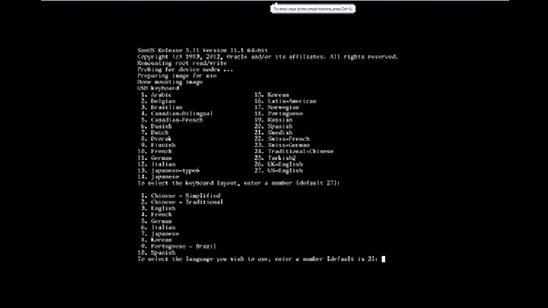
Figure 2 - Selecting Keyboard and Language
Once you have chosen the keyboard and language, the next screen you'll see is a functional desktop (Figure 3) that provides some important icons.
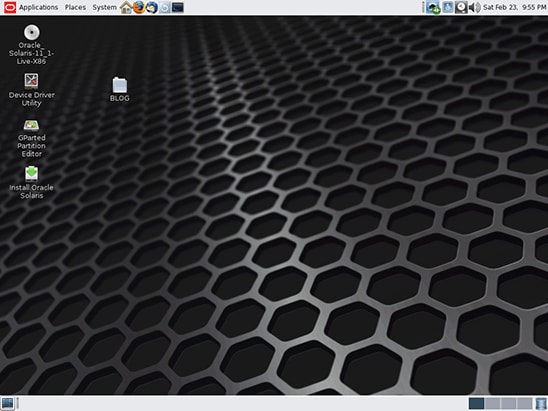
Figure 3 - Oracle Solaris 11 Functional Desktop
One icon is labeled GParted Partition Editor, which brings up a tool you can use to modify disk partitions and adapt them to your installation. See Figure 4.
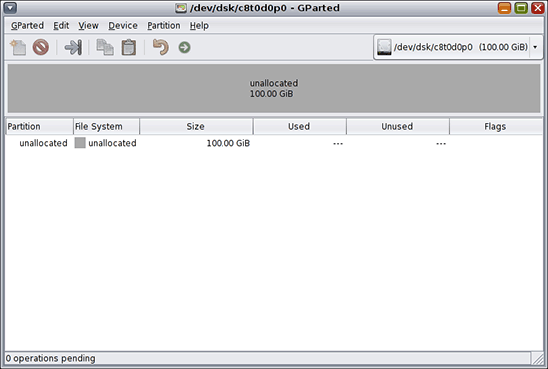
Figure 4 - GParted Partition Editor
In addition, there is an icon for another tool named Device Driver Utility, which enables you to check whether Oracle Solaris 11 can offer device drivers for all the hardware on your machine. Figure 5 shows a sample screen. It's advisable to run this tool before installing Oracle Solaris 11 to determine whether there are any devices for which Oracle Solaris 11 cannot provide a suitable software driver.
Remember, at this point, you are running an Oracle Solaris 11 Live Media DVD version and nothing has been installed yet. By the way, if the application asks you for a password, the default password is solaris.
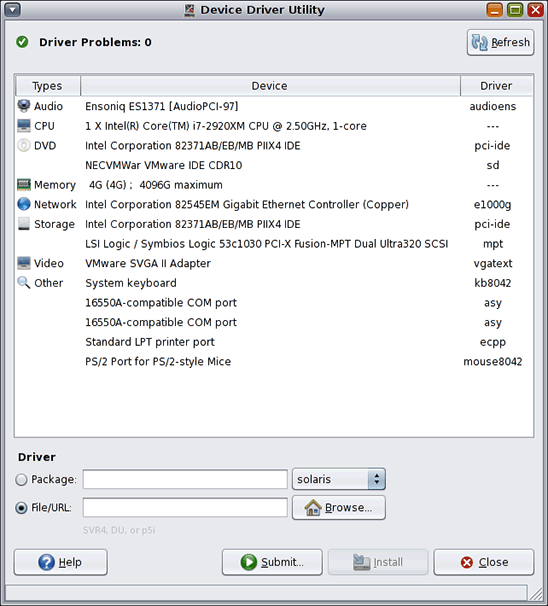
Figure 5 - Device Driver Utility
As you can see in Figure 5, I am running Oracle Solaris 11 on a VMware virtual machine and everything runs fine, but here's something that's important to know in case you run into some problems. If you look at bottom of the screen, you'll see a Submit button. When you submit the submission data to Oracle (the appropriate e-mail address is feedback_ww-grp@oracle.com), you will help make Oracle Solaris 11 better.
How? Here is an amazing story: some years ago, when I was still using Oracle Solaris 10, the installation couldn't find a device driver that was suitable for my network card. I submitted a report to Sun Microsystems, and I let the matter drop. Some weeks after, I received an e-mail from Sun telling me that my network driver would be included in the next Solaris 10 release.
Figure 6 shows the screen for submitting information to Oracle:
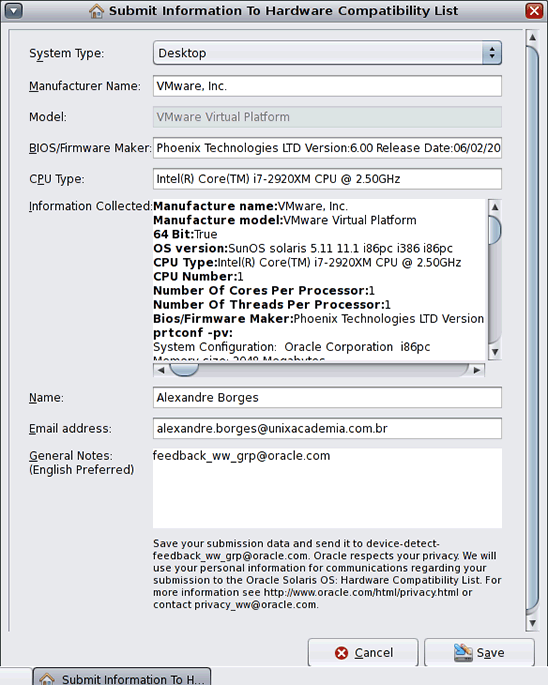
Figure 6 - Submitting Information to the Hardware Compatibility List
Installing Oracle Solaris 11
Now that we have seen some tools from the Oracle Solaris 11 installation DVD, let's install Oracle Solaris 11.
To start, click the Install Oracle Solaris icon on the desktop. You will see a welcome screen like the one shown in Figure 7:
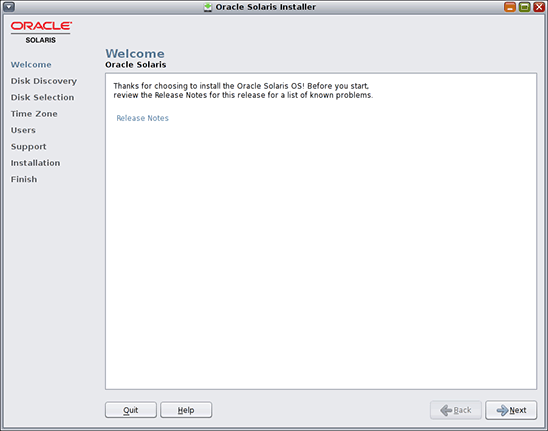
Figure 7 - Oracle Solaris 11 Installer Welcome Screen
Click Next.
The screen shown in Figure 8 is displayed. There, you have the opportunity to specify whether to use local disks or iSCSI disks to install Oracle Solaris 11. Because I set up my machine to use VMware, let's choose Local Disks and click Next.
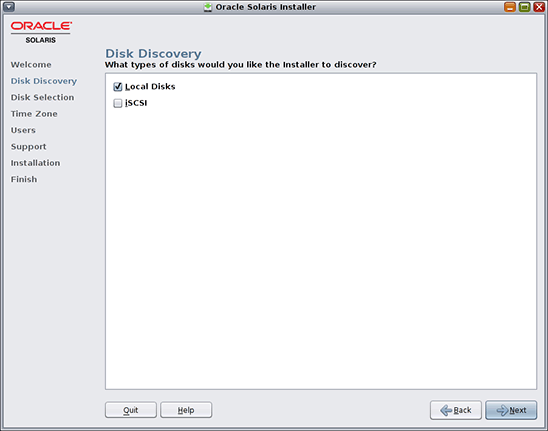
Figure 8 - Disk Discovery Screen
The screen shown in Figure 9 is displayed, which shows two options. To make things simple, let's choose Use the whole disk and then click Next.

Figure 9 - Disk Selection
The screen shown in Figure 10 appears. This is a typical screen you'll recognize from other operating systems, in which you must select your region, location, and your time zone. It's recommended to also set the date and time, but it's also possible to use the NTP service in Oracle Solaris 11.
After making the necessary selections, click Next.
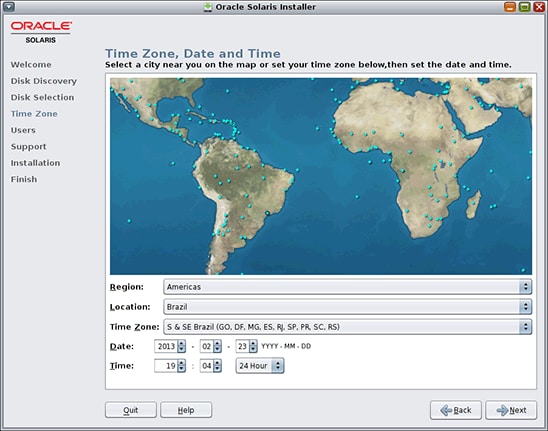
Figure 10 - Time Zone, Date, and Time
The next screen (shown in Figure 11) asks you to create a regular user account by entering your name, a username, and a password. It's advisable to pick a password composed of letters (lowercase and uppercase), numbers, and special characters.
In the Computer name box, enter a simple name that contains lowercase letters (because UNIX is case-sensitive) and no special characters (such as #, !, and $).
Be aware that this user account is going to be used for your first login on Oracle Solaris 11, so don't forget your password! Then click Next.
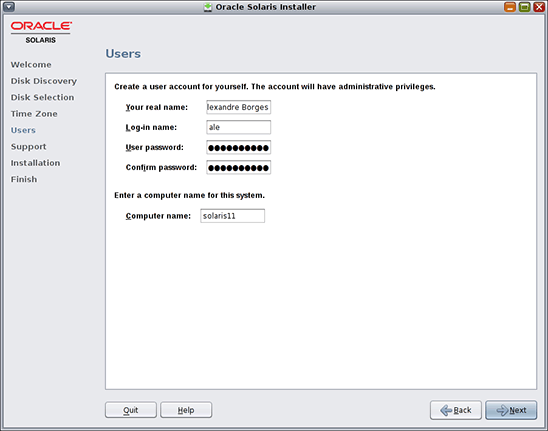
Figure 11 - Creating User Accounts
If you already have an Oracle Support account, in the screen shown in Figure 12, you can provide details of your Oracle profile (e-mail address and password) to receive security news from Oracle about Oracle Solaris 11.
Since we are just testing and learning about Oracle Solaris 11 now, we must deselect the I wish to receive security updates via My Oracle Support checkbox and leave everything else untouched in this screen. Then click Next.
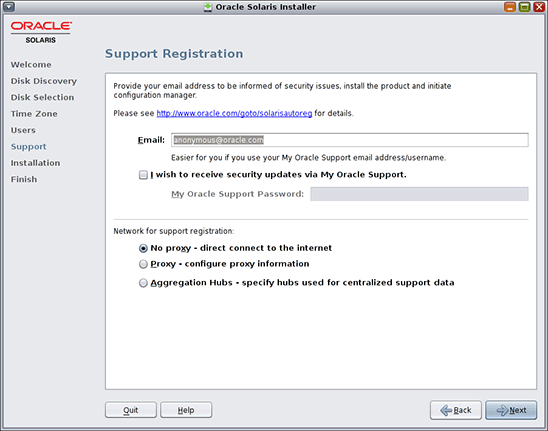
Figure 12 - Registering for Support
Next, we see the final summary screen (Figure 13) for our Oracle Solaris 11 installation. Here, review whether all your choices are correct, and then click Install.
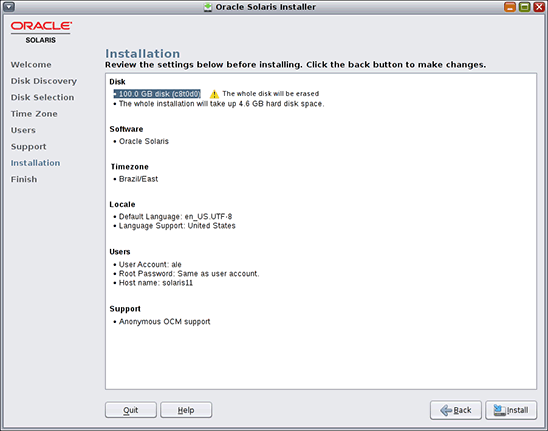
Figure 13 - Verifying the Installation Instructions
The installation begins and the whole operating system will be installed. You have time for a cup of coffee (or, in my case, a Coke). On my computer (a notebook Dell workstation 6600 using an Intel 930 i7 Extreme Edition processor), the installation process took 10 minutes.
After the installation is complete, you should click Reboot.
Taking Your First Steps with Oracle Solaris 11
During the first boot, you should see the Oracle Solaris Grub menu (which is very similar to the Grub menu in Oracle Linux). It will have only one option, as shown in Figure 14:
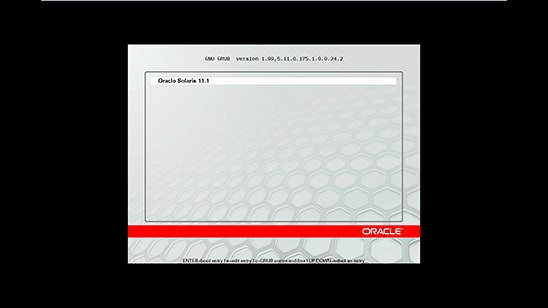
Figure 14 - The Oracle Grub Menu
As with Linux installations, you might want to customize the boot parameters of your new Oracle Solaris 11 installation by pressing the "e" key (to edit) in the screen shown in Figure 15:
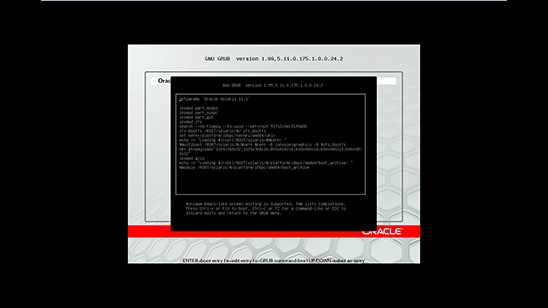
Figure 15 - Customizing the Boot Parameters
Since we are at the beginning of our exploration of Oracle Solaris 11, let's leave everything as is for now, so to press ESC to return to the previous screen (Figure 14). From the initial menu, press Enter and Oracle Solaris 11 will go through its boot sequence. (which takes some time) and, finally, the login screen is displayed:
Enter the username you specified during the installation.
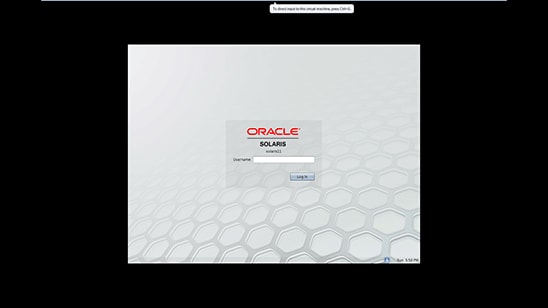
Figure 16 - Login Screen
On the next screen (shown in Figure 17), enter the password you specified during the installation. You can also change the Window Manager (GNOME or xterm), the keyboard, and the language.
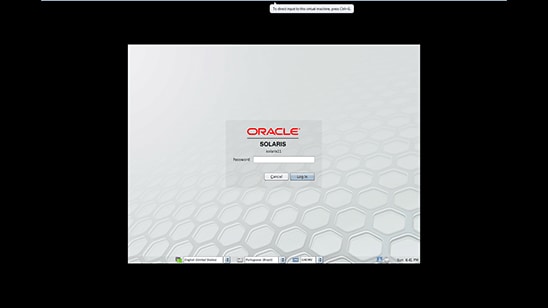
Figure 17 - Password Screen
After you have entered the password, the Oracle Solaris 11 desktop is shown (Figure 18):
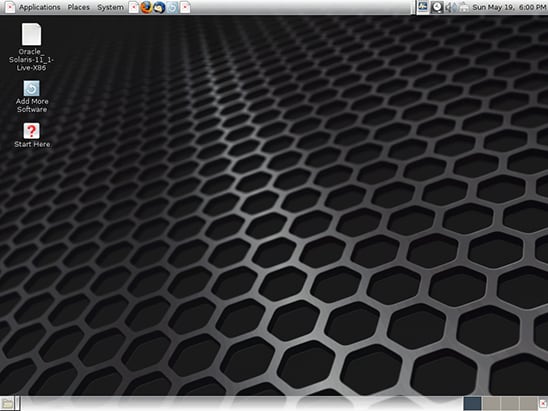
Figure 18 - Oracle Solaris Desktop
Using the root Role
Now that you have logged in, you might have the following question: "Why I can't use the root account?" The root account in Oracle Solaris 11 (as in Oracle Solaris 10) is just a role. You can use this role after you have logged in using a normal account (in my case, alex) by executing a command such as su - root.
Using this root role, you will be able to do everything you need to do in your environment. In future articles, I hope to cover RBAC in more detail. For now, let's learn how we can use the root role.
First, open a terminal window. This is a simple task: just right-click the background and choose Open Terminal. Then type the following command:
$ su - root
As shown in Figure 19, a new password will be required. I suggest you enter a new password that consists of letters (uppercase and lowercase), numbers, and special characters.
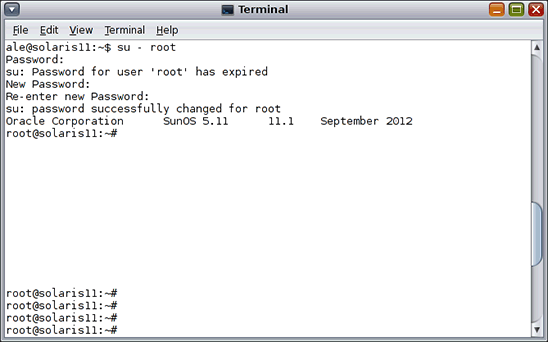
Figure 19 - Creating a Root Password
Now, we can proceed. If you recall, I said earlier that the root account is a role (similar to RBAC concepts). I can prove that by showing a very interesting file named /etc/user_attr:
# more /etc/user_attr

# The system provided entries are stored in different files
# under "/etc/user_attr.d".  They should not be copied to this file.

root::::type=role
alex::::lock_after_retries=no;profiles=System Administrator;roles=root
From this file, we can extract a lot of information:
- The
rootaccount is a role (it's not a user). - The only account that is able to use this
rootrole isalex. - Even if
alexenters a wrong password several times, he won't be locked out.
Now that we understand this file, let's convert the root role into a root user by typing the following:
# rolemod -K type=normal root
For this command to take effect, select System -> Log out. Then, try to log in again using the root account. There will be an option for you to set up the Window Manager (GNOME), the keyboard, and the language.
It would be useful to check the /etc/user_attr file again to see what changes the rolemod command made:
# more /etc/user_attr

#
# The system provided entries are stored in different files
# under "/etc/user_attr.d".  They should not be copied to this file.
#
alex::::profiles=System Administrator;roles=root;lock_after_retries=no
Notice that the line root::::type=role has disappeared. Our root account is a user account from now on.
Moreover, we can verify the same information by typing the following:
# id -a
uid=0(root) gid=0(root) groups=0(root),1(other),2(bin),3(sys),4(adm),5(uucp),6(mail),7(tty),8(lp),9(nuucp),12(daemon)
As we can see, we are logged in as root, our primary group is root, and we take part in many others secondary groups. Every configuration comes from two main files: /etc/passwd and /etc/shadow.
From time to time, changing our root password is a good idea. It is easy to do:
# passwd root
Every change of a user password alters the /etc/shadow file.
One more thing: if someone asks us to prove that our Oracle Solaris 11 installation succeeded, how can we show that? Once again, it is easy. As shown in Listing 1, there is a file that shows us everything about the Oracle Solaris 11 installation:
# more /var/sadm/system/logs/install_log

2013-05-19 20:07:10,837   InstallationLogger INFO       **** START ****
2013-05-19 20:07:11,152   InstallationLogger INFO       Loading GLADE files...

2013-05-19 20:07:11,313   InstallationLogger INFO       Done loading GLADE files.

PROGRESS REPORT: progress percent:0 Preparing for Installation
2013-05-19 20:07:11,497   InstallationLogger INFO       Initial screen is screen [0] [Welcome Screen]
PROGRESS REPORT: progress percent:100 TargetDiscovery completed.
2013-05-19 20:07:14,019   InstallationLogger INFO       Next screen is screen [1] [Disk Discovery Screen]
2013-05-19 20:07:15,002   InstallationLogger INFO       Starting Disk Discovery validation.
2013-05-19 20:07:15,004   InstallationLogger INFO       Next screen is screen [2] [Disk Screen]
2013-05-19 20:07:15,107   InstallationLogger INFO       TD XML:
<target name="discovered">
  <disk whole_disk="false">
    <disk_name name="c8t0d0" name_type="ctd"/>
    <disk_prop dev_type="scsi" dev_vendor="VMware," dev_size="33543720secs"/>
    <disk_keyword key="boot_disk"/>
  </disk>
  <logical noswap="true" nodump="true"/>
</target>

2013-05-19 20:07:15,108   InstallationLogger INFO       TD found 1 disks matching criteria
2013-05-19 20:07:15,164   InstallationLogger INFO       Disk [c8t0d0] selected

2013-05-19 20:07:15,164   InstallationLogger INFO       TD AND TC FINISHED SUCCESSFULLY!
2013-05-19 20:07:15,206   InstallationLogger INFO       Disk [c8t0d0] selected

2013-05-19 20:07:21,205   InstallationLogger INFO       Disk [c8t0d0] selected

2013-05-19 20:07:23,245   InstallationLogger INFO       Starting validation.

2013-05-19 20:07:23,251   InstallationLogger INFO       Disk layout after tidy
Listing 1
Connecting to Oracle Solaris 11 Using Other Methods
Unfortunately, we don't always have an opportunity to connect to Oracle Solaris 11 as root using a local desktop. Therefore, let's make some changes to our environment.
Caution: Be aware that the following two commands are not recommended for a production system, because they represent a BIG SECURITY RISK. I've just included them here to make your life easier initially. You can work on Oracle Solaris 11 without using them.
First, it would be useful to unlock the telnet connection for user root. Therefore, let's edit the /etc/default/login file and comment out the line beginning with CONSOLE, as shown in Listing 2:
# vi /etc/default/login

# Set the TZ environment variable of the shell.
#
#TIMEZONE=EST5EDT

# ULIMIT sets the file size limit for the login.  Units are disk blocks.
# The default of zero means no limit.
#
#ULIMIT=0

# If CONSOLE is set, root can only login on that device.
# If the specified device is /dev/console, then root can also log into
# any of the currently enabled /dev/vt/# virtual terminal devices.
# Comment this line out to allow remote login by root.
#
# CONSOLE=/dev/console

# PASSREQ determines if login requires a password.
#
PASSREQ=YES
Listing 2
We can do the same thing for the SSH service by editing the /etc/ssh/sshd_config file and changing the PermitRootLogin line to yes, as shown in Listing 3:
# vi /etc/ssh/sshd_config

# Listen port (the IANA registered port number for ssh is 22)
Port 22

# The default listen address is all interfaces, this may need to be changed
# if you wish to restrict the interfaces sshd listens on for a multi homed host.
# Multiple ListenAddress entries are allowed.

...

# Are root logins permitted using sshd.
# Note that sshd uses pam_authenticate(3PAM) so the root (or any other) user
# maybe denied access by a PAM module regardless of this setting.
# Valid options are yes, without-password, no.
PermitRootLogin yes

# sftp subsystem
Subsystem   sftp   internal-sftp

...
Listing 3
Now we can connect to Oracle Solaris 11 in a convenient (but not as safe) way.
Getting System Information
Sometimes it's necessary to get some information about your system, for example, how much RAM you have in your machine or what other hardware features exist in your machine. There are two simple commands for getting these answers.
First, let's get the memory size:
# prtconf | grep -i memory

Memory size: 4096 Megabytes
To get others hardware details, run the command shown in Listing 4:
# prtdiag -v | more

System Configuration: VMware, Inc. VMware Virtual Platform
BIOS Configuration: Phoenix Technologies LTD 6.00 06/02/2011

==== Processor Sockets ====================================

Version                          Location Tag
-------------------------------- --------------------------
Pentium(R) Pro                   CPU socket #0

==== Memory Device Sockets ================================

Type        Status Set Device Locator      Bank Locator
----------- ------ --- ------------------- ----------------
DRAM        in use 0   RAM slot #0         RAM slot #0
DRAM        empty  0   RAM slot #1         RAM slot #1

...

==== On-Board Devices =====================================
VMware SVGA II
ES1371

==== Upgradeable Slots ====================================

ID  Status    Type             Description
--- --------- ---------------- ----------------------------
0   unknown   ISA              ISA Slot J8
0   unknown   ISA              ISA Slot J9
0   unknown   ISA              ISA Slot J10
1   in use    PCI              PCI Slot J11
2   in use    PCI              PCI Slot J12
3   in use    PCI              PCI Slot J13
4   available PCI              PCI Slot J14
Listing 4
Listing 4 shows I am using a VMware virtual machine. On a physical machine, we would see more complete (and more meaningful) output.
It is a common requirement to know the name of your machine, which you can get by typing the following:
# hostname
solaris11
There are two other helpful commands:
# uname -a
SunOS solaris11 5.11 11.1 i86pc i386 i86pc

# more /etc/release

   Oracle Solaris 11.1 X86
  Copyright (c) 1983, 2012, Oracle and/or its affiliates.  All rights reserved.
                           Assembled 19 September 2012
To wrap up, let's learn how we can turn our system off. To accomplish that in a graceful way, type one of the following commands:
# shutdown -y -i5 -g0
Or:
# init 5
Note: If we instead run the poweroff command, our system will be turned off, but some recommended kill scripts won't be executed. Therefore, you should not use the poweroff command on a production system. Only use it as a last resource.
Conclusion
In this article, I showed how you can explore and install Oracle Solaris 11. See Part 2 of this series for a discussion of more in-depth Oracle Solaris 11 features.
See Also
About the Author
Alexandre Borges is an Oracle ACE and who worked as an employee and contracted instructor at Sun Microsystems from 2001 to 2010 teaching Oracle Solaris, Oracle Solaris Cluster, Oracle Solaris security, Java EE, Sun hardware, and MySQL courses. Nowadays, he teaches classes for Symantec, Oracle partners, and EC-Council, and he teaches several very specialized classes about information security. In addition, he is a regular writer and columnist at Linux Magazine Brazil.
Revision 1.0, 08/10/2013