 Part 1: Configuring Eclipse and WebLogic Server (WLS)
 Read more...
In OEPE, an application is an IDE concept that keeps the different parts of your application separated. The separation generally falls on the lines of the Model-View-Controller design pattern. When you create an ADF application in Oracle Enterprise Pack for Eclipse, there are at least two modules. or projects, created: an EAR module and a dynamic web module. If you are using JPA as the data model, you will also have a module for the JPA artifacts.
-
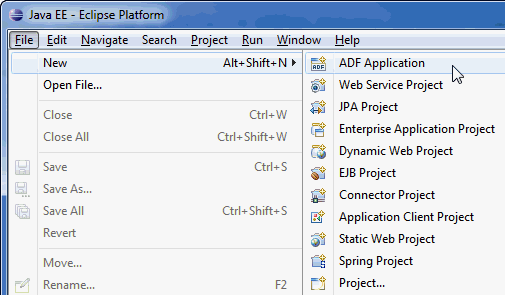
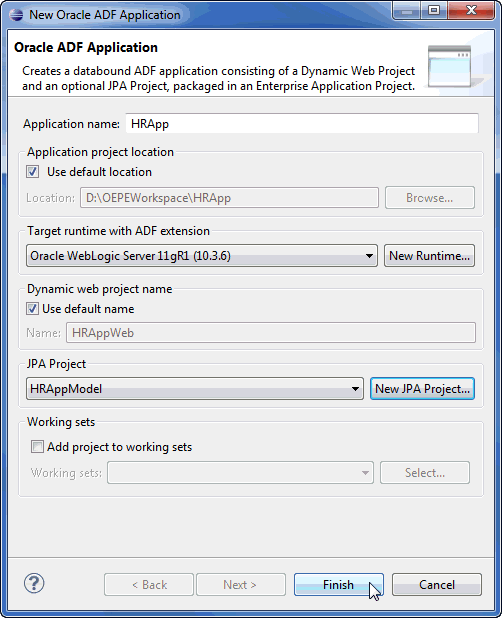
Right-click within the Project Explorer pane and select New > ADF Application. (Or you can select File > New > ADF Application.)
-
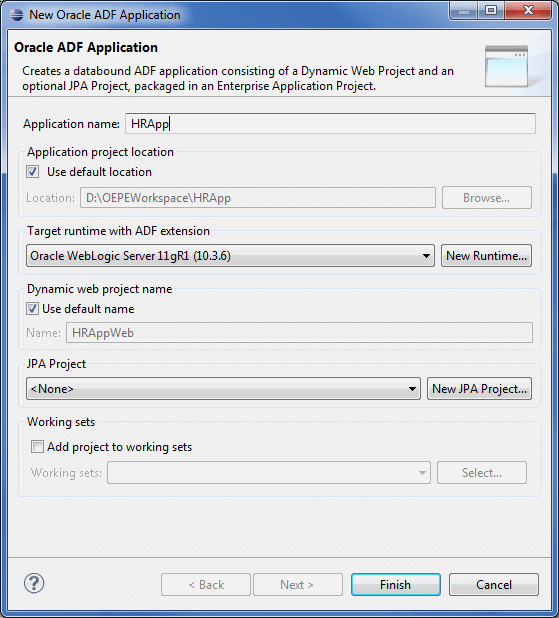
In the New Oracle ADF Application Wizard, enter HRApp as the application name. Notice that the default name for the dynamic web project is HRAppWeb. Next to the JPA Project field, click New JPA Project.
-
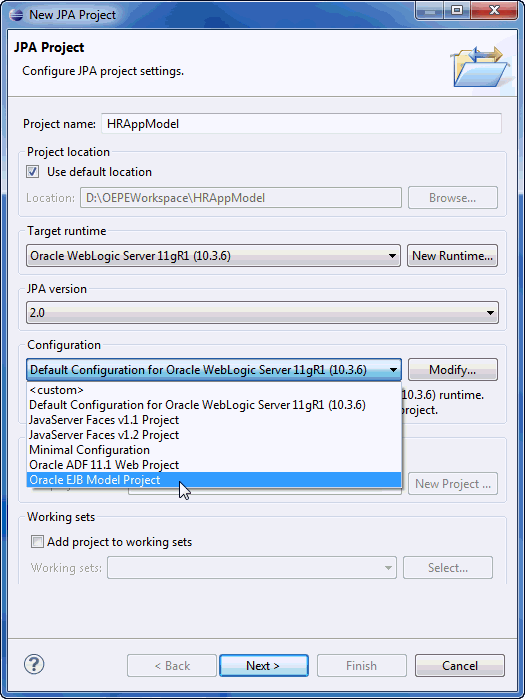
In the New JPA Project Wizard:
Note that the default Project name is HRAppModel.
Select Oracle WebLogic Server 11gR1 (10.3.6) as the Target runtime if it is not already the default value.
Make sure the JPA version is 2.0.
Under Configuration, select Oracle EJB Model Project.
Click Next.
-
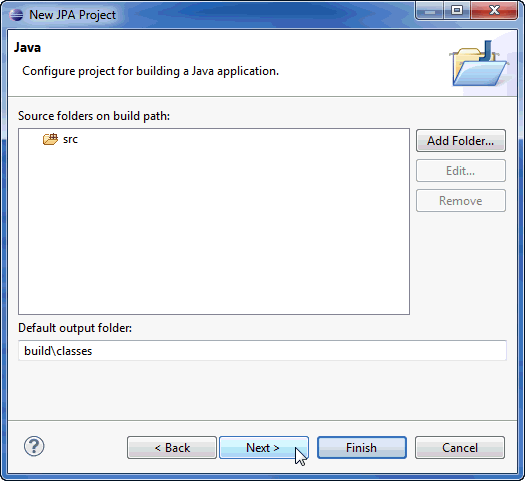
Click Next to accept the defaults on the Java page.
-
In the JPA Facet page:
Select EclipseLink 2.1.x as the platform.
Select WebLogic System Library (Oracle Toplink 11gR1) as the type.
Select HR as the connection.
Click Finish.
-
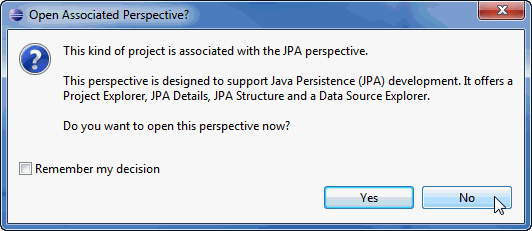
Eclipse prompts you to open the JPA perspective for this new project. Click No to continue using the Java EE perspective that you selected earlier.
-
Click Finish to create the application and projects.
-
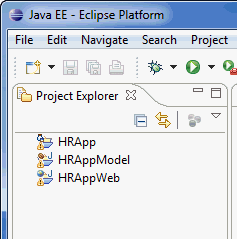
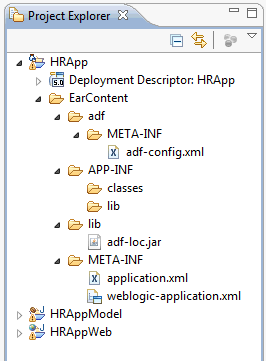
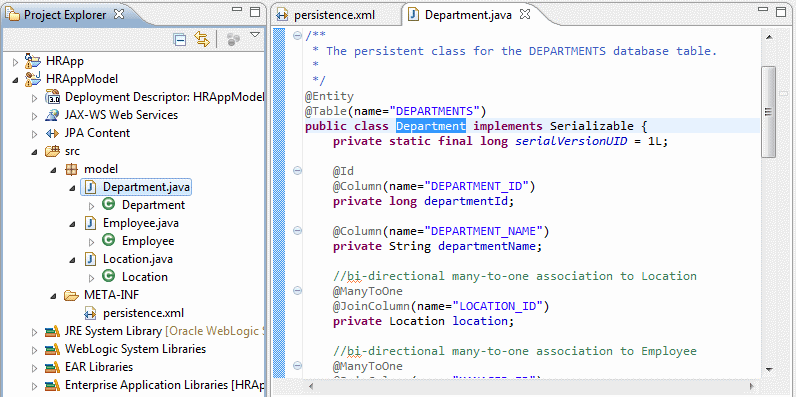
Now that you have created the application and projects, the Project Explorer should look like the following:
-
Expand the HRApp node to open the Enterprise Application Project (called an EAR project in Eclipse). Expand EarContent > adf > META-INF.
-
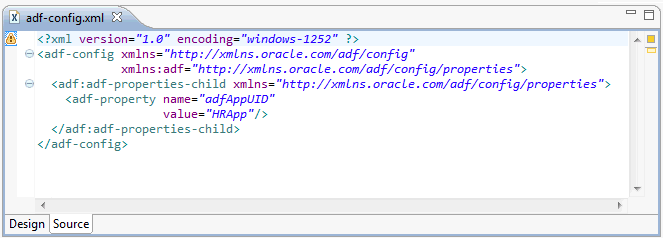
Double-click adf-config.xml to open the file, and then click the Source tab to see the source view.
-
In the Project Explorer, expand all the nodes under EarContent.
-
Notice that the ADF library, adf-loc.jar, has been added to your project. Open and examine the application.xml configuration file. Notice that it includes a reference to the HRAppWeb.war file and the ejb model project HRAppModel.jar.
-
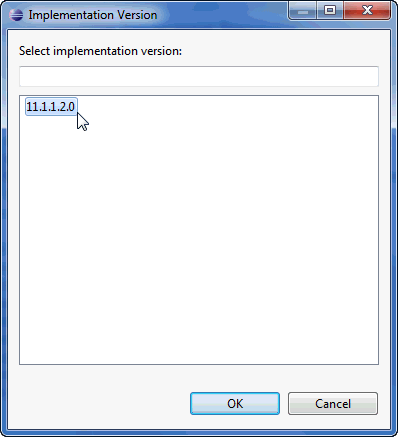
Open the weblogic-application.xml file. In the Design tab, expand Shared Libraries and select adf.oracle.domain.
-
Next to the Implementation version field, click the Browse icon and select 11.1.1.2.0. Click OK.
-
Click the Save All icon to save the changes.
-
Click the Source tab, and notice the declared components, such as listeners and libraries.
-
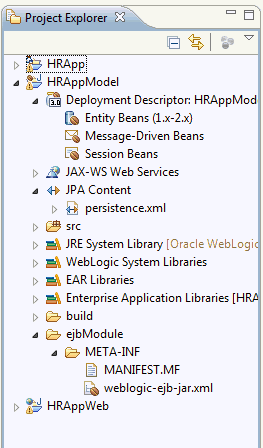
Back in the Project Explorer, expand the HRAppModel node, and review the basic structure that was created for the model project.
-
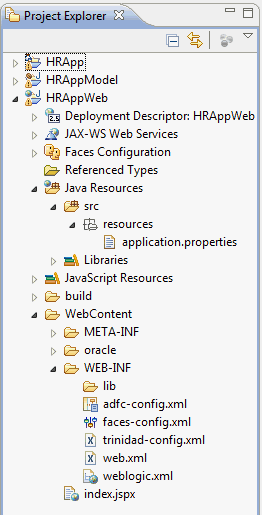
Expand the HRAppWeb node, and review the basic structure that was created for the user interface project.
-
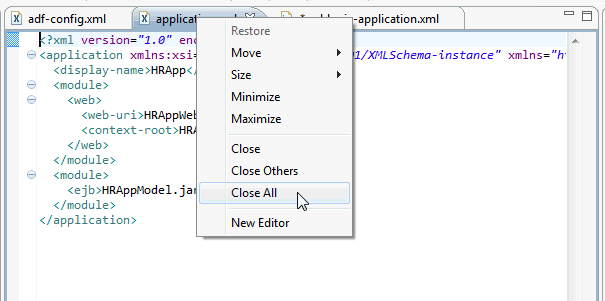
When you are done exploring the project structure and artifacts, right-click any tab and select Close All to close all the open tabs in the editor pane.
An enterprise application project ties together one or more Java EE modules, including application client modules, JPA modules, Connector modules, or Web modules. To create a new Oracle ADF application, perform the following steps:

In the next few steps, you explore the application you just created, including a few of the generated artifacts.


The Java Persistence API, sometimes referred to as JPA, is a Java programming language framework that manages relational data in Java applications. In this section, you use OEPE wizards to create Java classes, known as entities, which map database table definitions to entity objects. The entities use JPA to manage data persistence.
Before you can select tables on which to base your JPA entities, the connection that you defined earlier to the HR database must be active.
-
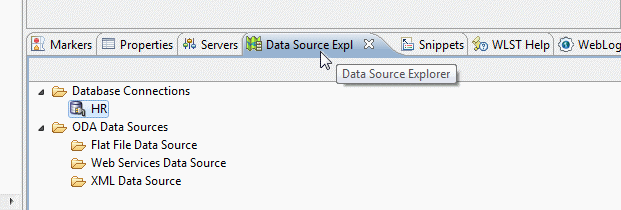
In the bottom pane, select the Data Source Explorer tab.
-
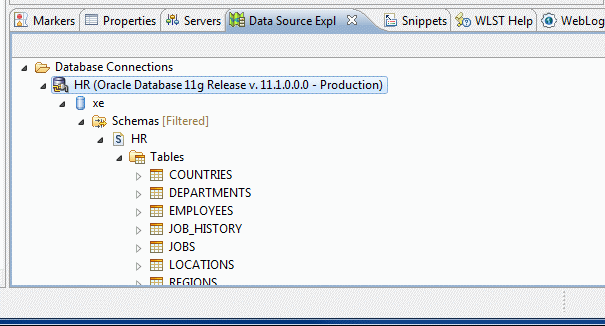
Under Database Connections, right-click HR, and select Connect.
-
When the connection is successful, the Data Explorer shows the database SID and allows you to expand and explore the contents of the database schema.
-
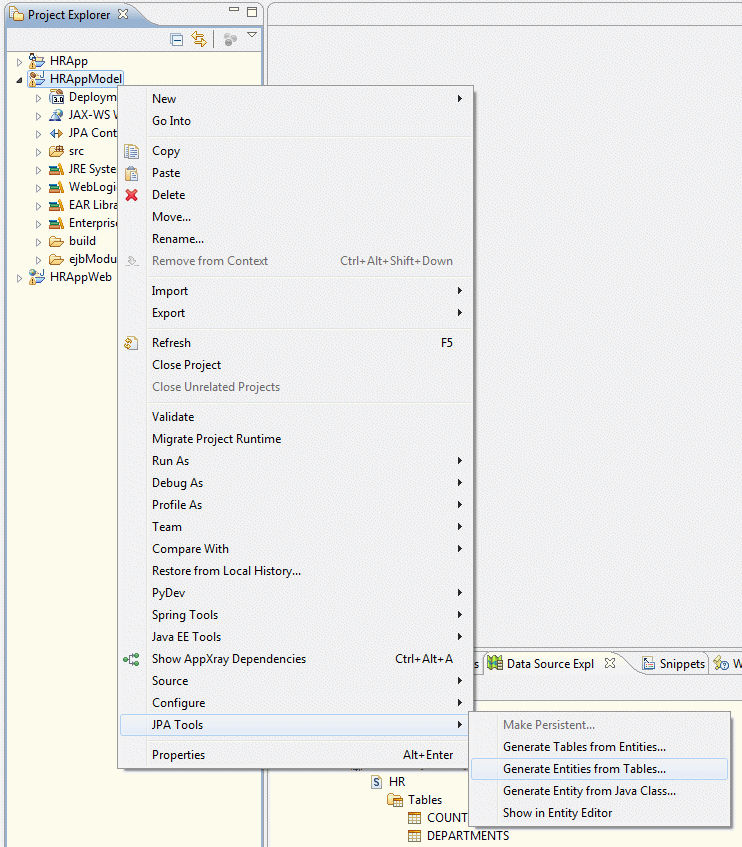
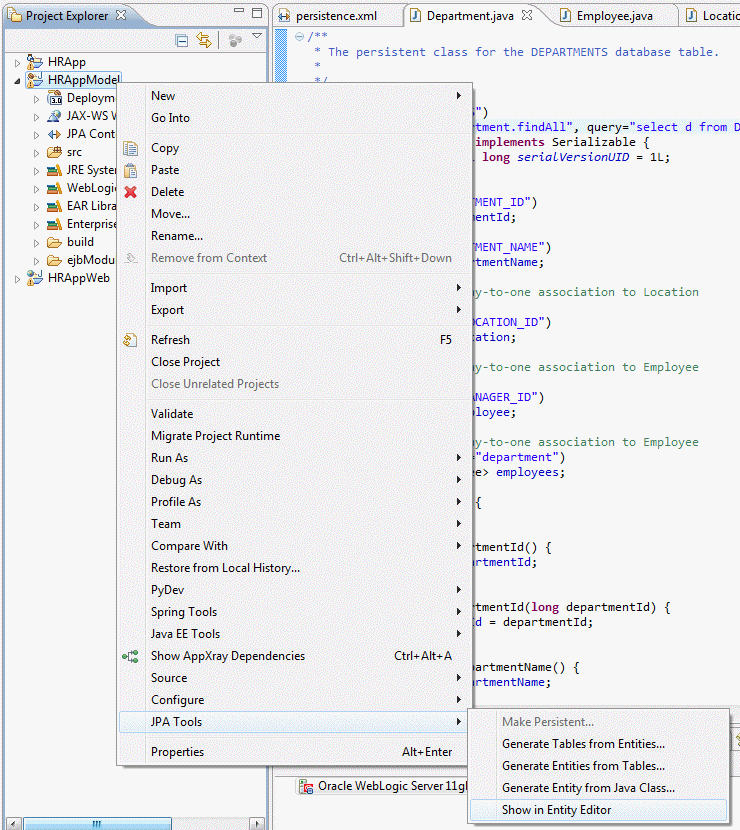
In the Project Explorer, collapse all the nodes except for HRAppModel. Right-click the HRAppModel node and select JPA Tools > Generate Entities from Tables.
-
In the Generate Custom Entities Wizard, select HR as the connection and HR as the schema. Notice that selecting these options populates the Tables list. In the Tables list, select the following three tables: Employees, Departments, and Locations. The data model for the application is based on these tables from the HR schema. Click Next.
-
Notice the table associations that are derived from the database schema definitions. You can select any of the relationships to examine the association details and properties. By default, the wizard creates the associations. Click Next to accept the default table associations and continue.
-
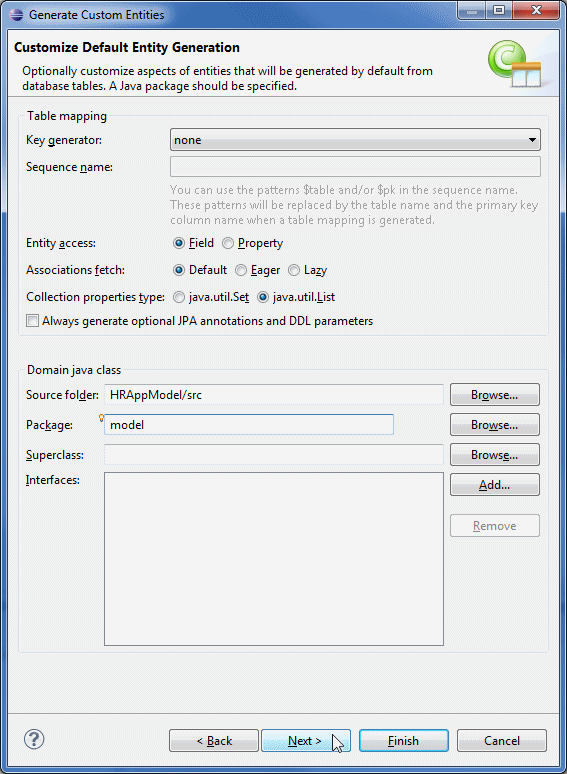
In the Customize Default Entity Generation page, select java.util.List for the collection properties type and enter model as the package name. The new entity will be added to the HRAppModel project under the model package. Click Next to continue.
-
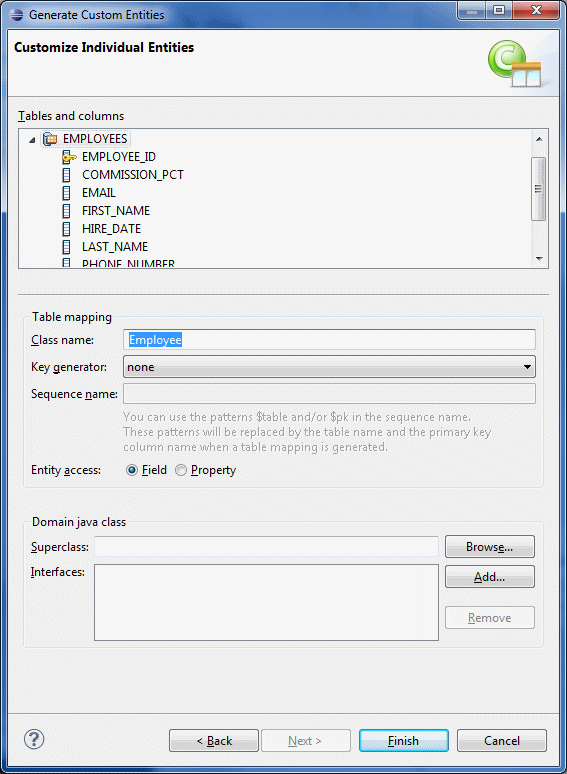
In the Tables and columns area, select and then expand EMPLOYEES. Notice that the proposed class name is Employee.
-
Select any column to see the column properties. Notice that you can change the properties that will be generated for the column. Click Finish to generate the entities.
-
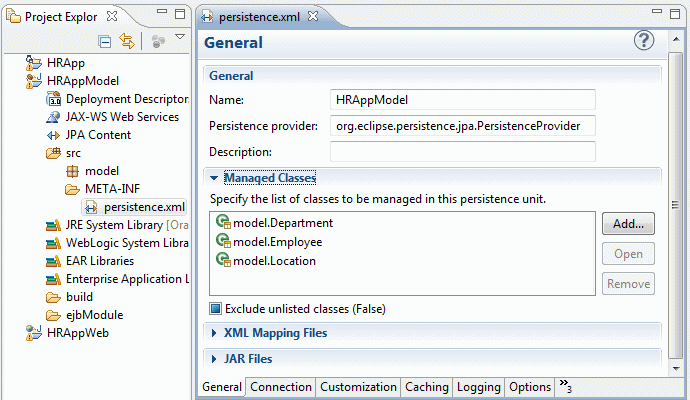
When the OEPE JPA Entity Generation Wizard finishes, the generated JPA entity classes are added to your project's persistence.xml file. Expand HRAppModel > src > META-INF and double-click persistence.xml. Open the Managed Classes accordion to view the generated classes.
-
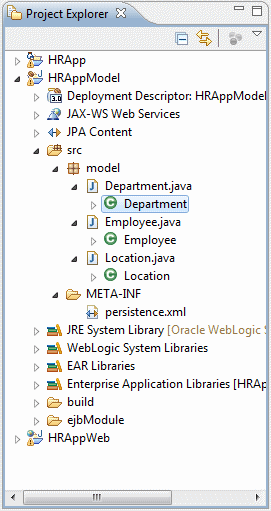
In the Project Explorer, expand HRAppModel > src > model to see the generated classes (Department.java, Employee.java, and Location.java).
-
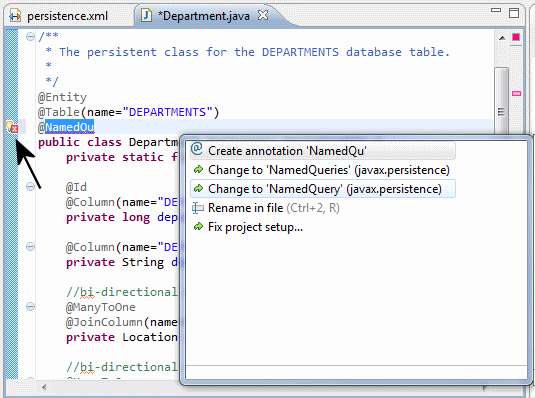
Double-click Department.java to open the class in the editor. Review the generated code.
-
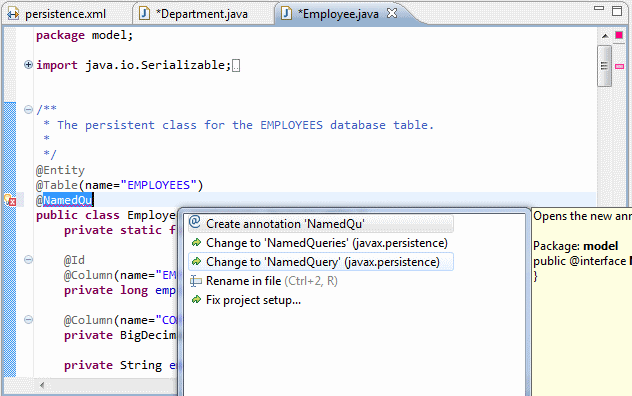
Insert a new line in the Department.java source file just below the @Table annotation. On that line, start typing @NamedQu. Click the red x in the margin and select Change to 'NamedQuery'... from the pop-up list.
-
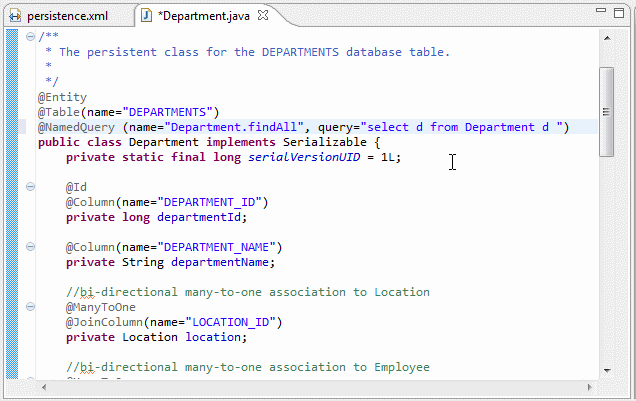
Complete your statement with the following code:
@NamedQuery(name="Department.findAll", query="select d from Department d "). Your new Java code should be: -
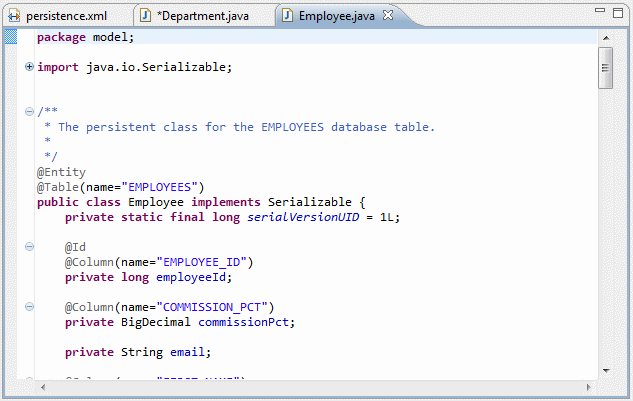
Double-click Employee.java to open it in the editor.
-
Insert a new line in the Employee.java source file just below the @Table annotation. Just like you did in earlier steps, start typing @NamedQu. Click the red x in the margin and select Change to 'NamedQuery'... from the pop-up list.
-
Complete your statement with the following code:
@NamedQuery(name="Employee.findAll", query="select e from Employee e"). Your new Java code should be: -
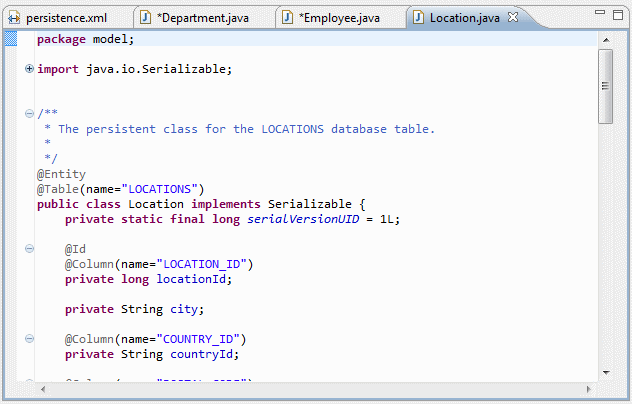
Double-click Location.java to open it in the editor.
-
Insert a new line in the Location.java source file just below the @Table annotation. On that line add a @ NamedQuery annotation.
-
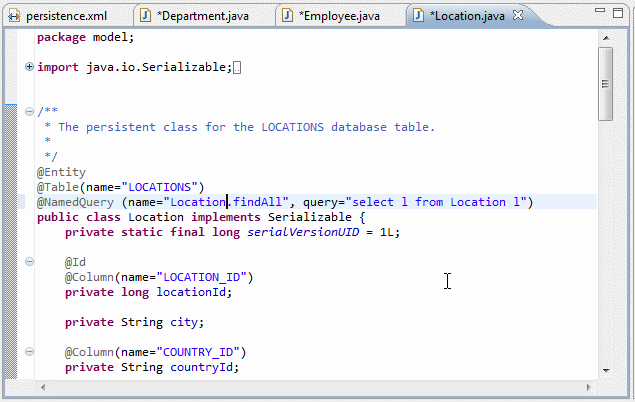
Complete your statement with the following code:
@NamedQuery(name="Location.findAll", query="select l from Location l "). Your new Java code should be:


Notice the metadata annotations used: @Entity, @Table, and so forth.
Read more...
The Java Enterprise Edition (JEE) Enterprise JavaBeans (EJB) are a component architecture that you use to develop and deploy object-oriented, distributed, enterprise-scale applications. An application written according to the Enterprise JavaBeans architecture is scalable, transactional, and secure.
The EJB 3.0 Java Persistence API (JPA) improves the EJB architecture by reducing its complexity through the use of metadata (annotations) and specifying programmatic defaults of that metadata.
EJB 3.0 and the Java Persistence API rely heavily on metadata annotation, a feature that was introduced in J2SE 5.0.
In the next few steps, you add named query elements to the entity classes that were generated by the wizard. These named queries will eventually provide client applications access to the data managed by the class. You use Java Persistence Query Language (JPQL) to annotate the class with named queries that retrieve all the rows of the tables. Later, you add a specific filtered query to one of the classes.
When defining the JPQL query string, OEPE provides content assist and validation against the active database connection.
In the next few steps, you add named queries to the Employee.java and Location.java source files.


You have now completed creating the JPA entities for your application model. Before we move on to creating the session bean, we'll look at the entities you created.
An EJB diagram is a way to create and visualize entities, Java beans, and relationships between these components. To create an EJB diagram, perform the following steps:
-
In the Project Explorer, right-click HRAppModel and select JPA Tools > Show in Entity Editor.
-
Notice that the diagram shows all the entities, attributes, and relationships in your project.
-
Using the Entity diagram, you can create new entities from tables and create new entities from Java files. You can also use the diagrammer to customize how your diagram appears. For example you can hide one-to-one relationships.
 Read more...
Modeling Enterprise JavaBeans (EJBs) helps you visualize your EJB entity relationships and architecture. You can quickly create a set of beans to populate with properties and methods, and create a graphical representation of those beans and the relationships and references between them. Whenever a bean is modeled, the underlying implementation files are also created.

In the next section you create a session bean to provide access to your JPA entity model.
Read more...
As a result, dependencies and communication between clients and EJBs are reduced. If you are performing remote access without a Session Facade, numerous remote calls are needed for the clients to access EJB 3.0 entities directly over the network. This results in a large amount of network traffic that negatively affects performance. In addition, without a facade, the client depends directly on the implementation of the business objects. If the interface of an EJB changes, client objects have to be changed as well.
In this section, you create a session bean that implements the methods defined in the Employee, Department, and Location entities.
-
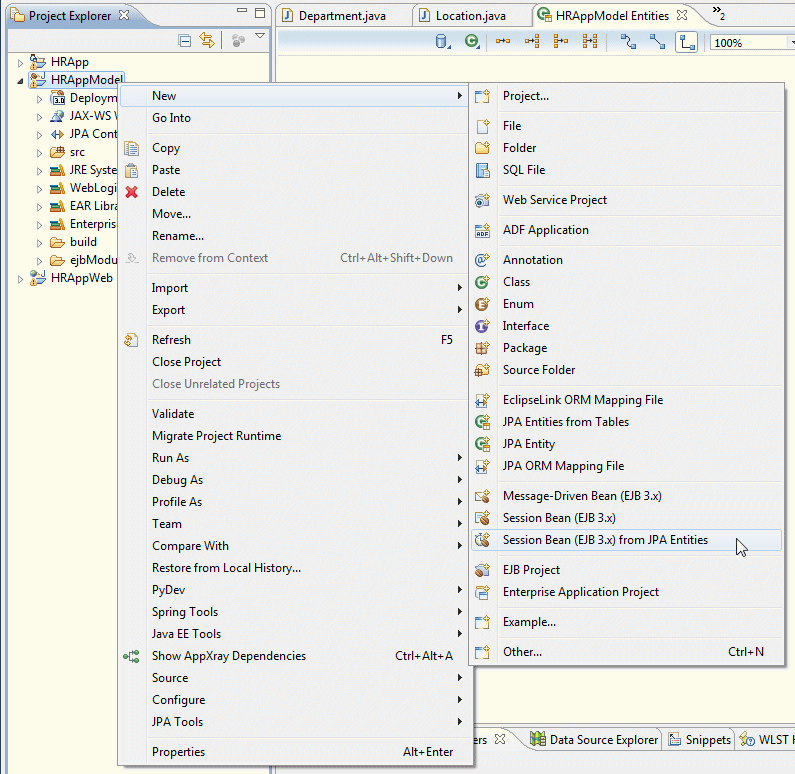
In the Project Explorer, right-click HRAppModel and select New > Session Bean (EJB 3.x) from JPA Entities.
-
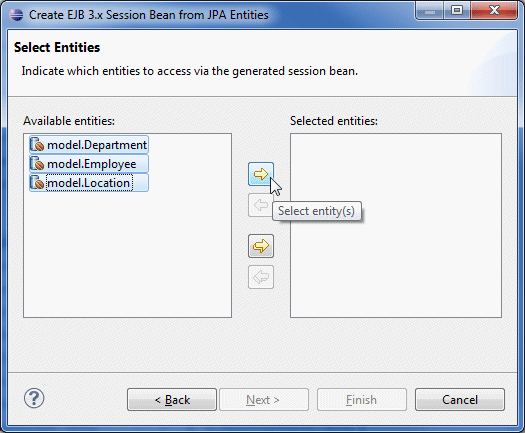
In the wizard, enter oracle.service as the Java package, and HRAppFacade as the class name. Click Next.
-
Select all three entities and click the shuttle button to shuttle them to the Selected entities area.
-
Click Finish to create the session bean.
-
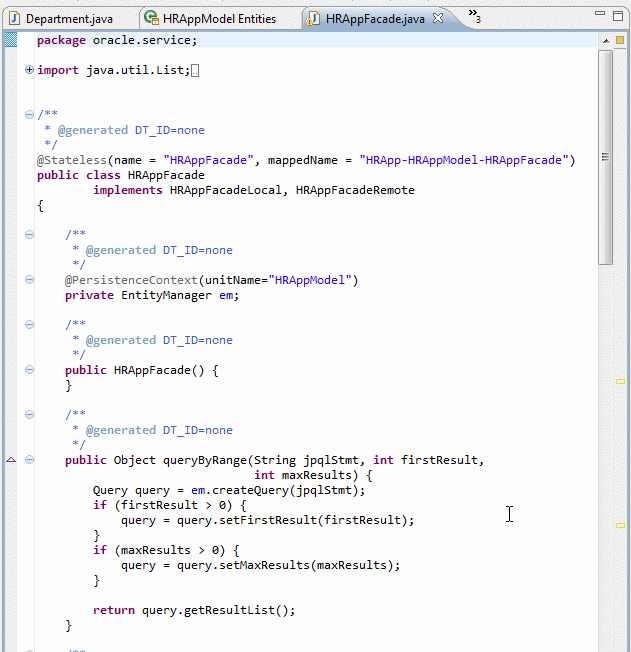
The wizard creates the following session bean (HRAppFacade.java):


You now expose the EJB as an Oracle ADF data control. ADF data controls simplify the way that you bind user interfaces to the EJB. To learn more about Oracle ADF, visit: http://oracle.com/technology/products/adf. To create ADF data controls from EJB session beans, perform the following steps:
-
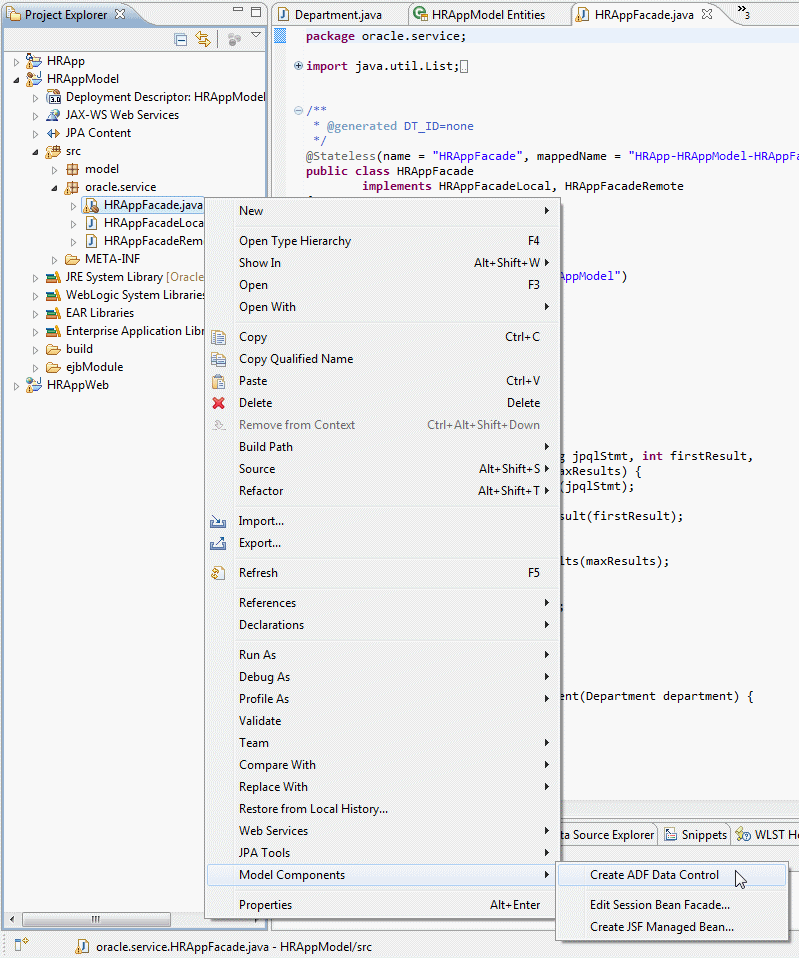
In the Project Explorer, expand HRAppModel > src > oracle.service. Right-click HRAppFacade.java and select Model Components > Create ADF Data Control.
-
The wizard creates the ADF data control, which is defined in a set of .xml files stored in the adfmsrc package.

You have now created the model project that contains the JPA entities, the Session Facade (which publishes access to client applications), and the ADF data controls. In the next section of this tutorial, you build a web client application that consumes the components that you just created.