In this part of the tutorial, you build a view project that contains all the view components for your application. These view components consume the model components to present data to the user.
You will be using Oracle ADF Faces as the view components in your application. Oracle ADF Faces provides a set of over a 150 Ajax-enabled JSF components that enable you to build a rich web user interface for Java EE applications.
 Read more...
ADF Faces provides several types of components. Layout components are designed to give you a fine level of control over the layout of your pages. These components include items like Tabbed Layout, Panel Splitters, Panel Form Layout, Panel Accordion, Panel Group Layout, Decorative Box, and many others. Each of these components works in conjunction with other layout components to give you a high level of control over your application layout.
Other types of ADF Faces components include input components and output components. These components encompass everything from simple input text fields to carousel components to shuttle components. With ADF Faces components, you can create a rich client web application that meets all your application needs.
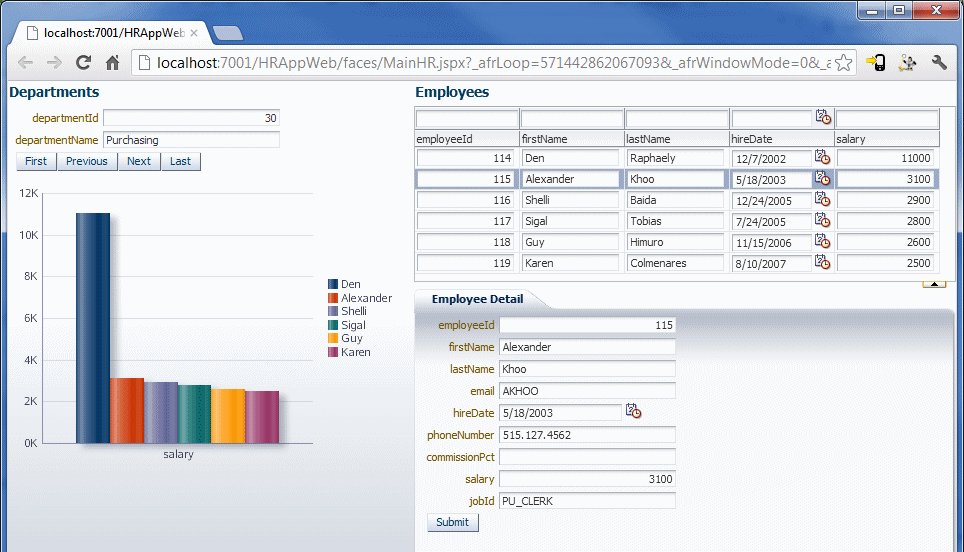
In this section, you use ADF Faces components to create the following web application page:
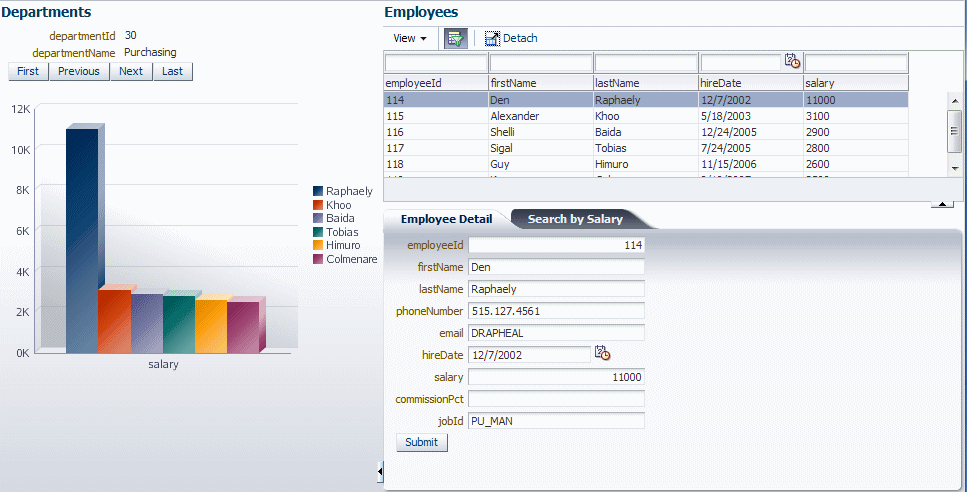
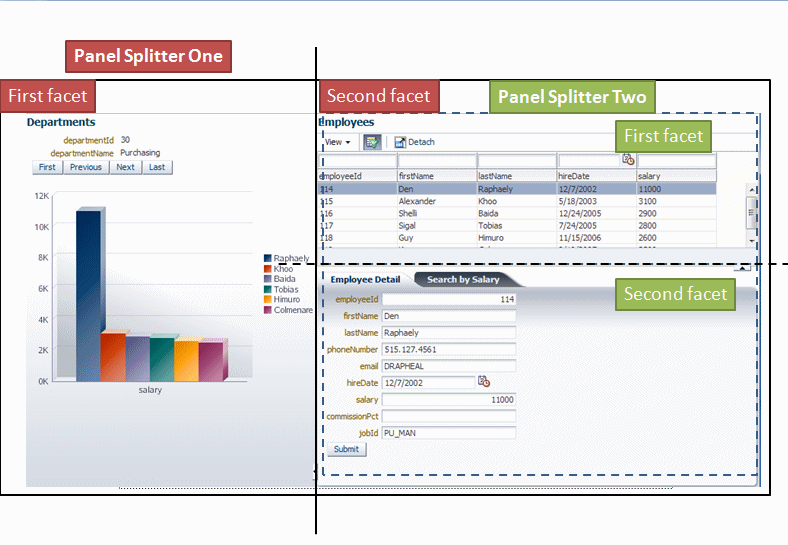
The left side of the page consists of a Departments component that allows the user to navigate through departments, and a graph that shows the salaries of employees within the current department. The upper right side of the page shows a list of all employees within the selected department. The lower right side of the page contains two tabs: One tab shows the details of the selected employee, and the other tab allows the user to search for employees by salary.
In this section, you create the basic page layout and populate the left side of the page with a Departments form and a graph that shows all the salaries for the selected department.
-
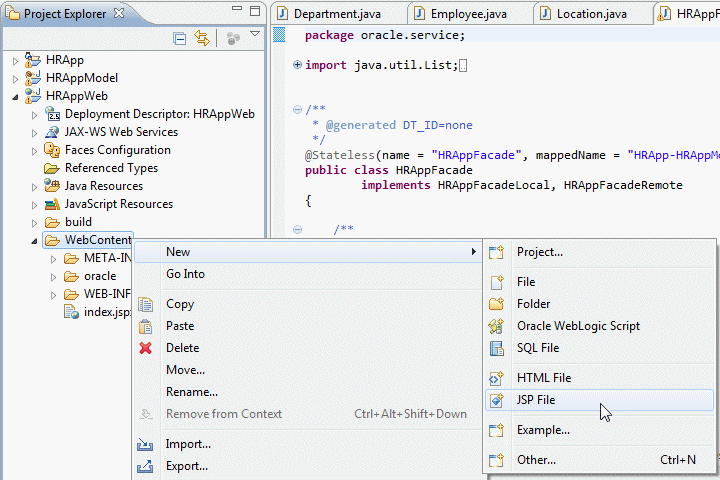
In the Project Explorer, expand HRAppWeb. Right-click WebContent and select New > JSP File.
-
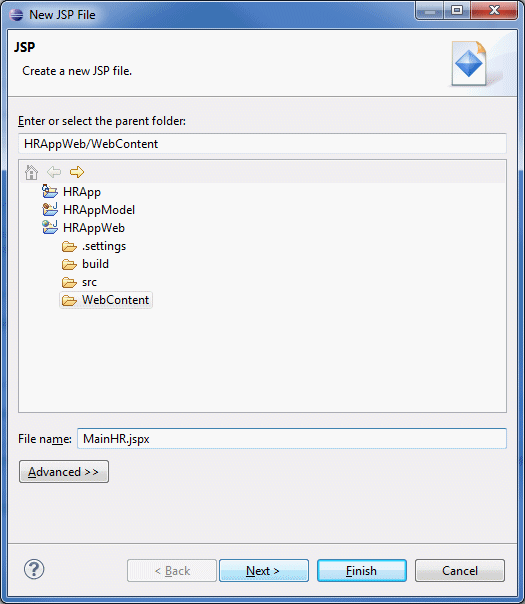
Enter MainHR.jspx as the file name. Make sure the extension is .jspx. Click Next.
-
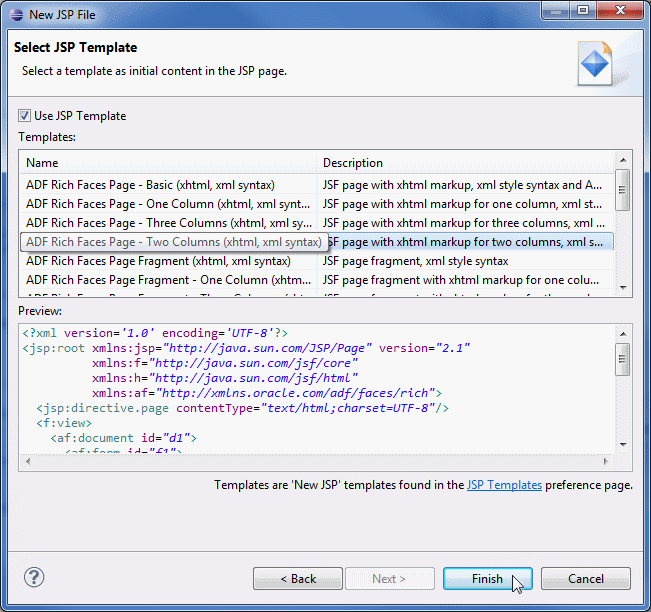
Select ADF Rich Faces Page - Two Columns (xhtml, xml syntax) and click Finish.
-
Selecting these options creates a starter page with an ADF Panel Splitter component added to the page.
-
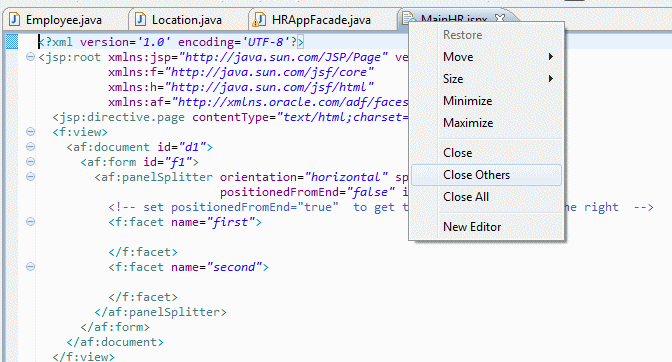
You are now working in the View project. To close the tabs that you are not currently using, right-click the MainHR.jspx tab and select Close Others.
-
ADF Faces provides several types of layout components. One type of layout component is used for geometry management, which controls where components are displayed and help control behavior. Another type of layout component helps manage the look of a page. Some examples of layout components include Decorator Box, Panel Header, and Panel Collection.
In the next few steps, you create the layout and data components for the left side of the page. The left side of the page consists of several nested layout components. The layout components include a Panel Header, which is used to place the title "Departments" on the page, and a Panel Group Layout component, which controls where the Departments form and Employees Salary graph are displayed.
-
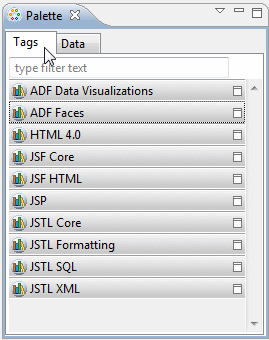
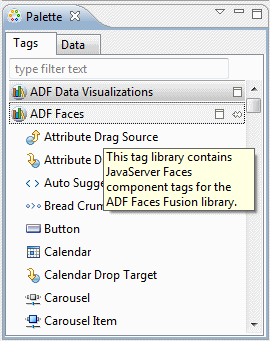
In the Palette, click the Tags tab to show the list of available components. Notice that the components are grouped by type.
-
Click the ADF Faces node to expand it.
-
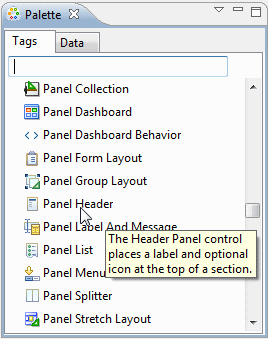
Scroll down the list or use the filter to find the Panel Header component.
-
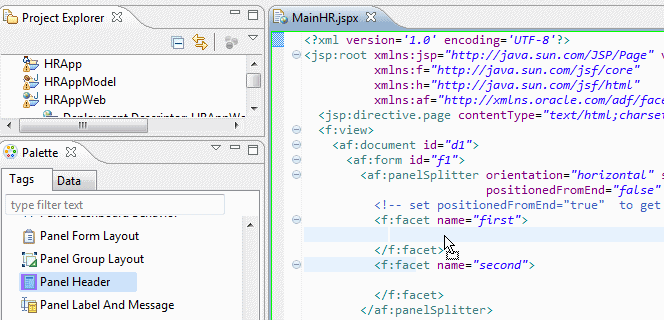
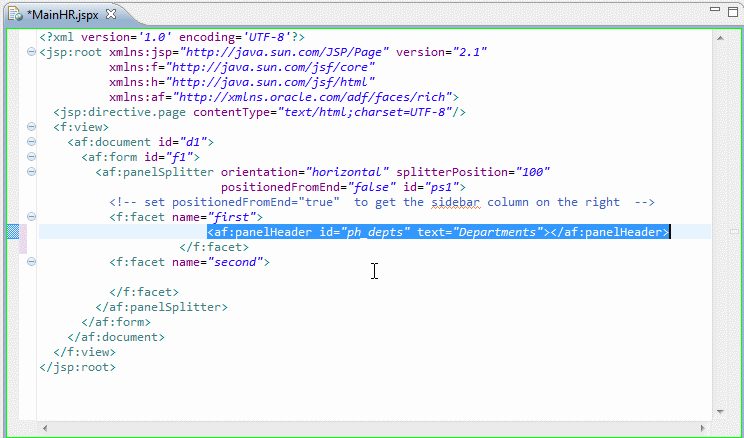
Drag the Panel Header component to MainHR.jspx editor window and drop it within the first facet tag.
-
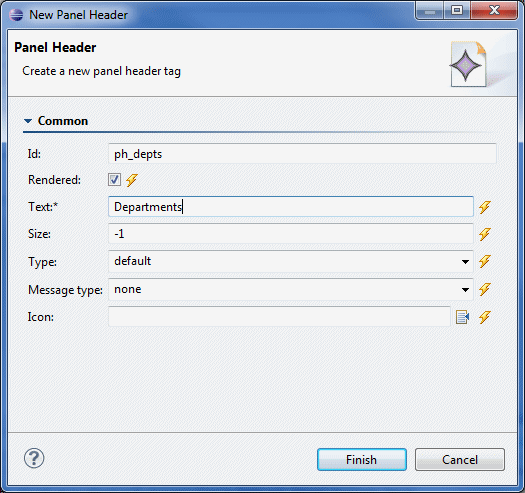
In the New Panel Header Wizard, enter ph_depts as the Id and Departments as the Text. Click Finish.
-
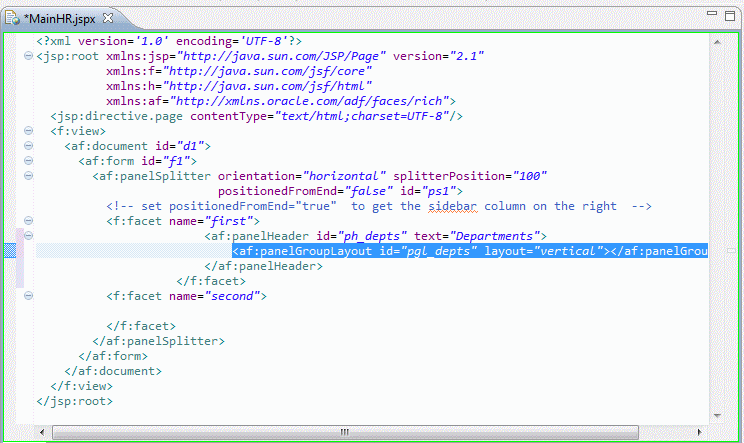
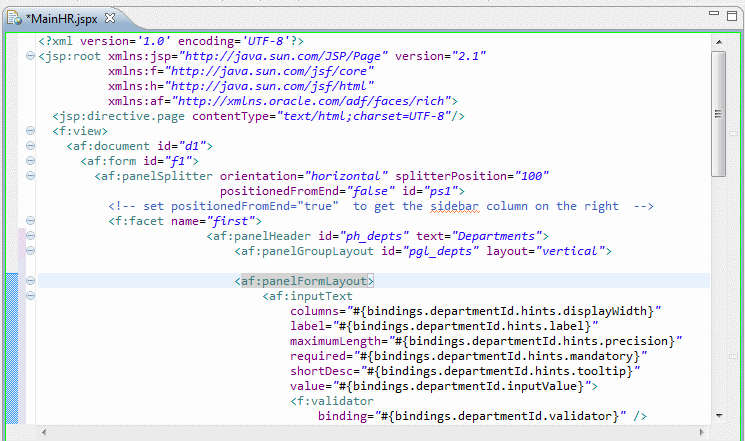
The code should look something like the following:
-
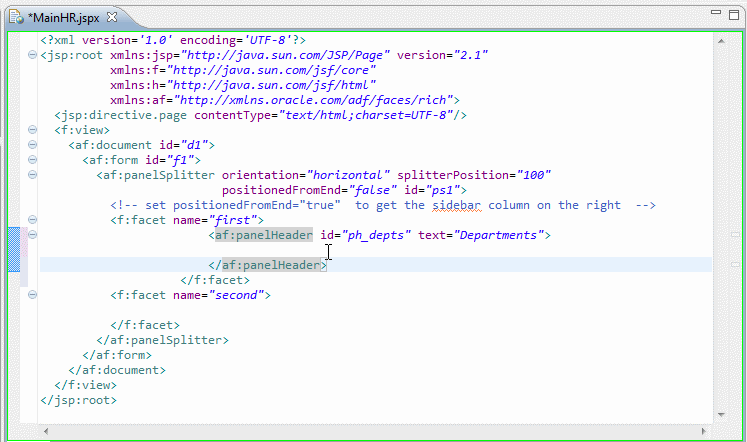
Insert an empty line between the opening <af:panelHeader> tag and the closing </af:panelHeader> tag. Inserting an empty line simply gives you more space for the next step.
-
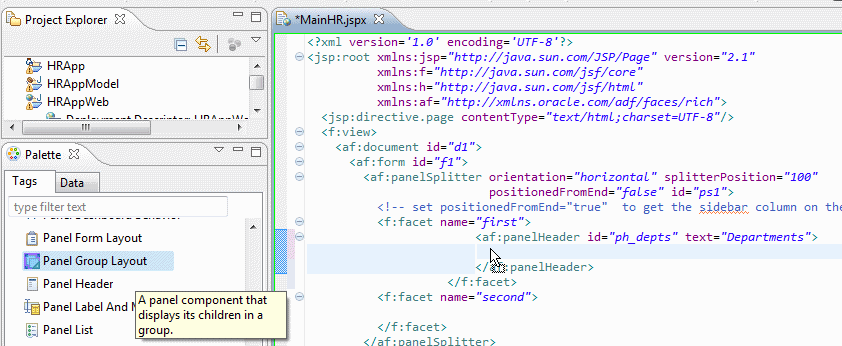
Drag a Panel Group Layout component to the inside of the <af:panelHeader> tag.
-
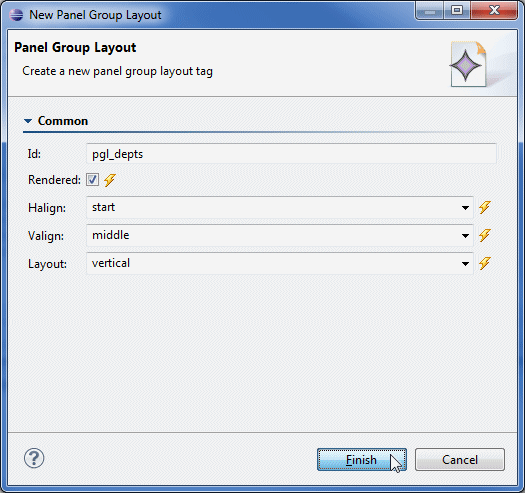
In the New Panel Group Layout Wizard, enter pgl_depts as the Id and set the Layout to Vertical. Click Finish.
-
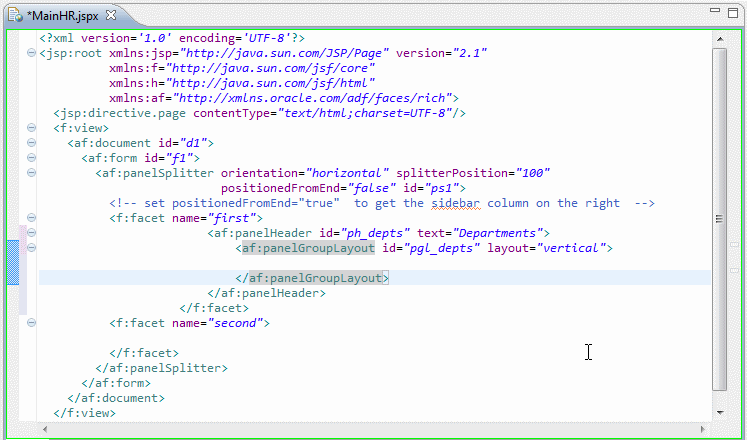
The code should look something like the following:
-
Insert an empty line inside of the <af:panelGroupLayout> tag just as you did earlier for the <af:panelHeader> tag.
-
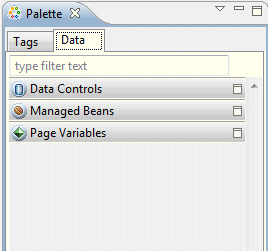
In the Palette, click the Data tab to see all data-centric elements available to your application.
-
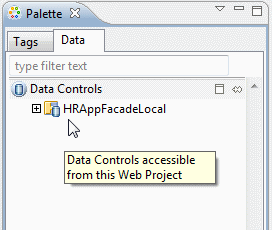
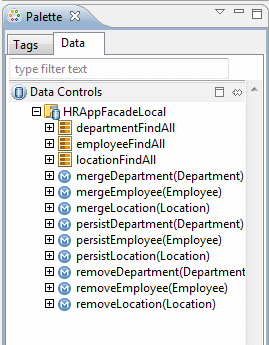
Click the Data Controls node to see all of the ADF data controls that you created from the Session Facade.
-
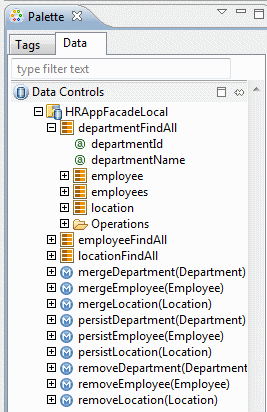
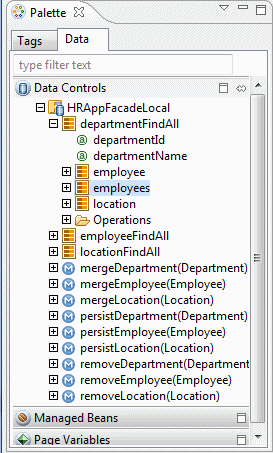
Expand HRAppFacadeLocal to see the structure of the data controls. Notice there are 3 groups, departmentFindAll, employeeFindAll, and locationFindAll. These are the data controls the represent the methods in the Session Facade that you created from the java files, specifically, the implement the NamedQueries.
-
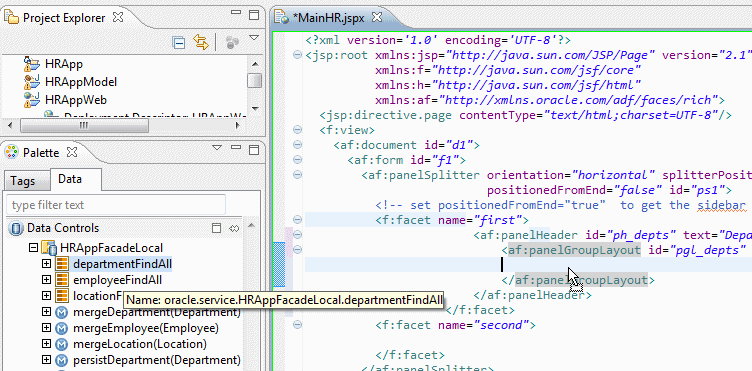
In the Data tab of the Palette, select departmentFindAll and drag it to the empty line that you inserted earlier within the Panel Group Layout.
-
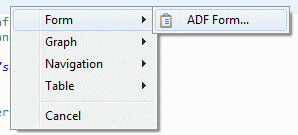
When you drop the data control onto the editor, a pop-up menu is displayed for selecting the type of object you want to create. Select Form > ADF Form.
-
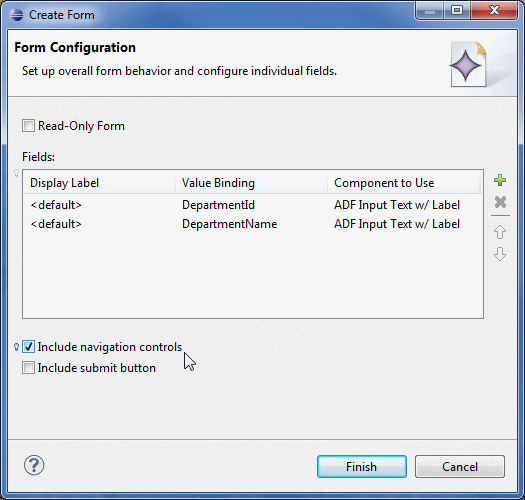
In the Create Form Wizard, select Include navigation controls, and then click Finish.
-
The resulting code should look something like the following:
-
Save your work. You can either select File > Save All, click the Save All icon in the menu bar, or use Ctrl + Shift + S.
-
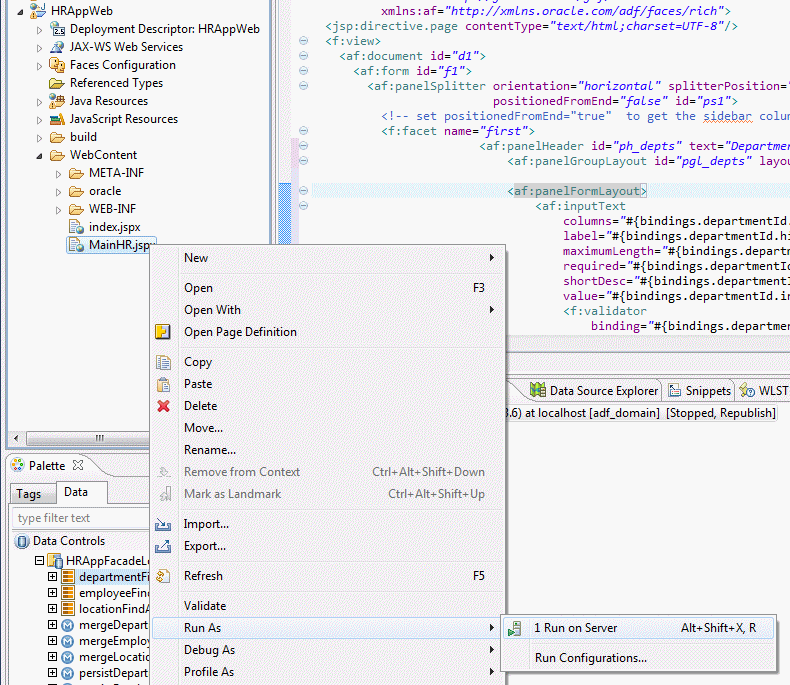
Now, test the page. Find MainHR.jspx in the Project Explorer (expand HRWebApp > Web Content). Right-click MainHR.jspx and select Run as > Run on Server.
-
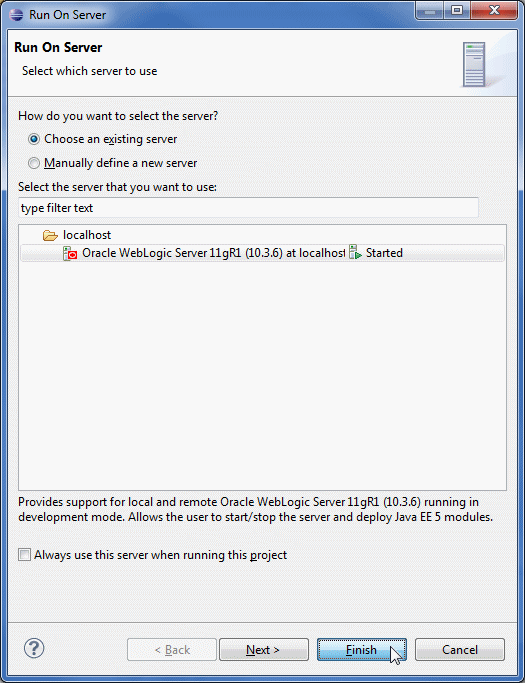
In the Run On Server Wizard, click Finish.
-
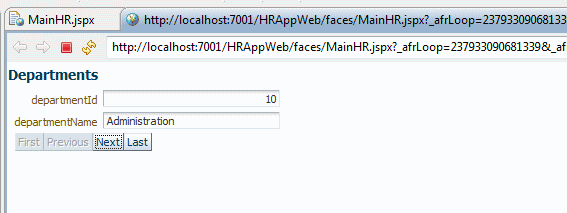
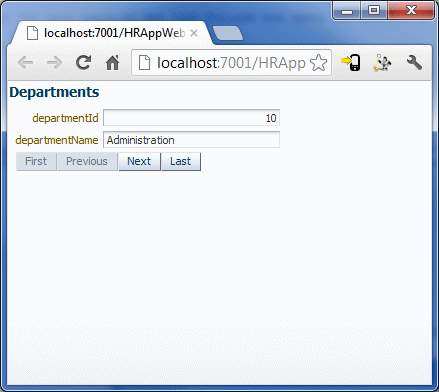
The page runs and opens in a tab in the IDE. Your page should look like the following:
-
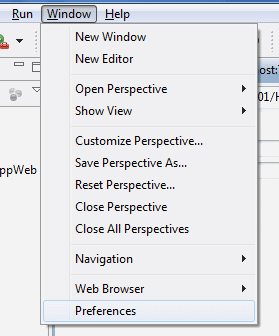
By default, Eclipse uses an internal browser to render running pages. To specify an external browser, select Window > Preferences.
-
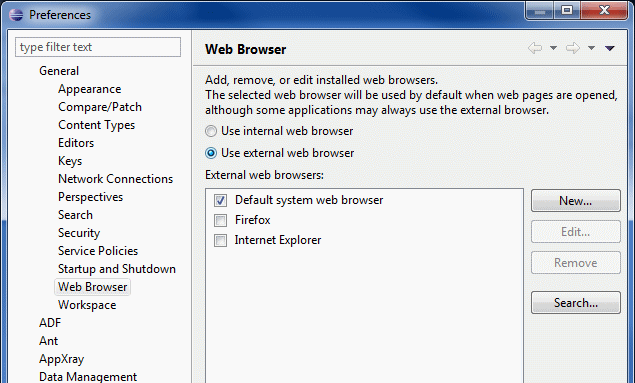
In the Preferences dialog box, select General > Web Browser and select Use external web browser. You can choose to use a specific installed browser, or use the default system web browser. Click OK.
-
Run the page again to see that Eclipse now opens the page in the browser that you selected. (Hint: Right-click MainHR.jspx, select Run as > Run on Server, and click Finish.)
-
Click the MainHR.jspx tab to open the code editor. Click <af:panelSplitter> to select the Panel Splitter.
-
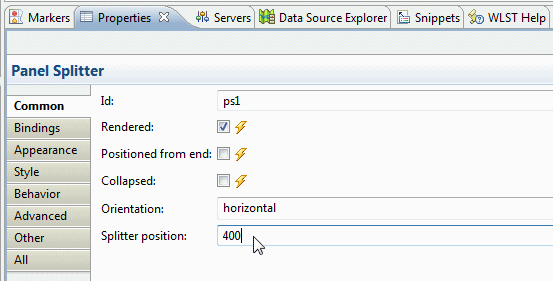
Click the Properties tab in the bottom portion of the IDE. Set the Splitter Position property to 400.
-
In the Data tab of the Palette, expand HRAppFacadeLocal > departmentFindAll.
-
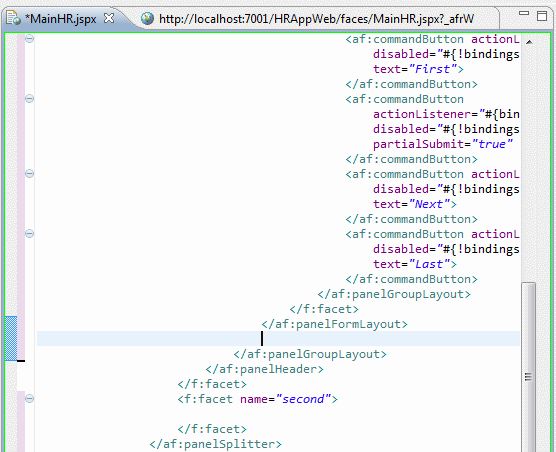
In the source code editor, scroll down to find the closing tag of the Panel Form Layout (</af:panelFormLayout>) and insert an empty line just after the tag.
-
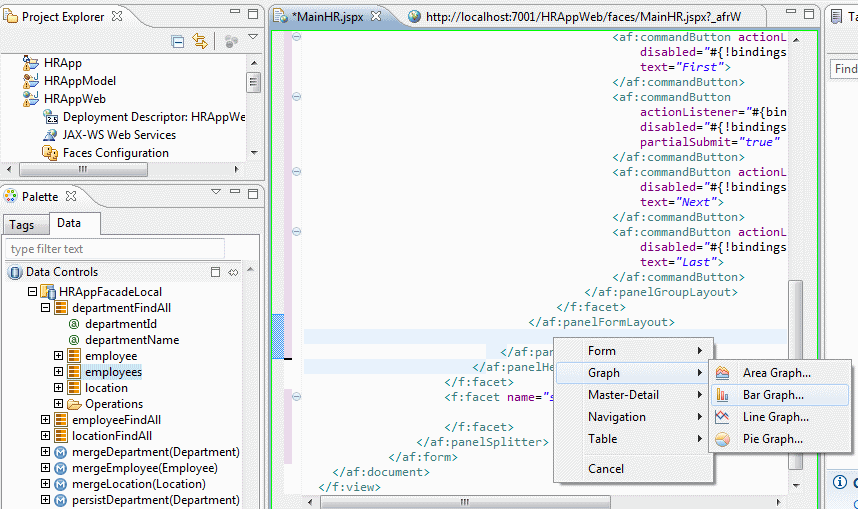
In the Data tab of the Palette, under departmentFindAll, select employees and drag it to the empty line. Select Graph > Bar Graph.
-
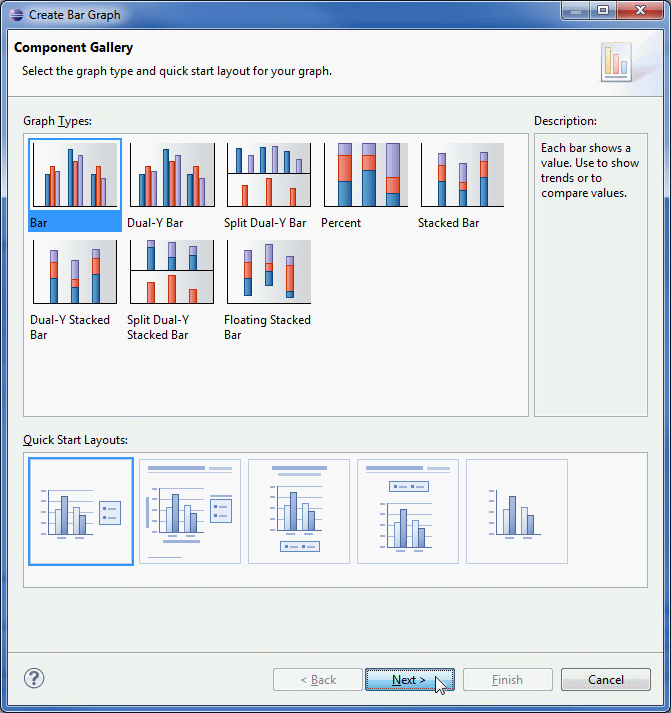
In the Create Bar Graph Wizard, under Graph Types, select Bar, and under Quick Start Layouts, select the far left Quick Start Layout, which should be the default. Click Next.
-
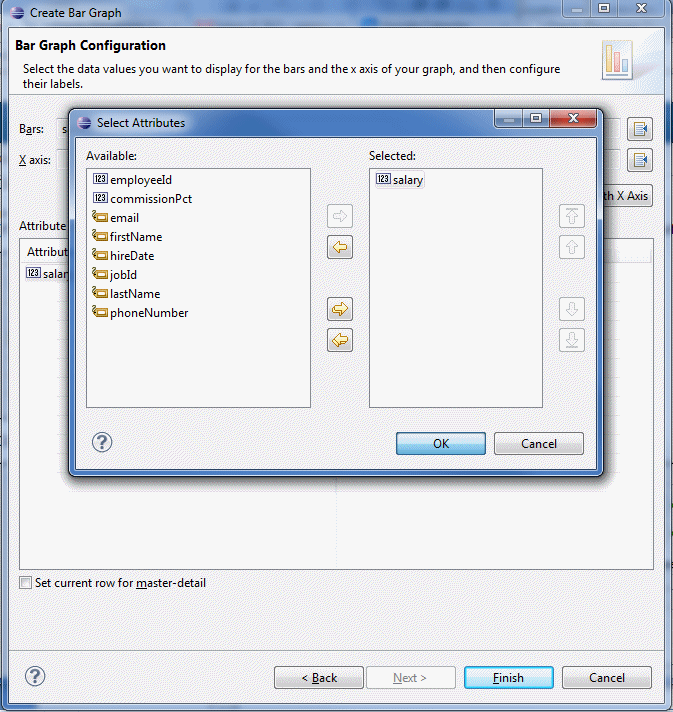
In the Bar Graph Configuration page, click the Add Attribute icon next to the Bars field. Select Salary for the value and shuttle it to the Selected list. Click OK.
-
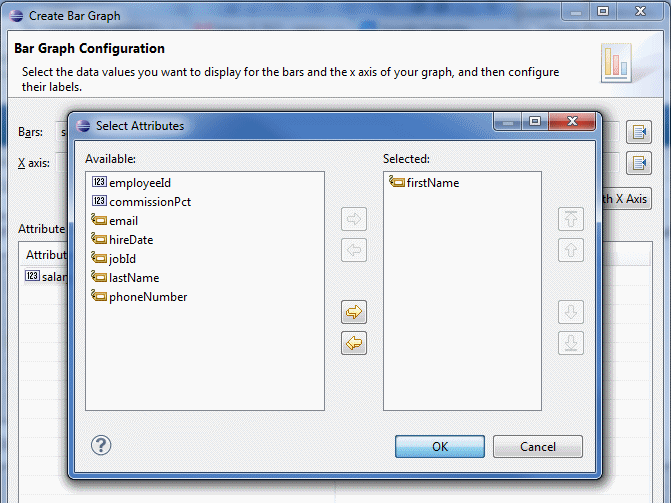
Next, click the Add attribute icon next to the X Axis field. Select firstName and shuttle it to the Selected list. Click OK.
-
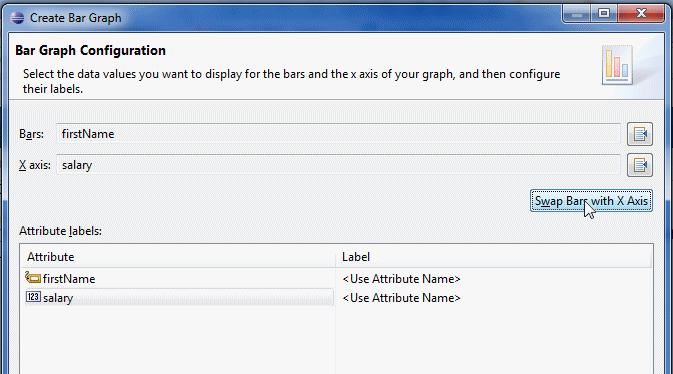
Click the Swap Bars with X Axis button, and then click Finish.
-
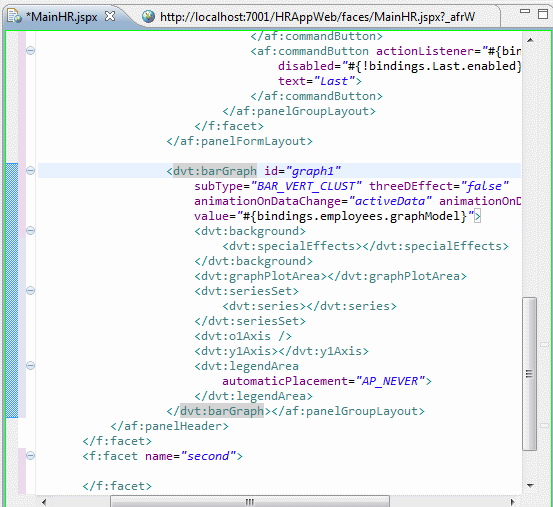
The code should look like the following:
-
Save your work.
-
Run MainHR.jspx. (Hint: Right-click MainHR.jspx, and select Run As > Run on Server.)
-
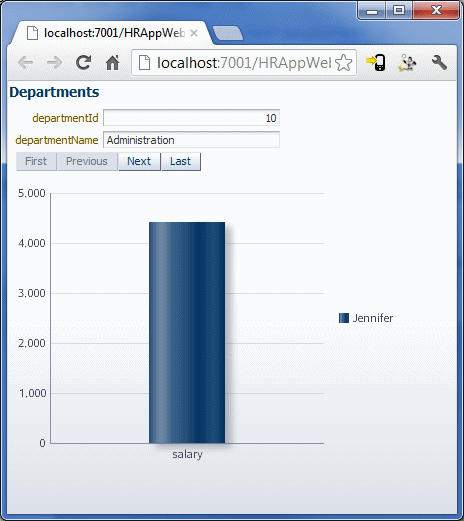
The page should look like the following:
-
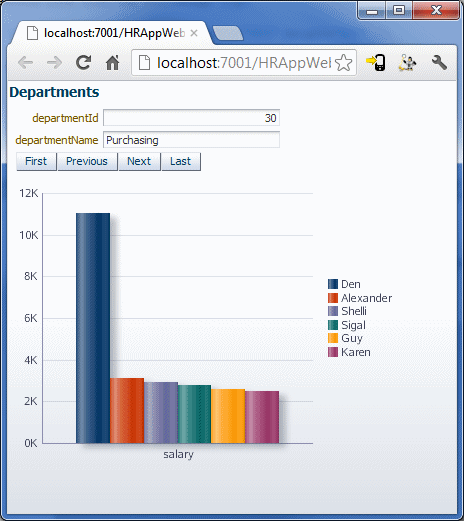
Use the navigation buttons on the form to navigate through the departments. As you navigate through departments, notice that the graph shows the employee salaries for the current department.
-
Save your work in the IDE.
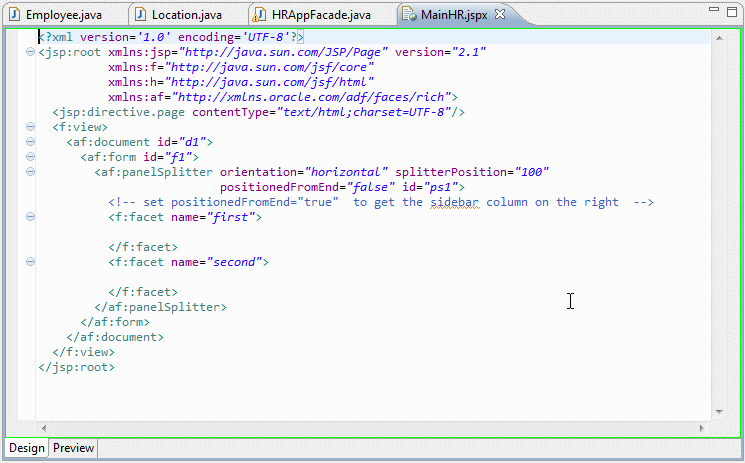
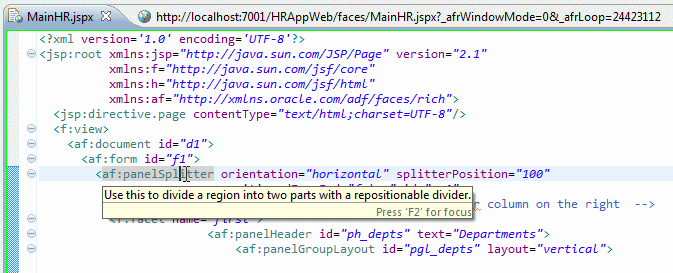
PanelSplitters are used to divide a region into two parts with a repositionalble divider.  Read more...
The two parts are identified as the "first" facet and the "second" facet. If the contained component supports it, the contents of a section will stretch to fill up all available space in that section. The panel splitter can be adjusted with the mouse, by pressing a collapse button, or by use of the arrow keys when the splitter is selected. A panel splitter can split horizontally or vertically based on the orientation attribute.
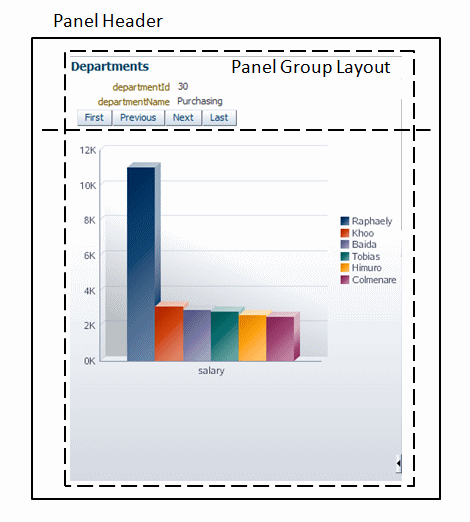
Now that the basic Departments form is working, you will add a graph that shows the employee salaries within the current department.
In this section, you add a few more layout components to control the layout of the right side of the page. The right side of the page will be used to display employee data. Notice in the diagram that the page is divided into two sections. This is accomplished by using an ADF Panel Splitter component. It divides the page vertically into the First facet and the Second facet. The right-hand side of the page is divided horizontally by Panel Splitter Two. This component is what separtes the top-right content from the bottom-right content. As you saw earlier, the panel splitter provides a repositional divider that separates content.
-
Open MainHR.jspx in the editor and find the <f:facet name="second"> tag.
-
In the Tags tab of the Palette, select the Panel Splitter component and drag it to just after the opening <f:facet name="second"> tag and before the closing </f:facet> tag.
-
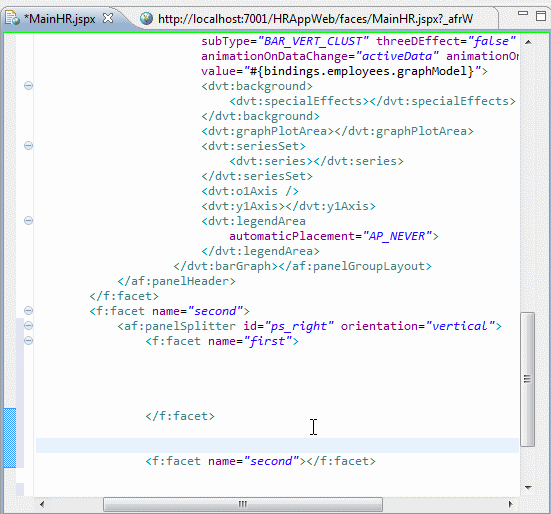
Set the ID on the Panel Splitter component to ps_right and the orientation to vertical. Click Finish.
-
The code should look something like the following:
-
Just as you did earlier, insert a couple of empty lines within the Panel Splitter component.
-
From the JSF Core node in the Tags tab of the Palette, drag a facet component to within the Panel Splitter. Name the facet first. Drag another facet component to within the Panel Splitter, and name the facet second.
-
As in previous steps, insert a few empty lines within the <f:facet name="first"> tag that you just added.
-
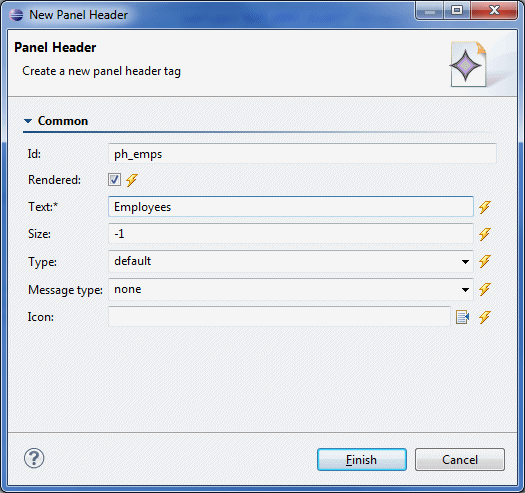
From the ADF Faces node in the Tags tab, drag a Panel Header to within the first facet. Set the Id to ph_emps and the Text to Employees. Click Finish.
-
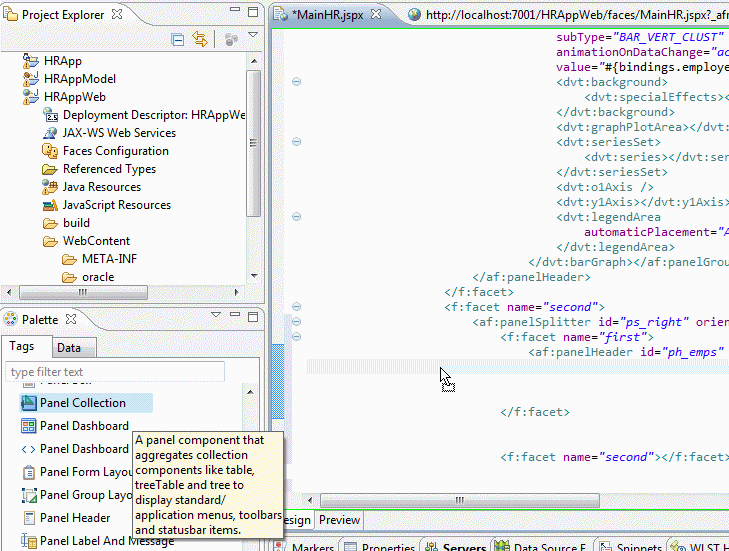
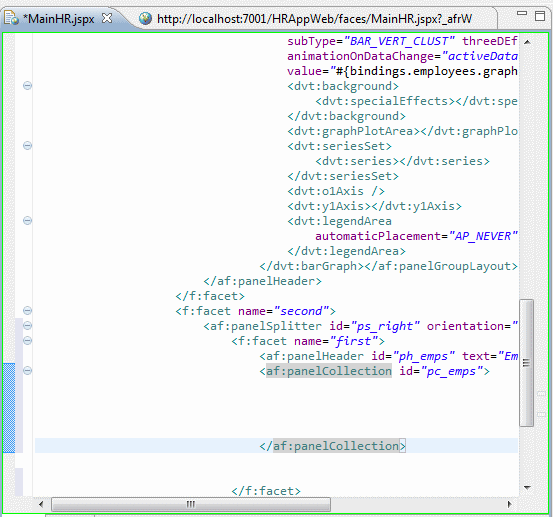
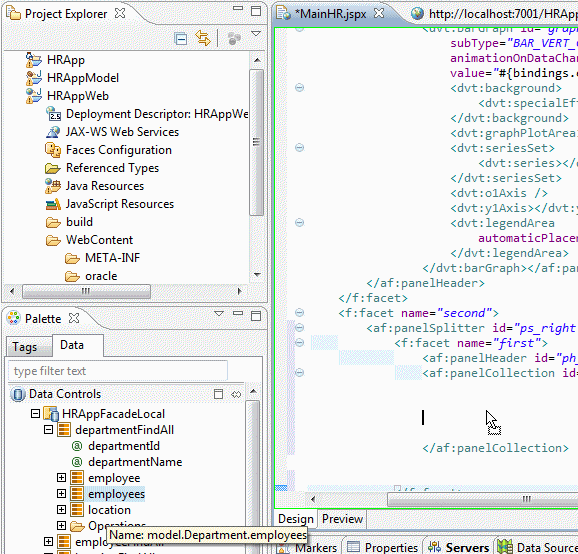
Next add the Panel Collection by dragging a Panel Collection component to just below the Panel Header within the first facet. Set the ID of the Panel Collection component to pc_emps. Click Finish.
-
As before, add a few blank lines within the Panel Collection that you just added.
-
In the Palette, switch to the Data tab.
-
Under HRAppFacadeLocal > departmentFindAll, select employees and drag it inside of the Panel Collection. Select Table > ADF Table.
-
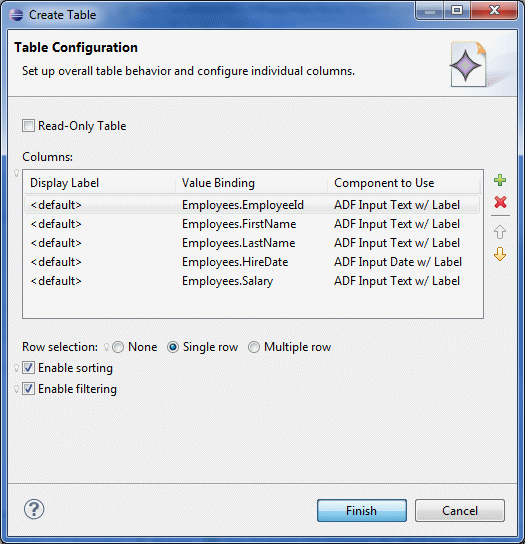
In the Table Configuration Wizard, remove all but the following columns:
Employees.EmployeeId
Employees.FirstName
Employees.LastName
Employees.HireDate
Employees.SalarySet Row selection to Single row and select Enable sorting and Enable filtering. Click Finish to create the table.
-
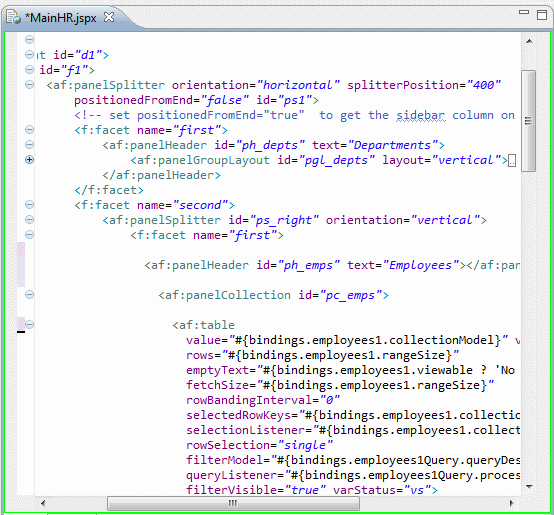
The code should now look something like the following:
-
Save your work.
-
Run the page to see your changes. (Hint: Right-click MainHR.jspx and select Run As > Run on Server.) Notice that the Employees table shows all the employees in the selected department and that the graph shows a comparison of the salaries.
-
Because the top portion of the page (the first facet) is complete, you can collapse it in the code editor. Collapsing completed pieces of code makes it a little easier to navigate through the code. To collapse the code for the first facet, click the minus sign that appears on the same line as the <f:facet name="first"> tag in the left margin of the code editor.
-
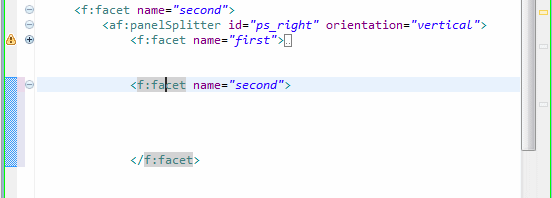
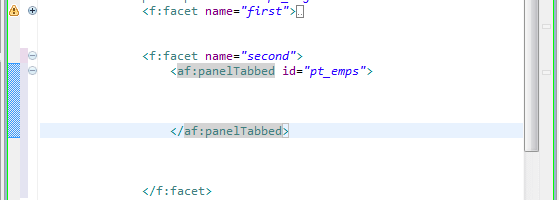
Insert a couple of empty lines inside of the <f:facet name="second"> tag.
-
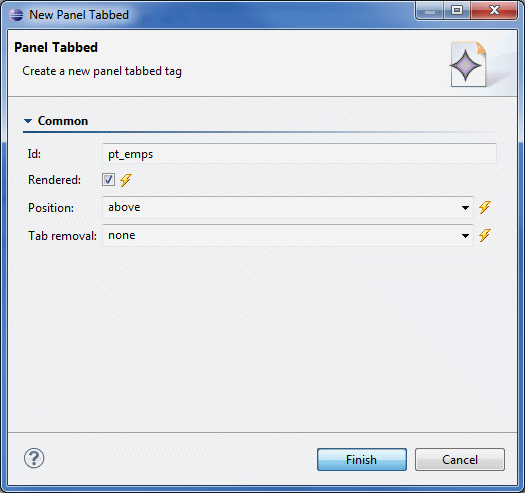
From the ADF Faces node in the Tags tab of the Palette, drag a Panel Tabbed component to within the second facet. Set the Id of the component to pt_emps. Click Finish.
-
Insert a couple of empty lines inside the <f:panelTabbed id ="pt_emps"> tag.
-
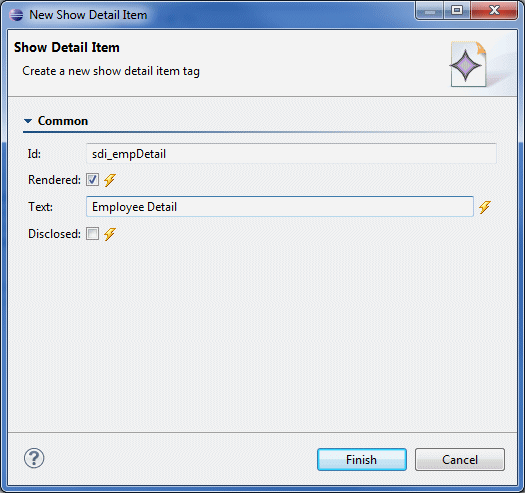
Drag a Show Detail Item component to within the panelTabbed tag that you just added. Set the Id of the Show Detail Item component to sdi_empDetail and the Text to Employee Detail. Click Finish.
-
Insert a couple of empty lines inside of the <af:showDetailItem id="sdi_empDetail" text="Employee Detail"> tag.
Now that the layout containers are in place, you can add the data components.
-
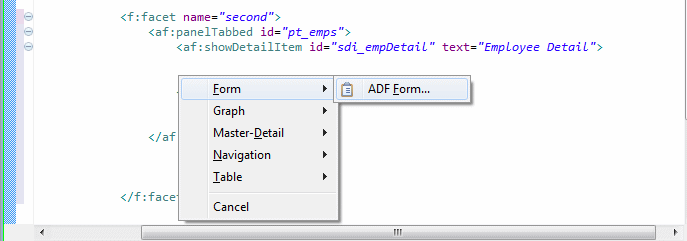
In the Data tab of the Palette, expand the Data Controls node. Under HRAppFacadeLocal > departmentFindAll, select employees and drag it inside of the Show Detail Item component. From the pop-up list, select Form > ADF Form.
-
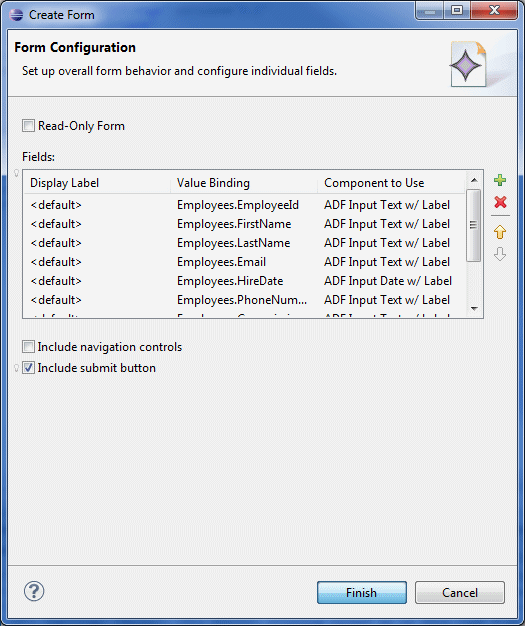
Rearrange the columns to any order you like (you can use the following screen as an example). Select Include submit button, and click Finish to create the form.
-
Save your work.
-
Run the page to see your changes. (Hint: Right-click MainHR.jspx, and select Run as > Run on Server.) The page should look something like the following:
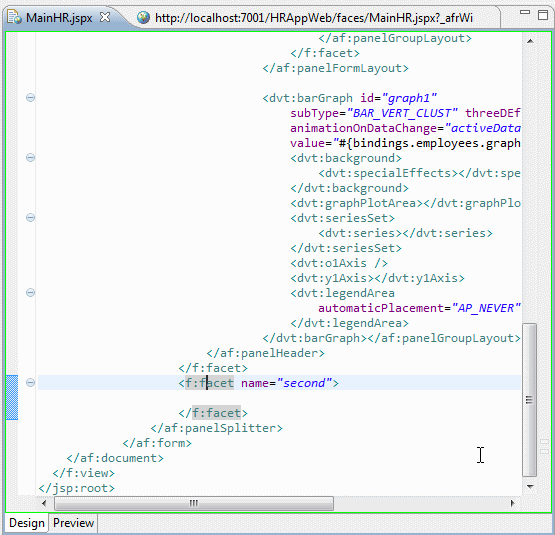
In the next few steps, you add a Panel Splitter component to the right side of the page and set the orientation to vertical.
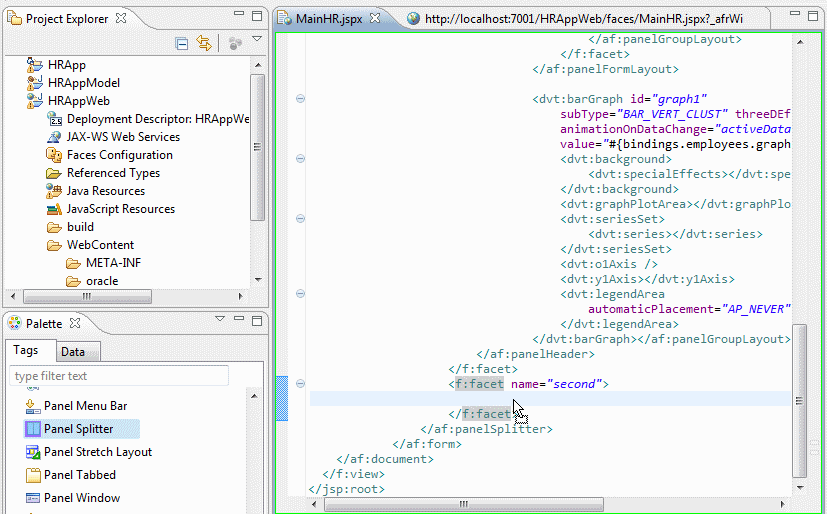
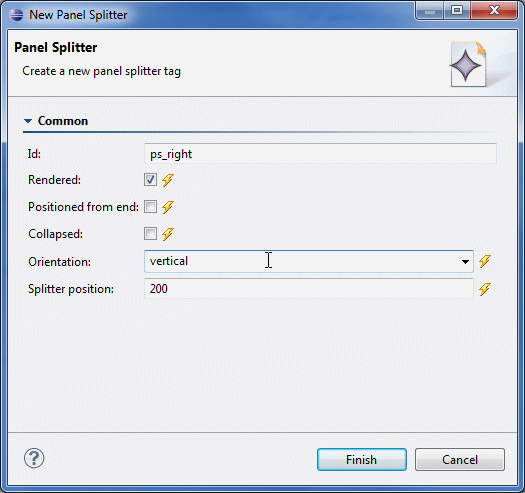
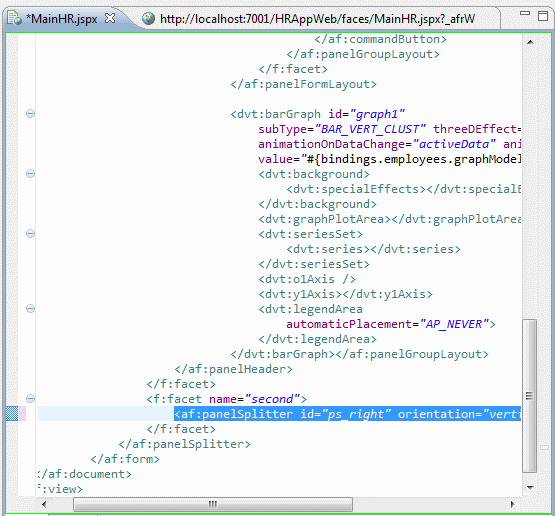
The Panel Splitter component uses two facet components to hold content. In the next step you add two facets to the Panel Splitter.
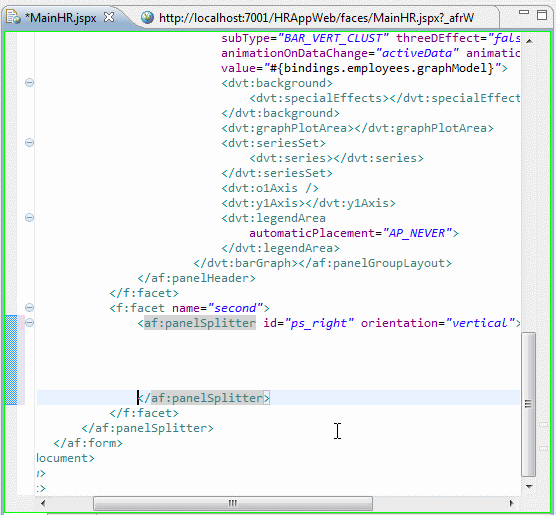
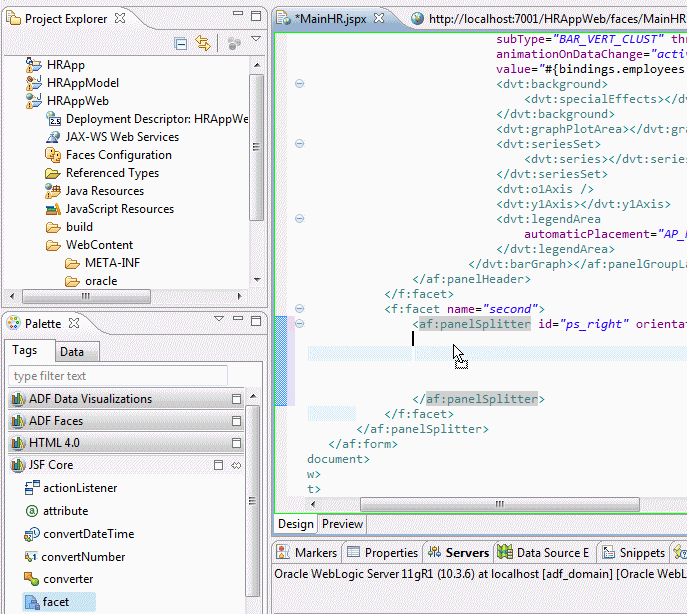
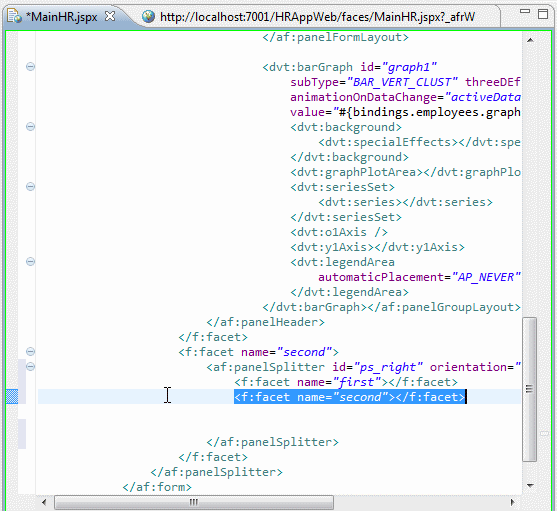
Because the Panel Splitter has a vertical orientation, the first facet is at the top right side of the page, while the second facet is at the bottom right side of the page. In the next few steps, you will be working with the first facet to add layout and data components.
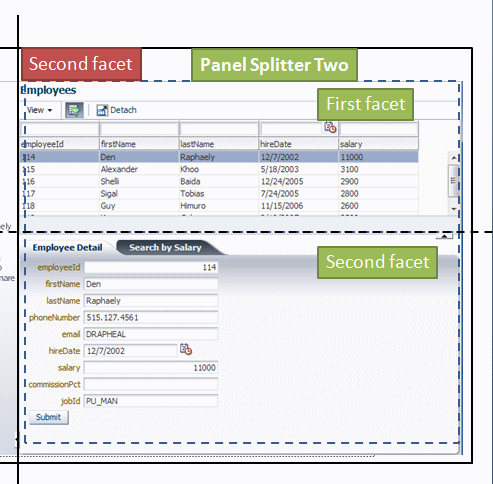
The first facet has two layout components: a Panel Header, which provides a heading for the content, and a Panel Collection component. The Panel Collection component wraps a table component and provides some extra menu options and functionality to the table.

Now that the top portion of the page is complete, you add a few more layout components to the bottom right side of the page. These components enable a tabbed layout. The first tab will be used to show the details of the currently selected employee.
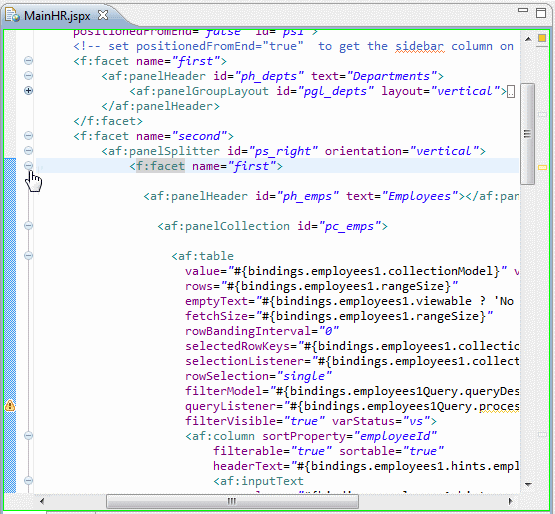
The collapsed code should look something like the following:
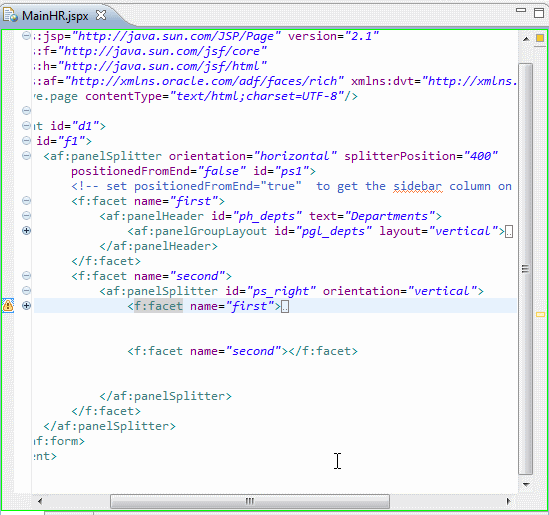
When this page is complete, the bottom right portion of the page will contain a tabbed layout that enables users to click whichever tab is needed. This layout is achieved by using two types of ADF layout components: a Tabbed Layout component and Show Detail Item components. The Tabbed Layout component provides the management of the tabs, and the Show Detail Item components control the content of each tab.
That completes the layout and data components from the basic model. In the next section, you add a custom query to the model and add an ADF task flow to the application.
In this section, you add a customized query to your application. This query returns a collection of employees that have a salary greater than an argument passed to the query. You consume this query in the next section when you create an ADF task flow.
In the first few steps, you add the custom query.
-
In the Project Explorer, under HRAppModel, find and open Employee.java.
-
Insert an empty line after the @NamedQuery... annotation.
-
On the line that you inserted, enter @NamedQueries (. Eclipse completes the parentheses for you. Insert a few empty lines inside the parentheses.
-
Add opening and closing brackets inside the parentheses in the @NamedQueries annotation.
-
Select and drag the @NamedQuery to within the @NamedQueries annotation, and add a comma to the end of the line.
-
Add the following code as a second @NamedQuery. This query selects all the employees with a salary that is greater than the argument passed to the query.
@NamedQuery(name = "Employees.findBySal", query = "select o from Employee o where o.salary > :p_sal")
-
Save your work.
-
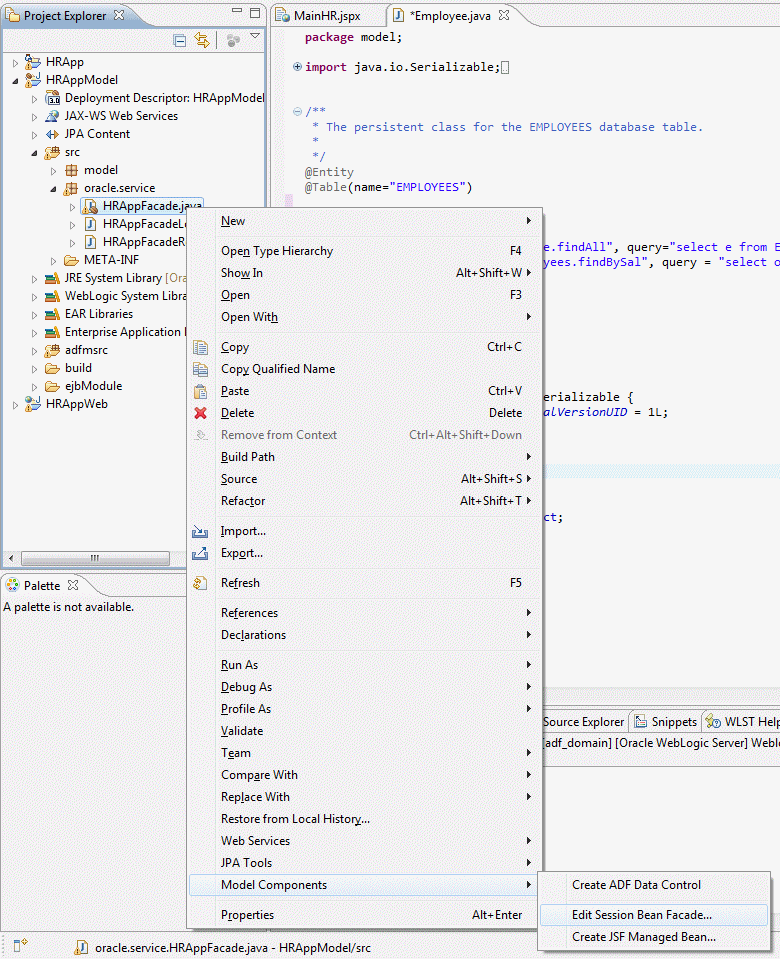
In the Project Explorer, expand oracle.service. Right-click HRAppFacade.java and select Model Components > Edit Session Bean Facade.
-
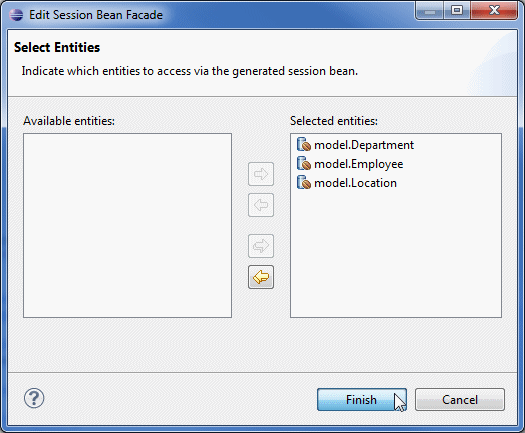
Click Finish to accept the defaults. Eclipse interrogates the classes for changes and rebuilds the Session Facade. The Session Facade now includes the new query.
-
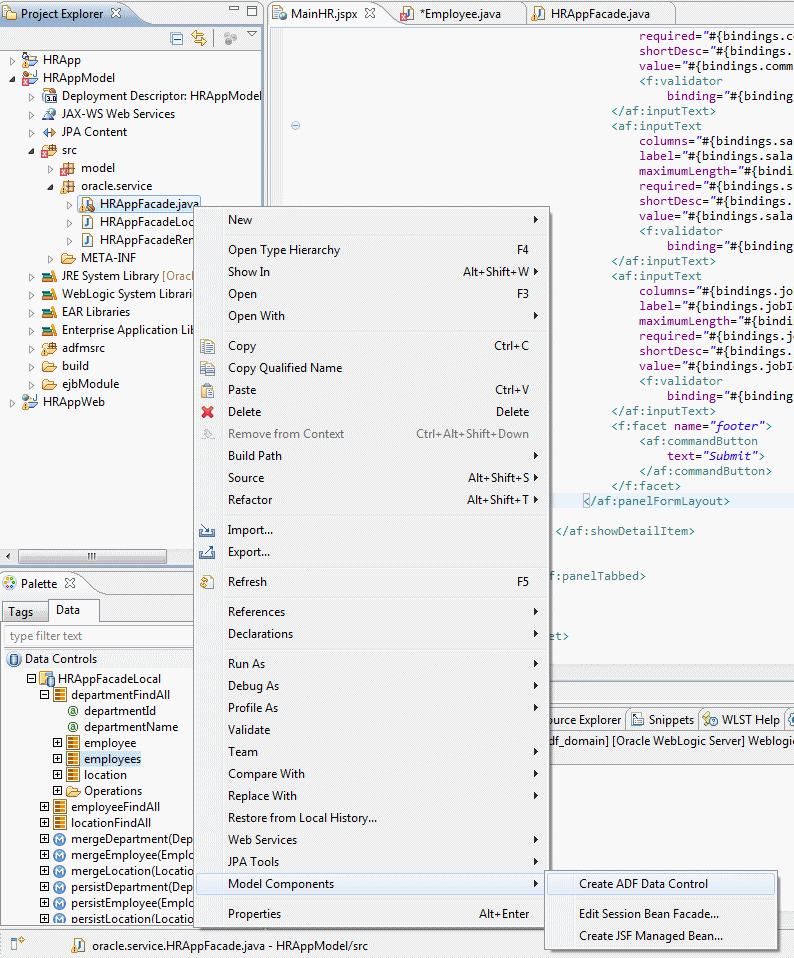
To create a data control that is based on the new query, right-click HRAppFacade.java and select Model Components > Create ADF Data Control.
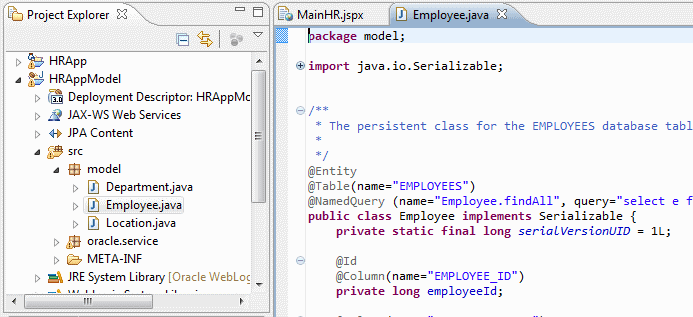
In the next few steps, you add a named query to the class. To do that, you change the @NamedQuery annotation to a @NamedQueries annotation to accommodate multiple queries. You then update the Session Facade to include the new named query.


Now that you have the new query defined, you add it to the Session Facade and then to the data controls.
Now that you have created an ADF data control based on the new query, you can consume it on an ADF Faces page.

 Part 1: Configuring Eclipse and WebLogic Server (WLS)