In this section of the tutorial, you use an ADF task flow to create a reusable, self-contained component that you will consume on a page.
ADF task flows provide a modular approach for defining control flow in an application
 Read more...
Instead of representing an application as a single large JSF page flow, you can break it up into a collection of reusable task flows. Each task flow contains a portion of the application's navigational graph. The nodes in the task flows are activities. An activity node represents a simple logical operation, such as displaying a page, executing application logic, or calling another task flow. The transactions between the activities are called control flow cases.
-
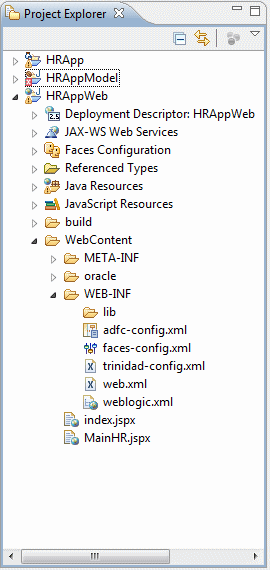
In the Project Explorer, expand HRAppWeb > WebContent > WEB-INF.
-
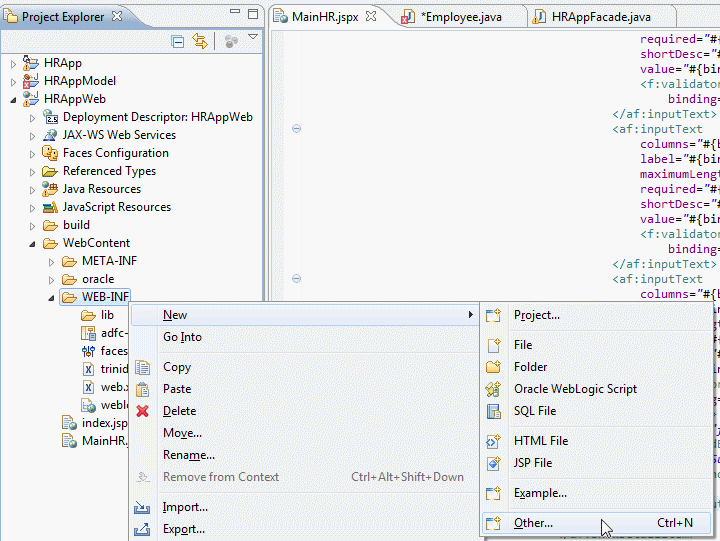
Right-click WEB-INF and select New > Other.
-
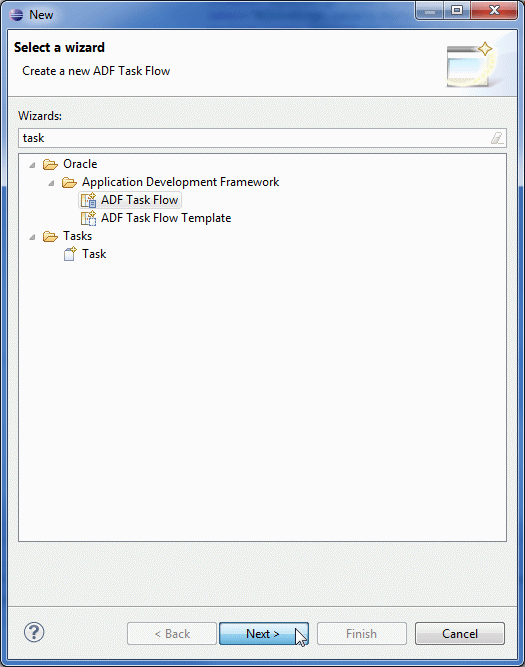
On the Select a wizard page, enter task in the filter and select ADF Task Flow. Click Next.
-
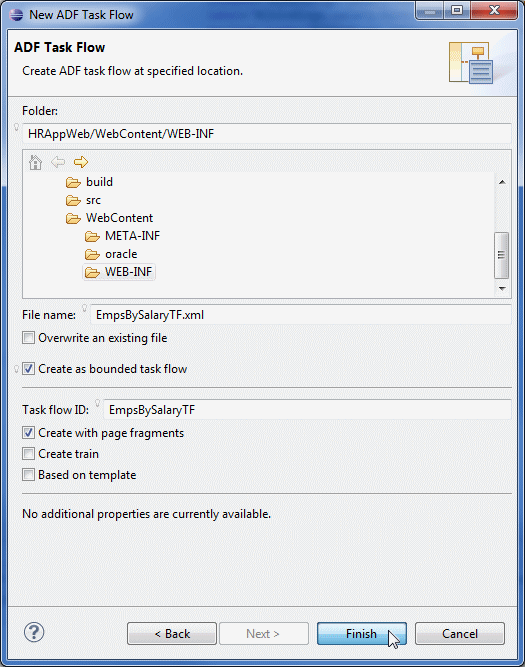
In the New ADF Task Flow Wizard, specify EmpsBySalaryTF.xml for the file name. Select Create as bounded task flow and Create with page fragments. Click Finish to create the task flow.
-
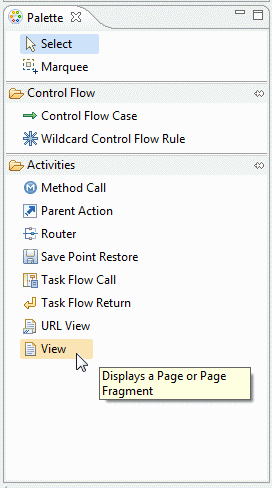
Notice that the Palette reflects the components that are valid for the current object type in the editor. In this case, because you have a task flow open, the Palette shows components that are available for building task flows.
-
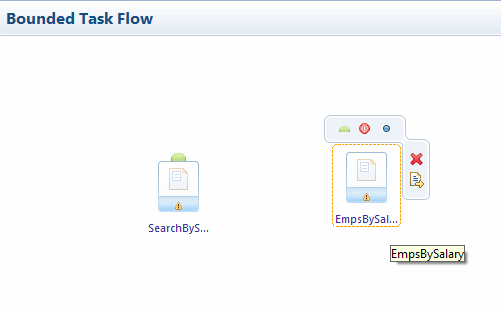
From the Palette, drag a View activity to the task flow diagram and name it SearchBySalary.
-
Drag another View activity to the diagram and name it EmpsBySalary.
-
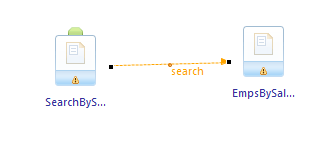
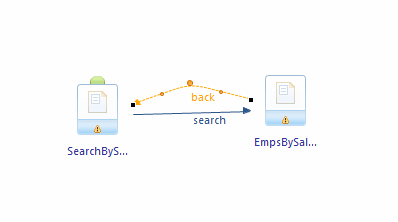
Create a control flow case from the SearchBySalary view to the EmpsBySalary view. Click Control Flow Case in the Palette, then click SearchBySalary, and then click EmpsBySalary. Name the control flow case search.
-
Repeat this procedure to create a control flow case from EmpsBySalary to SearchBySalary, and name the control flow case back.
-
In the Palette, click the Select icon, and then double-click SearchBySalary to create the associated page. Name it SearchBySalary.jsff and click Next.
-
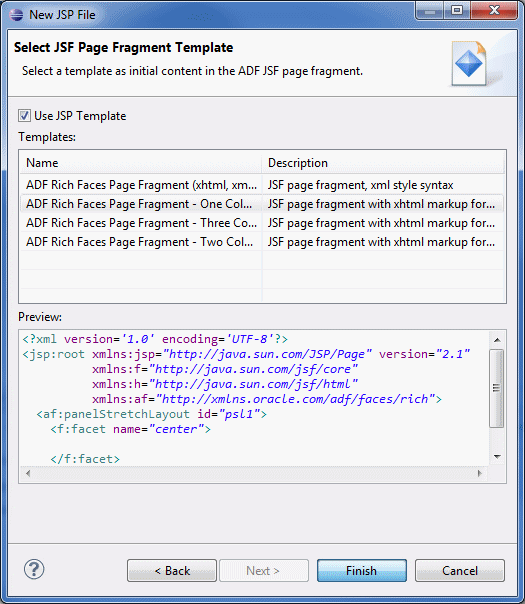
Select ADF Rich Faces Page Fragment - One Column and click Finish.
-
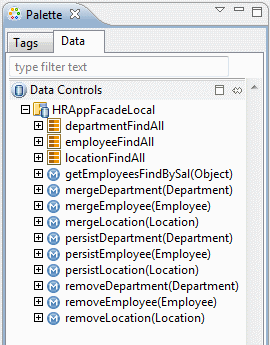
In the Data tab of the Palette, expand the Data Controls node and then expand HRAppFacadeLocal.
-
Drag getEmployeesFindBySal(Object) to the center facet and select Parameter > ADF Parameter Form.
-
Because you want the query to execute on the second page, remove the actionListener from the commandButton. Click the commandButton in the source code.
-
Select the line actionListener="#{bindings.getEmpl... and delete it.
-
Change the text property value to Search.
-
Save your work. Because you have changed both the task flow and the page, click Save All.
-
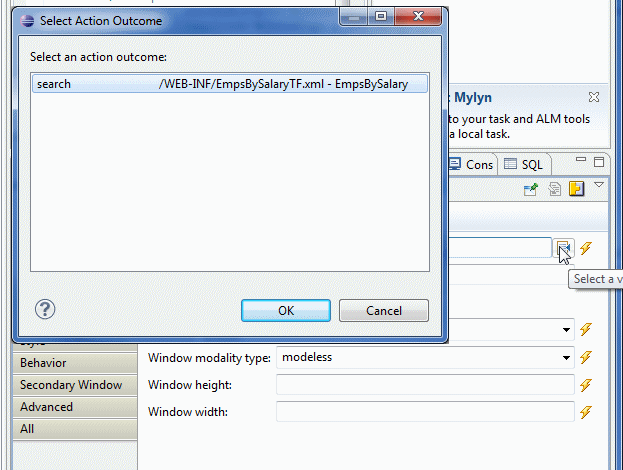
To set the Action property of the commandButton to search, in the Properties tab, click the Browse icon on the far right of the Action property field. Select search from the pop-up window. The pop-up window shows only control flow cases that are valid for the page. Click OK. Note: If search is not available in the list, you may have not saved your work. Save your work and try again.
-
In the Palette, click the Tags tab and use the filter to find the setActionListener. Drag the setActionListener component to the code editor and drop it into the commandButton tag.
-
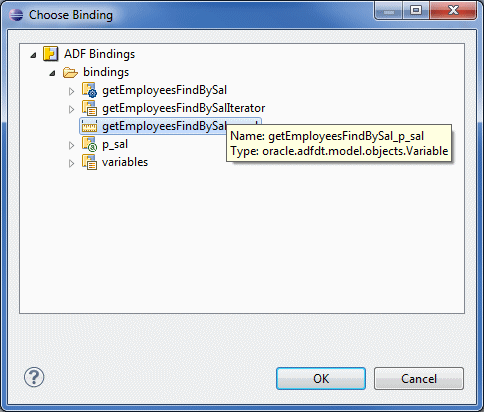
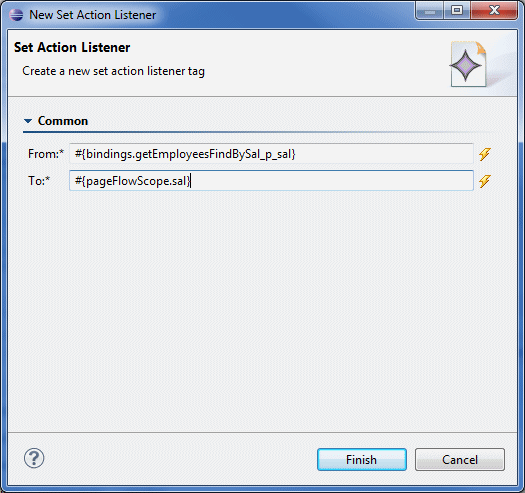
In the New Set Action Listener dialog box, next to the From field, click the bind to a dynamic value icon. Expand the nodes in the list and select the getEmployeesFindBySal_p_sal binding. Click OK.
-
In the To field, enter #{pageFlowScope.sal} and click Finish to create a pageFlowScope variable. The pageFlowScope variable is available for as long as the task flow is active.
-
While you have the SearchBySalary.jsff page open, scroll up and find the label property of the inputText tag and set the value of the label to Enter Lowest Salary for Search.
-
Create the EmpsBySalary.jsff page just as you created the SearchBySalary.jsff page. (Hint: Open the EmpsBySalaryTF.xml file and double-click the EmpsBySalary view. Select ADF Rich Faces Page Fragment - One Column.)
-
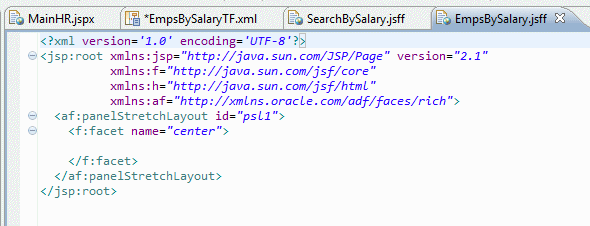
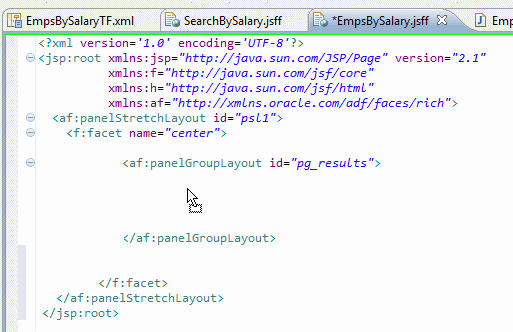
When page creation is complete, Eclipse opens the page in the editor. The code looks something like the following:
-
Before you add data components, you need to add some layout components to specify the correct layout for the page. First, you add a Panel Group Layout component to the center facet. (Hint: Use the filter on the Tags tab of the Palette to find the Panel Group Layout component, and then drag it to within the center facet tag.)
-
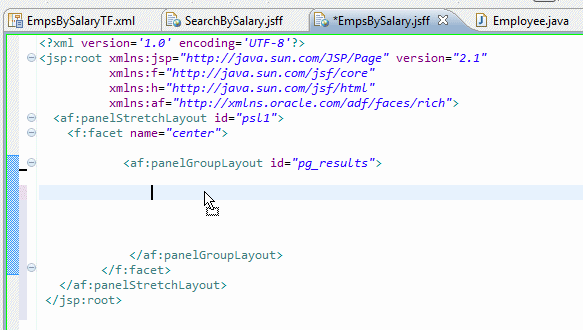
Insert a few empty lines inside of the panelGroupLayout tag.
-
Use the filter on the Tags tab of the Palette to find a Button component. Drag the ADF Faces Button component to within the panelGroupLayout tag that you just added.
-
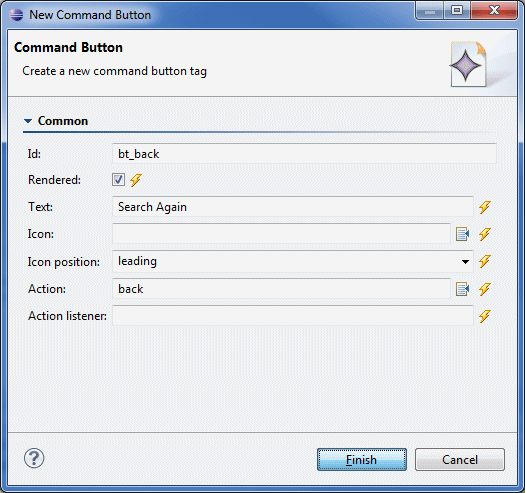
In the New Command Button Wizard, enter bt_back for the Id and Search Again for the Text. Set the Action to back. Click Finish.
-
Next, add a Panel Collection component to the page. Later, you will add an ADF Table component that displays the results of the query. The Panel Collection component will surround the Table component and provide several behaviors that enhance the usability of the table.
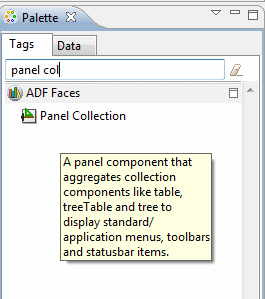
Use the filter on the Tags tab of the Palette to find the Panel Collection component.
-
Drag the Panel Collection to within the panelGroupLayout tag.
-
Set the Id of the Panel Collection to pc_empsResults and click Finish.
-
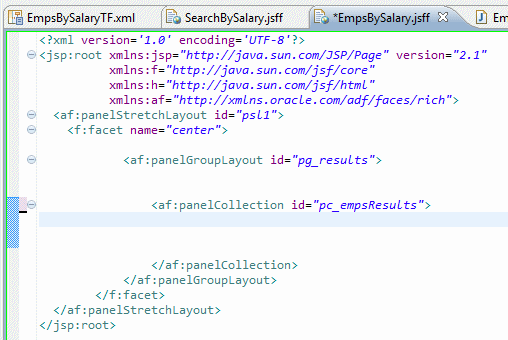
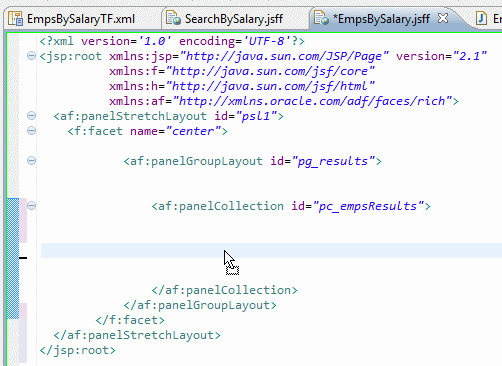
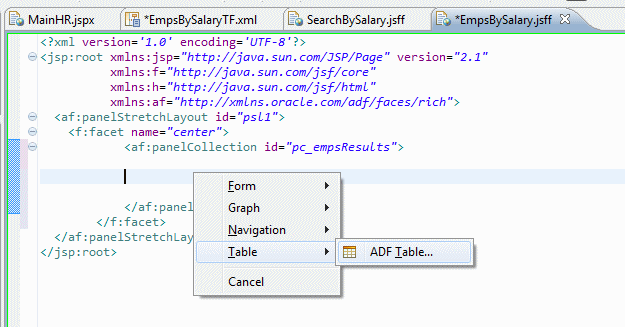
Insert a couple of empty lines within the Panel Collection tag in the source code. The code should now look something like the following:
-
Now that the layout is done for the page, we can add and configure the data component.
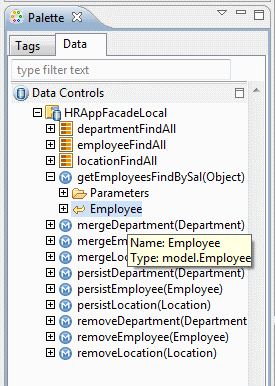
Open the Data tab on the Palette and expand the Data Controls node to find getEmployeesFindBySal.Employee.
-
Drag getEmployeesFindBySal.Employee to within the Panel Collection.
-
Select Table > ADF Table.
-
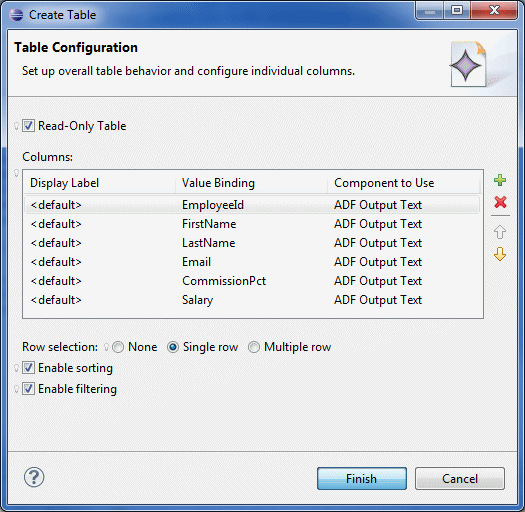
Configure the table as follows:
Include the following columns:
EmployeeId
FirstName
LastName
Email
CommissionPct
SalarySelect Read-Only Table.
For Row selection, select Single row.
Select Enable sorting.
Select Enable filtering.
Click Finish. -
In the Project Explorer, right-click EmpsBySalary.jsff and select Open Page Definition.
-
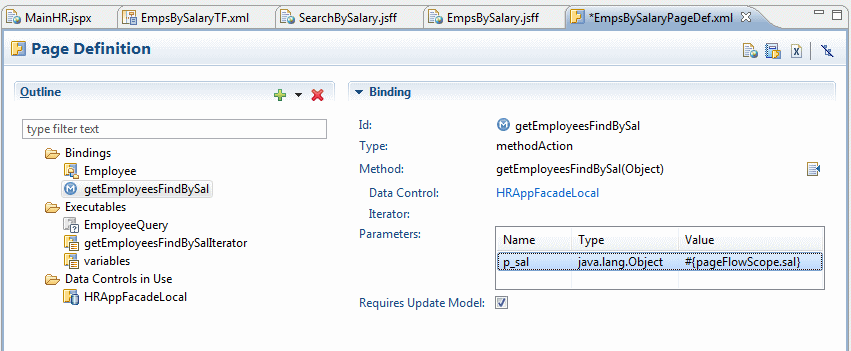
In the Page Definition area, under Bindings, select getEmployeesFindBySal. Enter p_sal for the parameter name and #{pageFlowScope.sal} for the Value. Save your work.
In this simple example application, you consume the custom query that you created in the previous section by creating a couple of pages in a task flow. The pages include a query page and a query results page. You add the task flow to a tab on the MainHR.jspx page, and when the application runs, the user sees either the query form or the results in the exact same space on the page.
When task flow creation is complete, Eclipse opens the task flow in an editor.
In the next few steps, you create two view activities and connect them with control flow cases for navigation. You then create page fragments and consume the EmpsBySalary data control.


You now have the control structure in place for the search and results. In the next few steps, you create the page fragments that display the search and results.
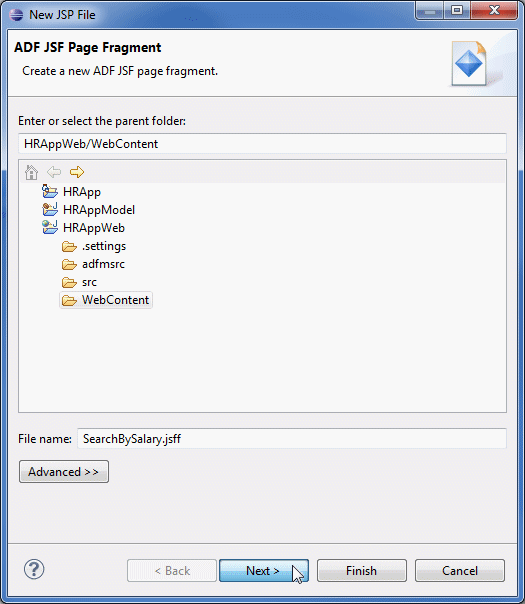

When page creation is complete, Eclipse opens the page in the editor.
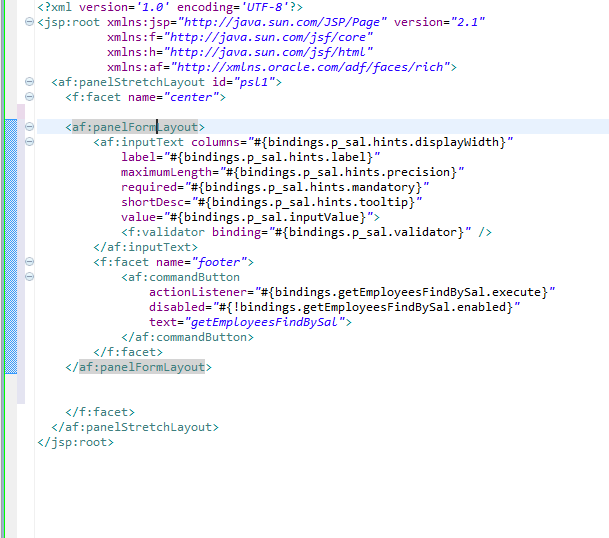
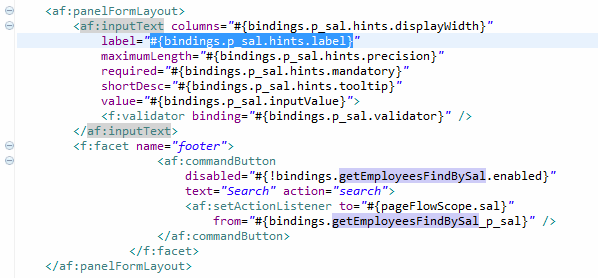
The query on which the parameter form is based accepts a salary as an argument. Therefore, the form includes an input field and a command button that is set to execute the query. Because the application uses a second page to show the results, you need to pass the salary argument to that page.
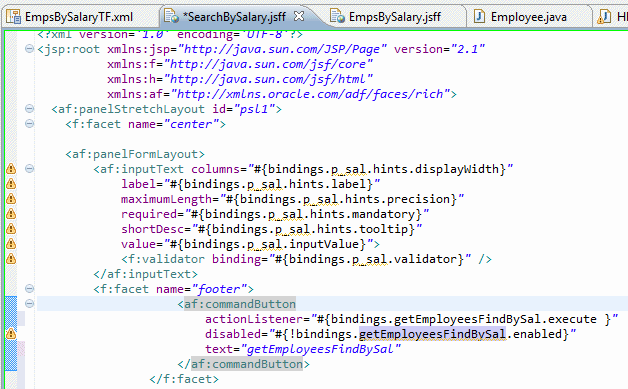


Next, you use a component called a setActionListener to take the argument from the input field on the search page and pass it to the results page. You use a pageFlowScope variable to hold the value.

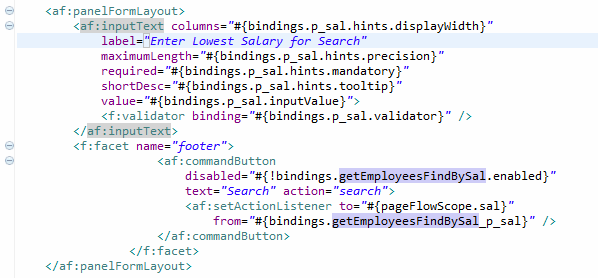
The search argument input page is complete. Next, you create the results page.
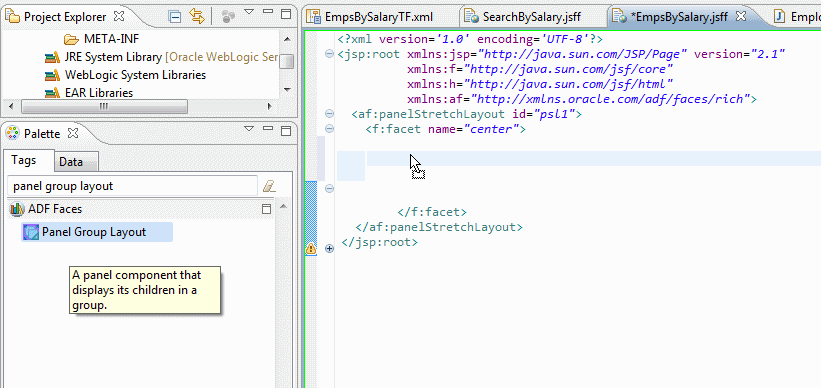
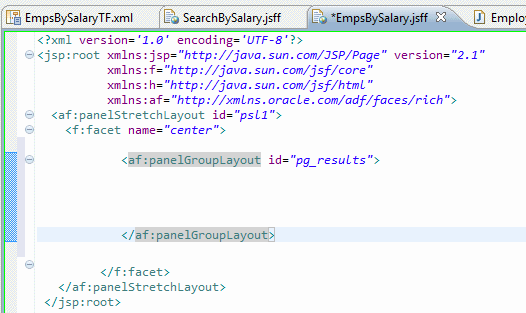
The Panel Group Layout component that you just added is used to separate components. In this case, the page will have two components in the group: a navigation button, and a data table that displays the results of the search.

Next, you need to set the results page to get the argument for the query from the pageFlowScope parameter, sal. (Remember, when you created the query page, you added a setActionListener that stored the argument in a pageFlowScope parameter named sal.)

That completes the definition of the task flow and the pages. In the next few steps, you consume that task flow as a region on the MainHR.jspx page.
An ADF task flow is a reusable software component that may contain multiple pages, navigation, and decision points. ADF task flows are used to segregate business activities, like creating an order, into reusable software components. ADF task flows are usually consumed from a page as a region. A task flow that is consumed as a region can display multiple parts or steps of a process in a single area, making efficient use of screen real estate.
In this section, you add the task flow that you just built as a region on the page.
-
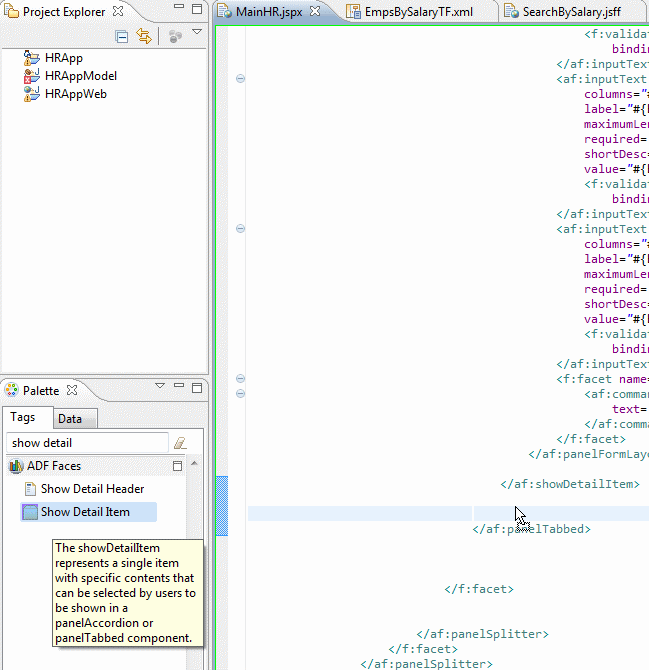
Open MainHR.jspx in the editor.
-
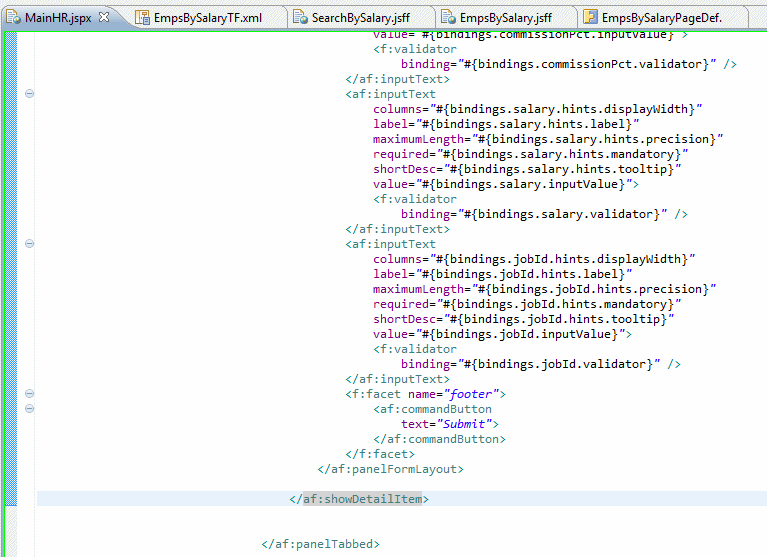
In the source code editor, find the </af:showDetailItem> tag that is inside of the </af:panelTabbed> tag. For context, remember that the Show Detail Item components work together with the Panel Tabbed component to render tabs on a page. The Panel Tabbed component is on the bottom right side of the page and currently has only one tab, which is the Employee Detail tab.
-
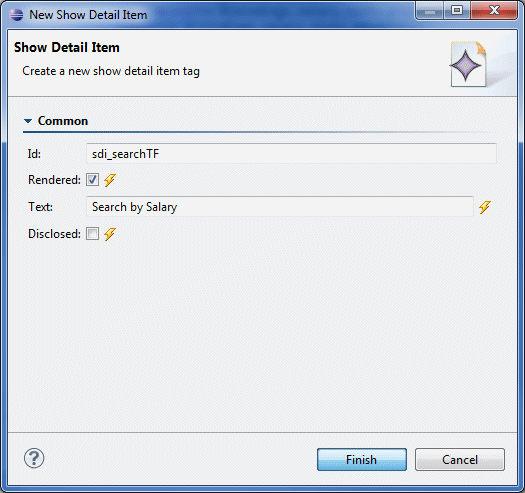
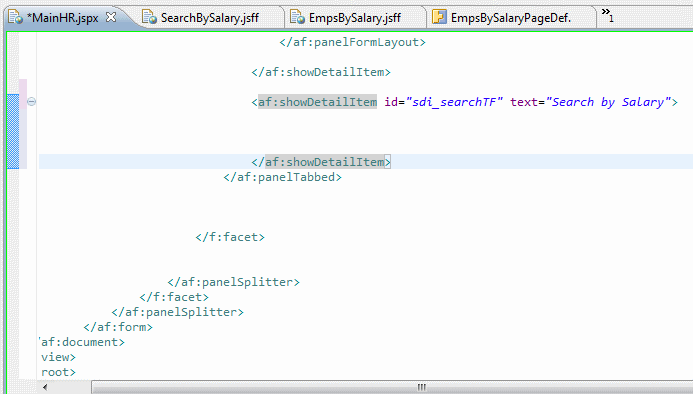
Add a Show Detail Item component just after the closing </af:showDetailItem> tag and before the closing </af:panelTabbed> tag. Later in this tutorial, you place a region within the tab that you just created.
-
Set the Id to sdi_searchTF and the Text to Search by Salary.
-
Just as you have done before, insert a few empty lines inside of the showDetailItem tag. Your code should look something like the following:
-
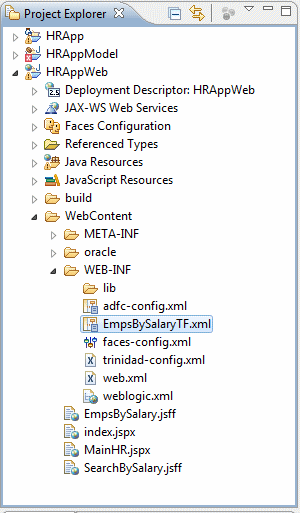
In the Project Explorer, locate EmpsBySalaryTF.xml. (Hint: Expand HRAppWeb > WebContent > WEB-INF.)
-
Drag EmpsBySalaryTF.xml to within the showDetailItem tag that you just added, and select Region as the component type. Save your work.
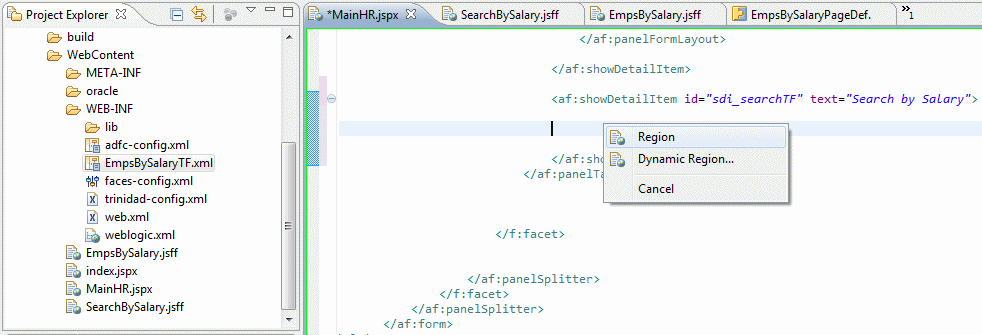
You have now added the necessary components to consume the search task flow as a region on the page.
Now all of the pieces are in place, and you can test the page.
-
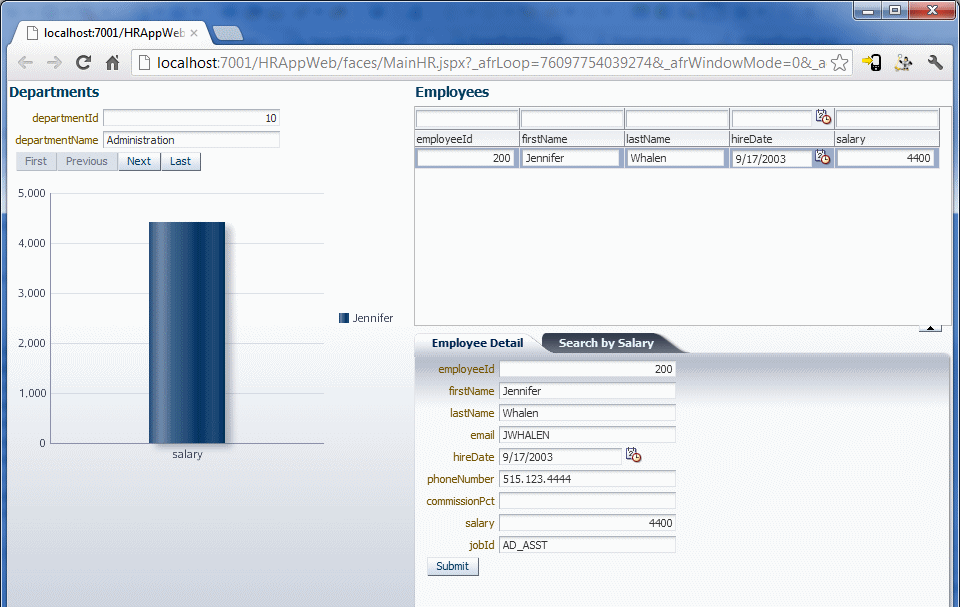
Run MainHR.jspx as you did earlier. (Hint: Right-click MainHR.jspx and select Run as > Run on Server.)
-
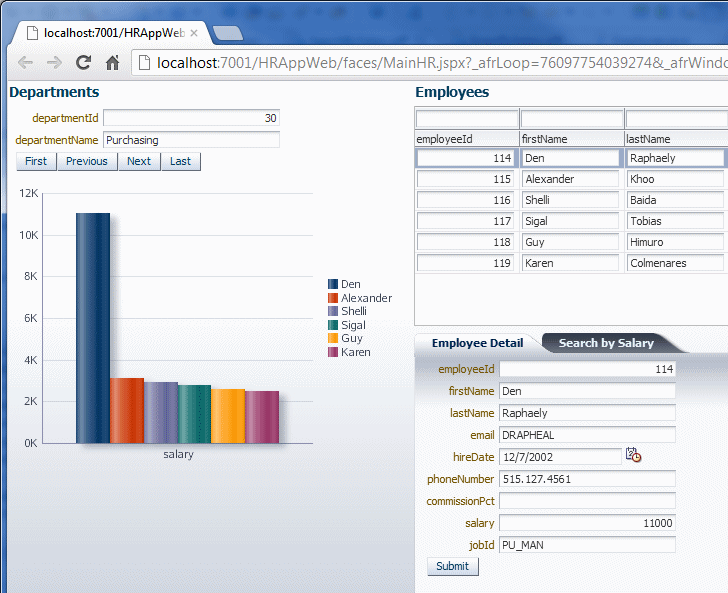
Click Next in the Departments pane to scroll through a few departments. Notice that the Employees list and the graph change to reflect the currently displayed department.
-
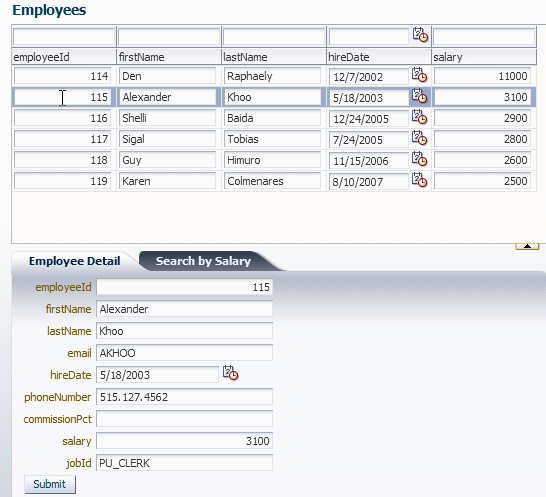
In the Employees section, click an employee that is not selected and notice the Employee Detail changes to reflect the currently selected employee.
-
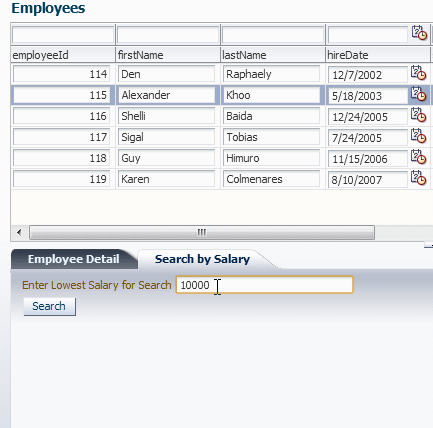
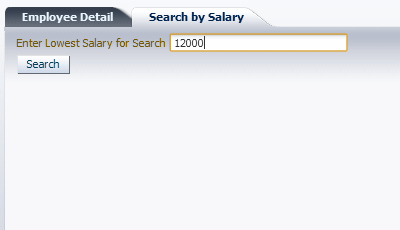
Click the Search by Salary tab and enter a value (for example 10000).
-
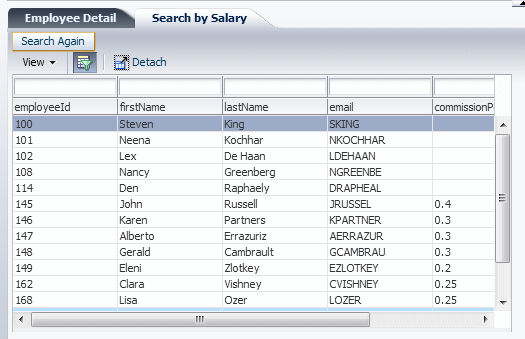
Click Search. The results page opens in the same area as the search page. The page behaves this way because you used a task flow to encapsulate this behavior.
-
Click Search Again and in the search page, enter another value.
-
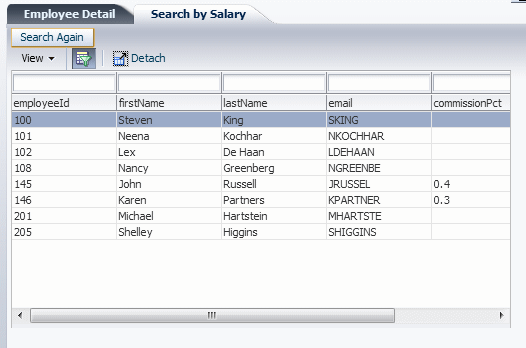
Click Search and notice that the list of employees changes.
-
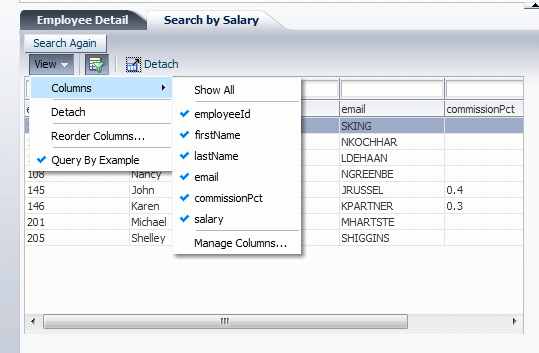
In the results table, click the View drop-down menu to see the available options. These options are created by the Panel Collection component that you added to the page.
-
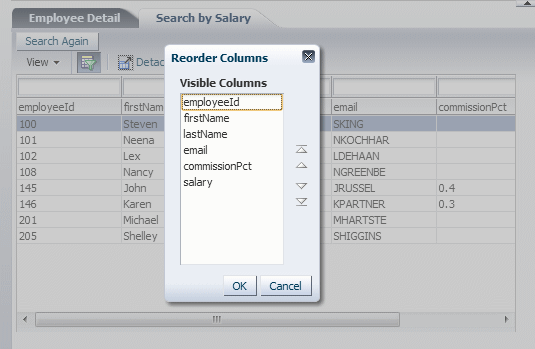
Select Reorder Columns from the drop-down menu.
-
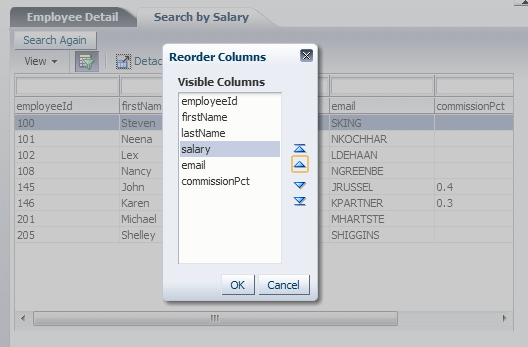
Move salary up to just under lastName and click OK.
-
Continue to experiment with the application as you like. When you are done, close your browser.
AppXray is an OEPE technology that analyzes an application and provides validation and consistency checking across the many layers of the application. It works by examining source code throughout the application and storing the relationships in its database. It then uses that information to provide features like code completion and easy navigation within the application code.
As you build the application, AppXRay detects new artifacts and adds them to its database. AppXRay collects information about:
- The projects web.xml file
- Faces Configuration
- JSP pages and artifacts
- Resource bundles
- ADF artifacts
- etc.
In these next steps, you will use AppXRay to examine the application you have built.
The first feature we will look at in Content Assist.
-
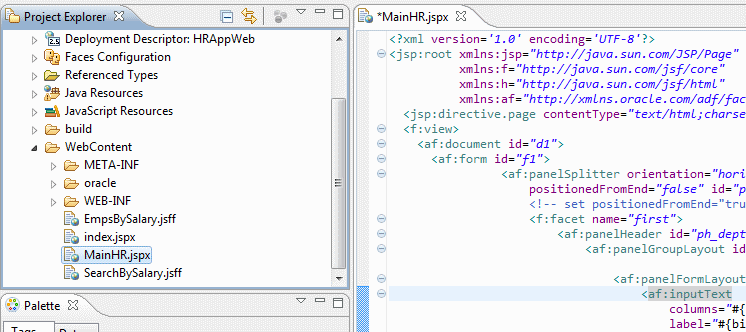
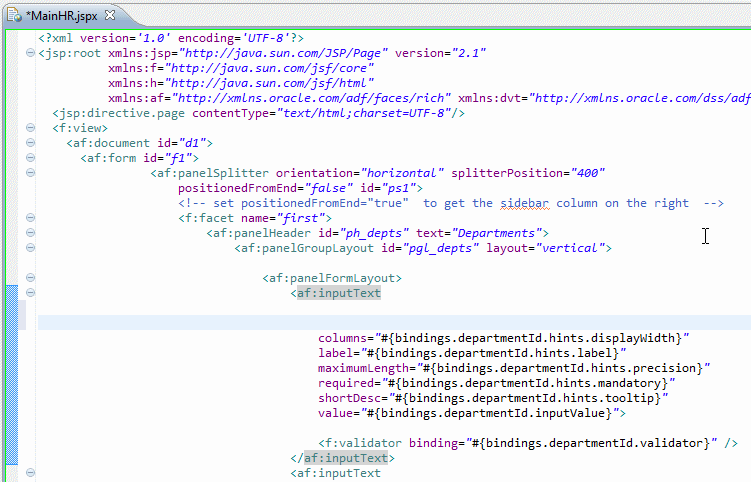
Open MainHR.jspx in the editor.
-
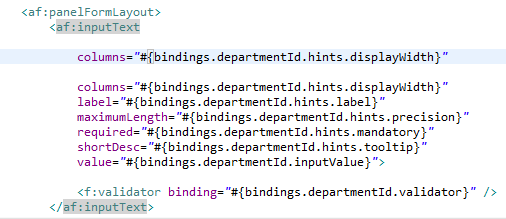
Insert a blank line in the first <af:inputText> tag just above the columns property.
-
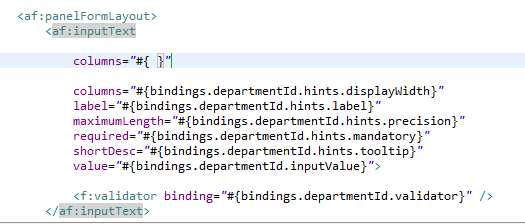
Just for the purpose of practice, you will add a columns property and duplicate the binding. Enter columns="#{ . Notice that OEPE completes the closing bracket and quotes for you.
-
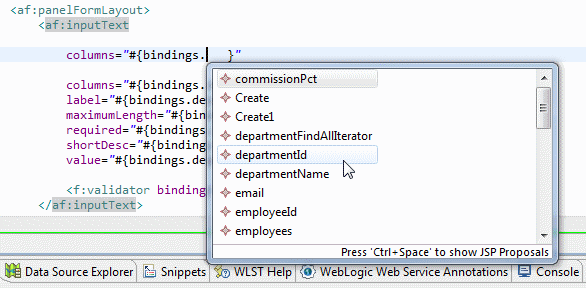
Next enter bindings. and hit CTRL + space. In the code assist popup, double-click departmentId.
-
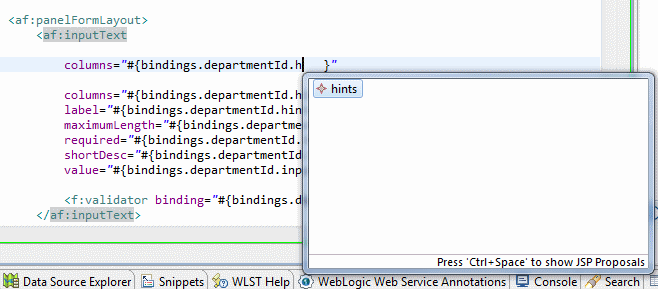
Add a period after departmentId and notice that code assist proposes all the possible attributes. Enter h and the list narrows to only hints. Double-click hints or select hints and hit Enter.
-
Use code assist to complete the code as follows:
columns="#{bindings.departmentId.hints.displayWidth}"
-
Since this was just to demonstrate Code Assist, delete the line you just added.
Because AppXRay tracks dependencies between artifacts, it can show relationships and dependencies between those artifacts graphically.
-
In the Project Explorer, expand HRAppWeb > Webcontent > WEB-INF.
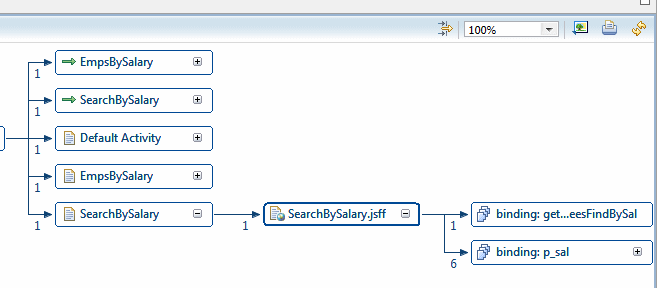
Right-click EmpsBySalaryTF.xml and select Show AppXray Dependencies.
-
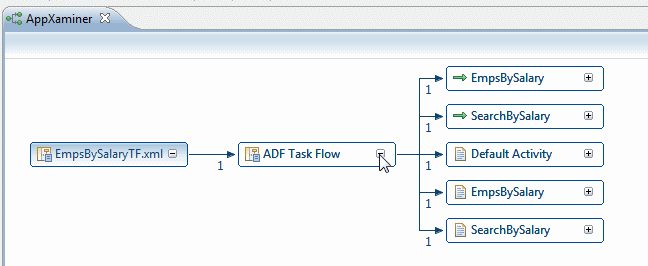
Click the + (plus sign) in the ADF Task Flow box to expand it. The diagram now shows the dependent artifacts.
-
Expand SearchBySalary in the same way. SearchBySalary is not the page on the task flow but rather the View component on the taskflow. Therefore, when you expand it, you see the page, which is SearchBySalary.jsff..
-
Expand SearchBySalary.jsff. Now that you are examining the page, you see the bindings..
-
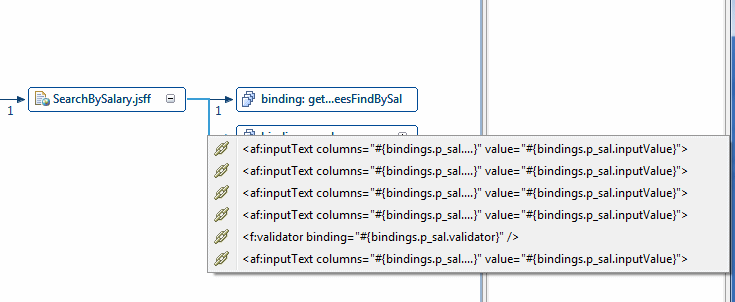
Notice the numbers by the relationship lines. This shows how many references there are to that artifact. Right-click the line (or number) that goes to binding: p_sal. This will show you the specific references to that binding.
-
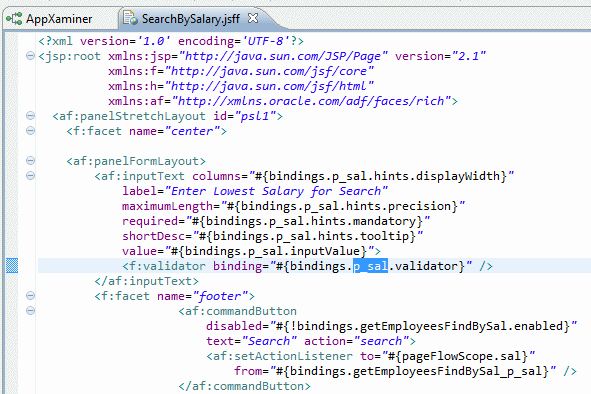
Click <af:validator binding="#{bindings.p_sal.validator}". That will open the page and highlight the binding in the editor.
-
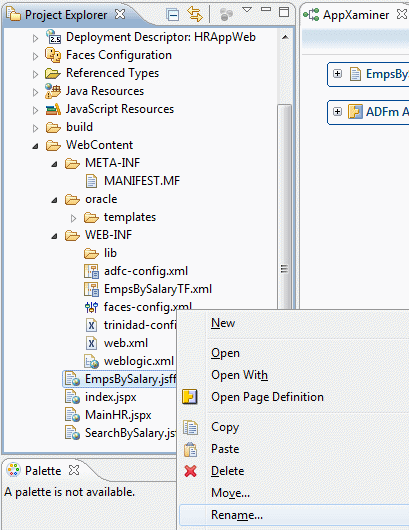
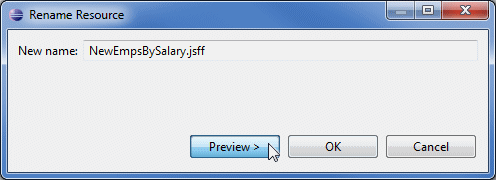
In the Project Explorer, right-click EmpsBySalary.jsff and select Rename.
-
Change the name to NewEmplsBySalary.jsff and click Preview.
-
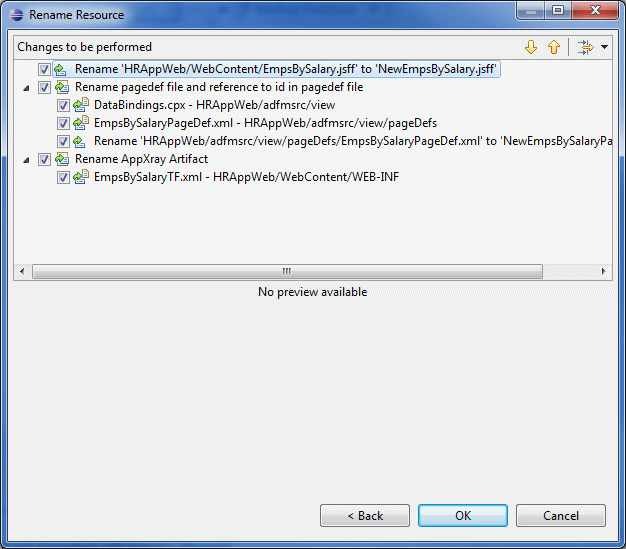
Expand each of the nodes and the Preview dialog and notice that all the references to the old name are tracked and will be changed.
-
Click Cancel.
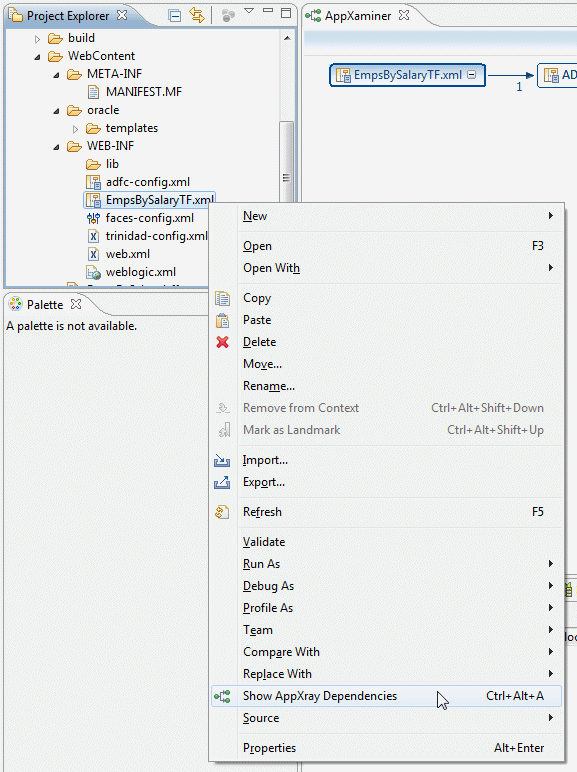
AppXaminer opens in a tab.

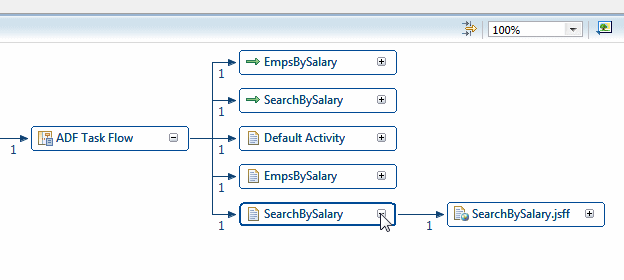
Another benefit from the dependency tracking is the ability to rename, or refactor, artifacts. Because AppXray knows the relationships between artifacts, it knows what code needs to be changed if an artifact is renamed.

 Part 1: Configuring Eclipse and WebLogic Server (WLS)